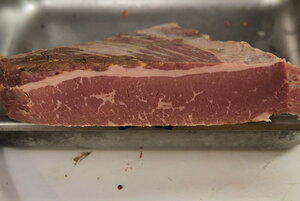
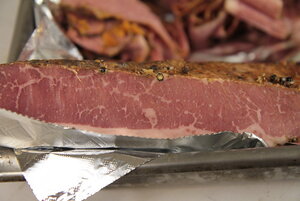
This has been a long time coming and to be quite honest I'm glad it's over.
If I find ant discrepancies I'll fix them later but for now I'm spent!
Corned Beef and Pastrami

Pastrami Shown above.
February 21st, 1st day
Step 1 Game plan
You will need a game plan as to what your intentions are. So the first thing you need to decide is, what do you want to make, "Corned Beef" or "Pastrami"? Or both!
You also need to ask yourself, how will this be served/processed/stored?
I will be pressing and cold slicing the "Corned Beef" and "Pastrami" very thin on a slicer for "Ruebens" and "The Rachel" sandwiches. So this article is written to reflect that. I can't stress that enough, because there are so many recipes on this subject and many are for a more traditional type of corned beef for example, Corned Beef and Cabbage comes to mind.
Disclaimer: There are many ways to do this and results will vary, this article is to document exactly how I prepared my "Corned Beef" and "Pastrami".
Step 2 Timing
There is a lot going on, so this needs to timed accordingly, for example;
Timing Tip: I work backwards from the Date I need the finished product by.
Note on Timing: Although there are a few steps stating 8 hours, I gave that step a full 24 hours because with work, there's no way to time it otherwise.
Step 3 Supplies
Step 4 - Select a brisket

Fig. 1

Fig. 2
Step 5 - Trimming and Cutting

Fig. 3
Step 6 - Choose a Method of Curing, Dry cured
Cure Rub
Per 1 pound of Brisket (Mix cure according to each piece of brisket)
Pickling Spice
Per 1 pound of Brisket (Mix Pickling spice according to each piece of brisket)

Fig. 4

Fig. 5
Step 7 - Adding the cure and Pickling Spice

Fig. 6

Fig. 7

Fig. 8

Fig. 9

Fig. 10

Fig. 11

Fig. 12
March 11th, 18th Day
Step 8 - End of Curing process
Continue on to Step 9a if making "Pastrami"

Fig. 13

Fig. 14

Fig. 15

Fig. 16

Fig. 17

Fig. 18

Fig. 19

Fig. 20

Fig. 21

Fig. 22

Fig. 23

Fig. 24

Fig. 25

Fig. 26
Step 9 - Cooking Option#1
"Corned Beef" (skip the cooking part if making pastrami)
Stove top
"Corned Beef" (skip the cooking part if making pastrami)
After reading up on cooking Via SousVide I became extremely fascinated with the concept behind this type of cooking so I decided this would be a god time to try out the method, but first I had to build a SousVide machine, you can find that Journey here.
[h2]http://Sous Vide (Soo Veed)[/h2][h2]http://click on the SousVide link for more information[/h2]
Cooking Sous Vide

Fig. 27

Fig. 28

Fig. 29

Fig. 30

Fig. 31

Fig. 32

Fig. 33
Fig. 34

Fig. 35
March 14th, 21st Day

Fig. 36

Fig. 37

Fig. 38

Fig. 39

Fig. 40

Fig. 41

Fig. 42

Fig. 43

Fig. 44
Step 10 - Slicing
March 15th, 22nd Day
Slicing
Slice across the grain .
Fig. 45-51.

Fig. 45

Fig. 46

Fig. 47

Fig. 48

Fig. 49

Fig. 50

Fig. 51
March 15th, 22nd Day
Step 11 - Making sandwiches
Fig. 52-61.
Personally I love "Corned Beef" or "Pastrami" served on rye with Swiss and some mayo, but since I am making this for my Brothers St. Patricks Day party, were going to make sandwiches, preferably "Ruebens". I just need to figure out how to do this so the bread will not get soggy as these will be sitting out a bit and served as finger food. I am trying to come up with a "DRY" warming idea to serve them slightly warmed.
Ruebens
option #1
Ingredients: (8 sandwiches - 32 quarter slices)
Spread 8 slices of the sliced bread with Russian dressing.
Spread the other 8 slices of the sliced bread with mayonnaise
Layer one slices of the rye with corned beef, sauerkraut and slices of Swiss cheese, then top the sandwiches with the remaining slice of rye (dressing-side down).
(we did not fry these) Heat 2 large heavy skillets over medium heat. Brush the bread with butter. Put the sandwiches in the pans and weight them with a lid or heat proof bowl topped with something heavy. Cook until the first sides are crisp and golden about 7 minutes then flip the sandwiches. Cook until the second sides are also well toasted and the cheese is melted. Lift the sandwiches onto a cutting board. Cut each in half diagonally, half again and serve.
Cut in quarters on the bias.
Ruebens
option #2
Ingredients: makes 16 servings

Fig. 52

Fig. 53

Fig. 54

Fig. 55

Fig. 56

Fig. 57

Fig. 58

Fig. 59

Fig. 60

Fig. 61
The corned beef was nothing short of spectacular, Wow! was I impressed.
These were a big hit at my brothers party.
That about wraps it up for the Corned Beef section.
"Pastrami"
Step 9a - Pellicle Formation
March 12th and 13th, 19th and 20th Day

Fig. 13a

Fig. 14a

Fig. 15a

Fig. 16a

Fig. 17a

Fig. 18a
March 14th, 22nd Day
Step 10a - The Rub
Prepare the rub
Fig. 19a
Coarsely grind the following ingredients (I strongly suggest a Mortar and Pestle) I just used my grinder and ended up with a lot of whole peppercorns, these should flavor the meat during the rest overnight but will obviously fall off once it gets tossed on the pit, however, it's no big deal since I added the Montreal Steak Seasing to the recipe at the last minute.

Fig. 19a
Combine coriander seeds, peppercorns, Juniper Berries and mustard seeds. Grind coarsely, preferably in a mortar and pestle. Add in remaining ingredients and mix well.

Fig. 20a

Fig. 21a
March 15th, 23rd Day
Step 10a - OK, It's time to cook.
For the Pit This is the method I chose this time around.
Fig. 22a - 26a

Fig. 22a

Fig. 23a

Fig. 24a

Fig. 25a

Fig. 26a
Rest

Fig. 27a
(skip if cooked on the pit) Cooking Via Sious Vide will add two days to the total time.
For Sous Vide (Next time I will use this method)
March 16th, 24th Day
Slicing the Pastrami

Fig. 28a

Fig. 29a

Fig. 30a

Fig. 31a

Fig. 32a
Making sandwiches
Personally I love corned beef or pastrami served on rye with Swiss and some mayo Fig. 33a, however I posted a recipe for, "The Rachel" sammies!
[h1]http://Pastrami Rueben aka "The Rachel"[/h1]
Ingredients: (4 sandwiches)
Heat a heavy-bottomed nonstick skillet or griddle pan over medium-low heat. Add the sandwiches, cover with a heatproof bowl and griddle until golden and gooey in the middle, 3 to 4 minutes. Flip, cover and let cook until golden all around, another 3 minutes. Serve the extra dressing on the side.
Homemade Russian Dressing Dressing: (or just buy a bottle of dressing)
Ingredients
For the dressing: Combine the mayonnaise, chili sauce, sour cream, horseradish, lemon juice, sugar, Worcestershire sauce, hot sauce, smoked paprika, dill pickles and shallots in a food processor until thoroughly mixed. Do not over blend, you still want to see some texture. Season with salt and pepper. Set aside or refrigerate in a covered jar until serving time.
Homemade Thousand Island dressing (or just buy a bottle of dressing)
Ingredients:
Combine all ingredients with a whisk. Store in the refrigerator for up to 2 weeks.

Fig. 33a

More fun stuff with this cook


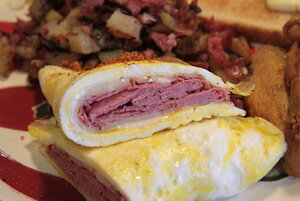
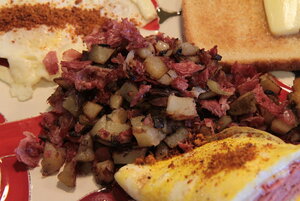
Corned beef hash, corned beef omelet with Swiss and American a pinch of Mad Hunky Hot Whang Rub, toast and butter, Over easy egg with Mad Hunky, a few hot wings, Mocha Nut Fudge Coffee and a glass of ice cold milk.


If I find ant discrepancies I'll fix them later but for now I'm spent!
Corned Beef and Pastrami
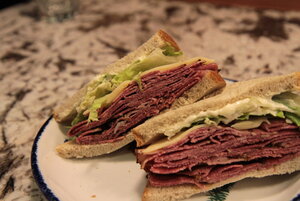
Pastrami Shown above.
February 21st, 1st day
Step 1 Game plan
You will need a game plan as to what your intentions are. So the first thing you need to decide is, what do you want to make, "Corned Beef" or "Pastrami"? Or both!
You also need to ask yourself, how will this be served/processed/stored?
I will be pressing and cold slicing the "Corned Beef" and "Pastrami" very thin on a slicer for "Ruebens" and "The Rachel" sandwiches. So this article is written to reflect that. I can't stress that enough, because there are so many recipes on this subject and many are for a more traditional type of corned beef for example, Corned Beef and Cabbage comes to mind.
Disclaimer: There are many ways to do this and results will vary, this article is to document exactly how I prepared my "Corned Beef" and "Pastrami".
Step 2 Timing
There is a lot going on, so this needs to timed accordingly, for example;
| Corned Beef | Pastrami |
Based on these numbers, my "Corned Beef" will be ready to eat on the 21st day) for traditional cooking will be ready to eat on the 22nd day for Sous Vide cooking |
Based on these numbers, my "Pastrami" will be ready to eat on the 23rd day |
Timing Tip: I work backwards from the Date I need the finished product by.
Note on Timing: Although there are a few steps stating 8 hours, I gave that step a full 24 hours because with work, there's no way to time it otherwise.
Step 3 Supplies
- Make sure to have all the supplies needed, supplies can be broken down into two categories, curing and cooking.
- In addition to the two categories, there are supplies labeled "Corned Beef" and supplies labeled "Pastrami", the supplies are dependent upon what you plan to make. The pastrami Rub can be made in advance.
| Curing | Cooking |
|
|
Step 4 - Select a brisket
- Pick a brisket that bends easily, The more flexible the more tender the brisket. A brisket needs to be well marbled with fat to be tender and juicy.
- 8 to 12 pound Brisket cut into 3 to 5 pound pieces or (Botton Round and Beef Round can be substituted)
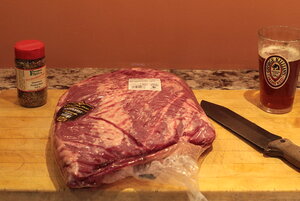
Fig. 1

Fig. 2
Step 5 - Trimming and Cutting
- Rinse the brisket with water and pat dry with paper towels.(Ooops, I forgot to do this)
- Trim fat from brisket, leaving a 1/8 inch of the fat cap for the "Pastrami"
- Trim the fat from brisket completely for the "Corned Beef"
- Cut into 3 to 5 pound sections and prepare each section as a separate brisket, Fig. 3.
- Weigh each piece of brisket and Jaccard both sides of the brisket. Fig. 5
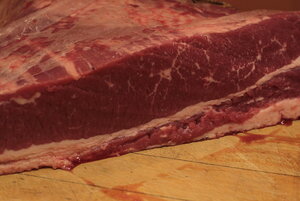
Fig. 3
Step 6 - Choose a Method of Curing, Dry cured
- Cure Bags I use Large resealable plastic bags or vacuum seal bags.
- Mix Cure, using the information below and a little math, mix the Tender Quick, brown sugar and garlic powder to make the cure rub. Be sure to mix in individual batches for each brisket if curing more than one. I place the mixed cure directly in front of the pan and each pan is marked with the exact weight, for each piece of meat so I don't get confused. Fig.4
- Mix Pickling Spice,You can just use regular pickling spice from the supermarket. Combine pickling spice with paprika for Pastrami. Fig.8
Cure Rub
Per 1 pound of Brisket (Mix cure according to each piece of brisket)
- 1 tablespoon Morton Tender Quick[emoji]174[/emoji] curing salt (1/2 ounce per pound of meat / OR 1 Tablespoon)
- 1 teaspoon brown sugar (helps counter the salty taste)
- 1 teaspoon garlic powder
Pickling Spice
Per 1 pound of Brisket (Mix Pickling spice according to each piece of brisket)
- 1 tablespoon pickling spices
- 1 tablespoon Smoked Paprika for the "Pastrami" only (I added to the Corned Beef and Pastrami)
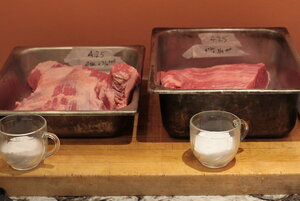
Fig. 4
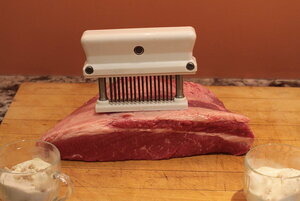
Fig. 5
Step 7 - Adding the cure and Pickling Spice
- Cure: Take half of the cure mixture and rub it into one side of the brisket. Turn the brisket over and rub the rest of the cure mixture into the brisket. Try to do this in the bag you will be using to cure the brisket in so none of the cure is lost and try to coat the brisket somewhat evenly , Fig. 6 -7
- Pickling Spice: Coat the brisket with pickling spices. Fig. 8
- Sealing: Vacuum seal each brisket piece. Since the ingredients are dry, this methods works really well for me. Don't worry too much about the cure and pickling spices not mixing evenly, because after a day or two, the cure will pull enough moisture from the brisket to form a sort of brine, Fig. 9. Date the bag or pan for reference. Fig.10.
- Curing: Place the sealed brisket into a pan (in case the bag leaks) make sure to date the pan Fig.10-12 and place in the refrigerator and cure for 10 days, flipping the bag once a day, I massage it as well. As long as you keep the bag sealed the corned beef should keep for 6 weeks, just keep flipping and massaging the bag. I did not flip it every day but maybe 6 or 7 times, this is OK just as long as you have some liquid in the bag to keep thinks mixed up a bit. Cure the meat at a temperature between 36°F – 40°F. Colder temperatures will prevent you from curing properly and warmer temps will encourage spoilage growth.
- Cure Time (Morton Salt recommends allowing the cure to progress for 5 days for each 1 inch of meat thickness) Curing times: You should figure 1 day cure time per ¼ inch from center of meat out. In other words measure the total thickness of the meat and divide by 2. Divide this result by 0.25. The result of this is the minimum number of days suggested to cure.
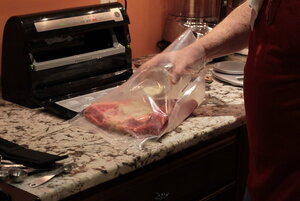
Fig. 6

Fig. 7
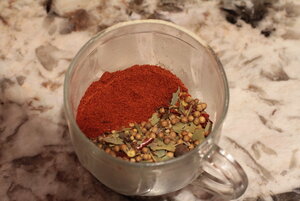
Fig. 8
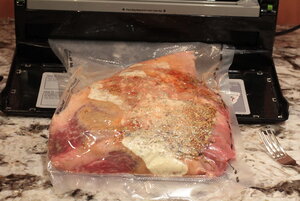
Fig. 9
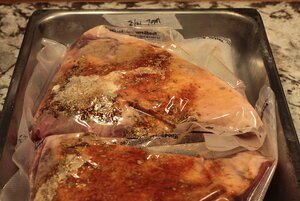
Fig. 10
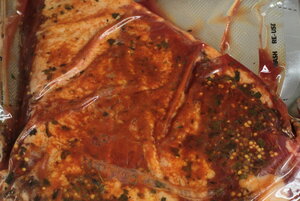
Fig. 11
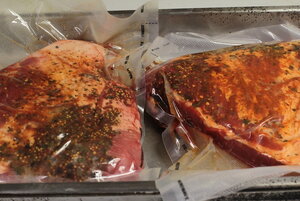
Fig. 12
March 11th, 18th Day
Step 8 - End of Curing process
- Rinse: Remove the brisket from the bag and rinse the salt and spices off under cold running water, Fig. 13-15. Wow, when I opened the bag the smell was awesome, reminded me of the delis as a kid.
- Soak: Put the corned beef in a container larger than the meat and cover it with cold water and ice and place in the fridge for at least 8 hours (I did this for 24 hours) The water will pull salt away from the meat to a point of equalization once the water and meat salt content has equalized, it will not pull anymore salt from the meat, at this point you would need to change the water. For this particular corned beef, I am doing a 24 hour soak in a 3 gallon container for simplicity. Fig. 16-18.
- Fry test, Remove the corned beef from the water bath Fig. 19 and pat dry Fig. 20-21. Slice several pieces and fry a piece, preferably the slice furthest from the end. Taste the piece Fig. 23-26, if the flavor is acceptable (not too salty), move onto step 9, if it is too salty, soak again for several hours with fresh ice water in the refrigerator.
Continue on to Step 9a if making "Pastrami"
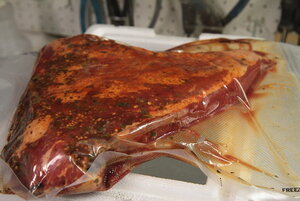
Fig. 13
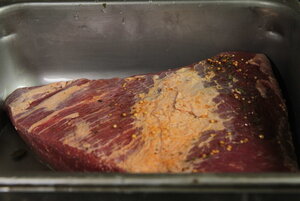
Fig. 14
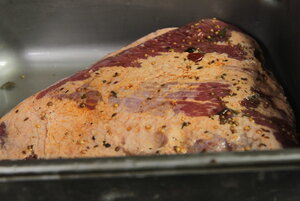
Fig. 15
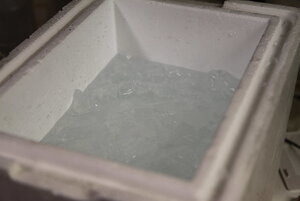
Fig. 16
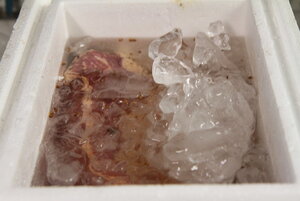
Fig. 17
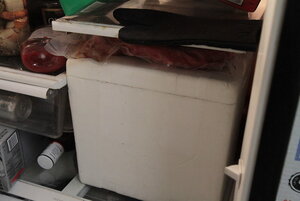
Fig. 18
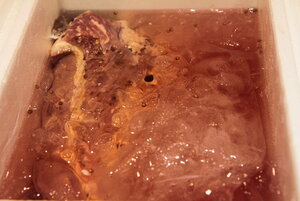
Fig. 19
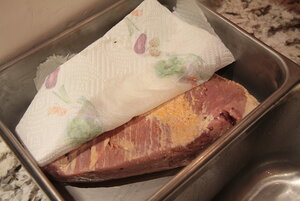
Fig. 20

Fig. 21
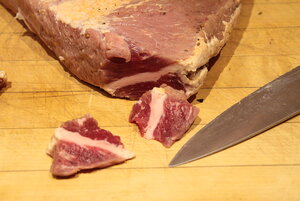
Fig. 22
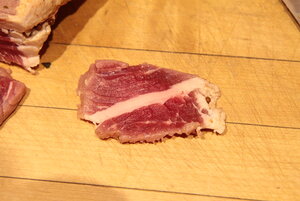
Fig. 23
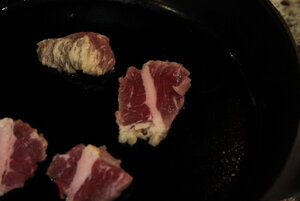
Fig. 24
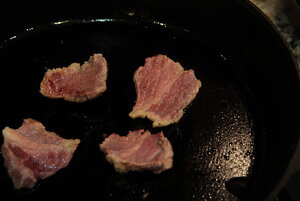
Fig. 25
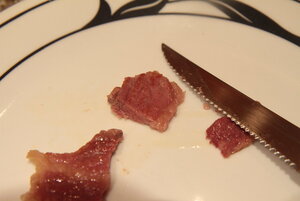
Fig. 26
Step 9 - Cooking Option#1
"Corned Beef" (skip the cooking part if making pastrami)
Stove top
- Prepare the corned beef by removing any visible outside fat (I completely trimmed the corned beef half of the brisket)
- in a large pot, add 6 quarts of water, 1 tablespoon of pickling spice, 1 tablespoon of peppercorns, 2 cans of beer and a few bay leaves, make sure to add enough water to cover the brisket completely, cover and bring to a boil.
- Once the liquid comes to a boil, reduce the heat to low, add the corned beef, and simmer on low (optimal water temperature is 180°) for 8-10 hours, checking hourly, and adding more water if necessary to keep the meat covered. Cook until beef is fork tender but not falling apart.
- Gently remove corned beef from the pot, keeping it in one piece if possible. If any chunk of beef falls off, just place the 2 pieces together before wrapping.
- While still hot, carefully scrape off any outside fat, using a very sharp knife.
- Immediately wrap the hot corned beef in plastic wrap, wrapping it as tightly ACROSS THE GRAIN as possible. Snugly fold ends of plastic to completely encase beef.
- Put plastic wrapped beef in a Zip-lock bag, place in a pan and weight with a few bricks overnight.
- When ready to serve, remove from the refrigerator, and slice thinly across the grain with a sharp knife (not serrated) or an electric slicing machine.
"Corned Beef" (skip the cooking part if making pastrami)
After reading up on cooking Via SousVide I became extremely fascinated with the concept behind this type of cooking so I decided this would be a god time to try out the method, but first I had to build a SousVide machine, you can find that Journey here.
[h2]http://Sous Vide (Soo Veed)[/h2][h2]http://click on the SousVide link for more information[/h2]
Cooking Sous Vide
- Fill the Sous Vide vessel 2" from top with hot tap water, this should be around 110° on average depending on your water heater settings, Fig. 27.
- Place probe and pump in vessel and turn on Sous Vide machine, set temp for 140°, Fig. 28. I always calibrate the Sous Vide temperature controller with an accurate thermometer such as the Thermapen.
- Prepare the corned beef by removing any visible outside fat (I completely trimmed the corned beef half of the brisket) Blot the corned beef completely dry, this should have been done in the fry test, see Fig. 20-21.
- Place the corned beef in a sous vide pouch or food safe bag with any included spices, pushing into the meat, (I Seasoned with pickling spice, a few bay leaves, peppercorns and some crushed red pepper). Vacuum seal if using a vacuum sealer. Leave a long tail to allow for moisture to pull up, it should seal before the liquid gets to the seal area, Fig. 30-31. If using a ziploc bag, seal the bag but leave a small area open for air to escape, submerge the bag with the meat into the water, the air will be forced out, zip the bag completely
- Place the Corned beef in the cooking vessel for 48 hours Fig. 32-33., make sure to have proper circulation if needed, make sure that the bag does not float... it must be completely submerged and should not be touching any thing. If you are having problems keeping the bag submerged, use a clip and add some weight or lay a few utensils on top of the meat, Fig. 34.

Fig. 27
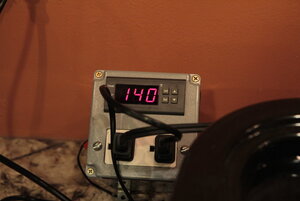
Fig. 28
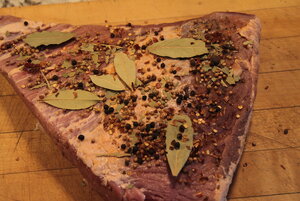
Fig. 29
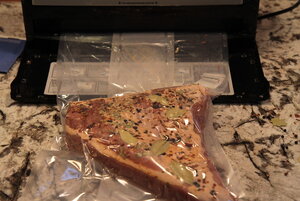
Fig. 30
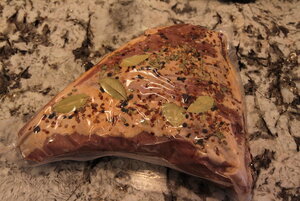
Fig. 31
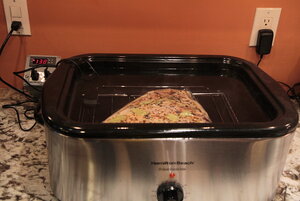
Fig. 32
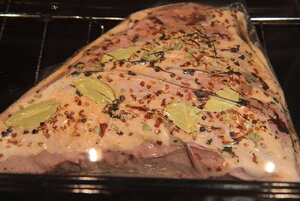
Fig. 33
- 24 Hours
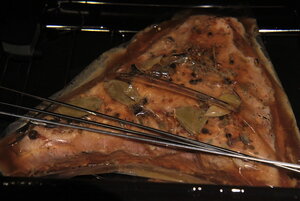
Fig. 34
- 24 Hours
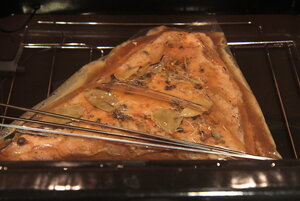
Fig. 35
March 14th, 21st Day
- Remove the corned beef from the Sous Vide Machine, cool for a half hour then open the bag, keeping it in one piece if possible, reserve the juices Fig. 36-37. Clean up the corned beef, scraped off fat and trim if needed Fig. 38-42. Wrap the beef tightly in plastic wrap pulling together across the grain, If any chunk of beef falls off, just place the 2 pieces together before wrapping. Using a double pan method, weight with a few bricks and place in the refrigerator overnight Fig. 43-44.
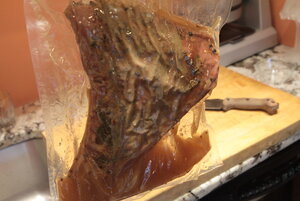
Fig. 36
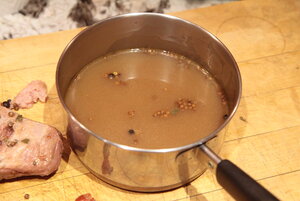
Fig. 37
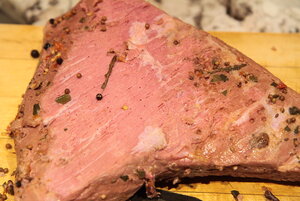
Fig. 38
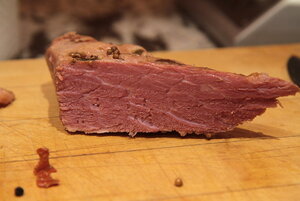
Fig. 39
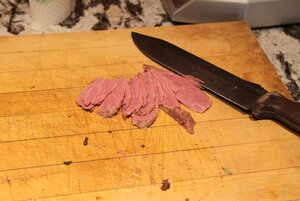
Fig. 40
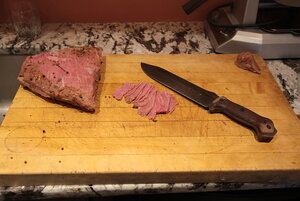
Fig. 41
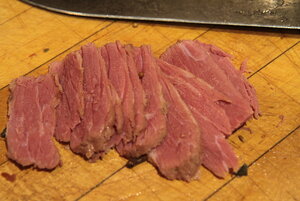
Fig. 42
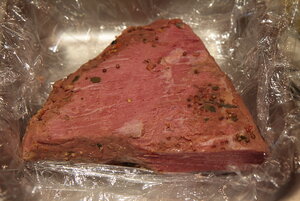
Fig. 43
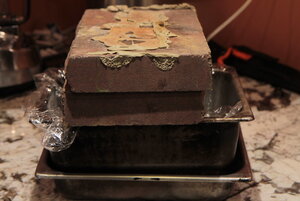
Fig. 44
Step 10 - Slicing
March 15th, 22nd Day
Slicing
Slice across the grain .
Fig. 45-51.
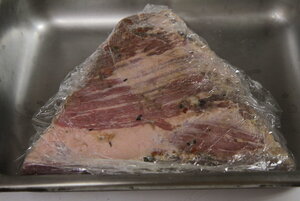
Fig. 45
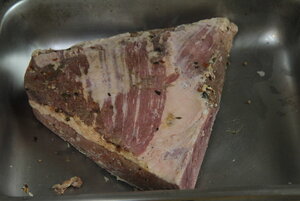
Fig. 46
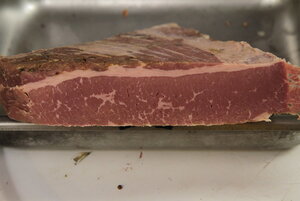
Fig. 47
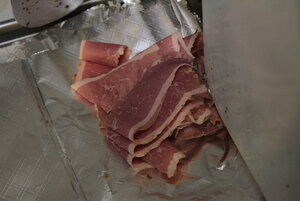
Fig. 48
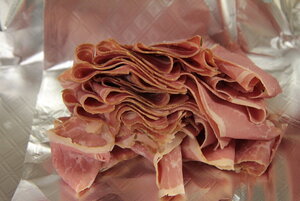
Fig. 49
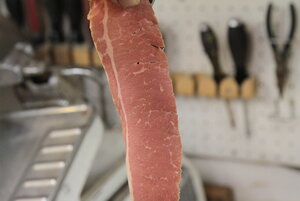
Fig. 50
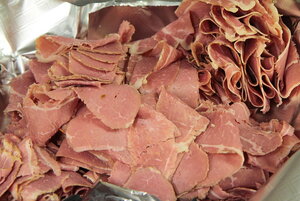
Fig. 51
March 15th, 22nd Day
Step 11 - Making sandwiches
Fig. 52-61.
Personally I love "Corned Beef" or "Pastrami" served on rye with Swiss and some mayo, but since I am making this for my Brothers St. Patricks Day party, were going to make sandwiches, preferably "Ruebens". I just need to figure out how to do this so the bread will not get soggy as these will be sitting out a bit and served as finger food. I am trying to come up with a "DRY" warming idea to serve them slightly warmed.
Ruebens
option #1
Ingredients: (8 sandwiches - 32 quarter slices)
- 3 cups sauerkraut, squeezed of excess moisture
- 1 cup Russian dressing Buy or make (recipe below) (we used thousand island)
- 1 cup of mayonnaise (optional)
- 16 slices marble rye bread
- 16 slices Swiss
- 2 pounds corned beef, shaved or cut how you like it
- Salted butter, softened (we did not fry these)
Spread 8 slices of the sliced bread with Russian dressing.
Spread the other 8 slices of the sliced bread with mayonnaise
Layer one slices of the rye with corned beef, sauerkraut and slices of Swiss cheese, then top the sandwiches with the remaining slice of rye (dressing-side down).
(we did not fry these) Heat 2 large heavy skillets over medium heat. Brush the bread with butter. Put the sandwiches in the pans and weight them with a lid or heat proof bowl topped with something heavy. Cook until the first sides are crisp and golden about 7 minutes then flip the sandwiches. Cook until the second sides are also well toasted and the cheese is melted. Lift the sandwiches onto a cutting board. Cut each in half diagonally, half again and serve.
Cut in quarters on the bias.
Ruebens
option #2
Ingredients: makes 16 servings
- 1 (1 pound) loaf cocktail rye bread
- 1 cup thousand island dressing or 1/2 cup thousand island and 1/2 cup Russian dressing
- 1 1/2 pounds deli sliced corned beef
- 1 (16 ounce) jar sauerkraut, rinsed and well drained
- 1 pound sliced Swiss cheese
- Salted butter
- Preheat the oven's broiler.
- Butter each piece of rye.
- In a skillet toast the bread.
- Remove from the skillet, place on a cookie sheet and top each one with about 2 teaspoons of thousand island salad dressing, then fold about 1/2 slice of corned beef to fit the bread, and lay over the dressing. Place a small amount of sauerkraut over the meat, then top with 1/4 slice of the Swiss cheese, or a slice about as big as the bread.
- Broil for 3 to 5 minutes, until cheese is melted. Serve warm.
- Quick taste test
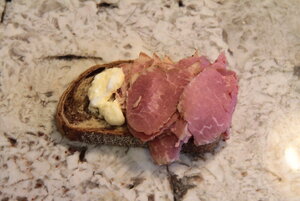
Fig. 52
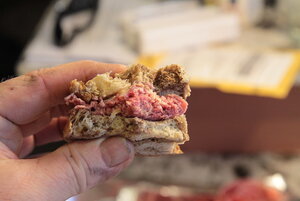
Fig. 53
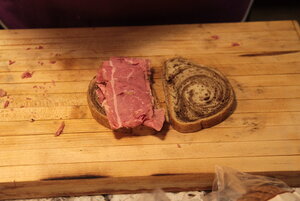
Fig. 54
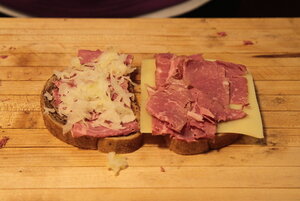
Fig. 55
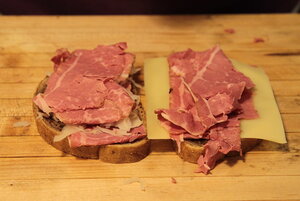
Fig. 56
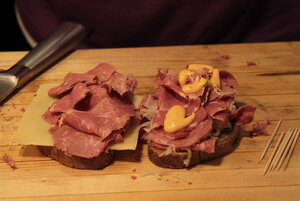
Fig. 57
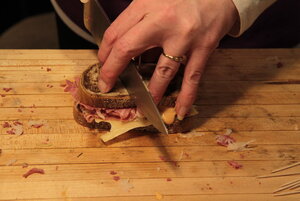
Fig. 58
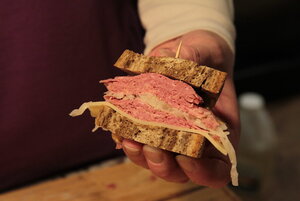
Fig. 59
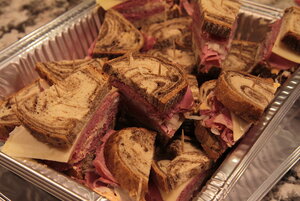
Fig. 60
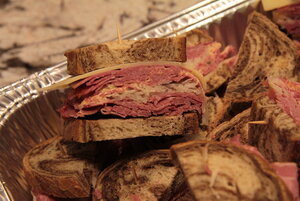
Fig. 61
The corned beef was nothing short of spectacular, Wow! was I impressed.
These were a big hit at my brothers party.
That about wraps it up for the Corned Beef section.
"Pastrami"
Step 9a - Pellicle Formation
March 12th and 13th, 19th and 20th Day
- (Continued from "End of Curing Process, step 8"). If the salinity is acceptable after the fry test Fig. 21 - 26, rest in the refrigerator uncovered, until the next day to form a pellicle. There was no need to check the Brisket marked for pastrami as I knew the overnight soak was perfect for the corned beef.
- Tip: Place a wire rack on a catch pan to facilitate better air flow Fig. 18a.
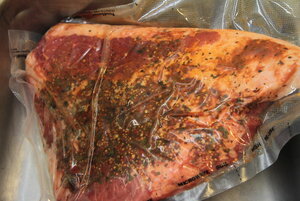
Fig. 13a
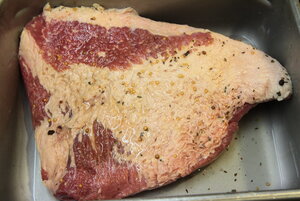
Fig. 14a
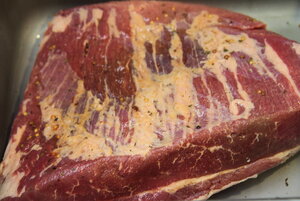
Fig. 15a
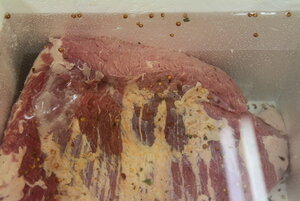
Fig. 16a
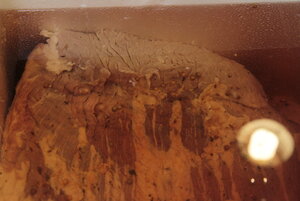
Fig. 17a
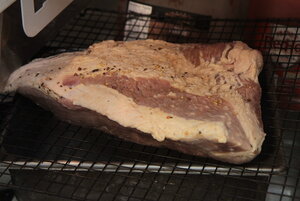
Fig. 18a
March 14th, 22nd Day
Step 10a - The Rub
Prepare the rub
Fig. 19a
Coarsely grind the following ingredients (I strongly suggest a Mortar and Pestle) I just used my grinder and ended up with a lot of whole peppercorns, these should flavor the meat during the rest overnight but will obviously fall off once it gets tossed on the pit, however, it's no big deal since I added the Montreal Steak Seasing to the recipe at the last minute.
- 4 tablespoons fresh coarsely ground black pepper
- 4 tablespoons coriander seeds
- 2 teaspoon mustard seeds
- 1 teaspoon juniper berries (Omitted, because I had none)
- 1 tablespoon crushed garlic
- 1 tablespoon brown sugar
- 1 teaspoon chili powder
- 1 tablespoon paprika
- 3 tablespoon Montreal Steak Seasoning
In any recipe calling for juniper berries, substitute 1 tsp. of gin per 2 berries, I dont know how well it would work on a dry rub but I guess you can always sprinkle a bit on the meat once it's on tne pit.
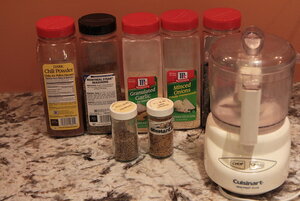
Fig. 19a
Combine coriander seeds, peppercorns, Juniper Berries and mustard seeds. Grind coarsely, preferably in a mortar and pestle. Add in remaining ingredients and mix well.
- Rub the CORNED BEEF: After the overnight pellicle formation, remove the meat from the refrigerator, trim excessive fat if you have not done so earlier Fig. 20a. Coat the corned beef with a thin layer of cooking oil (I skipped the oil part), apply the rub liberally, and press it into the surface to help it adhere Fig. 21a, if there is a thin part of meat, use less rub.
- Rest: Wrap the meat ightly, place on a plate or drip pan and place in the refrigerator and rest overnight or up to two days

Fig. 20a
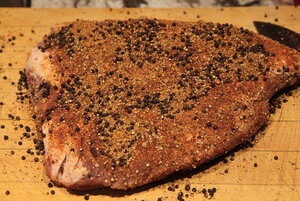
Fig. 21a
March 15th, 23rd Day
Step 10a - OK, It's time to cook.
For the Pit This is the method I chose this time around.
Fig. 22a - 26a
- Preheat pit to 350° Obtain a god coal base.
- Pam spray grates
- Directly from the refrigerator, place the corned beef in the pit fat side up and slowly dial the pit down to 225°
- Foil at an internal temp of 155° and cook to 185° internal. Internal temp of 185° was reached in 3 hours 45 minutes

Fig. 22a
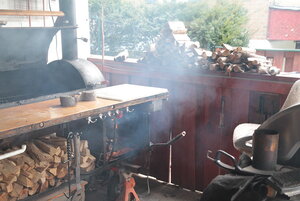
Fig. 23a

Fig. 24a
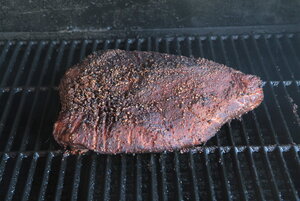
Fig. 25a
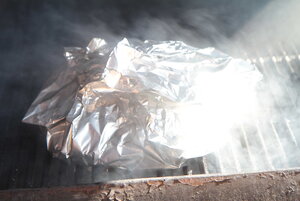
Fig. 26a
Rest
- Pull at an internal temp of 185°, foil, towel and rest in cooler for several hours.
- Remove meat from the cooler, remove the towels and place the foiled meat in a drip pan, using a double pan method, weight with a few bricks and place in the refrigerator overnight.Fig. 27a
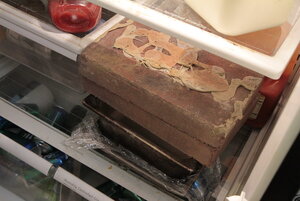
Fig. 27a
(skip if cooked on the pit) Cooking Via Sious Vide will add two days to the total time.
For Sous Vide (Next time I will use this method)
- Preheat smoker to 150° Place the Seasoned corned beef in the GOSM. Smoke at 150° for up to 7 hours rest for 30 minutes (use the AMNPS and an electric hot plate if there's a problem keeping temps, also use ice in the water pan and change as needed.
- vacuum seal and cook in sous vide machine at 149° for 48 hours
- Remove the pastrami from the cooker, place on a wired rack uncovered in the fridge for several hours, wrap tightly in plastic wrap across the grain using a double pan method, weight with a few bricks and place in the refrigerator overnight.
March 16th, 24th Day
Slicing the Pastrami
- Remove the "Pastrami" from the refrigerator and slice very thin against the grain on the slicer. (Optional) Save all the juices from the foil and add it to the meat when you’ve finished slicing the meat. Fig. 28a - 32a
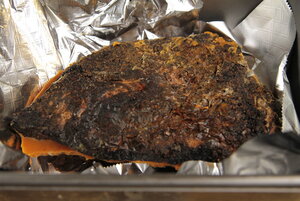
Fig. 28a
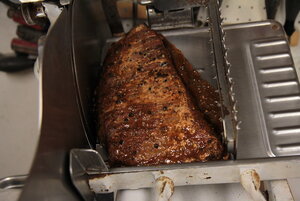
Fig. 29a
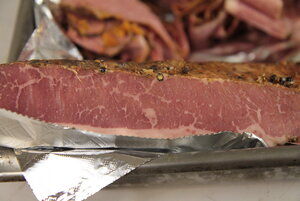
Fig. 30a
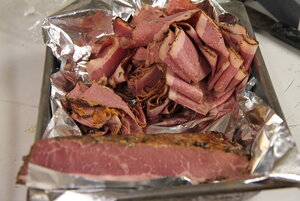
Fig. 31a
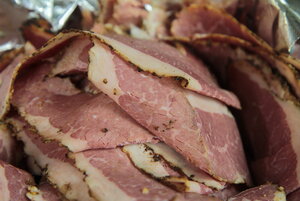
Fig. 32a
Making sandwiches
Personally I love corned beef or pastrami served on rye with Swiss and some mayo Fig. 33a, however I posted a recipe for, "The Rachel" sammies!
[h1]http://Pastrami Rueben aka "The Rachel"[/h1]
Ingredients: (4 sandwiches)
- 1 1/3 cups sauerkraut, squeezed of excess moisture
- 2 cups Russian dressing (recipe below)
- 8 slices marble rye bread
- 8 slices Swiss
- 1 pound pastrami, shaved or cut how you like it
- Salted butter, softened
Heat a heavy-bottomed nonstick skillet or griddle pan over medium-low heat. Add the sandwiches, cover with a heatproof bowl and griddle until golden and gooey in the middle, 3 to 4 minutes. Flip, cover and let cook until golden all around, another 3 minutes. Serve the extra dressing on the side.
Homemade Russian Dressing Dressing: (or just buy a bottle of dressing)
Ingredients
- 1 1/2 cups mayonnaise
- 2/3 cup chili sauce
- 1/2 cup sour cream
- 1 tablespoon prepared horseradish
- 1 tablespoon freshly squeezed lemon juice
- 2 teaspoons sugar
- 2 teaspoons Worcestershire sauce
- 1/2 teaspoon hot sauce
- 1/2 teaspoon smoked paprika
- 1 dill pickle, chopped
- 1 shallot, chopped
- Salt and freshly cracked black pepper
For the dressing: Combine the mayonnaise, chili sauce, sour cream, horseradish, lemon juice, sugar, Worcestershire sauce, hot sauce, smoked paprika, dill pickles and shallots in a food processor until thoroughly mixed. Do not over blend, you still want to see some texture. Season with salt and pepper. Set aside or refrigerate in a covered jar until serving time.
Homemade Thousand Island dressing (or just buy a bottle of dressing)
Ingredients:
- 1 cup mayonnaise
- 1/2 cup chili sauce
- 2 Tablespoons sweet pickle relish
- 2 teaspoons horseradish
Combine all ingredients with a whisk. Store in the refrigerator for up to 2 weeks.

Fig. 33a
- Very tender
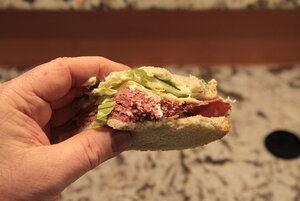
- Side by side
More fun stuff with this cook
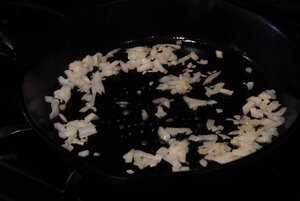
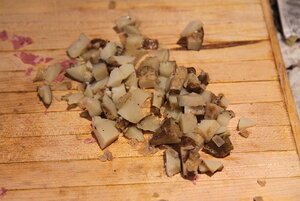
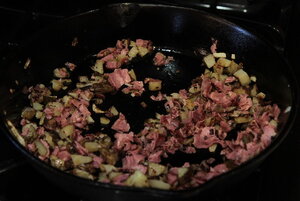
- Corned Beef Hash
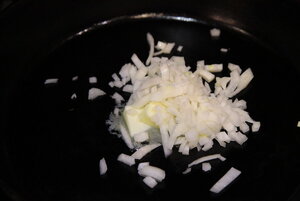
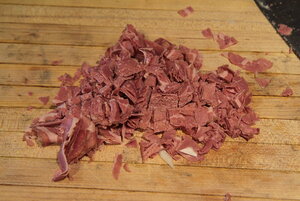
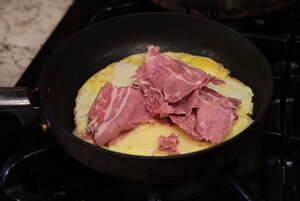
- Corned Beef omelet with Swiss and American.
- My breakfast
Corned beef hash, corned beef omelet with Swiss and American a pinch of Mad Hunky Hot Whang Rub, toast and butter, Over easy egg with Mad Hunky, a few hot wings, Mocha Nut Fudge Coffee and a glass of ice cold milk.

Dammm thank goodness this is finished!


