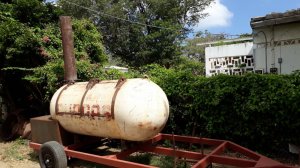
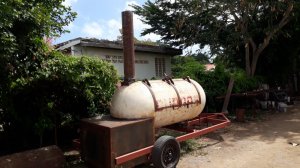
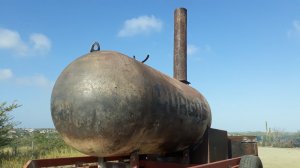
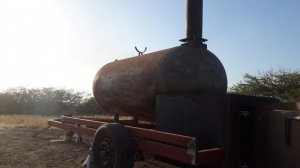
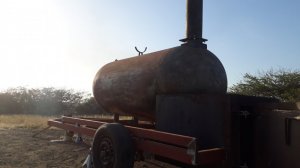
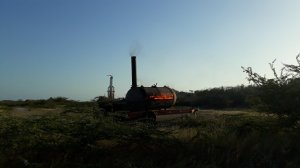
500 gallon fattie build
- Thread starter Remy Bernabela
- Start date
-
Some of the links on this forum allow SMF, at no cost to you, to earn a small commission when you click through and make a purchase. Let me know if you have any questions about this.
You are using an out of date browser. It may not display this or other websites correctly.
You should upgrade or use an alternative browser.
You should upgrade or use an alternative browser.
SmokingMeatForums.com is reader supported and as an Amazon Associate, we may earn commissions from qualifying purchases.
I did a redesign on the hinges. Now I have more welding area and more leverage. Also I can integrate a stealth doorstop in between. I put washers in between and untreaded bolts on the moving parts so they don't wear in on the tread.
Next week the welder can begin and it should be a quick project from there. All the major pieces are ready and waiting.

Next week the welder can begin and it should be a quick project from there. All the major pieces are ready and waiting.
Got some work done today....
Prepping to mark the horizontal cutout for the firebox. Upside down "table". Upside down the tank is much easier to level.


Hinges on....


However I decided to split the door in half so I don't lose all the heat inside. It will still hold full width grates. I just use the half side of the smoker which overlaps the other half.
And this is where I am now. Making two sets of hinges and then I'll split the door in half. And the top left warped only 2mmdue to rolling the tank over a few times!!! Easy fix with a sledgehammer. I was right about the door not warping after the tank already released it's stress on the firebox cutout.

After the door is split in two we shall begin with the firebox. It's easier to fix the door afterwards and before adding the strips if the whole tank warped again while welding on the firebox.
Prepping to mark the horizontal cutout for the firebox. Upside down "table". Upside down the tank is much easier to level.
Hinges on....
However I decided to split the door in half so I don't lose all the heat inside. It will still hold full width grates. I just use the half side of the smoker which overlaps the other half.
And this is where I am now. Making two sets of hinges and then I'll split the door in half. And the top left warped only 2mmdue to rolling the tank over a few times!!! Easy fix with a sledgehammer. I was right about the door not warping after the tank already released it's stress on the firebox cutout.
After the door is split in two we shall begin with the firebox. It's easier to fix the door afterwards and before adding the strips if the whole tank warped again while welding on the firebox.
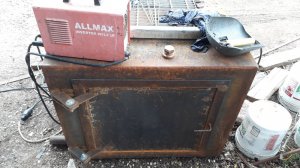
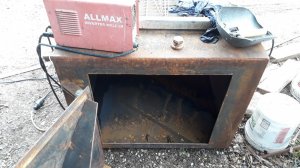
Due to a lot of work, rain and outdoor work space, I haven't done a lot on this build until last Friday. But we smashed this huge firebox out without any problems. It measures 39" ish (1 meter) x 39" ish (1 meter) x 30" high. I'm still thinking what type of closure I want on the door. It's just for the design. I managed to cut one of the 1 1.2" plugs from the tank keeping it nice. I will use it to make a low profile drainplug on the firebox to drain out the rain if I have to.



forkin pork
Smoking Fanatic
Remy your doing a great job, the only thing I say and maybe I you mentioned it but, a nice counter weight for the latch door would aid in lifting and help prevent it from falling back on your head. A lot of commercial brand offsets have it, just a safety suggestion.
Keep up the good work.
Keep up the good work.
Thank you man. I want a roof system on top later on. It's hot on this island in the Caribbean! When I do that, I want the space below the roof for extra storage. So I will think about that. For now I'm leaning towards a cable counterweight system. It's much easier to fabricate and balance out. Jus hang a bucket and fill it with water and then weight the bucket. By doing that I can keep the system low profile, leaving more room above the cooker.
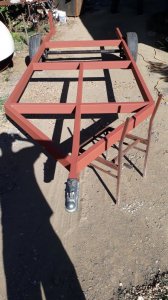
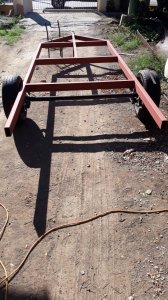
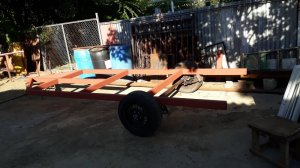
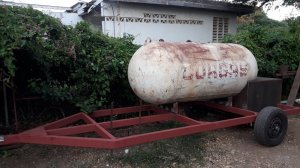
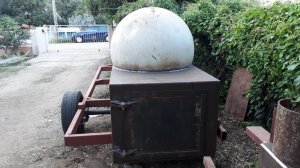
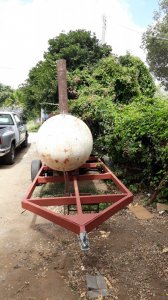
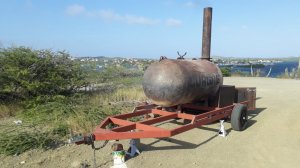
So today we pretty much finished the trailer. I only have to weld two plates on the outside corners and above the triangle up front to reinforce those places. The back side will have a tube on each end closing the whole trailer off from rain and moisture and also connecting the ends to the firebox to stiffen things up. The trailer measures 16' long end to end and 5' wide (spring centre). The cooker will be off-centered to give me some extra (storage) space on the other side. I also worked on one of the doors and reconfigured the hinges that were slightly off. Door warped VERY little, but that will be addressed tomorrow.
Attachments
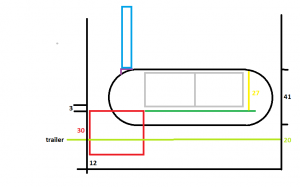
What is the lowest height you put the bottom of the firebox at on a 500 gallon build? My trailer is 20" tall with the axle above the springs. Firebox is 30" high with a 14" fb/cc opening. Tank is 41" diameter. So the tank on the fb is 30-14+41= 57" tall sitting on the ground. Lower door cut is 3" above the rf plate so it sits 57-27 (space above rf plate)= 30" from the ground up. I was thinking a 12" clearance which will add to that 57" and 30". I'm 5'11".
Attachments
forkin pork
Smoking Fanatic
forkin pork
Smoking Fanatic
Remy, I'm enjoying watching your build, I remember my good ol' day when I played around and built a new smoker every year, totally fun and yes does it feel good!
Can't wait to see some meat and smoke on that beauty. .... I watchin!
Can't wait to see some meat and smoke on that beauty. .... I watchin!
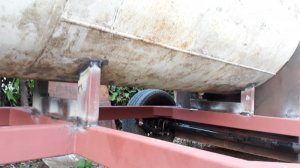
The only issue is the trailer. It flexes in the middle right at the front legs of the tank. We'll reinforce the whole side with 1/4" strip. That will solve the "problem". Here on the island they stock only 1/8" thick wall square tubing. Channel iron would have cost me 3 times more per length. But it towed really good on the road and the low center of gravity really helped keeping it steady in corners. But it will be balanced out when adding storage, sink etc. on the other side. This thing almost 65" tall. So I made two plates which will make the smokestack fold able.
Here on the island we have only galvanized pipes and plugs in the local hardware stores. So I found a way on YouTube to get rid of that galvanized protection. Just put the pipe in strong vinegar and let it sit for 24 hours. The pipe comes out as white as Snow-white. I'm using 1 1/2" pipe and ball valve to drain the baffle plate. I also welded a plug in the firebox to drain water (rain) out if needed. And I left a plug intact in the belly of the tank to drain under the rf plate. I have a 1" dam at the firebox.
It was a long day due to the resources we have at hand. Only a 3 ton tripod, wooden blocks and wood beams for leverage. You guys make it look so easy with your heavy tools.
Tomorrow we do the plenum and smokestack. Finish the second door and some welding offs and then we concentrate on the inside. I have a better view of the inside to make final decisions about grate height etc.
Thanks to everybody posting stuff here. I had little direct help here, but all the info I needed is already here. You just have to browse a bit. I'm very confident that this cooker will work above expectations.
forkin pork
Smoking Fanatic
Yah I understand, your build is quite big, something most in here I think would not take on.
Your build looks excellent and on the money, I not an expert by far, but I do understand offsets
Keep up the good work and do you really think you need to have fold down smokestacks?
Your build looks excellent and on the money, I not an expert by far, but I do understand offsets
Keep up the good work and do you really think you need to have fold down smokestacks?
I have a 60" of 8" ID pipe from the scrapyard. I'd like a 9" pipe, but a new plate and have it rolled is too expensive. So this 8" pipe will add another 50" above the 65". It's just a few extra cuts with the torch but I'll be on the safe side. It also helps keep the centre of gravity down while driving. This is not a smoker for home use. I live of this and need to get anywhere a costumer wants (if I agree the pit can operate there). I got a piece of 1/4" gasket which I can use to seal in between the plates. Also I can't think how that would influence the performance in a bad way unless you can think of one.
My only concern now is due to available materials on the island that my grates are going to be HEAVY!!! The grates being 56.5" wide by 39 deep, the 1/8 wall thickness I can get here might sag when heavy loaded. The only angle iron I can get here 1/4 thick is 1 1/2" by 1 1/2". But where it gets ugly is that we don't have expanded metal here which leaves me to angle iron or round 1/4"rebar both supported in the middle. That's a massive extra weight. I can buy perforated steel plate. But they let only 50% through. I'd be blocking a lot of heat.
My only concern now is due to available materials on the island that my grates are going to be HEAVY!!! The grates being 56.5" wide by 39 deep, the 1/8 wall thickness I can get here might sag when heavy loaded. The only angle iron I can get here 1/4 thick is 1 1/2" by 1 1/2". But where it gets ugly is that we don't have expanded metal here which leaves me to angle iron or round 1/4"rebar both supported in the middle. That's a massive extra weight. I can buy perforated steel plate. But they let only 50% through. I'd be blocking a lot of heat.
We used 1/8" angle for the cooking grates and it does sag a little bit when fully loaded, but only because we didn't support the grates in the center. The sag isn't too bad either.
Nice build!
Nice build!
I looked at your project many many times!!! However the left door overlaps the right one. I want to be prepared for whole hogs if I get the opportunity. I guess your grates are 36"x36" in that range? I want single grates (for the whole hog). I saw your stack is 38" tall above the cooking chamber. I also saw another build with 48" tall. And you both happy with how it works. I'll have to fire mine up next weekend and just see for myself. If I have to trim it down, I'll extend it into the cooking chamber. I still got 8" of pipe left.
The largest cooking grate on ours is nearly 60" wide.
The height of the chimney on ours was dictated by the volume needed to get the right draw. You can go taller with little worry, but too short is a problem.
The height of the chimney on ours was dictated by the volume needed to get the right draw. You can go taller with little worry, but too short is a problem.
Attachments
Little but big update!
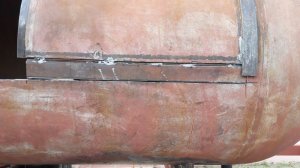
I made a terrible mistake when marking out the tank before cutting out the door. My bottom cut was 6 cm too high. The result of that is that the bottom grate won't slide out and putting it 2" higher means no 3th grate in the smoker which is the whole reason I started this build. More space.
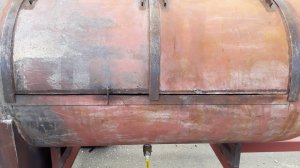
Because I cut below 3 o clock, I wanted to put a strip inside on the doors too divert the drippings and moisture back into the tank. So now I did that using the strip to fill in the gap I had due to a very bad bottom cut. A tank full of water and a big grinder which isn't mine.... Oh!!! That KILLER sun burning me up there too. But I'm glad the mistake was an easy fix. Here are some pics of the mistake and the fix. I just need to fill the gaps now and grind them down.
The bottom cut and where it's supposed to be marked out.

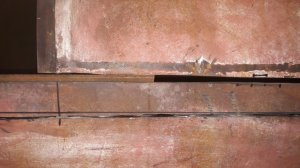
I made come cuts leaving a few places still on until I made some welds.

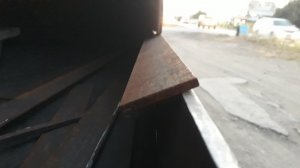
The strip in place to even out the gap between door and tank.

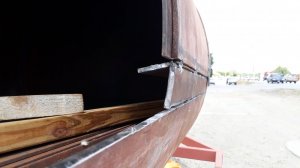
The fix tag welded and working just fine!


I ran out of thicker welding rods, so tomorrow I'll finish the doors inside and out. It's a bit extra work but it was highly necessary!
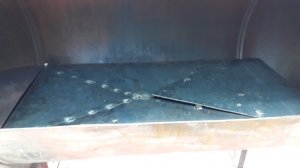
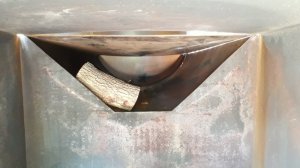
You can also see the rf plate in place. Stick welded ready to finish off. I shaped it like a pyramid so drippings always reach the drain immediately even if the trailer is not leveled in both directions. I have a 1 1/5" drain pipe and ball valve going straight down in the middle.


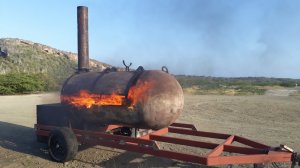
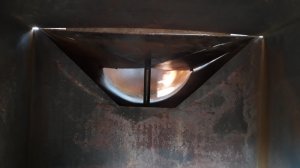
Almost there!!! By the end of the week I hope to light her up and see what she can do.
I made a terrible mistake when marking out the tank before cutting out the door. My bottom cut was 6 cm too high. The result of that is that the bottom grate won't slide out and putting it 2" higher means no 3th grate in the smoker which is the whole reason I started this build. More space.
Because I cut below 3 o clock, I wanted to put a strip inside on the doors too divert the drippings and moisture back into the tank. So now I did that using the strip to fill in the gap I had due to a very bad bottom cut. A tank full of water and a big grinder which isn't mine.... Oh!!! That KILLER sun burning me up there too. But I'm glad the mistake was an easy fix. Here are some pics of the mistake and the fix. I just need to fill the gaps now and grind them down.
The bottom cut and where it's supposed to be marked out.
I made come cuts leaving a few places still on until I made some welds.
The strip in place to even out the gap between door and tank.
The fix tag welded and working just fine!
I ran out of thicker welding rods, so tomorrow I'll finish the doors inside and out. It's a bit extra work but it was highly necessary!
You can also see the rf plate in place. Stick welded ready to finish off. I shaped it like a pyramid so drippings always reach the drain immediately even if the trailer is not leveled in both directions. I have a 1 1/5" drain pipe and ball valve going straight down in the middle.
Almost there!!! By the end of the week I hope to light her up and see what she can do.
SmokingMeatForums.com is reader supported and as an Amazon Associate, we may earn commissions from qualifying purchases.
Similar threads
- Replies
- 6
- Views
- 4K
- Replies
- 3
- Views
- 1K
- Replies
- 4
- Views
- 1K
- Replies
- 1
- Views
- 383
Hot Threads
-
Featured Prime Boneless Striploin Steaks on the Q
- Started by DRKsmoking
- Replies: 38
- Beef
-
Bucket list Smoker - Humphrey's Pint
- Started by dward51
- Replies: 22
- General Discussion
-
Your Favorite Way to Use Leftover Smoked Pork Ribs
- Started by Jim_C
- Replies: 21
- General Discussion


