texascoast
Fire Starter
Hey there Fellow Smoking Nerds:)

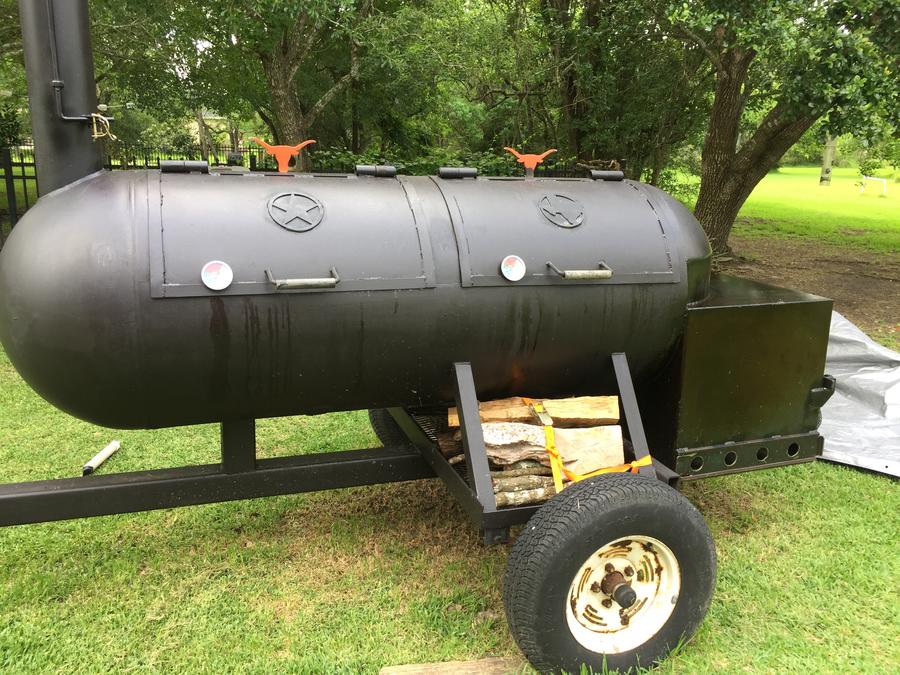
I just wanted to share with you folks a recent rebuild of a 250gallon offset smoker. We purchased the offset smoker for family reunion cooking a few years back and soon figured out the firebox and smoke stack needed to be replaced. So this spring I got with a neighbor that is a metal fabricator and we came up with a new firebox design.
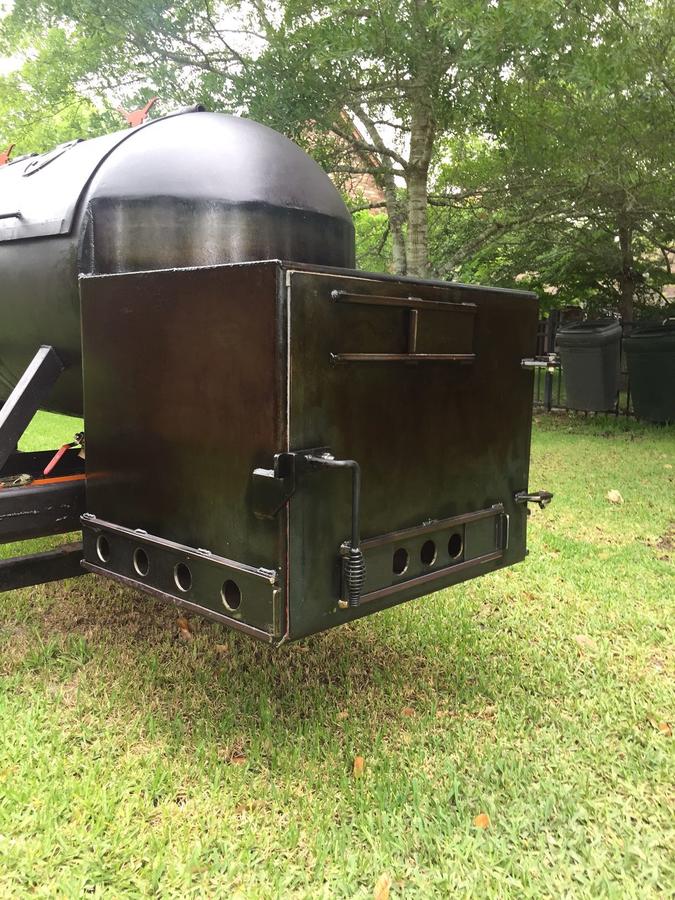
The new firebox has sliding air intakes at the bottom edges on the left, right and firebox door, it also has a heat exhaust vent on the top of the firebox door.
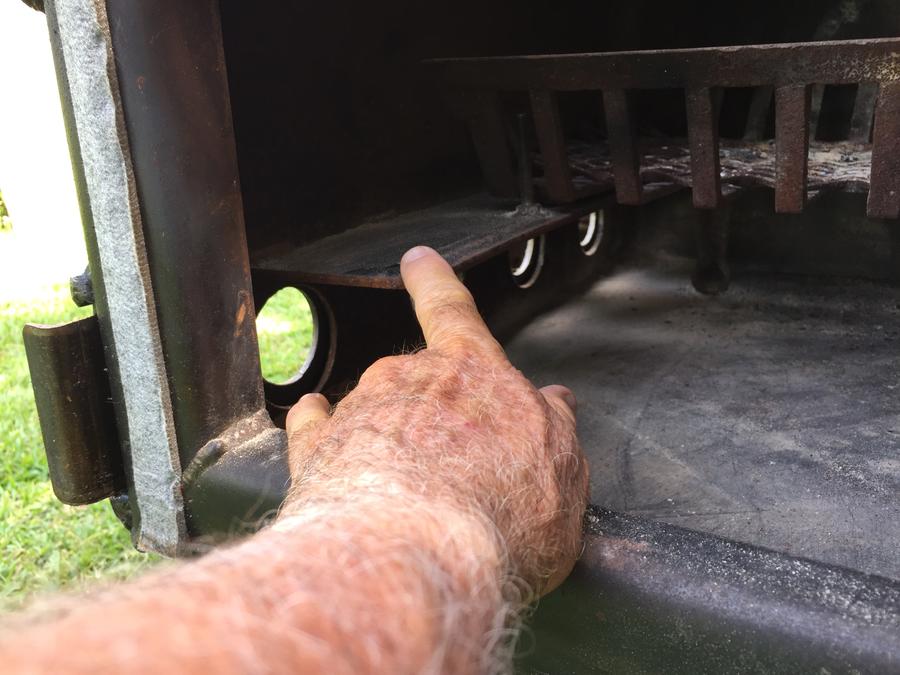
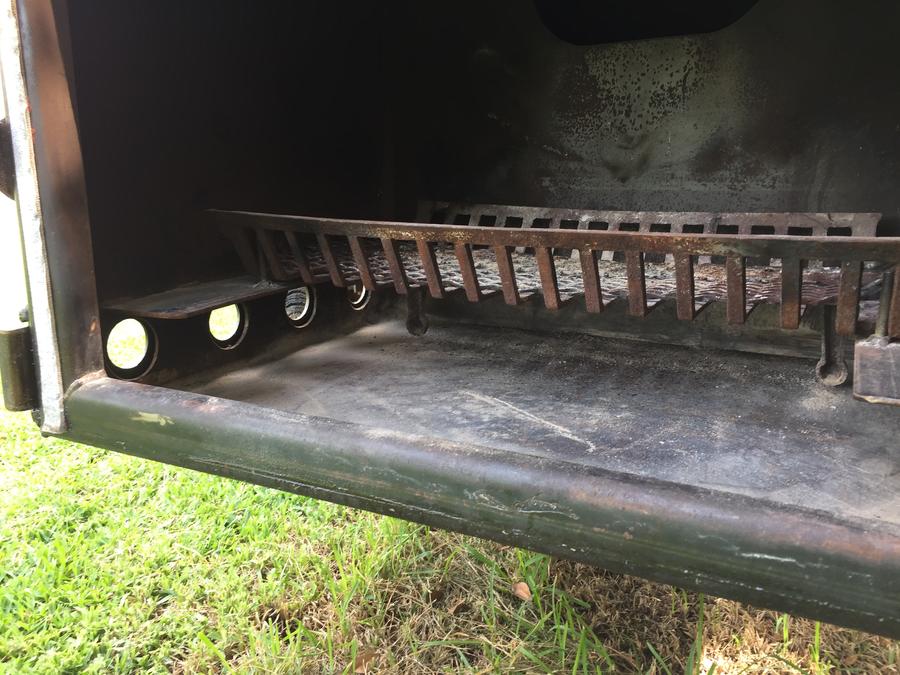
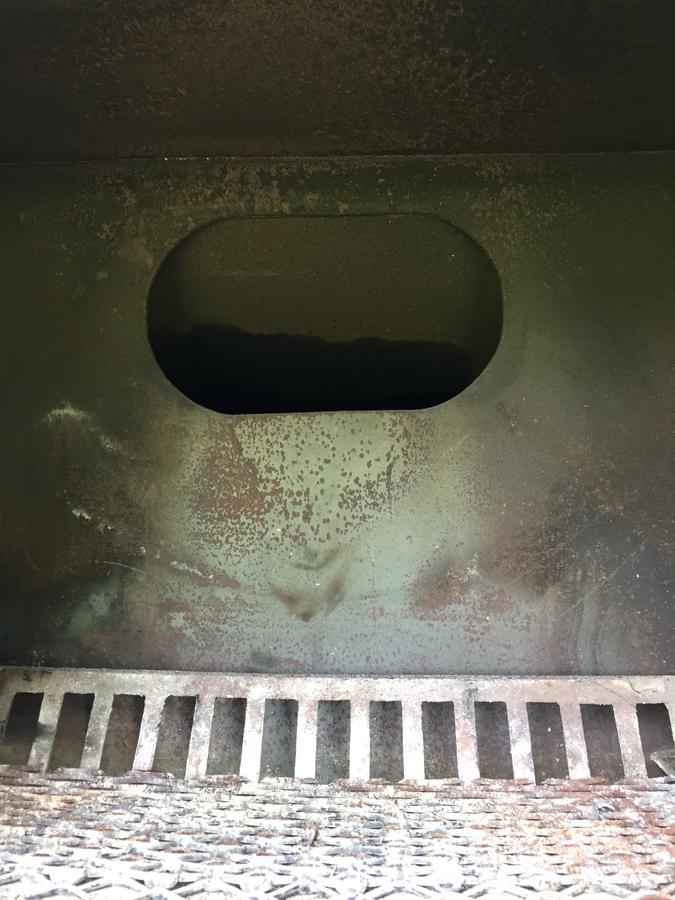
On the inside of the firebox above the two side air vents we welded two horizontal metal plates that extend inside the box about 4" to help force the incoming air to the center of the firebox where the fire should be...

The firebox opening into the cooking area has a deflector that extends about 12" into the cooking area, it is angled down at about 45deg, this really helps force heat into the middle of the cooking area so that it can spread out evenly. I added two new temp gauges at cooking grate level, these actually show that the cooking area temp is balanced from end to end.
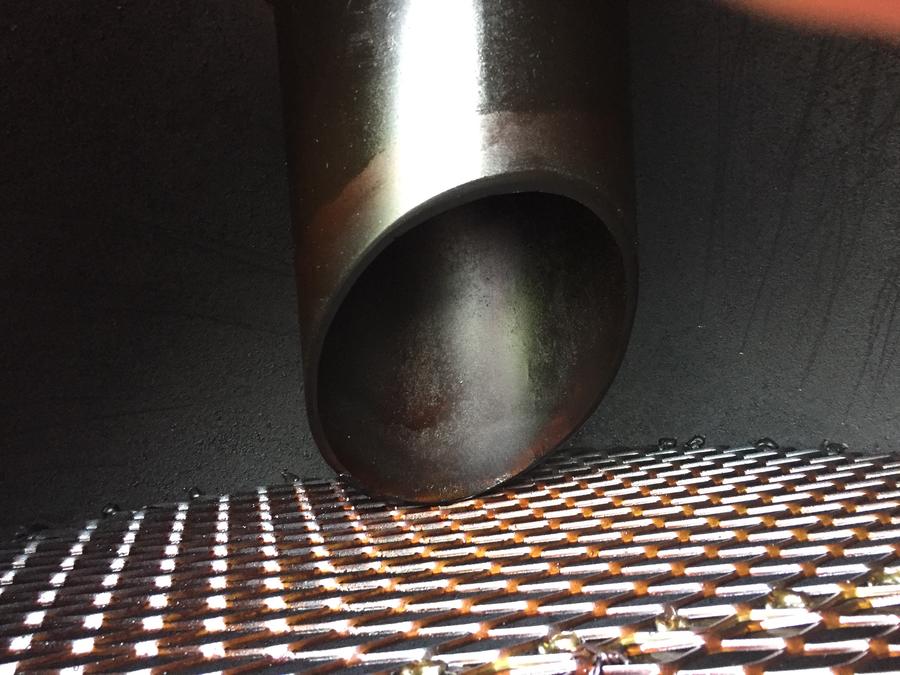
We also replaced the old 4" square tube smoke stack that had a T shaped cap at the top with an open ended 6" pipe that extends inside the cooking area to just above the cooking grate level, we cut the pipe bottom at a 45deg angle to allow a little more smoke & heat out. This seems to work very well.
The smoke stack has a moveable cover at the outside top of the stack. I did not use the smokestack cover during cooking, its there for keeping rain and critters out of smoker.
Instead of painting the firebox we decided to go with a different treatment.
The metal of the firebox was treated with canola oil when the box was hot, this was done several times, the firebox now has a glossy brown color that seems to resists rust..... We will see how long the resisting rust lasts:)

We also added a 1.5" grease drain valve at the bottom of the cooking area to help with overall smoker clean up!
We did several test fire burn ins to check the firebox air vents and smokestack draw, all went well.
After the test burns I treated the newly added expanded metal cooking surface and inside of smoker with canola oil, I am using the old iron skillet treatment technique.
So far I have done two cooking sessions with the new stuff in place, everything worked well. Temp was easy to maintain with the side air vents, I was able to maintain an even cooking temp on left and right side of cooking area. The temp was double checked with digital temp probes, I also added two new analog gauges just above the cooking grate level. I purchased the analog gauges from Academy, These gauges were actually recommend by one of Franklins BBQ videos.
I have attached a picture that shows the new firebox.
The firebox door was sealed using high temp RTV and Green Egg gasket material.
The top vent on the firebox door has two uses, it allows you to dump excess heat directly from the firebox and allows you to look at your fire without opening the door, also with a long metal rod you can stir the coals without opening the door.
I hope this helps others when it comes to a rebuild!
Time to go Smoke something

I just wanted to share with you folks a recent rebuild of a 250gallon offset smoker. We purchased the offset smoker for family reunion cooking a few years back and soon figured out the firebox and smoke stack needed to be replaced. So this spring I got with a neighbor that is a metal fabricator and we came up with a new firebox design.
The new firebox has sliding air intakes at the bottom edges on the left, right and firebox door, it also has a heat exhaust vent on the top of the firebox door.
On the inside of the firebox above the two side air vents we welded two horizontal metal plates that extend inside the box about 4" to help force the incoming air to the center of the firebox where the fire should be...
The firebox opening into the cooking area has a deflector that extends about 12" into the cooking area, it is angled down at about 45deg, this really helps force heat into the middle of the cooking area so that it can spread out evenly. I added two new temp gauges at cooking grate level, these actually show that the cooking area temp is balanced from end to end.
We also replaced the old 4" square tube smoke stack that had a T shaped cap at the top with an open ended 6" pipe that extends inside the cooking area to just above the cooking grate level, we cut the pipe bottom at a 45deg angle to allow a little more smoke & heat out. This seems to work very well.
The smoke stack has a moveable cover at the outside top of the stack. I did not use the smokestack cover during cooking, its there for keeping rain and critters out of smoker.
Instead of painting the firebox we decided to go with a different treatment.
The metal of the firebox was treated with canola oil when the box was hot, this was done several times, the firebox now has a glossy brown color that seems to resists rust..... We will see how long the resisting rust lasts:)
We also added a 1.5" grease drain valve at the bottom of the cooking area to help with overall smoker clean up!
We did several test fire burn ins to check the firebox air vents and smokestack draw, all went well.
After the test burns I treated the newly added expanded metal cooking surface and inside of smoker with canola oil, I am using the old iron skillet treatment technique.
So far I have done two cooking sessions with the new stuff in place, everything worked well. Temp was easy to maintain with the side air vents, I was able to maintain an even cooking temp on left and right side of cooking area. The temp was double checked with digital temp probes, I also added two new analog gauges just above the cooking grate level. I purchased the analog gauges from Academy, These gauges were actually recommend by one of Franklins BBQ videos.
I have attached a picture that shows the new firebox.
The firebox door was sealed using high temp RTV and Green Egg gasket material.
The top vent on the firebox door has two uses, it allows you to dump excess heat directly from the firebox and allows you to look at your fire without opening the door, also with a long metal rod you can stir the coals without opening the door.
I hope this helps others when it comes to a rebuild!
Time to go Smoke something