Whole Hog Cinder Block Build / Function Questions

  • Some of the links on this forum allow SMF, at no cost to you, to earn a small commission when you click through and make a purchase. Let me know if you have any questions about this.
SMF is reader-supported. When you buy through links on our site, we may earn an affiliate commission.

MPustka

Newbie
Original poster
Aug 23, 2022
29
11
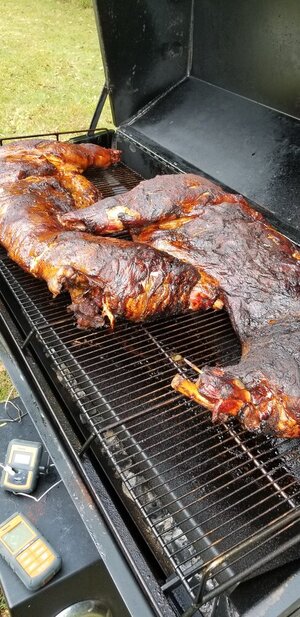
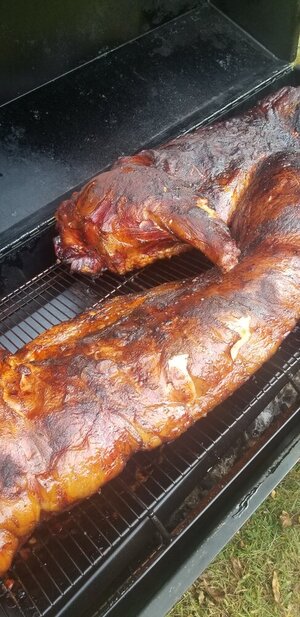
I turn 60 in January and I'm planning a whole hog roast. Thinking of building a design like below in terms of size for a cinder block pit.

Seems like you don't want to be too big on the interior dimensions or else its too much work to try and maintain heat and if you go too small then the hog won't fit.
A lot of builds I've read about talk about the venting shown below to provide the necessary airflow for the fire. This all seems to make sense and I think a design like this would work.

My two questions are related and have to do with placing the fire under the hog.

From my reading it looks like you want to either place the coals in the 4 corners of the pit or you spread them along the interior pit perimeter. Seems like a vastly different
burn depending upon where the heat is placed. Some directives have coals covering the bottom of the pit - but as several other designs mention it can create a grease fire
quickly. What is the preferred method for placing coals?

The subsequent question is how do you keep feeding the fire with hot coals to maintain the necessary temperature? Some build plans show openings on either end to shovel into
and some seem to be stating that you can use the draft control openings shown in the image below to shovel in coals. I can't figure out how either option is going to provide the
necessary maneuvering needed to spread the coals around the perimeter. Is this why its suggested that the heat only be placed in the 4 corners - along with the idea that the shoulders
and hams need the most heat. If you want to spread the coals around the interior perimeter do you take the lid off, remove the stretcher/hog and then shovel in the coals? This seems excessive
because from what I've read it could be as often as 30-45 minutes when coals need to be added.

Maybe I'm over complicating and there's an easy solution but I'm trying to think through my build along with my roasting plan to make sure the cook goes as well as can be expected
for a first timer.

Any and all feedback, comments, suggestions are welcome. If I'm way off base with my design direction let me know as well.

cinder-block-pig-roast-final-pig-pit-sketchup1.jpg
 
No suggestions, but Welcome to the forum from Minnesota!
But please keep posting about this very interesting project and good luck with your building it!!
 
  • Like
Reactions: MPustka
we built one similar to your drawing. Remove one of the long walls, replace it with a center support. We had a hardwood burn pit going and just shoveled hot coals as needed. Set one row of block above grate and used some corregated roof tin over the pig. We got the job done, but used a lot of wood.

Last one we did was rent a 6 foot Meadow Creek and used hardwood charcoal turn out quick and good. This was a no frills cook, so we just skinned him, no head, no feet. Sawzall up the spine to split him in half.

RG Screenshot_20220823-212044_Opera.jpg
 

Attachments

  • 20210925_102357.jpg
    20210925_102357.jpg
    173.9 KB · Views: 68
  • 20210925_102340.jpg
    20210925_102340.jpg
    148.1 KB · Views: 57
Last edited:
If you're making it permanent (e.g. with mortar) make sure you put at least one of those cinder blocks in sideways so you have an air intake...you can always move another block up to it to throttle back the draft. And I think you'll need metal sheet on top to keep the heat in. I like Cowgirl's use of corrugated steel roofing. Shiny helps reflect heat back too.
 
we built one similar to your drawing. Remove one of the long walls, replace it with a center support. We had a hardwood burn pit going and just shoveled hot coals as needed. Set one row of block above grate and used some corregated roof tin over the pig. We got the job done, but used a lot of wood.

Last one we did was rent a 6 foot Meadow Creek and used hardwood charcoal turn out quick and good. This was a no frills cook, so we just skinned him, no head, no feet. Sawzall up the spine to split him in half.

RGView attachment 641807
Do you open up one of the entire long sides of the pit or do you just create an opening in the side to add coals? If an opening how big? Do you use some kind of steel bar as a header piece to hold up the blocks above? Do you place coals under the entire pit bottom or just around the perimeter or only in corners? Thanks for the help. MP
 
If you're making it permanent (e.g. with mortar) make sure you put at least one of those cinder blocks in sideways so you have an air intake...you can always move another block up to it to throttle back the draft. And I think you'll need metal sheet on top to keep the heat in. I like Cowgirl's use of corrugated steel roofing. Shiny helps reflect heat back too.
Do you put the open blocks on long side corners as I’ve seen elsewhere or do you have another preference? Is corrugated roof tin galvanized? Thanks for chiming in. I appreciate the help. MP
 
Last edited:
We cooked on a temporary cinder block pit quite a few times back in the day when I was much younger. Most of one whole side was open to allow placement of coals all around underneath the hog. We'd block that side somewhat with a piece of tin. Two rows of blocks were above the cook surface, which was a piece of expanded metal, and we covered the top with a sheet of plywood. Opposite side from the opening at ground level was a block turned on it's side to allow air flow. Burned hardwood in a 55 gallon drum with a rebar grate at the 1st ridge up from the bottom and a shovel size hole cut into the side below that. Coals would fall through and be scattered under the hog. Back then we didn't have thermometers, it was all done by sight and feel, usually my uncle's. When it all cooled, we'd tear it down and clean it up until the next time.

Early in the morning while the hog was cooking, my uncle started making hog head hash in a large cast iron cauldron. He was the only one allowed to make it and he stirred it with a hickory stick he made just for that purpose. Nobody was allowed to touch that stick, ever. That took several hours. Cooking usually lasted all night and we'd fry fish around midnight for those still awake. Early afternoon was the time to eat and when a lot of folks would show up bringing all sorts of covered dishes.

Man, what memories and I would love to know what happened to that cauldron...
Very good info. Thanks.
 
Do you put the open blocks on long side corners as I’ve seen elsewhere or do you have another preference? Is corrugated roof tin galvanized? Thanks for chiming in. I appreciate the help. MP
I think Cowgirl was on the right track putting more heat over the head and tail than over the center ribs. So that would lead me to put the "open blocks" in the centers of the short sides.
Yes corrugated roofing is galvanized. At ~650-700F, the zinc will oxidize to ZnO, which, like B2O3, used to be widely used and now is shunned. So you don't want the corrugated sheeting to rest in flames, because it will then oxidize. But on the top of an oven, you're fine since if you have flames up that high you're ruining your meat. I don't think you're going to want temps at the top to go over ~250F. This may still exceed some folks comfort level for Zn so then consider plywood. Wood, like paper, oxidizes (burns) at "Fahreheit 411" (recall Ray Bradbury book) so you have more margin with the galvanized roofing! (And the glues in plywood are going to outgas/stink quite possibly at cook temps so I'm not keen on plywood) but I'm giving full disclosure and all that.
 
  • Like
Reactions: MPustka
My pork cooks are measured in pounds, not whole animals, but I agree it seems people roast the whole hog, not smoke it. But I'd love to hear from folks with big mobile offset rigs that cook for large gatherings what they think.
 
  • Like
Reactions: MPustka
My build to date, combining several different designs. I'm using bed frame angle to hold up a rebar stretcher that I'll build to contain the pig. Opening on each end in opposite corners for airflow. Trying to figure out a cover at this point.

I can't find any cheap used corrugated metal and am thinking about reflective insulation board, weighted on top, with the reflective side down facing the fire. Any thoughts on this approach would be appreciated.
 
Not sure where you're from but do you have a black Smith shop anywhere near you? They usually have scrap steel around and maybe you could find something there. This is one case where bribery is a good thing... unless he's a vegetarian!

Ryan
 
MPutska, morning... I would leave the block in the vent holes on their side... You will need something to partially block the air entering the smoker... You don't really want flame... Smoldering low and slow is good... A cooking temperature of 225 is about what works best... Splits about 1.5" square is good...
In the picture, cross braces of steel pipe or rebar at the 4 block height (~30') is good... chip out the top course to hold the support bars (4-5) below grade... lay expanded metal (HEAVY expanded steel) so it doesn't sag too much across the supports... Add another course of block... Now you have an ~8" tall oven... lay steel corrugated roofing across the top to keep in the heat... Screw 2x2 to the roofing metal for a frame... Leave the long side of the metal open (no frame) for a chimney of sorts... A small bed of coals will heat the unit nicely...
If you can, secure the pig between 2 layers of expanded steel (light weight) for ease in turning and removal to the carving table... (all thread & fender washers works) For a successful BBQ, do not skimp on anything... You may end up with a disaster during the cook...
 
  • Like
Reactions: pitmasternmakin
SmokingMeatForums.com is reader supported and as an Amazon Associate, we may earn commissions from qualifying purchases.

Latest posts

Hot Threads

Clicky