
Hellow Fellow SMF'ers
I posted this a while ago and have updated it significantly so I wanted to repost.
Many of you have read most of this and may just want to skim it.
Hopefully some will find this post useful.
I removed the links as this was taken from my website which was just updated, so if any mods find a link, feel free to delete...thanks.
I am sure there are a lot of things not in here and there is more than one way to skin a cat so with that said, below is ashort tutorial of my method.
Basic Pulled Pork according to SQWIB
Its done when its done, throw away your watch.
[font=verdana, sans-serif]Before we start with this tutorial we need a good frame of mind, remember the following and you will be set.[/font]
The goal here is to have fun!
I find something therapeutic about being outside cooking with a fire. I guess you could say it's sort of a therapy, well we know its definitely an aromatherapy. It's quite relaxing to be out tending the pit on a cold day, without the worries of the world around me.
This is what it is like for me when cooking on my pit.
You get up before the sun, head out to the pit, it is dark but the darkness is welcome, it makes you feel like you are in your own world.
You open up the firebox door and start a fire. It is very still and dry out, the fire burns upward.
It is silent, almost a deafening quiet, no birds, no airplanes or cars, no air conditioners, the only thing that is heard through the silence is the crackling of the fire, you glance at the temperature gauge on the wall and it reads 36°, you think to yourself , "that's cold", but the warmth from the pit is comforting and you are not cold.
The light from the fire cuts through the dark giving the area a warm soothing glow and the smell from the freshly ignited wood makes you close your eyes and inhale deeply, you loose yourself for a minute, at this point you know its going to be a great day.
You head upstairs and grab the pork, once at the pit, you unwrap the pork and get hit with another welcomed smell... it's of your rub, as you gaze at the slather that has developed from the rub mixing with the meat juices you are fighting the urge to swipe the gooey goodness with your finger and taste it like you would icing on a birthday cake, the whole time saying to yourself, "life is great".
The fire settles down, you look over your shoulder and notice the glow of the sun peeking through the trees.
You set up your pit and place your treasure into the pit, you close the pit and head upstairs to grab a coffee and back out to the pit.
You then place your favorite chair by your firebox and gaze at the thermometer and it is now 42°.
As you sip on your coffee you get a faint smell of your rub alongside a bit of smoke smell, now you get anxious... you spring up and take a peek... not much going on but you take a minute to admire your treasure.
A little while passes and you add some more wood to the fire, as the fire crackles you hear a sizzling sound, you spring up out of your chair and pop open the pit,...whoosh you get plastered in the face with the first signs that your pork is on it's way, you have now just opened Pandora's box, the anticipation weighs heavily on you like a crushing force that can only be lifted by time.
As you admire your treasure you notice the "pork gold" oozing from the surface, you know everything is as it should be and you have aligned with the universe.
too be continued.
Nothing is more relaxing to me than being outside tending the pit on a nice fall morning, kicking back with a fresh cup of coffee taking in all the wonderful aromas from the pit.
As much as it is relaxing, there is also something primeval about cooking meat over a fire, there is also the satisfaction of producing a product that required so much attention and will be enjoyed by many.
When I'm cooking on the pit, it's not just cooking, it is more of an event. Now that I look back I remember my Mother In Law would make thanksgiving dinner, I saw her slaving in a kitchen all day, but to her she was enjoying her event, she was in her element and enjoying every minute of it, to me it looked like a lot of hard work.
When I'm cooking on the pit, folks look at me and say, "man you've been tending that pit all day, that seem like a lot of work", but I'm in my element, so I say, "its only work if you don't enjoy it".
[font=verdana, sans-serif]Now that we are in the right frame of mind let's get started.[/font]
There are many variables to consider when cooking Butts/Picnics such as, variations in cuts of meats, fat content of meat, foiling, humidity in the cooking chamber, type of cooker, how you position items in the cooker, type of wood, quality of wood, size of wood, fire management, airflow and weather conditions, to name a few. Many of these conditions will effect your cook and finished product in some way.
This is based on a Reverse Flow Offset Pit and individual results will vary, for example when doing butts on my GOSM "Vertical Cabinet Water Smoker", my cooking times are much greater than on the Reverse Flow.
So please experiment a bit and find what works best for you.
Be Prepared[color= rgb(102, 0, 0)] [/color]
One thing I have learned over the years is to be prepared and organized. I strongly suggest making a checkl[font=verdana, sans-serif]ist. Start with your recipe and get all of your ingredients.[/font]
So before you start, make sure you have everything you will need for the cook, Wood splits, Propane, Thermometers, HD foil, pans, Tongs, Lighters, Gloves, etc...
Same goes with the Ingredients to a recipe, get everything out the day before you plan on starting, you just may realize you are missing an important ingredient that the neighbor most likely will not have.
If using things like Digital Thermometers or Insta Read, make sure to have fresh batteries and check probes prior to the cook.
Documentation
Make sure to document your cook including cooking times and temps as well as weather conditions and take plenty of pictures if possible, this is a great tool when reviewing successes and failures. Keep your documentation organized. I transfer my photos and notes to this website for future reference and sharing.
Variables:
There are many variables to a cook, you may ask yourself why did this cook take a lot longer than my other cook, well its hard to tell but below will be some variables that can affect your cook. There are also a few variables mentioned under Mother Nature.
Meat:
Bone in, Boneless, cut of meat and fat. Bone and fat do not transfer heat like solid muscle meat.
Trimming fat will reduce the cook time somewhat however if your cooking directly over a heat source and flare ups can be a problem you may chose to leave the fat intact and cook fat side down to protect the meat. De-boning or boneless may reduce your cook time, however, I think its more trouble to remove it and the little bit of cook time saved is not worth the aggravation of de-boning and its fun to pull the bone out as it's a built in doneness checker (I know doneness isn't a word). Many folks like to leave the bone in saying that it adds to the flavor.
Temperature:
Your cooking temperature is one of the biggest variables when cooking, see the chart below for an example, these numbers are based on cooking the meat on a pit to an internal temperature of 200°-205° using wood and no foil.
Many die hard Low and Slow folks say 225° is the best temp for cooking butts/picnics, after many cooks I have found my happy ground at 275°. I have not noticed a change in flavor profile, texture nor moistness one way or another, however you will need to find your favorite cooking temp. Just a word of caution, if you do decide on the lower temps at least keep it up to 250° the first 2 or three hours to help you get through the danger zone safely, this is explained later in this article.
9 pounds @ 225° = 90 - 120 minutes per/lb [13.5 - 18 hours]
9 pounds @ 250° = 80 - 90 minutes per/lb [ 12 - 13.5 hours] (this article is based on 250°)
9 pounds @ 275° = 60 - 80 minutes per/lb [ 9 - 12 hours]
9 pounds @ 275° = 50 - 60 minutes per/lb [ 7.5 - 9 hours] FOILED
Please use the above chart loosely, every cook will be different as mentioned in the variables, this is just a general guide and not etched in stone. Also note that cooking at higher temps such as 275° when using rubs high in sugar can result in a burnt bark. When doing 275° I use a low sugar rub.
Fuel; Charcoal, Lump and Wood (under wood there are many different species) (explained the best way I could)
Humidity
Humidity in a pit can affect cook times as well, I always use a drip pan with water to catch the drippings, this does not have any impact on my pit but smoking on my GOSM using a water pan seems to take significantly longer than when using water on my pit.
Mother Nature
Prepare for the predicted weather... Examples;
Equipment
[font=verdana, sans-serif]Make sure your equipment is clean and ready to go, preferably the night before, examples;[/font]
Brining:
Trimming / Not trimming:
Reasons why I trim the fat:


Injecting / Rub
Rubs.
[/font]
Time:
The next morning:
Fire Management:
I will quickly go into fire management here. This is where you should start to take accurate notes and understand your Pit. Learning how to control your fire for your particular pit is a key component in a successful cook. Wood will have different requirements than charcoal and Lump Charcoal.
I primarily use wood on my cooks and will only use charcoal when starting a fire. I would love to give more specific advice on fire management but there are too many variable to give specific instructions, however I will provide the following tips.
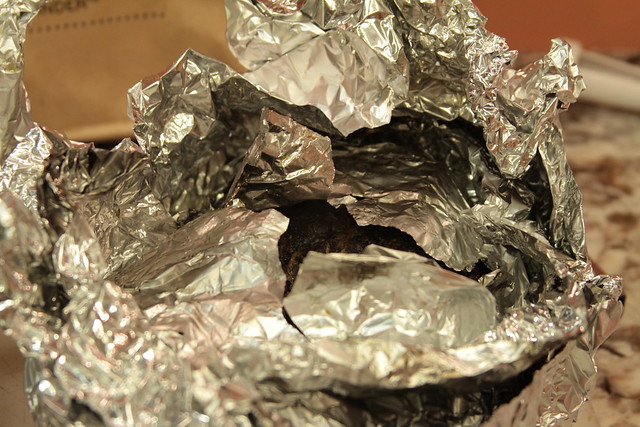
Placement of the meat, make sure the meat is not touching anything, and be careful of any "Cold spots" or "Hot spots". If your smoker is prone to hot spots, it would be wise to flip rotate and shuffle the meat around during the cook, just make sure to do this when basting or adding water to the pan.
These are a bit too close, they should not be touching
Thermometers.
If your are using your thermos to monitor chamber temp, place the probe directly in front of the meat being cooked, making sure the probe is not touching anything. You can use a potato or onion to secure the probe, just make sure at least one inch of the probe protrudes from the potato or onion. If your thermos have a timer hit the start button once the meat is on the grates (recording your cook times will be a great reference for future cooks).
Firebox
The top of the firebox can get pretty hot depending on your pit, so why not use it as a cooking surface.
Clean your work area:
Now that everything is cleaned up, you have a clean work area and the Pit is chugging along, it's time to relax.
Sit back and enjoy!
If you have a ET732 or any wireless unit that monitors the cooking chamber temperature, you have a bit more freedom to move around, my last cook I went upstairs while Frank was chugging along and hopped in the jacuzzi tub for near an hour, came downstairs and made a cup of coffee then headed back outside.
Mopping (Optional) The term mopping comes from actually mopping the meat with a little mop, many folks use spritzing, mopping and basting interchangeably.
Heat Recovery:
Don't get hung up on the old saying, "If you're looking your not cooking". Do not sweat opening the cooker every now and then especially if your cooker has a quick heat recovery time, the more thermal mass you have the better the heat recovery will be, just don't get carried away. Peeking constantlywill increase the cook time.
Here's a tip, if you want to check the drippings in the pan or want to mop the meat, time it when adding your splits, once the splits start to smoke, right before combustion, open the cooking chamber door and mop at this time and add liquid if needed.
Flipping/Rotating:
Although not usually necessary sometimes a flip or moving the meat will give a more even bark formation I will sometimes flip when doing butts or picnics, but it may be more necessary for some that experience hot spots or cold spots on their smoker, where one butt of similar size may take much longer to cook.
The stall:
You may encounter what folks call the "Stall", (Plateau) from my experience, this usually is around 155°F to 180°F this can last several hours, don't sweat it, this is normal and will pass.
If you experience the Stall you can move things along by wrapping the butt in foil and bumping the temps up to 275°F until the temps start to rise again, at this point you could lower the temps and unfoil the butt or let continue to cook foiled.
The "Danger Zone"
What is the danger zone?
The below statement, was taking from a frequently visited forum. Bare in mind this is not a specific safety rule by the FDA and is a general rule adopted by extensive research and experienced chefs.
It is important for your Safety, that any Meats that have been Punctured, Probed, Injected or Ground, be cooked or smoked at a temperature, typically 225°F or greater, that gets the Internal Temperature of the meat from 40°F to 140°F in 4 Hours or less...Frequently called the 40 to 140 in 4 Rule. (This does not include meats containing Cure #1, Cure #2 and Morton's Tender Quick.)
A Guideline like 40-140 in 4...aka the Rule (less letters than Guideline) is, Easy to remember, Provides a margin of Error, Has been gleaned from information provided by Multiple sources, including but not limited to, Professional Food service organizations, The American Culinary Federation, The ServSafe program, the USDA and Food Service Professionals with Years of Experience... Is, " 40°F to 140°F in 4 " written down in any Government Food Service Law Manual, or Word for Word on any fore mentioned Website or Charter?...NO...But it Has been adopted by This Site and others to protect our members...
Foiling / not foiling.
There are times when I foil and there are times when I do not foil. I have a few recipes such as my "Philly Style Pulled Pork" and my "Porchetta Italian Marketplace Pulled Pork", that I do not want TOO much bark so I foil at a certain temperature.
Resting for slicing:
If you choose to slice the pork, remove from the Pit at an internal temperature of 185°F - 190°F, wrap tightly in Foil then wrap in heavy towels and place into a cooler for 1 hour.
Resting for Pulling/Shredding:
If you choose to pull/shred the pork, remove from the Pit at an internal temperature of 200°F- 205°F, wrap tightly in Foil then wrap in heavy towels and place into a cooler for 1 - 2 hours. (1 hour minimum, however I shoot for two hours, patience pays off here). Some Butts can be kept 4 hours or more in a good cooler but keep an eye on the internal temperature, do not let it drop below 140°F, better yet 150°F. Place the cooler wherever it is warmer, so if its cold outside, place it in the house. You can use your oven if you do not have a cooler. I recently have been placing the pork on the counter foiled and wrapped in towels with equally good results.
Pulling and Finishing:

Sauces (Taken from wikipedia)
[font=verdana, sans-serif]East Carolina Sauce – [/font][font=verdana, sans-serif]Can be used as a "mopping" sauce to baste the meat while it was cooking and as a dipping sauce when it is served. Thin and sharp, it penetrates the meat and cuts the fats in the mouth. There is little or no sugar in this sauce. This sauce has a very sharp taste[/font]
[font=verdana, sans-serif]Lexington Dip[/font][font=verdana, sans-serif] (a.k.a. Western Carolina Dip or Piedmont Dip) – In Lexington and in the "Piedmont" hilly areas of western North Carolina, the sauce is often called a dip. It is a lot like the East Carolina Sauce (above) with tomato paste, tomato sauce, or ketchup added. The vinegar softens the tomato.[/font]
[font=verdana, sans-serif]Kansas City – Thick, reddish-brown, tomato or ketchup-based with sugars, vinegar, and spices. Evolved from the Lexington Dip (above), it is significantly different in that it is thick and sweet and does not penetrate the meat as much as sit on the surface. This is the most common and popular sauce in the US and all other tomato based sauces are variations on the theme using more or less of the main ingredients.[/font]
[font=verdana, sans-serif]Memphis[/font][font=verdana, sans-serif] – Similar to the Kansas City style, typically having the same ingredients, but tending to have a larger percentage of vinegar and use molasses as a sweetener.[/font]
[font=verdana, sans-serif]South Carolina Mustard Sauce – Part of South Carolina is known for its yellow barbecue sauces made primarily of yellow mustard, vinegar, sugar and spices. This sauce is most common in a belt from Columbia to Charleston, an area settled by many Germans. Vinegar-based sauces with black pepper are common in the coastal plains region as in North Carolina, and thin tomato- and vinegar-based sauces are common in the hilly regions as in North Carolina[/font]
[font=verdana, sans-serif]Texas – In some of the older, more traditional restaurants the sauces are heavily seasoned with cumin, chili peppers, bell peppers, chili powder or ancho powder, lots of black pepper, fresh onion, only a touch of tomato, little or no sugar, and they often contain meat drippings and smoke flavor because meats are dipped into them. They are medium thick and often resemble a thin tomato soup. They penetrate the meat easily rather than sit on top. Bottled barbecue sauces from Texas are often different from those used in the same restaurants because they do not contain meat drippings.[/font]
[font=verdana, sans-serif]Alabama White Sauce[/font][font=verdana, sans-serif] – North Alabama is known for its distinctive white sauce, a mayonnaise-based sauce, which is used predominantly on chicken and pork. It is composed of mayonnaise, vinegar, sugar, salt and black pepper.[/font]
SQWIBS Favorite to date - Taken from a Robert Irvine Recipe and modified to my taste this is a nice sauce that will penetrate the meat a bit, has just enough sweetness as well as distinctive sharpness.
[h2]http://SQWIBS Favorite to date BBQ Sauce:[/h2]
I posted this a while ago and have updated it significantly so I wanted to repost.
Many of you have read most of this and may just want to skim it.
Hopefully some will find this post useful.
I removed the links as this was taken from my website which was just updated, so if any mods find a link, feel free to delete...thanks.
I am sure there are a lot of things not in here and there is more than one way to skin a cat so with that said, below is a
Basic Pulled Pork according to SQWIB
Its done when its done, throw away your watch.
[font=verdana, sans-serif]Before we start with this tutorial we need a good frame of mind, remember the following and you will be set.[/font]
The goal here is to have fun!
I find something therapeutic about being outside cooking with a fire. I guess you could say it's sort of a therapy, well we know its definitely an aromatherapy. It's quite relaxing to be out tending the pit on a cold day, without the worries of the world around me.
This is what it is like for me when cooking on my pit.
You get up before the sun, head out to the pit, it is dark but the darkness is welcome, it makes you feel like you are in your own world.
You open up the firebox door and start a fire. It is very still and dry out, the fire burns upward.
It is silent, almost a deafening quiet, no birds, no airplanes or cars, no air conditioners, the only thing that is heard through the silence is the crackling of the fire, you glance at the temperature gauge on the wall and it reads 36°, you think to yourself , "that's cold", but the warmth from the pit is comforting and you are not cold.
The light from the fire cuts through the dark giving the area a warm soothing glow and the smell from the freshly ignited wood makes you close your eyes and inhale deeply, you loose yourself for a minute, at this point you know its going to be a great day.
You head upstairs and grab the pork, once at the pit, you unwrap the pork and get hit with another welcomed smell... it's of your rub, as you gaze at the slather that has developed from the rub mixing with the meat juices you are fighting the urge to swipe the gooey goodness with your finger and taste it like you would icing on a birthday cake, the whole time saying to yourself, "life is great".
The fire settles down, you look over your shoulder and notice the glow of the sun peeking through the trees.
You set up your pit and place your treasure into the pit, you close the pit and head upstairs to grab a coffee and back out to the pit.
You then place your favorite chair by your firebox and gaze at the thermometer and it is now 42°.
As you sip on your coffee you get a faint smell of your rub alongside a bit of smoke smell, now you get anxious... you spring up and take a peek... not much going on but you take a minute to admire your treasure.
A little while passes and you add some more wood to the fire, as the fire crackles you hear a sizzling sound, you spring up out of your chair and pop open the pit,...whoosh you get plastered in the face with the first signs that your pork is on it's way, you have now just opened Pandora's box, the anticipation weighs heavily on you like a crushing force that can only be lifted by time.
As you admire your treasure you notice the "pork gold" oozing from the surface, you know everything is as it should be and you have aligned with the universe.
too be continued.
Nothing is more relaxing to me than being outside tending the pit on a nice fall morning, kicking back with a fresh cup of coffee taking in all the wonderful aromas from the pit.
As much as it is relaxing, there is also something primeval about cooking meat over a fire, there is also the satisfaction of producing a product that required so much attention and will be enjoyed by many.
When I'm cooking on the pit, it's not just cooking, it is more of an event. Now that I look back I remember my Mother In Law would make thanksgiving dinner, I saw her slaving in a kitchen all day, but to her she was enjoying her event, she was in her element and enjoying every minute of it, to me it looked like a lot of hard work.
When I'm cooking on the pit, folks look at me and say, "man you've been tending that pit all day, that seem like a lot of work", but I'm in my element, so I say, "its only work if you don't enjoy it".
[font=verdana, sans-serif]Now that we are in the right frame of mind let's get started.[/font]
There are many variables to consider when cooking Butts/Picnics such as, variations in cuts of meats, fat content of meat, foiling, humidity in the cooking chamber, type of cooker, how you position items in the cooker, type of wood, quality of wood, size of wood, fire management, airflow and weather conditions, to name a few. Many of these conditions will effect your cook and finished product in some way.
This is based on a Reverse Flow Offset Pit and individual results will vary, for example when doing butts on my GOSM "Vertical Cabinet Water Smoker", my cooking times are much greater than on the Reverse Flow.
So please experiment a bit and find what works best for you.
Be Prepared[color= rgb(102, 0, 0)] [/color]
One thing I have learned over the years is to be prepared and organized. I strongly suggest making a checkl[font=verdana, sans-serif]ist. Start with your recipe and get all of your ingredients.[/font]
So before you start, make sure you have everything you will need for the cook, Wood splits, Propane, Thermometers, HD foil, pans, Tongs, Lighters, Gloves, etc...
Same goes with the Ingredients to a recipe, get everything out the day before you plan on starting, you just may realize you are missing an important ingredient that the neighbor most likely will not have.
If using things like Digital Thermometers or Insta Read, make sure to have fresh batteries and check probes prior to the cook.
Documentation
Make sure to document your cook including cooking times and temps as well as weather conditions and take plenty of pictures if possible, this is a great tool when reviewing successes and failures. Keep your documentation organized. I transfer my photos and notes to this website for future reference and sharing.
Variables:
There are many variables to a cook, you may ask yourself why did this cook take a lot longer than my other cook, well its hard to tell but below will be some variables that can affect your cook. There are also a few variables mentioned under Mother Nature.
Meat:
Bone in, Boneless, cut of meat and fat. Bone and fat do not transfer heat like solid muscle meat.
Trimming fat will reduce the cook time somewhat however if your cooking directly over a heat source and flare ups can be a problem you may chose to leave the fat intact and cook fat side down to protect the meat. De-boning or boneless may reduce your cook time, however, I think its more trouble to remove it and the little bit of cook time saved is not worth the aggravation of de-boning and its fun to pull the bone out as it's a built in doneness checker (I know doneness isn't a word). Many folks like to leave the bone in saying that it adds to the flavor.
Temperature:
Your cooking temperature is one of the biggest variables when cooking, see the chart below for an example, these numbers are based on cooking the meat on a pit to an internal temperature of 200°-205° using wood and no foil.
Many die hard Low and Slow folks say 225° is the best temp for cooking butts/picnics, after many cooks I have found my happy ground at 275°. I have not noticed a change in flavor profile, texture nor moistness one way or another, however you will need to find your favorite cooking temp. Just a word of caution, if you do decide on the lower temps at least keep it up to 250° the first 2 or three hours to help you get through the danger zone safely, this is explained later in this article.
9 pounds @ 225° = 90 - 120 minutes per/lb [13.5 - 18 hours]
9 pounds @ 250° = 80 - 90 minutes per/lb [ 12 - 13.5 hours] (this article is based on 250°)
9 pounds @ 275° = 60 - 80 minutes per/lb [ 9 - 12 hours]
9 pounds @ 275° = 50 - 60 minutes per/lb [ 7.5 - 9 hours] FOILED
Please use the above chart loosely, every cook will be different as mentioned in the variables, this is just a general guide and not etched in stone. Also note that cooking at higher temps such as 275° when using rubs high in sugar can result in a burnt bark. When doing 275° I use a low sugar rub.
Fuel; Charcoal, Lump and Wood (under wood there are many different species) (explained the best way I could)
- Charcoal will burn more consistent and have less heat output than lump or wood it will also give a charcoal flavor profile. Charcoal will leave more ash than Lump or wood. Charcoal is better suited for smaller pits but I have had success on my pit.
- Lump will burn less consistent than charcoal and give a slight smoky flavor profile based on the type of lump, Lump will have less ash than wood or charcoal and burn hotter. Lump is better for quick direct heat, such as grilling steaks, but can be used successfully in a pit
- Wood will burn the least consistent and may have more temperature fluctuations than both lump and charcoal and will give a smoke flavor profile based on the species of wood. Wood will have more ash than lump but less than charcoal.
- Hardwood Coals I feel is the best method for a pit, for this you would need a preburn barrel to burn the wood then place the coals in the pit, I never use this method for the simple fact it's too troublesome.
Humidity
Humidity in a pit can affect cook times as well, I always use a drip pan with water to catch the drippings, this does not have any impact on my pit but smoking on my GOSM using a water pan seems to take significantly longer than when using water on my pit.
Mother Nature
Prepare for the predicted weather... Examples;
- Wind, try blocking the wind as this may have an adverse effect on the performance of your pit.
- Rain, prepare a shelter to keep you and your equipment dry.
- Cold very cold temps may have an adverse effect on your pit.
- Heat, extreme heat can make an enjoyable cook a nightmare, grab some fans or reschedule your smoke for the evening.
- Bugs/Mosquito's, place a fan in your cooking area and have citronella and bug spray if needed.
- Animals, make sure not to leave food out unattended, you may end up with unwanted dinner guests.
Equipment
[font=verdana, sans-serif]Make sure your equipment is clean and ready to go, preferably the night before, examples;[/font]
- [font=verdana, sans-serif]Remove excessive grease (Potential FIRE HAZARD)[/font]
- Clean Grates
- Clean out Fire box
- re season
- Work area, make sure that your work area is adequate and you have adequate lighting.
- Comfortable chair
- Fuel
- Empty grease drain catch.
Brining:
- Some folks like to brine the meat before cooking, I honestly feel this type of meat does not benefit from a brine, brining should not have a negative impact on the final product.
Trimming / Not trimming:
- The day before the cook, trim the fat and skin from the pork for more bark formation, don't forget the false cap on the Butts, (Some do not trim, I do). Save the fat, this can be thrown into the drip pan or rendered above the drip pan.
Reasons why I trim the fat:
- Smoke and rub will not penetrate through the fat into the meat, however a cross hatch cut into the fat to meat level helps with some rub penetration.
- Cooking with the fat intact increases cook time, which I toss after the cook anyway and I find no benefit to leaving the fat intact while cooking on a pit.
- Some folks subscribe to the fact that leaving the fat on self bastes the meat however the pork butt contains a good amount of intramuscular fat, so the roast will actually "self baste" from the inside out.
- Trimming the external fat increases the surface area for more bark formation and smoke penetration.
- [font=Verdana,Arial,Helvetica]Trim off any unsightly things like veins, bloody spots and Lymph Nodes.[/font]
- If you plan on keeping the fat on, score in a cross hatch pattern and make sure to pack the rub in the cross hatch.
Injecting / Rub
- Some folks like to inject their meat before cooking, I have tried this but do not prefer this method my only suggestion when injecting, is to stay away from acidic ingredients, again the choice is yours.
Rubs.
- Rubs can be anything you prefer, it is purely personal choice here. [font=verdana, sans-serif]If you want a thick chewy bark, you can use a high sugar rub and leave un foiled the entire smoke[/font][font=verdana, sans-serif], just watch your temps don't get too high or you will end up with burnt bark, for high sugary rubs try to keep it 240°F - 250°F max. [/font]If achieving bark is not a big deal then you can foil to help through the stall. When I do my"Philly Style Pulled Pork" and "Porchetta Pulled Pork", I will run the pit at 250°F - 275°F [font=verdana, sans-serif]leaning more towards the 275°F mark[/font]. I also foil, as I do not want as much bark formation.
- You can also achieve a great bark just using a mop.
- My Basic Rub (better at lower temps)
- Philly Style Rub (works good for higher temps 275°F)
- Porchetta Italian Marketplace Rub/Slather (works good for higher temps 275°F)
- Montreal or Canadian Steak Rub
- Rub the pork with your favorite rub, naked is fine too. Start by lining a pan with an extra long piece of plastic wrap, coat the plastic wrap heavily with your choice of rub, place the meat on the rub, fat side down if you left the fat on, coat sides and the top of the meat liberally with your rub. I like to apply the rub the night before the cook. You can apply it right before the cook, but it's nice to start an early morning cook with food that is already prepped and ready for the smoker.
- If you want a thick chewy bark, you can use a high sugar rub and do not foil, just make sure your temps don't get too high.
- [font=verdana, sans-serif]Fold over the plastic wrap and secure snugly.[/font]
- Some folks use mustard to help the rub stick better, I see no need to do this because the salt and sugar will draw out moisture making a nice slather, below is an example of a dry rub pulling out moisture.
- Dry
- The next day.
- If you leave the fat intact, you will not pull out as much moisture on the fat so the rub will be drier and some will fall off during the cook, so mustard will help the rub stick to the fat. This is your choice. I will sometimes brush Butts and Picnics with a 50/50 mix of Worcestershire sauce and soy sauce before adding a rub.
Time:
- Use time wisely.
- Clear your Schedule, make sure everyone knows that you will be unavailable.
- The night before figure out what time you want the food to be ready by and set your alarm accordingly, give yourself at least one hour extra for firing up the cooker.
- Make sure to allow enough time for your cook including, rest, pulling and cleanup. As a general rule of thumb I usually give 1.5 hours per pound plus 1, so a 9 pound butt once on the pit will be ready to eat in 15.5 hours, this includes the rest and finishing sauce, this is only an estimate but has worked out great for me. On my stickburner, I have never gone past this time allotment. Many folks go by the 2 hour per pond rule, you will need to find your average cooking time niche.
- Remember (Different cookers will vary, for example my GOSM takes longer than my Stick burner per/LB.) I am averaging 80 minutes a pound on my stick burner.
- Ready all your supplies. (refer to your list as mentioned earlier)
- Have your starter wood ready to go.
- Make sure to have an accurate way to monitor the chamber temperature. I currently use the Redi Check Maverick ET732 and a Thermapen. I also use Taylor digital thermos and will use these as a timer.
The next morning:
- Give yourself about an hour for this step, Using starter wood or your junk wood, knots, small and large cuts, uneven cuts, anything to get a good coal base.
- Now there's several different ways I do this, Propane, Charcoal and Lump Charcoal
- With Propane I start by opening my cooking chamber, all the vents and the fire door then I place all my starter wood in a basket , place the basket on the grates over top of the log lighter, turn on the propane and ignite the log lighter then I shut the firebox door. After 20 minutes or so I'll shut down the propane and add a few more splits. Once these splits are ignited and past the combustion stage, I will add the meat.
- Charcoal and Lump Charcoal, sometimes I will start the fire with charcoal or Lump, I will usually light a 3/4 full chimney, as that is igniting I will add some smallish splits and junk wood to the basket and place some junk wood to the side. After 20 minutes or so I will dump the charcoal into the basket and place the wood on top. *Tip for starting a chimney, use 3 pieces of newspaper, crumble each piece loosely, place in bottom of the chimney starter, drizzle a little oil on the paper and ignite.
Fire Management:
I will quickly go into fire management here. This is where you should start to take accurate notes and understand your Pit. Learning how to control your fire for your particular pit is a key component in a successful cook. Wood will have different requirements than charcoal and Lump Charcoal.
I primarily use wood on my cooks and will only use charcoal when starting a fire. I would love to give more specific advice on fire management but there are too many variable to give specific instructions, however I will provide the following tips.
- Split size matters: Use smaller splits and add more often as opposed to larger splits less often, this will reduce the amount of the "Combustion" smoke that you do not want. Remember, adding large splits will make the wood smolder longer before it ignites. Place the wood that is to be added inside the firebox to the side where it will not ignite, my fires usually get too hot to place the splits inside the firebox so I sometimes place my next few splits on top of the firebox.
- Choking: Do not choke your fire, make sure you have proper draft. You can see the flame going towards the cooking chamber if you have proper draft, you can also see and feel the heat coming out of the top of the exhaust stack.
- Ventilation: Make sure your wood does not choke itself in it's own ashes, make sure to build the fire in a basket with holes and/or build the fire on grates. The air should flow underneath the fire through the fire and toward the cooking chamber. Make sure these vents are not blocked. If there is ash in the basket or in the vents clear the ashes.
- Stoking: Every now and then you may need to stoke the fire, however do this gently as you do not want ash traveling through the Pit and resting on the meat.
- Backing Up: If you are getting smoke pouring out of the firebox, check your intakes and vents and stoke the fire. Make sure the exhaust vent is unobstructed and wide open. Open the cooking chamber lid for a few seconds if needed.
- Wood is Fuel: Do not focus on imparting smoke flavor in the food, focus on the cleanest burn possible, you will still get a smoke flavor. You do not need to see smoke to get smoke flavor.
- Adding Wood: When adding wood to the existing fire, leave the firebox door open a little bit, if a white billowing smoke starts pouring out of the exhaust vent, open the cooking chamber lid for a few seconds allowing the smoke to escape quickly. Close once the white/gray smoke has cleared, I call this burping the Pit.
- As your fire is burning, ready your Pit, place a drip pan underneath the grates and add a quart or so of water I start off with two quarts of water in my steamer pan, especially if its closer to the firebox. Adding a water pan underneath will impede the airflow slightly, I have found this to be insignificant.
- I think the benefits of catching the drippings outweigh the minor impeding of airflow. Make sure to have enough water in the pan so you do not burn up your drippings, (I strongly suggest catching and using your drippings in the final product).
- Make sure your Drip pan is level or the water will cook off quickly on the shallow end and burn up your beloved drippings.
- Tip, when your cook is a few hours from completion monitor your drippings, you may need to reduce the drippings so they are not too watery, timing is important here, so be careful not to add too much water near the end of the cook.
- Now that everything is in place Place your next few splits on the firebox, keep doing this as your wood turns into coals. placing more splits on the firebox as they are used.
- Get out your cleaning supplies, rags, cooking gloves, HD Foil, thermometers, tongs, etc... if you have not done so earlier.
- Once the temperature is at least 300° + remove the meat from the refrigerator and unwrap the meat carefully. I highly recommend placing the meat into the Pit directly from the refrigerator. Some folks say to leave it out to come up to room temperature, I think this is bad advice. Think about the danger zone here, if you have 4 hours to get from 40° - 140° and you leave the meat out to come up to room temperature for just say an hour... you just reduced your time to get past the danger zone by 25%. The danger zone is explained later in this article.
- Make sure to place the meat into the Pit with the pan underneath to catch drippings. Slowly bring the Pit temps down to about 250°. If you lay the pork directly in a pan, make sure to use a rack so the pork does not sit directly in the drippings.
- Don't sweat the temperature fluctuations, if it drops down to 230° and back up to 260°., don't panic, butts and Picnics are very forgiving, but try to maintain a constant temp hovering around 250°+.
Placement of the meat, make sure the meat is not touching anything, and be careful of any "Cold spots" or "Hot spots". If your smoker is prone to hot spots, it would be wise to flip rotate and shuffle the meat around during the cook, just make sure to do this when basting or adding water to the pan.
These are a bit too close, they should not be touching
- This is much better.
Thermometers.
If your are using your thermos to monitor chamber temp, place the probe directly in front of the meat being cooked, making sure the probe is not touching anything. You can use a potato or onion to secure the probe, just make sure at least one inch of the probe protrudes from the potato or onion. If your thermos have a timer hit the start button once the meat is on the grates (recording your cook times will be a great reference for future cooks).
- Do not probe the meat at this point! I will explain why, later.
- Place a large can of water, tea pot or coffee pot on top of the fire box, this will be used to add to the dripping pan if it is to get too low. I also place a large can of water on the firebox and will place my cooking utensils inside during the cook, works great when doing stuff like beans or chili, or if you are using tongs. It also reduces the chance of food borne illness when smoking chicken.
- About three hours into the cook I usually, insert a digital thermometer probe into the thickest part of the meat. The reason I wait three hours before inserting the probe is that it reduces the chance of pushing surface bacteria into the meat. Some folks don't probe, others use insta-read type thermometers and Thermapens, some folks just go by feel! I currently use the Redi Check Maverick ET732 and a Thermapen.
- Plan the food you will be cooking wisely and make sure to have some snacks on the pit while cooking, remember its going to be a long day.
Firebox
The top of the firebox can get pretty hot depending on your pit, so why not use it as a cooking surface.
- Utilize the top of the firebox.
- Just make sure that it don't burn your food, for this pig candy I had to place a grate on top of the firebox to prevent burning.
Clean your work area:
- Now that the fire is going, the meat is safely on the Pit, now is the time to clean up.
- Get out your Clorox cleanup, wipe down the work area, wash all your utensils and pans. Put away everything you will not be using and keep a few rags handy. I keep a few dry and one wet.
- Get out your towels and cooler and keep them handy for the rest.
Now that everything is cleaned up, you have a clean work area and the Pit is chugging along, it's time to relax.
Sit back and enjoy!
If you have a ET732 or any wireless unit that monitors the cooking chamber temperature, you have a bit more freedom to move around, my last cook I went upstairs while Frank was chugging along and hopped in the jacuzzi tub for near an hour, came downstairs and made a cup of coffee then headed back outside.
Mopping (Optional) The term mopping comes from actually mopping the meat with a little mop, many folks use spritzing, mopping and basting interchangeably.
- Leave the meat undisturbed until an internal temp above 145°F is achieved, at this point feel free tomop. Sometimes I mop sometimes I don't. If mopping I use a 3-2-1 mix, Apple Cider (3 parts), Apple Cider Vinegar (2 parts) Captain Morgan or Southern Comfort (1 part). Mops are limited only to your imagination, just remember, more sugar will give more bark and sugar can burn.[font=verdana, sans-serif] Note, make sure to get the Butt through the Danger Zone 40°F[/font] - 140°F within 4 hours. Update, my go to mop is equal parts of the following, Worcestershire, Soy Sauce and Jack Daniels.
- Some folks keep a mop bucket in the smoker, so when they mop they are using hot liquid and not ambient temperature liquid, I don't sweat this, you could just as easily keep your mop on top of the firebox.
- Make sure to keep an eye on the drip pan, you do not want the accumulated drippings to burn up, make sure there is liquid inside the pan at all times, check this when you are mopping.
Heat Recovery:
Don't get hung up on the old saying, "If you're looking your not cooking". Do not sweat opening the cooker every now and then especially if your cooker has a quick heat recovery time, the more thermal mass you have the better the heat recovery will be, just don't get carried away. Peeking constantlywill increase the cook time.
Here's a tip, if you want to check the drippings in the pan or want to mop the meat, time it when adding your splits, once the splits start to smoke, right before combustion, open the cooking chamber door and mop at this time and add liquid if needed.
Flipping/Rotating:
Although not usually necessary sometimes a flip or moving the meat will give a more even bark formation I will sometimes flip when doing butts or picnics, but it may be more necessary for some that experience hot spots or cold spots on their smoker, where one butt of similar size may take much longer to cook.
The stall:
You may encounter what folks call the "Stall", (Plateau) from my experience, this usually is around 155°F to 180°F this can last several hours, don't sweat it, this is normal and will pass.
If you experience the Stall you can move things along by wrapping the butt in foil and bumping the temps up to 275°F until the temps start to rise again, at this point you could lower the temps and unfoil the butt or let continue to cook foiled.
The "Danger Zone"
What is the danger zone?
The below statement, was taking from a frequently visited forum. Bare in mind this is not a specific safety rule by the FDA and is a general rule adopted by extensive research and experienced chefs.
It is important for your Safety, that any Meats that have been Punctured, Probed, Injected or Ground, be cooked or smoked at a temperature, typically 225°F or greater, that gets the Internal Temperature of the meat from 40°F to 140°F in 4 Hours or less...Frequently called the 40 to 140 in 4 Rule. (This does not include meats containing Cure #1, Cure #2 and Morton's Tender Quick.)
A Guideline like 40-140 in 4...aka the Rule (less letters than Guideline) is, Easy to remember, Provides a margin of Error, Has been gleaned from information provided by Multiple sources, including but not limited to, Professional Food service organizations, The American Culinary Federation, The ServSafe program, the USDA and Food Service Professionals with Years of Experience... Is, " 40°F to 140°F in 4 " written down in any Government Food Service Law Manual, or Word for Word on any fore mentioned Website or Charter?...NO...But it Has been adopted by This Site and others to protect our members...
Foiling / not foiling.
There are times when I foil and there are times when I do not foil. I have a few recipes such as my "Philly Style Pulled Pork" and my "Porchetta Italian Marketplace Pulled Pork", that I do not want TOO much bark so I foil at a certain temperature.
- FOR MORE INTENSE BARK FORMATION; cook at 250° (un foiled) until an internal temp of 200-205°(my average is 82 minutes per lb.)
- FOR LESS INTENSE BARK FORMATION ; cook at 250°° until an internal temp of 165° then foil and continue cooking until internal temp of 200-205° (smoke will not penetrate while foiled).
- Plateau, You may hit a stall around 165° - 180° that can last several hours, "don't worry", the temperature will eventually start to climb. If you foil at around 155°, there is a chance you may not hit a stall, and if you do, it will be short lived. READ THIS.
- If you foiled, you can bump the temperature up to 260°F -275°F, some will go up as high as 300°F, (I will sometimes increase the temp during a cook and have had no ill effects by doing so.)
- Make sure to reinsert the probe after foiling.
Resting for slicing:
If you choose to slice the pork, remove from the Pit at an internal temperature of 185°F - 190°F, wrap tightly in Foil then wrap in heavy towels and place into a cooler for 1 hour.
Resting for Pulling/Shredding:
If you choose to pull/shred the pork, remove from the Pit at an internal temperature of 200°F- 205°F, wrap tightly in Foil then wrap in heavy towels and place into a cooler for 1 - 2 hours. (1 hour minimum, however I shoot for two hours, patience pays off here). Some Butts can be kept 4 hours or more in a good cooler but keep an eye on the internal temperature, do not let it drop below 140°F, better yet 150°F. Place the cooler wherever it is warmer, so if its cold outside, place it in the house. You can use your oven if you do not have a cooler. I recently have been placing the pork on the counter foiled and wrapped in towels with equally good results.
Pulling and Finishing:
- While the pork is resting, remove the pan with the drippings strain and refrigerate. if the drippings are black and charred I do not use them, however, this is your call.
- [font=verdana, sans-serif]Right before pulling the pork remove the drippings from the refrigerator and remove the grease (white waxy stuff on top). Make your preferred finishing sauce using the drippings, keep the finishing sauce hot until you are ready to add to the pork). The drippings may need to be reduced if they are too watery. Note: I have been using "McCormick Beef Base" in lieu of the Beef Broth.[/font]
- Remove the pork from the cooler, tent the foil to leave the steam out very slowly, the longer the initial rest, the less steam will escape, remember that steam is moisture, you do not want to loose too much moisture, the goal here is to have as much moisture as possible reabsorb into the pork.
- Place the foiled butt in a pan where it will be shredded, open the top completely and roll out into the pan, the reason I do this is because there may be a good amount of drippings in the foil, below is a picture from a loin that had residual drippings.
- Shred the pork with some forks or bear claws, hence the name shredded pork (some like to pull it by using their fingers, hence the name pulled pork). I prefer a coarser pull.
Make sure to remove all the bones and nasty bits.
- If you plan on slicing, just slice the pork and serve with your finishing sauce, however slicing may be difficult if you cooked it past 190°.
- Shredded (finer texture), notice the drippings from the pork in the pan.
- Finger pulled (chunkier texture)
- [font=verdana, sans-serif]Add your Rub or finishing sauce, at the least, add your drippings. Make sure to taste whatever you plan on adding back into the meat.[/font]
- [font=verdana, sans-serif]Serve with a few different sauces.[/font]
- [font=verdana, sans-serif]here are some examples[/font]
Sauces (Taken from wikipedia)
[font=verdana, sans-serif]East Carolina Sauce – [/font][font=verdana, sans-serif]Can be used as a "mopping" sauce to baste the meat while it was cooking and as a dipping sauce when it is served. Thin and sharp, it penetrates the meat and cuts the fats in the mouth. There is little or no sugar in this sauce. This sauce has a very sharp taste[/font]
[font=verdana, sans-serif]Lexington Dip[/font][font=verdana, sans-serif] (a.k.a. Western Carolina Dip or Piedmont Dip) – In Lexington and in the "Piedmont" hilly areas of western North Carolina, the sauce is often called a dip. It is a lot like the East Carolina Sauce (above) with tomato paste, tomato sauce, or ketchup added. The vinegar softens the tomato.[/font]
[font=verdana, sans-serif]Kansas City – Thick, reddish-brown, tomato or ketchup-based with sugars, vinegar, and spices. Evolved from the Lexington Dip (above), it is significantly different in that it is thick and sweet and does not penetrate the meat as much as sit on the surface. This is the most common and popular sauce in the US and all other tomato based sauces are variations on the theme using more or less of the main ingredients.[/font]
[font=verdana, sans-serif]Memphis[/font][font=verdana, sans-serif] – Similar to the Kansas City style, typically having the same ingredients, but tending to have a larger percentage of vinegar and use molasses as a sweetener.[/font]
[font=verdana, sans-serif]South Carolina Mustard Sauce – Part of South Carolina is known for its yellow barbecue sauces made primarily of yellow mustard, vinegar, sugar and spices. This sauce is most common in a belt from Columbia to Charleston, an area settled by many Germans. Vinegar-based sauces with black pepper are common in the coastal plains region as in North Carolina, and thin tomato- and vinegar-based sauces are common in the hilly regions as in North Carolina[/font]
[font=verdana, sans-serif]Texas – In some of the older, more traditional restaurants the sauces are heavily seasoned with cumin, chili peppers, bell peppers, chili powder or ancho powder, lots of black pepper, fresh onion, only a touch of tomato, little or no sugar, and they often contain meat drippings and smoke flavor because meats are dipped into them. They are medium thick and often resemble a thin tomato soup. They penetrate the meat easily rather than sit on top. Bottled barbecue sauces from Texas are often different from those used in the same restaurants because they do not contain meat drippings.[/font]
[font=verdana, sans-serif]Alabama White Sauce[/font][font=verdana, sans-serif] – North Alabama is known for its distinctive white sauce, a mayonnaise-based sauce, which is used predominantly on chicken and pork. It is composed of mayonnaise, vinegar, sugar, salt and black pepper.[/font]
SQWIBS Favorite to date - Taken from a Robert Irvine Recipe and modified to my taste this is a nice sauce that will penetrate the meat a bit, has just enough sweetness as well as distinctive sharpness.
[h2]http://SQWIBS Favorite to date BBQ Sauce:[/h2]
- 3 cups ketchup
- 1 cup brown sugar
- 1 cup Cider Vinegar
- 3/4 cup yellow mustard
- 1/3 cup Worcestershire sauce
- 1 teaspoon cayenne pepper 1 Tablespoon for hot
- 1 tablespoon sea salt
- Temperature; I like to shoot for a minimum 250°F cooking chamber temperature, I will run the butts at 265°F - 275°F as long as there is no other meats in the pit like ribs. If I have ribs on the pit, my maximum temperature is 250°F until the ribs are finished.
- Temperature fluctuations do not make or break the final product, however trying to maintain a given temperature such as 250° is preferred.
- Foiling will help reduce the stall and will reduce bark formation.
- Outside temps don't seem to interfere with my Pit and although wind is a concern, I have done cooks on fairly windy days with no ill effect.
- Mixing cuts: I have been "Q" -ing picnics paired up with butts with better results than either butts or picnics alone.
- Yields: My average yield is approximately 50% from butts and 40% for picnics.
- Cooking time, I am averaging about 80 minutes a pound unfoiled and 70 minutes a pound foiled on my pork cooks.
- Drip Pan , my cooks are not lengthened by using a drip pan "water pan" in the pit and I do not notice any better temp control using the water pan. My goal using the drip pan is to catch the drippings only.
- Gosm/Pit variations: When doing large cuts of meat on my GOSM (Vertical water smoker) my cooks are longer than on the reverse flow, I attribute this to the amount of moisture in the smoker assisting in "evaporative cooling" of the meat which increases the cook time.
- Fat side up or fat side down?, that depends on your type of cooker and your desired results, a lot of folks will go fat side down to protect the meat from direct heat, some say fat side up to self baste the meat and some folks flip the meat at some point, I trim all the fat off.
- Placement of items in your Pit can have a negative impact on airflow creating longer cooking times.
- Straight from Refrigerator to cooker, some folks like to bring the meat up to Room temperature before placing in the cooker. I think this is unwise, think about it, leaving the meat out at room temperature for just one hour reduces the danger zone window by 25%.
- Frozen Meat: Although I have not kept specific notes on the difference between fresh and frozen, I have noticed two welcomed differences between the two.
- The cooking time is less with frozen/thawed meat
- The frozen/thawed meat seems to be a bit more tender compared to the fresh which has a bit more body to the meat. This may have to do with the [font=verdana, sans-serif]freezing and thawing processes causing the water in the meat to expand and contract, changing the texture of the meat somewhat. I believe that I get better results from frozen Picnics/Butts.[/font]
Last edited:


