Thanks for your reports, too!
Here are a couple of pictures of how I have it set up right now. This may not be permanent, but it's what I tried the other night.
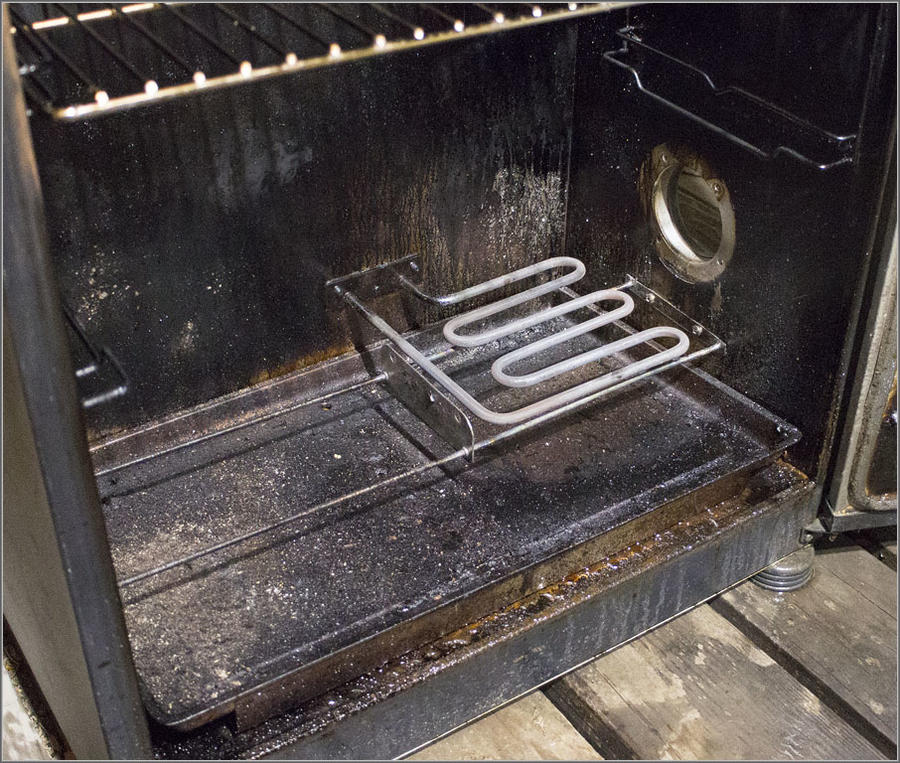
This was how things looked after I removed the original "innards".
The original metalwork shielded the bottom of the heating element, which keeps its direct radiation from "shining" on the drip pan in the bottom of the smoker. I think that was somewhat important because when the element is on fully, it glows, and the IR radiation shines down onto the collected grease, getting it hot enough to smolder, and we don't want that to happen because it creates a very nasty-smelling smoke, as well as potentially creating conditions for getting an explosion of that grease-smoke or igniting the grease itself.
So I wanted something below the heating element. The original piece that slides in there below the heating element is steel. And that might be a good material because it melts at a higher temperature than aluminum would. But sheet aluminum might be acceptable, too. I haven't worked out exactly what I'll end up doing.
Above the heating element, the chip tray itself would be closest, but the whole air box, chip-loader was up there above most of the element. And that all acted as a drip-shield to keep grease or whatnot from dripping directly down onto the heating element. Again, I think that's all very important because if grease drips onto the heating element, it will burn and the smoke from that will taste bad, too.
The original design also protected the door of the smoker from receiving direct infra-red radiation from the heating element.
When I tested the unit with no food and nothing around the heating element, I noticed that it made the crud on the inside of my smoker's door, down low, smolder. That, too, would be bad tasting stuff!
So I wanted my shielding to protect the inside of the front door of the smoker from that direct IR from the heating element by casting a shadow on it, as well.
So I feel that the heating element should be surrounded by metal to prevent it from shining directly on nearby surfaces that will collect grease or residue, and also be protected from drips from above. Yet at the same time, we need things to be open enough to let the heating element transfer its heat to the air inside the smoker. So the design needs to be open enough to allow free air circulation around the heating element.
Also, in my model of smoker, the temperature sensor for the temperature controller is above the heating element. I believe that this is done to provide what the manufacturer feels will be safe and work with the controller to keep the average temperature in the smoker close to the setpoint. This is a fairly complex subject. The position of the sensor for the controller is very important, but it can be influenced by how we place the food in the smoker, and certainly by any modifications we make to the airflow patterns in the smoker.
So I wanted to provide some air-flow path up the back wall of the smoker to let the sensor "see" the hot air coming up from the heating element. The original design provides for that because none of it fit tight against the back wall. If I recall correctly, there was about an inch gap or maybe more between all of their metalwork and the back wall. That let hot air, heated by the element rise up along the back wall to not only heat the smoker up, but also be sensed by their little sensor.
In the design of various laboratory incubators and ovens, I've sometimes seen the manufacturer place their temperature sensor fairly directly in the path of the heated air coming off of the heating element. On the one hand, this gives the controller a somewhat distorted "view" of the temperature in the oven, because it sees that hot air directly from the heater, and may read too high with respect to the rest of the oven. But on the other hand, it makes the control loop easier to tune, and prevents overheating some areas of the oven due to the cooling effect of whatever goodies you have in the oven. So it's safer and makes tuning the control loop easier.
But you will measure lower temperatures in other places in the oven or incubator. This is somewhat helped by using active stirring in these ovens/incubators. But even so, if there is a lot of "load" in them, and particularly if it's a drying oven, and you've got a lot of wet samples in it, the temperatures in many areas of the oven will be lower than what the controller sees, especially until most of the moisture is driven off. When things are dry, and have been given a chance to come up to temperature, THEN the temperatures in these ovens evens out because there's nothing really absorbing or removing much heat from the oven. And that's what they really count on. They do not want parts of the oven to be way above the setpoint while the wet "load" in the oven is absorbing and removing a lot of heat from the system.
If the temperature probe was mounted far form the heat source, giving what we might feel is a more representative temperature for the inside of the oven (or smoker in this case), then at the first of the cooking process, the cold, wet "load" in the oven would keep the temperatures seen by the probe lower than the temperatures we'd have right near the heat source. So that would fool the controller into turning the heating element on too hard. And we'd end up with some places in the oven (near the heater) that were actually way over the temperature setpoint. And that could be very bad for some laboratory operations (drying samples, for example) because many methods prescribe a maximum drying temperature to avoid driving off certain volatile compounds or elements.
And in our smokers, or any food oven, we'd end up burning or overcooking any food that was near the heating element even though the sensor for the controller thought things were actually too cool.
So there's a lot to be considered when tinkering with the airflow, "shading", etc., in and around the heating elements in these smokers. And the position of the controller's sensor needs to be taken into account with all of it, too.
People complain about readings they get with their separate temperature sensors being incorrect, and showing that the smoker's controller or sensor is bad. And I know that they may well be inaccurate. Some worse than others.
But the thing people fail to take into account is the enormous variation in temperature you'll measure inside of any oven, incubator, or our smokers. depending on where you place your probe and what sort of "load" is in the unit at the time.
So I tried to keep all of that in mind when putting various baffles, reflectors, etc., in the smoker. Mine is a work in progress. I am just experimenting with easy to cut/bend/form thin aluminum from disposable steam-table trays and lids that I got at the local Sam's Club. It's a nice thickness of aluminum because you can cut it easily, bend it easily, etc. And if it isn't what I want, I can just wad it up and put it in the recycling bin! :)
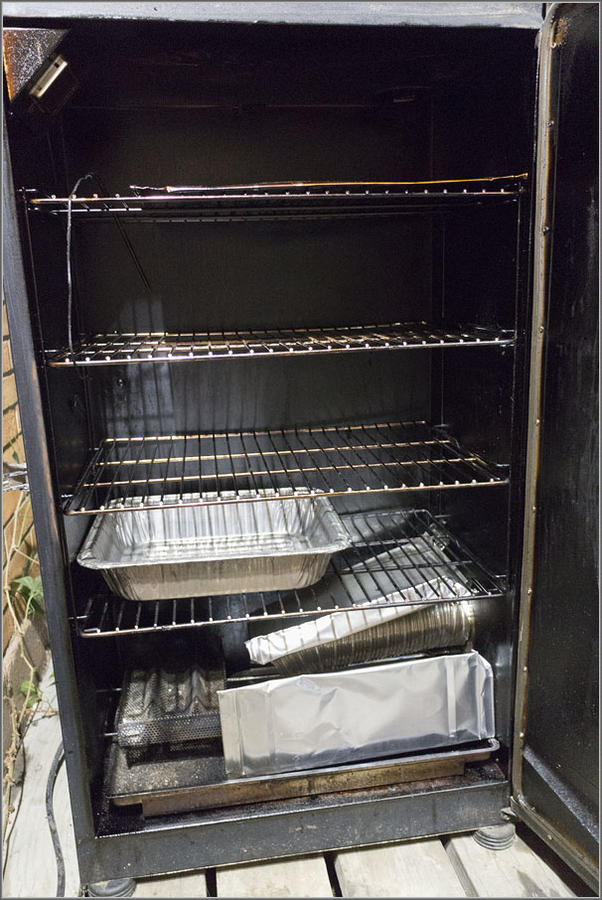
Here's what my smoker looked like originally:
You can see that the original metalwork hides the heating element. That chip drawer part slides out, and a lot of us leave it partway open to get better airflow since we're not burning chips. But what I didn't realize until I took things apart the other night was that the "drawer" that slides out has the chip drawer/tray, and it has a steel bottom to it that slides in underneath the heating element. So with the chip drawer pushed in all of the way, the heating element's bottom is completely blocked/covered (from below) by that steel piece.
That contains some of the heat to make the chip tray get hotter, but it also serves to keep the infra red radiation from shining down onto the grease collector. And I think that's important. So removing the drawer or even sliding it partway open will expose the bottom of the heating element, allowing it to shine on the floor of the smoker (the grease pan). And if there's grease there, it may well smolder from the intense heat, and that won't taste good.
Note how pristine the drip pan in mine looks in that photo! The unit was brand new when I took that picture a few years ago. By now, my grease tray is covered with grease, and kind of black. I should clean it off and make it shiny again, I guess. But since it is greasy, I don't want the heating element shining on it from close range as it will if I have that chip pan pulled out.
This photo shows my currently greasy drip tray and what things look like now that I removed all of the factory metalwork in that corner. The heating element is just exposed. And that wouldn't be a bad thing if it didn't "shine" on the grease tray and the inside of the bottom of the door, causing any buildup in those places to get hot enough to smolder.
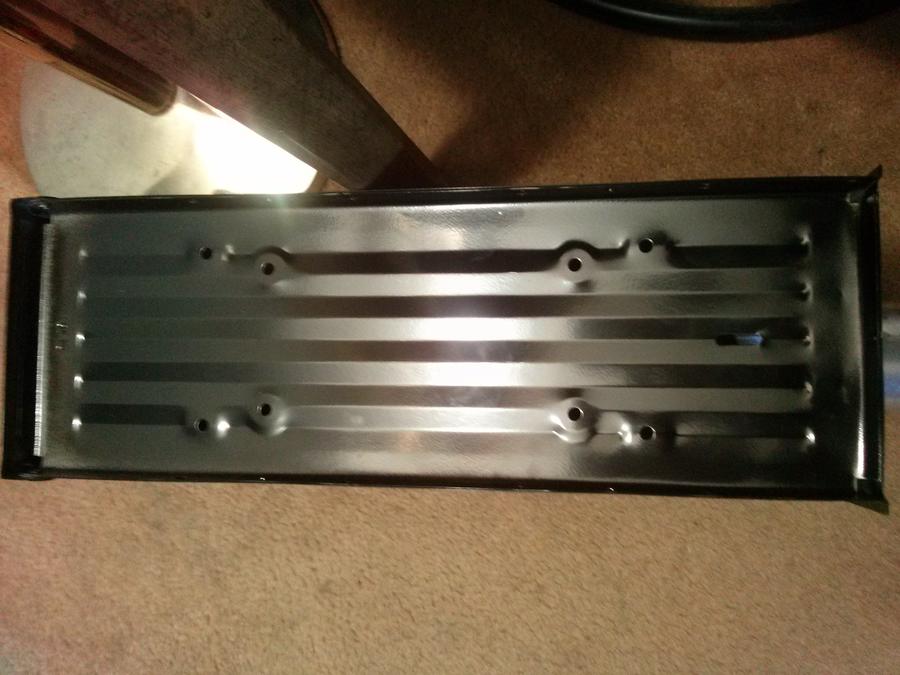
This is a picture I took after just sliding the pellet tray back into the place where it used to fit. You can see how part of it covers the underside of the heating element. I think that's desirable. It's just laying there for the picture. It's not a secure fit, but then again, it wouldn't go anywhere unless you bumped it. Note that neither the back edge of that bottom piece, nor the chip tray go back against the back wall of the smoker. There's a nice gap. That allows some hot air to move upwards. The heat from the heating element has to get into the smoker.
Here's what I did:
I cut a piece of aluminum duct long enough that it reaches past the heating element and can lay on a flat metal piece that is attached to the two "rails" that run across the bottom of the smoker. That flat piece has two threaded holes that used to hold two of the four screws that held the original metalwork in place. Unfortunately, you can't see exactly how the aluminum duct is laying on that piece because all of it is blocked from view in this shot.
I used an adapter to connect the aluminum duct to the hole through the smoker. The duct was slightly too large to fit through the hole. The adapter is what you might call a male X male duct connector. You could use it to join two sections of that 3" aluminum duct if you wanted to. It fits right into the hole in the smoker, and makes a fairly snug fit! Then you just stick the duct onto it on the inside.
I bent the duct down a bit at it's "snoot", and even squashed it down to an oval shape to blow right over onto where I usually put the
AMNPS. Because it's supported at the back end by the adapter through the hole, and on the nose end by laying on that flat metal piece that you can't really see, it's arched up over the heating element and cannot com into direct contact with it. There's a gap of about 1 inch, I'd say, above the heating element in the closest place. So the aluminum doesn't melt (or at least has not yet!).
The piece above the duct is more of that relatively flimsy disposable steam tray material. The steam tray covers are a goldmine of thin, easy-to-work aluminum sheet. Rigid enough to do the job, but flimsy enough to cut with a pair of regular scissors or a knife. Just be really careful. The cut edges are razor sharp! Gloves are a good idea, for sure!
So anyhow, that piece above the duct is bent up at the side nearest the smoker door to give it rigidity and make it just the right length to let air from the heating element pass up on that side and not be blocked (as it would be if that piece reached over closer to the door). I didn't want to choke off the various places where heat could circulate up from the heating element. The back side also doesn't reach the back wall of the smoker. I've left a gap there, too, for circulation.
It's hard to see, but I just bent the far right side upwards and cut and bent it so that it hangs from one of the places that are meant to hold the water tray. The front end just lays on the duct.
The purpose of that piece is to act as a drip shield to keep dripping fat from falling directly onto the heating element (again, making nasty tasting smoke).
Now, the larger piece at the bottom, and sticking up in the front is there to shield my filthy drip tray from the direct radiation off of the heater and also shield the lower part of the door, also filthy, from that same infra-red "shine". When I first tested the unit with nothing in there but the bare heating element, smoke was coming off of the drip tray under the heater, and the inside of the door down low. Not good!
So that bent piece in the bottom is a heat shield.
None of this is permanent. I think it will be best to build something more rigid and firmly attached ultimately. But the general ideas are there.
As for using a tee, blocked off, with holes to distribute the incoming air: That has some merit, I think. I just wanted to get a nozzle effect, so the incoming air was aimed right at the pellet burner to encourage good burning even when the humidity is high.
I have had it very hot for a long time testing, and nothing melted or drooped. I ran it for a few hours at 275 (the hottest setting available on this unit). And I've run it under "real" conditions, too. But what I haven't proven is how well and properly the pellets will burn under various conditions with this.
I did do a cold smoke of some butter, but because it was cold smoke, and I had the smoker turned off, I cheated and used a fan to force air into the duct from the outside. The pellets burned well, and used up about 3/4 of a row during about 3 hours of operation before I finished and put them out. But I think I actually pushed too much air over the pellets because to me, it seemed like they were giving off too much smoke, and not blue enough.
The conditions of combustion of the pellets is something I think bears a lot of scrutiny. I've read that if the wood burns too hot, then it causes some of the good tasting/smelling smoke compounds to be formed, but then be broken down again by the high heat, leaving worse tasting compounds. Perhaps the difference between thin blue smoke and thick white smoke.
So I need to work on all of that!
I like the idea of jiggling the tray and pressing the pellets down to consolidate them more. I think that might help them burn more reliably for me, too!
I will very likely build a full mailbox setup too when I get some time to play with it more. I do think that sort of thing offers a lot of advantages. Better control over everything, it would seem.
My feeling is that you need to have good and independent control of a lot of factors.
Combustion of the pellets needs to be controlled so that they smolder, but at a low temperature, yet don't go out!
The temperature in the smoker needs to be well controlled, and the air inside mixed well so that temperatures are as even as possible throughout the chamber. And the smoke needs to be evenly distributed in the chamber as well.
The amount of air passing through the smoker needs to be proper to either remove a lot of moisture from the product, or, in other cases, not pull too much moisture out of the product.
The amount of smoke going into the chamber needs to be controlled so that if you have high air flow through the chamber, you have more smoke generation. And if you have very little air passing through the chamber, you need a lot less smoke.
But you need to be able to control all of those things independently. And that may take some novel approaches that we really don't see on most smokers right off the showroom floor. :)