Shad Roe (The Best Ever)
This Stuff Was Perfect !!!!
I showed you all how I make my Pan Fried Shad Roe:
http://www.smokingmeatforums.com/t/104682/shad-roe-bears-favorite-food
And I showed you how I make my Broiled Shad Roe:
http://www.smokingmeatforums.com/t/105827/broiled-shad-roe-with-bacon
But the Shad Roe I made this time is even better than either of them, or any other Shad Roe I ever ate in my 55+ years of eating Shad Roe.
The two previous methods are cooking the Roe in their sacks, and you have to fry or broil them long enough to get the outer portion of the sacks a little too done in order to get the inside done to my liking.
The method I tried with these ended up just out of this world !!!! It all ends up nice and tender, yet completely done.
And the flavor is just so good, it's hard to even describe!!!--
 ---One of the best things I have eaten in my entire life!!!
My "Step by Step" will be in the captions with the pictures:
Note: I did a few of these since this batch, and I put two slices of buttered toast on the plate first, then dumped the Bacon & Shad roe right on top-----Awesome-----I will be doing that from now on!!!
Thanks For Looking,
Bear
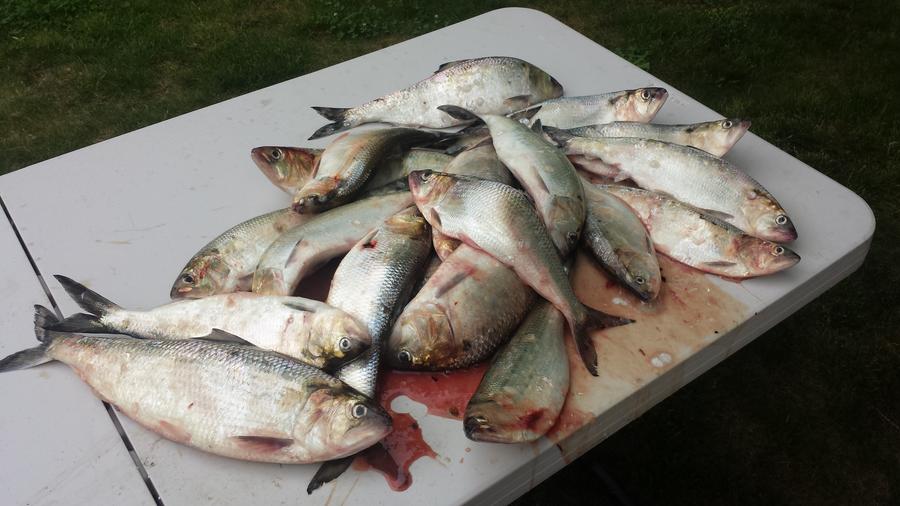
First, I always soak fresh Shad Roe in ice cold salt water over night.
This will draw the excess blood out of the sets:

Then I drain the salt water, and soak it in plain ice water for a few hours, changing the ice water a few times.
This will ensure that they won't be salty tasting from soaking in salt water:

Then I get a pot of water boiling, and put about 3 sets in at a time for about 3 minutes,
or however long it takes to not be raw & bloody inside.
I use a large slotted spoon to check, and to remove to paper towels when they get to that point.
On these you can see how they blossomed a lot, because I removed all the joining tissue before boiling.
That doesn't matter with these, because we're going to cut the Roe up in small pieces before frying.
Also----Notice that I put all the extra Roe in one of my freezer drawers, after lining it with plastic wrap.
I leave them in that drawer for 3 or 4 hours, before vacuum packing & freezing them.
I put the amount in each package that I figure I will eat for a meal.
In this case, it came out exactly the same as the number of sets----10 packages.
So, in other words, this picture shows 9 meals for me and/or my Son, not counting the pack I'm making today:

Now----Back to the ones I'm making now;
Cut up the amount of Roe you're going to make.

Then put a bunch of Home Smoked Belly Bacon in a frying pan, and get it started frying.
At this point I also add a tsp or two of butter:

Now dump the Shad Roe pieces into the pan with the Bacon.
Stir & flip the whole works a number of times with a spatula, until it's all nice and hot & bubbly.
Keep a lid on, or a splatter shield, because Shad Roe eggs are like gun powder.
Only remove the lid long enough to flip & stir the Eggs & Bacon.
If you look close you can see little eggs stuck to the inside of my Pan Lid.
Without the lid, those hot eggs could go into your eyes or on your kitchen ceiling!!!!
And yes, depending on how good your reflexes are, it might be a good idea to wear some kind of glasses!

All done in the pan:

Plated and ready to eat.
OMG, The Bear's eating good tonight!! This Stuff Is Awesome!!!

This Stuff Was Perfect !!!!
I showed you all how I make my Pan Fried Shad Roe:
http://www.smokingmeatforums.com/t/104682/shad-roe-bears-favorite-food
And I showed you how I make my Broiled Shad Roe:
http://www.smokingmeatforums.com/t/105827/broiled-shad-roe-with-bacon
But the Shad Roe I made this time is even better than either of them, or any other Shad Roe I ever ate in my 55+ years of eating Shad Roe.
The two previous methods are cooking the Roe in their sacks, and you have to fry or broil them long enough to get the outer portion of the sacks a little too done in order to get the inside done to my liking.
The method I tried with these ended up just out of this world !!!! It all ends up nice and tender, yet completely done.
And the flavor is just so good, it's hard to even describe!!!--
My "Step by Step" will be in the captions with the pictures:
Note: I did a few of these since this batch, and I put two slices of buttered toast on the plate first, then dumped the Bacon & Shad roe right on top-----Awesome-----I will be doing that from now on!!!
Thanks For Looking,
Bear
First, I always soak fresh Shad Roe in ice cold salt water over night.
This will draw the excess blood out of the sets:
Then I drain the salt water, and soak it in plain ice water for a few hours, changing the ice water a few times.
This will ensure that they won't be salty tasting from soaking in salt water:
Then I get a pot of water boiling, and put about 3 sets in at a time for about 3 minutes,
or however long it takes to not be raw & bloody inside.
I use a large slotted spoon to check, and to remove to paper towels when they get to that point.
On these you can see how they blossomed a lot, because I removed all the joining tissue before boiling.
That doesn't matter with these, because we're going to cut the Roe up in small pieces before frying.
Also----Notice that I put all the extra Roe in one of my freezer drawers, after lining it with plastic wrap.
I leave them in that drawer for 3 or 4 hours, before vacuum packing & freezing them.
I put the amount in each package that I figure I will eat for a meal.
In this case, it came out exactly the same as the number of sets----10 packages.
So, in other words, this picture shows 9 meals for me and/or my Son, not counting the pack I'm making today:
Now----Back to the ones I'm making now;
Cut up the amount of Roe you're going to make.
Then put a bunch of Home Smoked Belly Bacon in a frying pan, and get it started frying.
At this point I also add a tsp or two of butter:
Now dump the Shad Roe pieces into the pan with the Bacon.
Stir & flip the whole works a number of times with a spatula, until it's all nice and hot & bubbly.
Keep a lid on, or a splatter shield, because Shad Roe eggs are like gun powder.
Only remove the lid long enough to flip & stir the Eggs & Bacon.
If you look close you can see little eggs stuck to the inside of my Pan Lid.
Without the lid, those hot eggs could go into your eyes or on your kitchen ceiling!!!!
And yes, depending on how good your reflexes are, it might be a good idea to wear some kind of glasses!
All done in the pan:
Plated and ready to eat.
OMG, The Bear's eating good tonight!! This Stuff Is Awesome!!!
Last edited: