Questions about building a 30 Gallon Reverse Flow Smoker

  • Some of the links on this forum allow SMF, at no cost to you, to earn a small commission when you click through and make a purchase. Let me know if you have any questions about this.
SMF is reader-supported. When you buy through links on our site, we may earn an affiliate commission.

danoj77

Newbie
Original poster
Jul 11, 2012
9
10
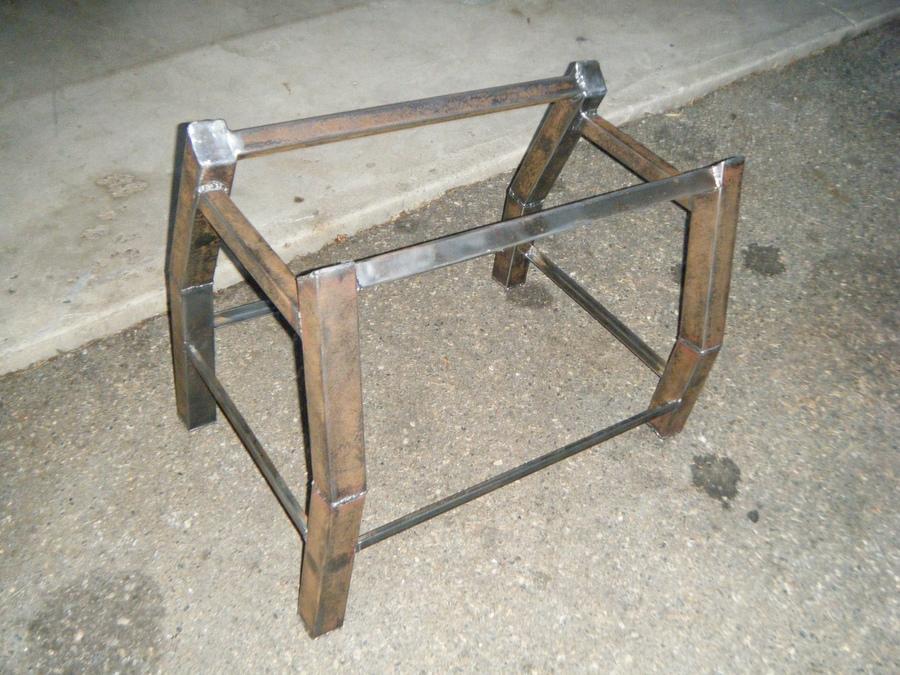
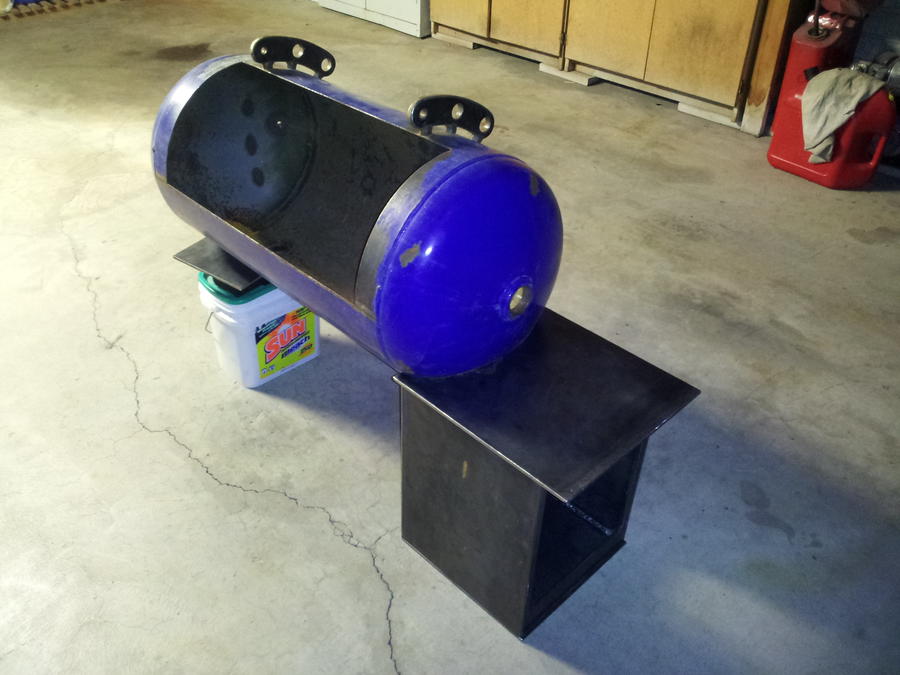
I have been itching to build a smoker for a few years now and finally got a hold of a 30 gallon air compressor tank, which will be the cooking chamber. I also have a 30# propane cylinder that I was thinking of using for the firebox.

The 30# propane cylinder has a capacity somewhere in the area of 7 gallons.  I know that the recommendations call for a firebox that is 30% the size of the cooking chamber which would mean that I need a 9 gallon chamber.

I would like to hear peoples opinions on whether or not I should use the propane cylinder for the firebox or not.

If I should use it,

     How should I have it set up, like the location, vertical or horizontal, or any other good tips or tricks?

And if I shouldn't,

     What would be my next best option?

Thanks,

Daniel J.

6bee18aa_DSCF5086.jpg


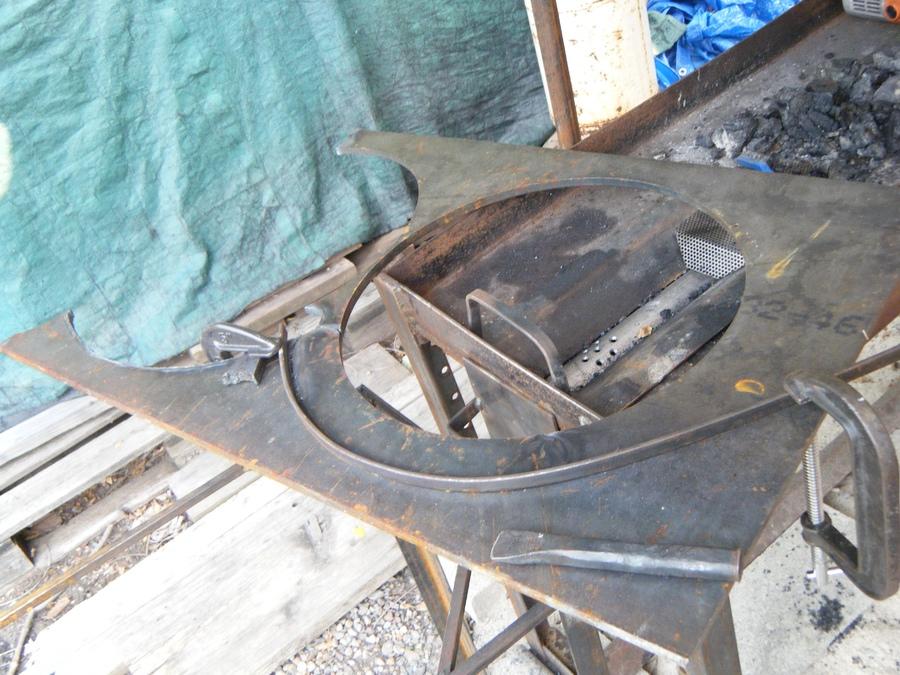
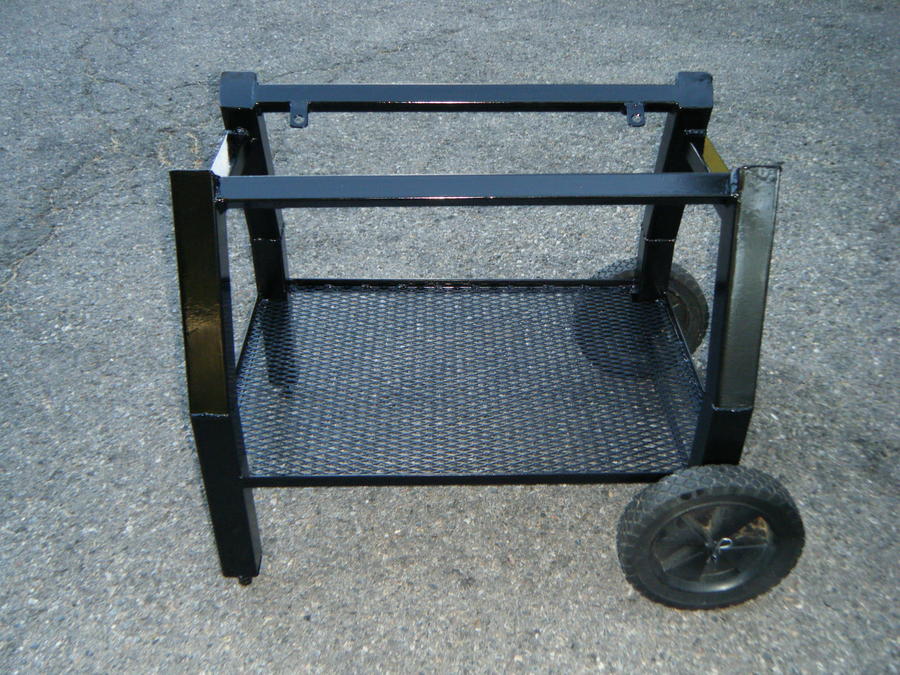
            This is what I am thinking of working with as of now.
 
Daniel,

I’m thinking it would make a neat little backyard smoker.

Put your known information in this site http://www.feldoncentral.com/bbqcalculator.html and see it all the calculations say it will work.

I use this on all my builds and it’s a sure thing.  To me it’s all about getting the temperature and smoke moving around the subject and out of the chamber.

I use propane tanks for the fire box all the time.  Just make sure you take the correct setps cleaning it out before you do any cutting on it.  I take the valve out then fill with soap and water a few times and it should be good to go, but there are others ways too.  BE SAFE!

There are a lot of others here that will direct you in the correct direction on builds.

Keep us posted and keep posting the pictures too.

randya
 
Yeah, I hope to turn it into a great little backyard smoker.

And thanks for the cautions, I have read all about how to cut into a propane tank. That is some scary stuff there.

Not sure if I will use an angle grinder with a cutoff wheel or acetylene torch to make the initial cut.
icon_eek.gif


I started a drawing of it in AutoBAD, trying to get some things figured out.

Right now I am not sure how to get accurate measurements of the 'Firebox-to-Cooker Opening Area' because of the angles and radii that are taking place on the two tanks.  The measurements of the AREA I have listed are not going to be entirely accurate.

But here is an attached picture of two different basic setups.

I would like to hear opinions on which to go with, and if I should go with a completely different layout.

Thanks,

Daniel J.

f750074d_Acaddrawingofsmoker.jpg
 
It should be fine running charcoal or lump but may be a rough ride when doing sticks,

I like the 2nd best for charcoal or lump, gives you plenty of room to raise the firegrate and add a round charcoal basket.

For intake vents, you could get a 2nd propane bottle cut out a sleeve, split one side open up to fit the forebox, weld a piece on the slit.

Drill holes around perimeter and through the firebox, secure ring with a lip weld on a handle and now you have a way to control airflow

excuse my lack of artistic ability.

8c979fd3_vent.jpg
 
Yeah, I hope to turn it into a great little backyard smoker.

And thanks for the cautions, I have read all about how to cut into a propane tank. That is some scary stuff there.

Not sure if I will use an angle grinder with a cutoff wheel or acetylene torch to make the initial cut.
icon_eek.gif


I started a drawing of it in AutoBAD, trying to get some things figured out.

Right now I am not sure how to get accurate measurements of the 'Firebox-to-Cooker Opening Area' because of the angles and radii that are taking place on the two tanks.  The measurements of the AREA I have listed are not going to be entirely accurate.

But here is an attached picture of two different basic setups.

I would like to hear opinions on which to go with, and if I should go with a completely different layout.

Thanks,

Daniel J.

f750074d_Acaddrawingofsmoker.jpg
Dano, morning....   Figuring the area and transferring to the tank can be done using 1" squares on a piece of paper cut and paste...  make the area larger if there is some concern....  Think about inserting the firebox into the smoke chamber more than necessary and make the opening cut after the firebox install...  then install the drains (smoke chamber / Rf plate) and the RF plate.... An extra plate above the firebox opening might be considered to reduce the direct heat to the RF plate... some folks have found the RF plate, directly above the opening, gets too hot and can use a little deflection / insulation... Dave
 
Thanks SQWIB, that is a great idea for a way to control air flow, I just need to get another propane cylinder now. =)

Dave, that is a smart way to figure out how much area to cut out, I wouldn't have thought of it.

And, if the area is larger, how much larger would be too much?

Thanks again, I appreciate it,

Daniel J.
 
And, if the area is larger, how much larger would be too much?

   Daniel, morning.... I think the calculations have been developed over much time and effort to provide a very workable smoker....

The calculator has been used to build hundreds if not thousands of smokers.... Looking at the builds here, there have been very few modifications to the original designs.... 

Pure speculation on my part here.... If the firebox seems to have extra heat compared to the smoke chamber, air flow is probably restricted through the smoker somewhere...  firebox/smoke chamber opening.... under the RF plate.... at the end of the RF plate.... or the exhaust stack....   

I have never built a RF smoker so I'm basically an idiot on this subject... Just saying, I try to provide an escape route when building anything.... I plan for the best and leave room for modifications...   

Whew !!!! that was a mouth full...  The dimensions in the calculator that are not clear to me are.. 1. the area under the RF plate... I would go with 1.5 times the firebox/smoke chamber opening (or larger as in what ever fits)..  2. End of the RF plate opening... that too would be 1.5 times firebox/smoke chamber opening....  Reason, friction loss of the smoke/air traveling the length of the smoker and taking a 180 degree turn at the end heading toward the stack....

Hope that makes some sense.....   Dave
 
Yeah, I hope to turn it into a great little backyard smoker.

And thanks for the cautions, I have read all about how to cut into a propane tank. That is some scary stuff there.

Not sure if I will use an angle grinder with a cutoff wheel or acetylene torch to make the initial cut.
icon_eek.gif
Danoj,

Please unscrew the valve and flood with water when you make the initial cut.
And please don't use a torch, use the angle grinder because the torch could boil the water and cause a water/metal splatter burst spoiling the cut.

Tom
 
I have already purged it with water and soap and was planning on doing it again, if I end up needing to use the propane tank I will now cut it with an grinder.

I may still end up buying plate steel to use for the firebox.

Thanks for the warning Tom, I definitely don't want to make a mistake on cutting this thing open.

Daniel J.
 
Hey everyone,

It's been awhile since I have posted any updates, and it has been slow going, for various reasons, out of town, sick, getting a hold of cheap material, etc..

But here are some pictures to check out.

This is the beginning of the stand.

Start with rusty 2" square tubing and some precise cuts....


.... and you get four legs!


Weld it all together and include some angle iron,

and test fit it on the soon to be cook chamber.


Almost done with the stand, just needs a few more additions.


Got the wheels, expanded steel, and height adjusters in place,

not much left to be done with the stand.

 
Here are some more pictures of my build.

This is the latest rendition of my Reverse Flow Smoker plans.

I decided to scrap the propane cylinder as a firebox idea and just go with 1/4" plate steel.


I found this at a local machine shop, it is 1/2" plate steel and it already had nearly the

correct size diameter holes cut in it. I really liked the hinge setup that mag409 used on

his build, and with this I only had to torch out the outer diameter to make my hinges.


Because the inner diameter of my hinge is larger than I would have liked I needed to

add some spacers.


Necessary lines have been drawn, certain cuts have been made, this thing is nearly

ready to be opened.


The hinges have been welded in place and the final cuts have been made.


Not as rusty as I thought it might be.


Not too bad looking so far, and I even used the original handle from the air compressor

for the handle on this, along with the wheels.


Now I am starting on the firebox, I have most of the plate steel I need, just need to draw

up some plans.
 
Hey everybody!

So, it has been a long time since I have posted any updates on my reverse flow smoker project.  I have just been so busy with school the last two years I hadn't had any time to work on it.  But, this summer I will get it finished, in fact, I should be completely done in just a week or two.

Anyway, here are some progress pictures.

Got the cart finished with a gloss black coating.


Here I was testing out how the firebox would fit just after I cut the hole in the tank, making sure that all of the cuts were good.


Still not ready to weld to the tank though, still lots left to do on the firebox.


Door and firebox are being prepped to have the hinges welded in place.


Hinges and handle have been completed.


Pretty good looking firebox right there.


Door works pretty smoothly too.


Here I had just finished welding the firebox to the tank.


Just got the reverse flow plate welded in place.


The reverse flow plate is about 1" above the firebox.  I am hoping that this helps with keeping the firebox side less hot.


Still need to get the dam put in place so that water can be held in there when needed.


I need to take some more pictures, I have finished the food racks, ash tray, and almost finished with the coal basket.

So the next update I will have a few more pictures to share.

See ya soon.
 
Last edited:
Hi again,

So just remembered that I had a question about my chimney.

Here is an Autocad drawing of what I am currently planning to do with the chimney.


I am going to use a 1/8" thick 3" outer diameter pipe.  Feldon's recommends a chimney pipe that is 16.31" of length with a diameter of 3".

As you can see in my design, my overall pipe will be longer than that. Right now I have a section of pipe that is exactly 24 inches long, and with that much pipe and the correct cuts I can get the finished chimney approximately the size depicted (within 1/4" or less).

Is this going to be too much pipe length with this design? Not enough?

Any ideas that would improve this?

Thanks,

See ya soon.
 
Your exhaust pipe length will be just fine.

When using Feldon's, you should consider the exhaust length to be a minimum.

Just don't go too tall; from Feldon's:

  • A chimney that is too short may produce insufficient draft (drawing of air). A chimney that is too long may cause the air to cool before it exits, reducing effective draft and worse, dripping of exhaust materials onto food!
  • Many horizontal smokers have an exhaust between 30-40 inches in length, but there is no hard and fast formula.

Or as I like to say, looks good, cooks good!
 
Thanks for the advice on the chimney, SQWIB and Smoke Jumper.

Tom, yeah, I have got the dam in place so that I can fill the reverse flow plate reservoir with water.

And, Thanks for all the great compliments everyone. I appreciate it.
 
SmokingMeatForums.com is reader supported and as an Amazon Associate, we may earn commissions from qualifying purchases.

Latest posts

Clicky