My New Rig - American Barbecue Systems All -Star

  • Some of the links on this forum allow SMF, at no cost to you, to earn a small commission when you click through and make a purchase. Let me know if you have any questions about this.
SMF is reader-supported. When you buy through links on our site, we may earn an affiliate commission.

petehalsted

Smoking Fanatic
Original poster
Jun 28, 2015
483
296
Now that we have a semi-permanent summer spot for the RV, I can put a chunk of Iron on it.

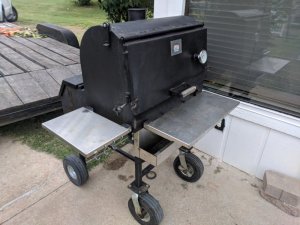
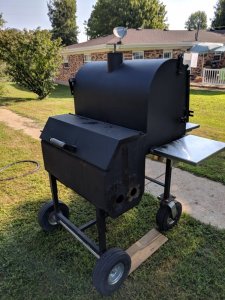
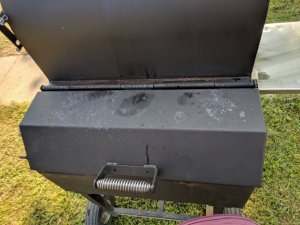
Craigslist find, it has the pneumatic wheels upgrade and custom cover. Just needs a good cleaning, touch up paint on a little surface rust, re-seasoned, and we she will be ready to go.

All it took for me to get it was 1 week, of begging, pleading, pouting, graveling, holding my breath, and every other trick from the married man's play book, then an 8 hour round trip in the truck, hearing how she doesn't understand why we need another smoker, why I would ever want to buy a 5 year old smoker, well you get the picture. Cashed in every chip in the marriage bank, but I think it was worth it!

I will get her cleaned up and seasoned today. Then play around a bit with some biscuits and my smoke probes and get a feel for her. At some point this week, I will do some chicken halves (my customary test smoke). But I got a whole packer in the freezer that has just been waiting for the right occasion, this sure seems like it.

The MES 30 will definitely stay in the arsenal, its just to handy for to many things. And it will still be the RV travel smoker for now, although I have been looking at and considering a Little Red Box smoker as the RV travel smoker, but definitely going to take a bit to build the marriage bank back up in order to do that.

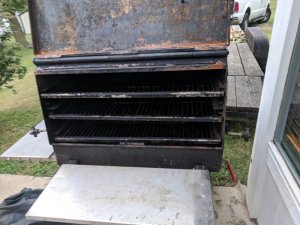
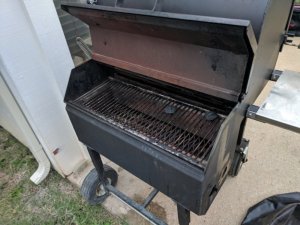
Pre-Cleaning photos.
smoker1.jpg
smoker2.jpg
smoker3.jpg
 
Get it cleaned up, and it should make you a nice smoker.
Myself I would do a couple chicken smokes just to get to know your smoker.
And get use to fire management.
 
Nothing that a wire brush and a lil paint can't fix. Great find! Congratulations and looking forward to some pix of the restored smoker as well as the first couple of chicken smokes.

Now, time to start putting back into the marriage bank for your next "investment"!
 
Nice rig, a lil'elbow grease and it'll be good to go.

For the wife, how about a nice Spa trip?
The deluxe package, sauna, massage, mani and pedicure, skin rejuvenation followed by a really nice lunch or dinner out.
Pamper the hell out of her.
 
Last edited:
^^^^^ Lol that is a great bargaining list.. A spa pkg for the smoker while the wife gets a spa... Great find.
 
No pics tonight, will take some tomorrow, let's just say smoker is now clean, I am not.

Really liking some of the engineering details on this smoker, can't wait to fire it up.

Going to touch up the paint tomorrow AM, then it will be time to re-season and start playing with fire.
 
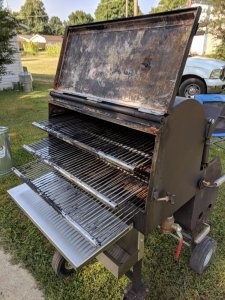
Here's some pics first thing this AM, All cleaned before touch up painting.

Original owner was a saucer, based on the caked on stuff on the grates, but that should be a surprise seeing as how it came from dead center of Missouri, and they do like their sauce in MO!

I am guessing he also had a BBQ Guru or something on it, that is some type of tape residue around the left hand fire box vent.

BTW, after I got done last night, I found a tip, that the easiest way to get grills super clean is to put them in a trash bag spray with ammonia, and then leave them overnight. Wish I had read that before all the work I did. Probably will try that for the next deep cleaning.

clean1.jpg
clean2.jpg
clean3.jpg
clean4.jpg
 
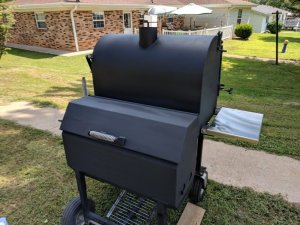
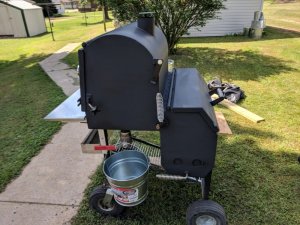
After the above pics, I took a green scotch pad and scuffed up the entire exterior, paying close attention to the spots that had some surface rust. Wiped the residue off with acetone, removed all the stainless, taped everything else that needed it. Then used a can of high heat paint I picked up a Home Depot, says it is good to 2000 degrees, hope it don't ever get that hot!!!

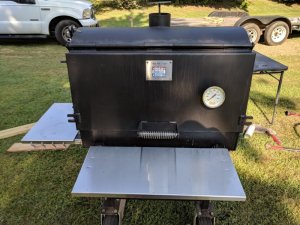
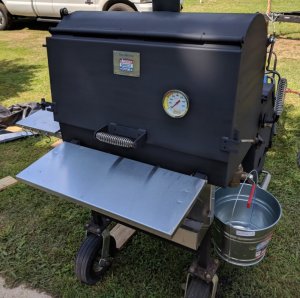
As you can see in the photos, the paint I picked up apparently was flat black, doesn't say so anywhere on the can. I debated for a few minutes about going and getting a can of gloss, but it didn't take long to convince myself that I actually like the flat black, kind of makes it look like its ready to do battle.

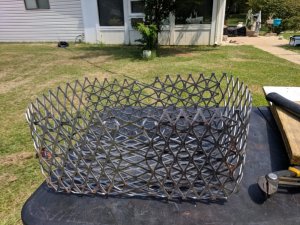
Based on a few post from other users of the All-Star I made a charcoal basket for it. 12x8x6. We will see how that goes, during the first seasoning session today, the center ran about 30 degrees hotter than the left and right, but since I am seasoning it, I didn't have any water in the bottom. I have a Smoke and a DOT, with 3 grate probes, so I am able to monitor 3 spots, right now I have them in center of middle shelf, Left, right and center.

Once I get it seasoned I will test with water to see if that makes a difference, but I suspect I am going to end up using the full width of the box so there is even heat from side to side. I suspect doing that I will have to use the damper between fire box and smoke box and burn more charcoal than with a smaller fire box in the center, but we will see.

Wiped everything in smoke box with vegetable oil, Ran 250-275 (actual hit 300 before I got it backed down to 275) for 1 hour. Shut the dampers off and letting it cool fully now. Once cool will do another 1 hour cycle at 325. This is based on ABS instructions.

Once second seasoning is done, I will play with the water and figure out if I am going to use the full width of the fire box or charcoal basket in center. Once I get it dial in, I have 3 cans of cheap biscuits to do biscuit test see how that goes.

Here it with its new War paint ready to go.
newsmoker.jpg
newsmoker2.jpg
newsmoker3.jpg
basket.jpg
 
Great job you should be proud of your work. Now fire it with some food (I would try some chicken first to get the feel of it) hoping to see some photos of your cooks.

Warren
 
SmokingMeatForums.com is reader supported and as an Amazon Associate, we may earn commissions from qualifying purchases.

Latest posts

Hot Threads

Clicky