Finally got the drum back from the sand blaster yesterday. The thing was nice and clean, looked brand new! I started by drilling all my holes, then started painting it yesterday:
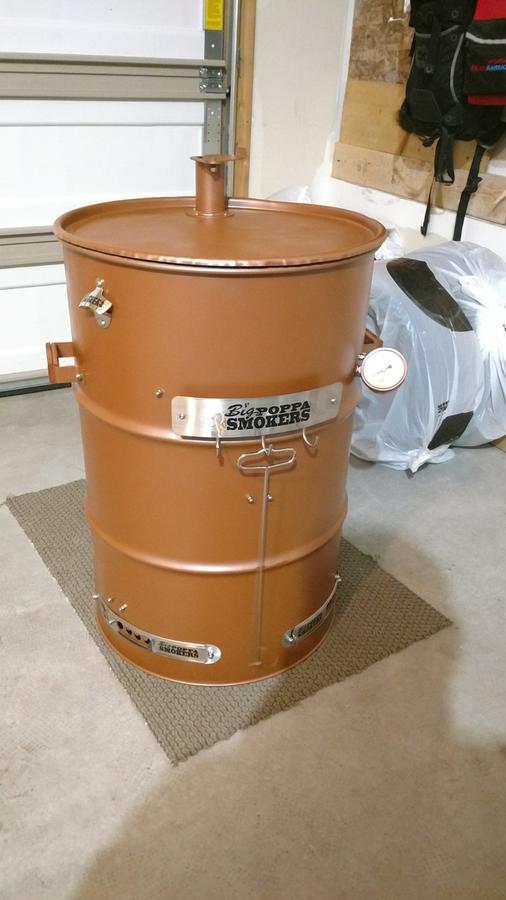
After 4 coats, I went ahead and mounted the hardware on, and got it assembled.
Still haven't received the pig that im using for the handle. The etsy seller was on Vaca, so just shipped it out on Monday after I pestered him.
Overall, the BPS kit is a pretty nifty kit! Pretty easy, though a lot of their instructions are very "guessy" like they will just say "put them about 5 inches apart", or "put the screw holes roughly 90 degrees apart", and lots of stuff like that. I supposed you could get more precise with your measurements if you cared to take the time, and have a flexible measuring tape.
Anyway, there is a lot of drilling, but ultimately, the measuring, drilling, painting and hardware assembly took just shy of 3 hours of working time.
I also see why people always just use matte black on these, cause this glossy copper sure does show every little imperfection in the used barrel!
I have a gasket kit for the lid, but my lid is so tight fitting, i'm not certain ill need it, but ill wait till she's got smoke coming out to figure that out. I also did the calking around various hardware bits including the top vent, the base intake vents, the holes for a few of the screws, depending on mounting type, and the hole for the temp gauge. The one problem I had was with the "u-bolts" where essentially, you have to use a hex nut to measure how much thread left youll need for the acorn nut to tighten to... Well, if you leave too much thread, the acorn nut will take all the thread it can, and the u-bolt will still be loose. Problem I had was on one u-bolt, I was just using a regular tightening pressure, but it sheared the thread clean off, cause it wasn't actually tightening against anything but itself, so ill have to go to the hardware store and find a matching u-bolt replacement.
Ill post another picture or so once I get the handle on, and do the hanging mod im gonna do.