texas ray
Smoke Blower
[h3]My Completed Mini-WSM[/h3][h3]
[/h3]
Completed Mini WSM. We are visiting our Daughter and Son-in-Law for the summer. Being away Texas and my WSM 22.5", my grandson Jacob & I built two Mini-WSMs in July. We used the Smokey Joe Silver because they were readily available in the Saint Peters, MO area. At the first smoke, I found that the Weber Thermometer I used is totally inaccurate. I will be ordering a 3" River Country (RC-T3W) Adjustable Thermometer from Amazon. Note: The Dome Lid does fit the pot exactly, but I had no problem keeping the temperature stable.
Here is a look inside - two racks, 12" Terra Cota Plate. Note: The plate sits on a trivet that I purchased at Bed Bath & Beyond for less that $8.00.
Here you can see the Trivet on which the Terra Cota Plate sits. I used the steamer plate that came with the Steamer Pot as a guide for drilling the holes in the bottom.
[h3]The First Smoke[/h3]
Baby Back Ribs. For this smoke I made Ancho Cherry Baby Back from a recipe I saw on YouTube --
Removing Membrane.
Sliced ribs into small sections to fit Mini-WSM.
Rubbed with mustard.
Unlit Stub's Charcoal Briquettes with some Apple & Pecan Wood Chucks underneath - Minion Method.
Apple and Pecan Wood Chunks on top.
Charcoal being prepared.
Poured Lit Charcoal on top of unlit coals and wood.
Smoker pot in kitchen to load in ribs.
For this smoke I used Simply Marvelous Cherry Rub - May be order from Big Poppa Smokers
Rubbing the Ribs.
Rubbed Ribs placed on Lower Rack.
Ribs placed on upper rack.
Beginning smoke - notice the thin blue smoke.
The smoker easily adjusted and held 225 Deg. I smoked these Baby Backs using the 2-2-1 method -- 2 hrs unfoiled; 2 hrs. foiled; and 1 hr. unfoiled.
Removed lid after the first two hours. I did spritz the ribs after the first hour with Apple Berry Cherry Juice.
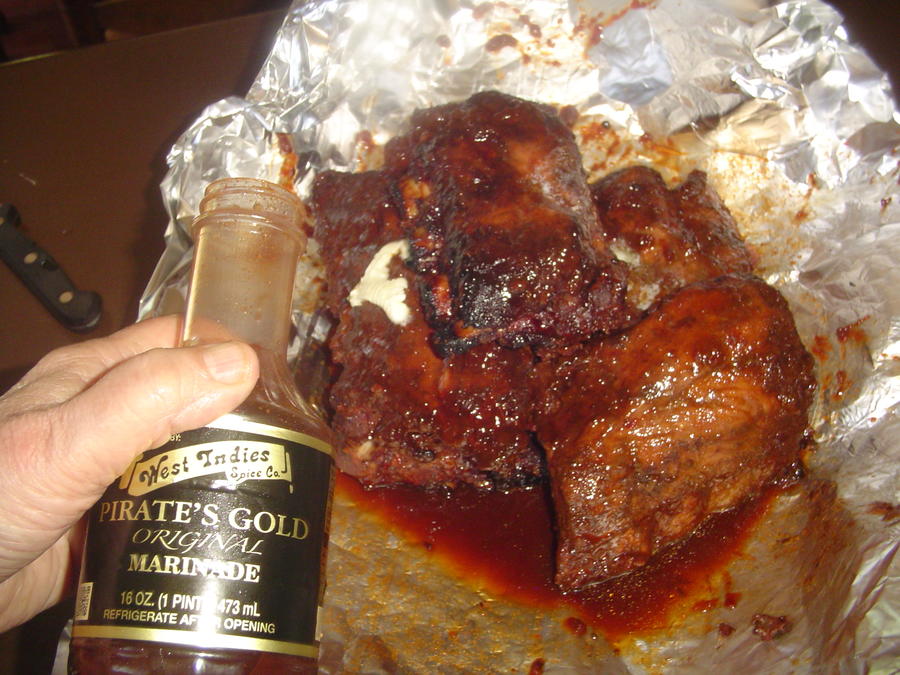
I used a slightly different liquid on each set of ribs because of various family preferences. On one set of ribs I coated with homemade Ancho Cherry BBQ Sauce, Honey, a little Butter, and poured in some Pirates Gold Marinade and double wrapped with foil. The other set of ribs were done the same except I used the Apple Berry Cherry Juice for marinade and double wrapped with foil.
Preparing the ribs in foil wrap.
Foiled Baby Backs back in smoker for the second 2 hrs.
After second 2 hrs, removed foil and kept the juices for use later. I put the juice in jars and refrigerated to let fat settle at top for each removal.
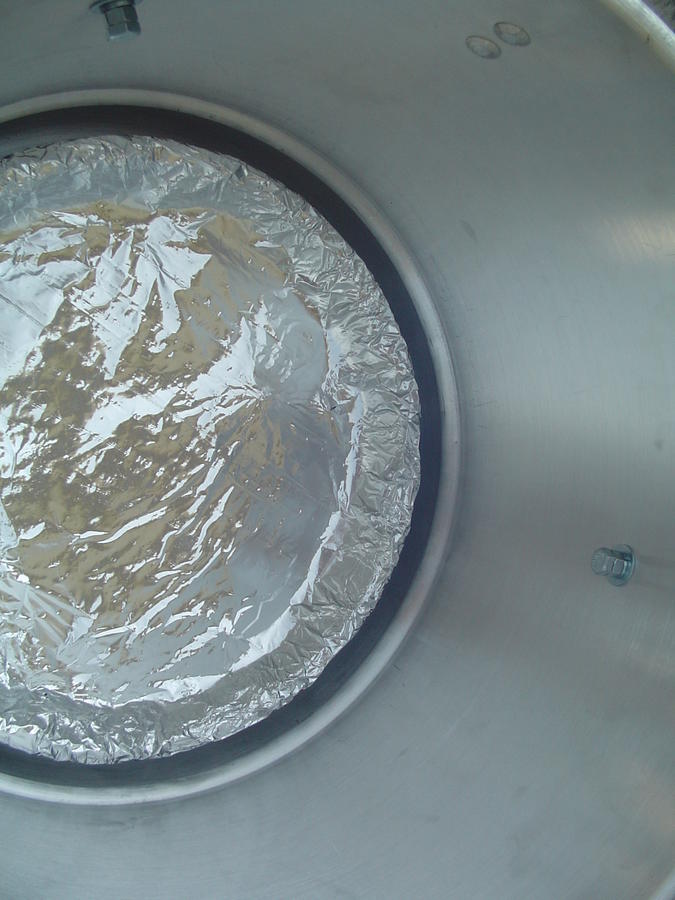
Ribs ready for last hr. in smoker without foil.
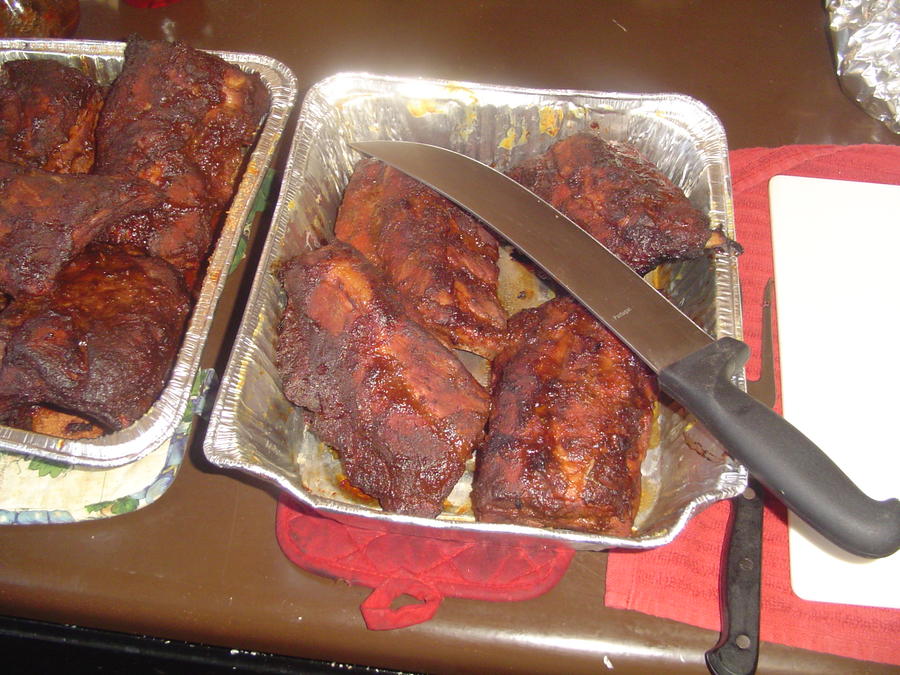
I let the ribs sat for about 20 minutes before slicing. They were tender and passed the bite test perfectly. Great taste!
Dinner served! NOTE: I closed the vents and the next day noticed that about a third of the coals weren't used and can be used on the next smoke. This smoker went for 5 hours and worked efficiently. Because I used the Silver, I did have to wiggle the bottom vent back and forth and tap the bottom side two times during to smoke for venting. No problem here. When I first seasoned the smoker, I used the popular brand of charcoal briquettes and the fillers clogged up the smoker. I have had no problem with Stub's Charcoal.
Texas Ray....sorry but I had to edit your post here....off site links are not allowed per TulsaJeff...the owner of the site...This came about in late June and you might have missed it. Here's the updated Terms of Service . Just an FYI. You can embed the youtube vid if you'd like instead of a link. ~Alesia

Completed Mini WSM. We are visiting our Daughter and Son-in-Law for the summer. Being away Texas and my WSM 22.5", my grandson Jacob & I built two Mini-WSMs in July. We used the Smokey Joe Silver because they were readily available in the Saint Peters, MO area. At the first smoke, I found that the Weber Thermometer I used is totally inaccurate. I will be ordering a 3" River Country (RC-T3W) Adjustable Thermometer from Amazon. Note: The Dome Lid does fit the pot exactly, but I had no problem keeping the temperature stable.

Here is a look inside - two racks, 12" Terra Cota Plate. Note: The plate sits on a trivet that I purchased at Bed Bath & Beyond for less that $8.00.


Here you can see the Trivet on which the Terra Cota Plate sits. I used the steamer plate that came with the Steamer Pot as a guide for drilling the holes in the bottom.
[h3]The First Smoke[/h3]

Baby Back Ribs. For this smoke I made Ancho Cherry Baby Back from a recipe I saw on YouTube --
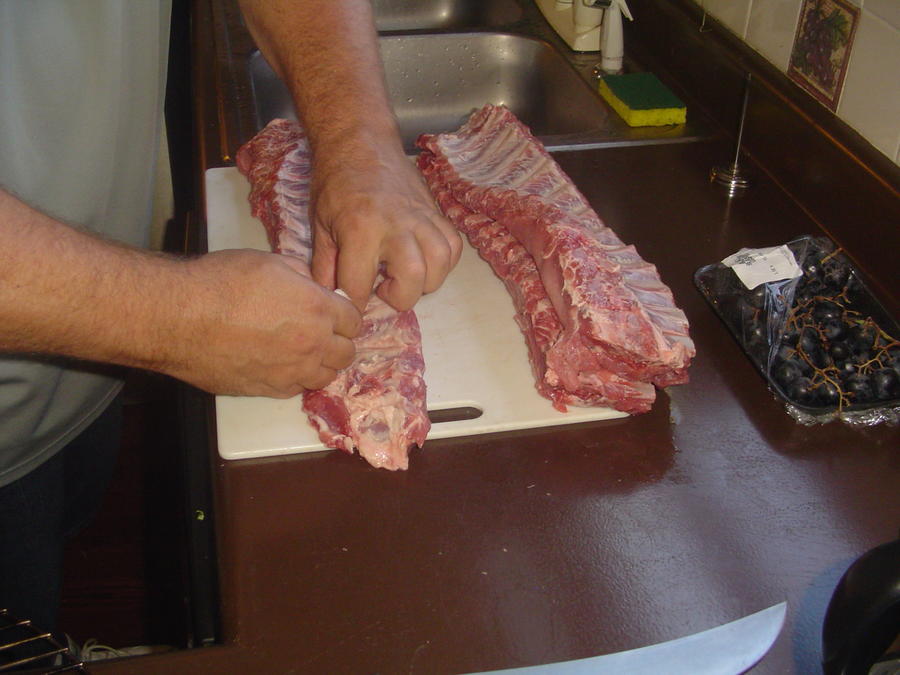
Removing Membrane.

Sliced ribs into small sections to fit Mini-WSM.

Rubbed with mustard.

Unlit Stub's Charcoal Briquettes with some Apple & Pecan Wood Chucks underneath - Minion Method.
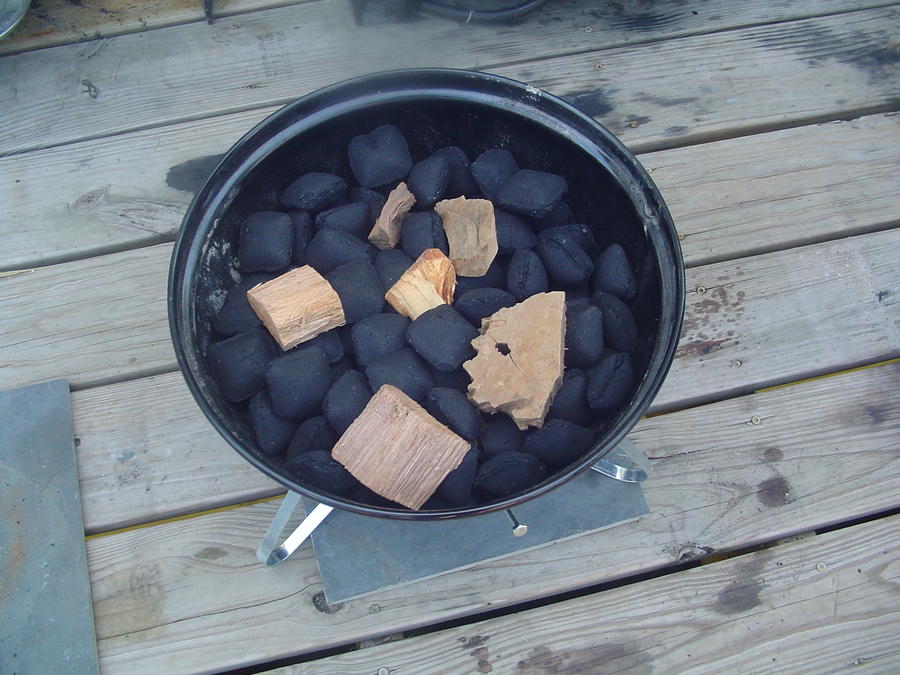
Apple and Pecan Wood Chunks on top.

Charcoal being prepared.

Poured Lit Charcoal on top of unlit coals and wood.

Smoker pot in kitchen to load in ribs.

For this smoke I used Simply Marvelous Cherry Rub - May be order from Big Poppa Smokers

Rubbing the Ribs.

Rubbed Ribs placed on Lower Rack.

Ribs placed on upper rack.

Beginning smoke - notice the thin blue smoke.

The smoker easily adjusted and held 225 Deg. I smoked these Baby Backs using the 2-2-1 method -- 2 hrs unfoiled; 2 hrs. foiled; and 1 hr. unfoiled.

Removed lid after the first two hours. I did spritz the ribs after the first hour with Apple Berry Cherry Juice.
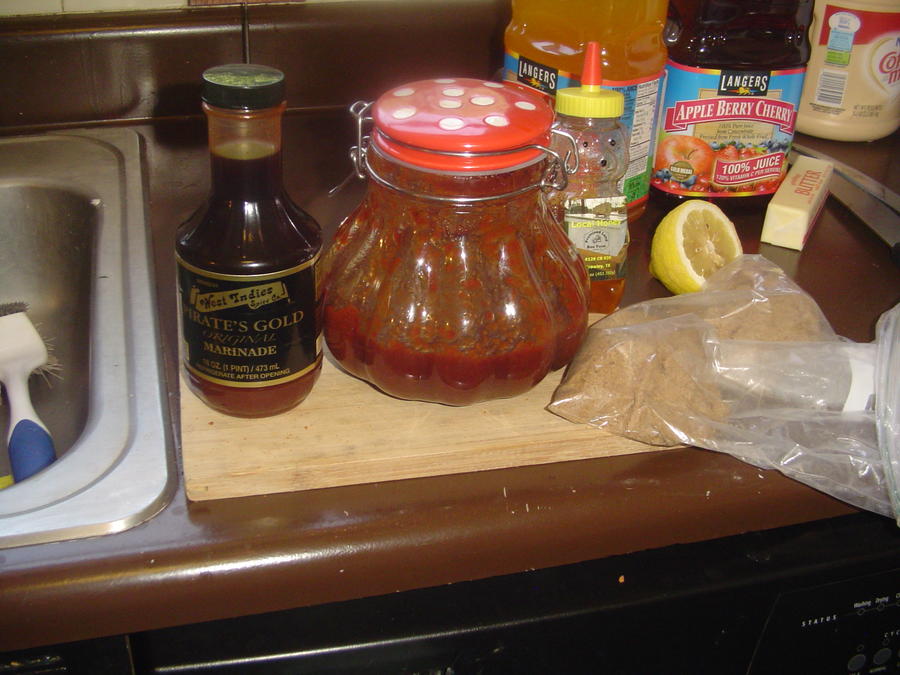
I used a slightly different liquid on each set of ribs because of various family preferences. On one set of ribs I coated with homemade Ancho Cherry BBQ Sauce, Honey, a little Butter, and poured in some Pirates Gold Marinade and double wrapped with foil. The other set of ribs were done the same except I used the Apple Berry Cherry Juice for marinade and double wrapped with foil.
Preparing the ribs in foil wrap.

Foiled Baby Backs back in smoker for the second 2 hrs.

After second 2 hrs, removed foil and kept the juices for use later. I put the juice in jars and refrigerated to let fat settle at top for each removal.
Ribs ready for last hr. in smoker without foil.

I let the ribs sat for about 20 minutes before slicing. They were tender and passed the bite test perfectly. Great taste!

Dinner served! NOTE: I closed the vents and the next day noticed that about a third of the coals weren't used and can be used on the next smoke. This smoker went for 5 hours and worked efficiently. Because I used the Silver, I did have to wiggle the bottom vent back and forth and tap the bottom side two times during to smoke for venting. No problem here. When I first seasoned the smoker, I used the popular brand of charcoal briquettes and the fillers clogged up the smoker. I have had no problem with Stub's Charcoal.
Texas Ray....sorry but I had to edit your post here....off site links are not allowed per TulsaJeff...the owner of the site...This came about in late June and you might have missed it. Here's the updated Terms of Service . Just an FYI. You can embed the youtube vid if you'd like instead of a link. ~Alesia
Last edited by a moderator:


