I have been using cure #1 for a bit now, mostly with bacon and pastrami. Feeling emboldened, I wanted to try working with cure #2 for some long-term curing. So I ordered some up from one of our sponsors, and started doing some research.
It came!
I used this book, which I recommend as interesting reading. I picked out the Bresaola recipe as it would only take 30 days, and this was going to be my first experience so I didn't want to try something like prosciutto that takes months only to find out it didn't work.
So to properly measure out the amount of cure #2, I weighed the eye of round.
This eye of round was just shy of 5 pounds, and following the directions, this meant I would need about .2 ounces of cure #2. So that's what I measured out.
According to the author, you have to be ruthless when trimming. Leave no silverskin or exterior fat.
Then it hit me...I had just trimmed away quite a bit of weight! I needed to re-weigh to properly calculate the amount of cure #2!
Luckily, I keep a small chalkboard in my kitchen to help me figure such things out. With the trimmings gone, I now only needed .17 ounces of cure #2.
My scale doesn't read that accurately, so I got it to .15 ounces and then sprinkled in just a little bit more.
I mixed this with a little bit of salt to help spread it around. Later I would be using MUCH more salt, and I didn't want any of the cure #2 to not stick to the meat.
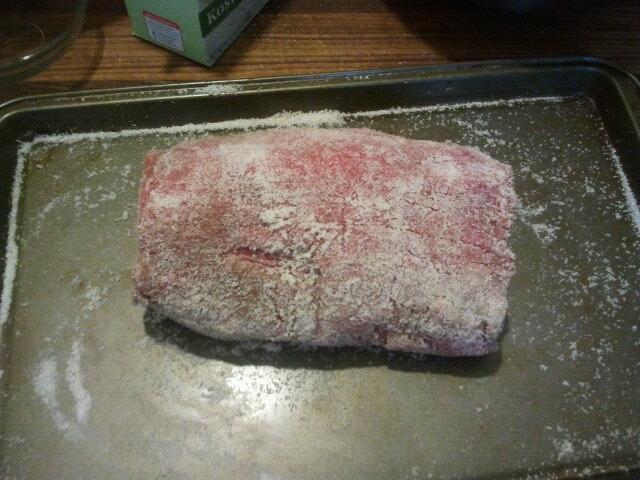
My strategy was to roll the eye of round in the salt/cure mix until as much as possible was stuck on.
It looked like this when I was done.
The author then instructs you to encase the eye of round in TEN POUNDS OF SEA SALT! I don't have that kind of cash flow, so I bought cheap kosher salt. My plan was to put down a good layer in that large plastic tub, put in the eye of round, and then cover with salt.
In we go!
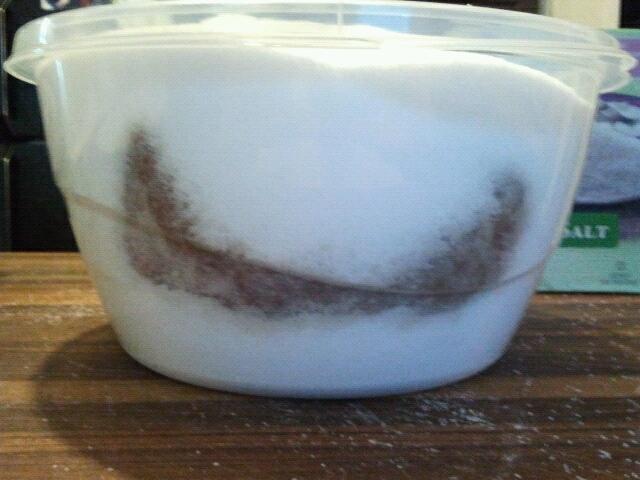
All cozy! There's a 4 pound eye of round in there somewhere. I actually only used about 6 pounds of salt to do this.
I noticed that the sides were not covered in salt (see below), so I had to fix that. I stuck my hands down in there and made sure that there was salt between the meat and the side of the container.
Cover, and set in the fridge for 3 days!
This is very similar to how the ancient Egyptians began the mummification process. Here's how it looked 3 days later.
The salt had turned into one giant block, having drawn out a lot of moisture from the meat.
The next step is to coat in black pepper.
You only cold smoke this for 2 hours, so I lit both ends to ensure I got as much smoke flavor as possible. I used Pitmaster's Choice.
Two hours of smoking later, here is what I had!
Flipped over.
I was now down to 3 pounds, 13 ounces!
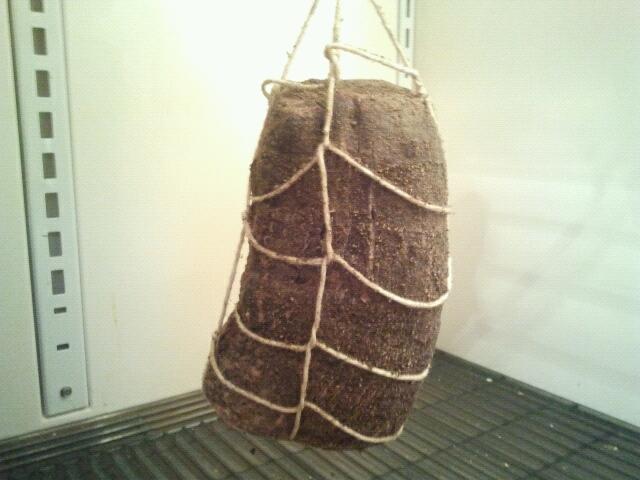
Now for the aging. I did my best tie-up job.
The author says to use a fridge that isn't opened and closed all the time. I have a second fridge that I use for odd things like this, so I hung it up there.
Day 0 of 30.
Day 7 of 30...already losing more moisture and starting to sag.
Day 14 of 30...all I could think of was George Canstanza from Seinfeld. "I was in the pool!"
Day 21 of 30.
Day 28 of 30.
Day 30...and now down to 2.5 pounds!
Here is the last intact shot I took. Time for my moment of truth!
GORGEOUS!
Lovely!
Then I hit a major problem...my slicer died! Upon inspection, one of the gears in the motor is plastic, spun by a metal worm gear. The metal stripped the plastic down, rendering my slicer useless! This was as far as I got:
So now I am sitting here, typing this up, extremely hacked off. My replacement gear will be on its way soon (I broke down for expedited shipping) and I can hopefully finish slicing this up soon!
In short, I think this was a GREAT introduction to "long-term" curing that gave me the confidence to continue investigating charcuterie. Think of bresaola has something akin to prosciutto, only with beef. I couldn't stop eating the stuff! All told, my eye of round was about 20 bucks, so I got awesome bresaola for about 8 bucks a pound!
It came!

I used this book, which I recommend as interesting reading. I picked out the Bresaola recipe as it would only take 30 days, and this was going to be my first experience so I didn't want to try something like prosciutto that takes months only to find out it didn't work.

So to properly measure out the amount of cure #2, I weighed the eye of round.

This eye of round was just shy of 5 pounds, and following the directions, this meant I would need about .2 ounces of cure #2. So that's what I measured out.

According to the author, you have to be ruthless when trimming. Leave no silverskin or exterior fat.

Then it hit me...I had just trimmed away quite a bit of weight! I needed to re-weigh to properly calculate the amount of cure #2!

Luckily, I keep a small chalkboard in my kitchen to help me figure such things out. With the trimmings gone, I now only needed .17 ounces of cure #2.

My scale doesn't read that accurately, so I got it to .15 ounces and then sprinkled in just a little bit more.

I mixed this with a little bit of salt to help spread it around. Later I would be using MUCH more salt, and I didn't want any of the cure #2 to not stick to the meat.

My strategy was to roll the eye of round in the salt/cure mix until as much as possible was stuck on.

It looked like this when I was done.
The author then instructs you to encase the eye of round in TEN POUNDS OF SEA SALT! I don't have that kind of cash flow, so I bought cheap kosher salt. My plan was to put down a good layer in that large plastic tub, put in the eye of round, and then cover with salt.

In we go!

All cozy! There's a 4 pound eye of round in there somewhere. I actually only used about 6 pounds of salt to do this.

I noticed that the sides were not covered in salt (see below), so I had to fix that. I stuck my hands down in there and made sure that there was salt between the meat and the side of the container.
Cover, and set in the fridge for 3 days!

This is very similar to how the ancient Egyptians began the mummification process. Here's how it looked 3 days later.

The salt had turned into one giant block, having drawn out a lot of moisture from the meat.

The next step is to coat in black pepper.

You only cold smoke this for 2 hours, so I lit both ends to ensure I got as much smoke flavor as possible. I used Pitmaster's Choice.

Two hours of smoking later, here is what I had!

Flipped over.

I was now down to 3 pounds, 13 ounces!

Now for the aging. I did my best tie-up job.

The author says to use a fridge that isn't opened and closed all the time. I have a second fridge that I use for odd things like this, so I hung it up there.
Day 0 of 30.

Day 7 of 30...already losing more moisture and starting to sag.

Day 14 of 30...all I could think of was George Canstanza from Seinfeld. "I was in the pool!"
Day 21 of 30.

Day 28 of 30.

Day 30...and now down to 2.5 pounds!

Here is the last intact shot I took. Time for my moment of truth!

GORGEOUS!

Lovely!

Then I hit a major problem...my slicer died! Upon inspection, one of the gears in the motor is plastic, spun by a metal worm gear. The metal stripped the plastic down, rendering my slicer useless! This was as far as I got:

So now I am sitting here, typing this up, extremely hacked off. My replacement gear will be on its way soon (I broke down for expedited shipping) and I can hopefully finish slicing this up soon!
In short, I think this was a GREAT introduction to "long-term" curing that gave me the confidence to continue investigating charcuterie. Think of bresaola has something akin to prosciutto, only with beef. I couldn't stop eating the stuff! All told, my eye of round was about 20 bucks, so I got awesome bresaola for about 8 bucks a pound!


