whtplainssmoker
Smoking Fanatic
I was inspired by the numerous mini-WSM build threads (Peavley, Big Twig, RowdyRawhide, IronHorse, JckDanls07, GrumpySmoke, SomkeyDez to name a few) and decided to build myself a mini for smaller smokes, and to take with me to tailgates and when I visit my friends at their lake house. First off, I'd like to thank Peavely (for the great instructional page on stenciling and paint), RowdyRawhide for some great tips on painting, and IronHorse, BigTwig and JckDanls 07 for some helpful comments in responses. I went with the Vasconia 32 qt steamer pot and based on some comments from others, I am trying the drilled out bottom as opposed to cutting out the bottom and using the terra cotta saucer as the heat sink.
Parts, Weber Smokey Joe Silver, Vasconia 32 Qt Steamer Pot, extra Weber grill grate, Rustoleum High Heat Grill Paint (semi-gloss). For the bolts, I actually had an extra set of Weber Smokey Mountain Washers and nuts when I called them and asked for another set when I broke some of the washers putting my Weber together. (The bolts are 5/8 deep I think 1/4 inch width). Carriage Bolt 5" 1/4 width. and Old Smokey 2" BBQ Temp Gauge.
Parts-waiting to be assembled
These are the Weber bolts with the nice heat resistant washers.
I bent the bottom vent cover and drilled out a 1/4 inch hole
Inserted the 5" carriage bolt and securted it with two nuts.
I used the steamer insert to mark the bottom of the pot and drilled it out using 1/2 inch holes. I didn't drill out the outer most holes with the intention that the pot will act as the heat sink.
Next I drilled the holes for the top grill grate. I have select different heights for the top grate. Because I will be leaving the steamer insert in and placing the bottom grill grate right on top of that, in order to leave sufficient space, I decided on drilling holes down 4 1/4 inches down which gives me about 5 inches from the rack to the top of the lid. (hope that is enough room) The three holes were spaced approximately 14 3/4 appart. I decided I wanted one hole dead center between the handles (with the temp gauge righ below it) so that the opposite side would have the most space for the logo. I measured the distance between the handles and center was about 8 3/4 inches.
The 3/8 inch hole for the temp guage was eyeballed so that the nut would fit past the upper bolt.
Here are the grate bolt and the temp gauge bolt fitted before paint.
Top down view steamer insert and bottom grill grate in place. Top bolts in place.
View with the top grate in place.
Then using Peavely's stenciling method, I prepared the Yankee logo using painter's tape and wax paper.
Cut out and ready for application
Pot all taped up for paint application. Decided to paint after holes were all drilled. Taped the handles too. When applying the logo stencil make sure to press hard. When I removed the stencil some paint got slightly under and I had to clean it up with some turpintine and q tips. I spray painted the pot with two coats of Rustoleum High-Temp Grill paint semi gloss. The semi-gloss is only very slightly less glossy than the smokey joe, but looks close enough for me.
Here it is with the Greatest logo on earth. Hopefully, this work of art will inspire the Yankees to a historic comeback in the ALCS.
Opposite side, the temp probe is right below the top grill grate nut (hiding it).
Only thing left is to make the ash cover and to give it a test run to see how the temps hold up. Updates will come one the test runs are done.
Thanks again for all the posts helping with the build. I was relatively easy and fun.
Parts, Weber Smokey Joe Silver, Vasconia 32 Qt Steamer Pot, extra Weber grill grate, Rustoleum High Heat Grill Paint (semi-gloss). For the bolts, I actually had an extra set of Weber Smokey Mountain Washers and nuts when I called them and asked for another set when I broke some of the washers putting my Weber together. (The bolts are 5/8 deep I think 1/4 inch width). Carriage Bolt 5" 1/4 width. and Old Smokey 2" BBQ Temp Gauge.

Parts-waiting to be assembled
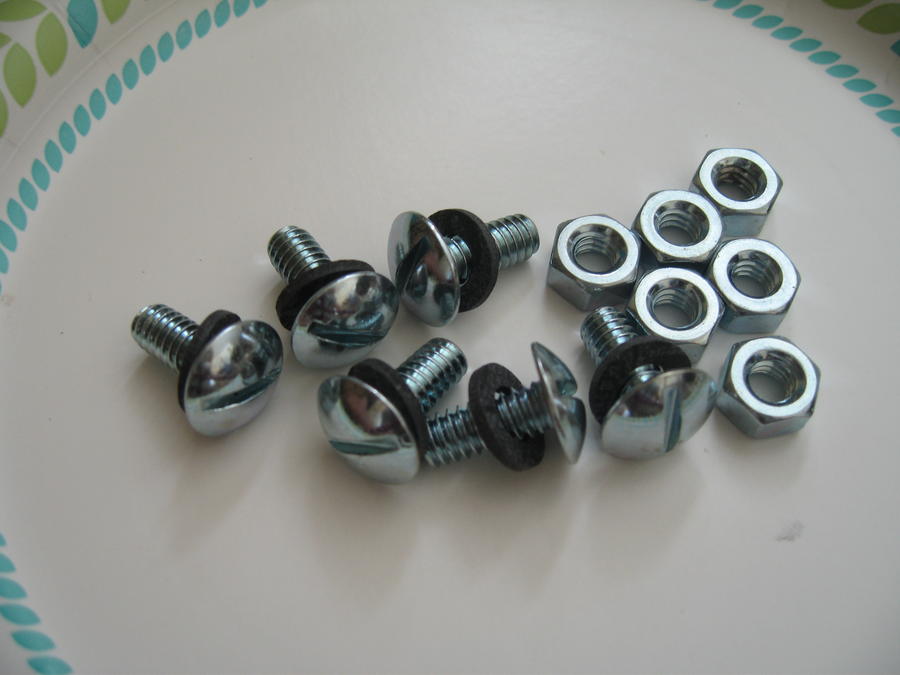
These are the Weber bolts with the nice heat resistant washers.

I bent the bottom vent cover and drilled out a 1/4 inch hole

Inserted the 5" carriage bolt and securted it with two nuts.
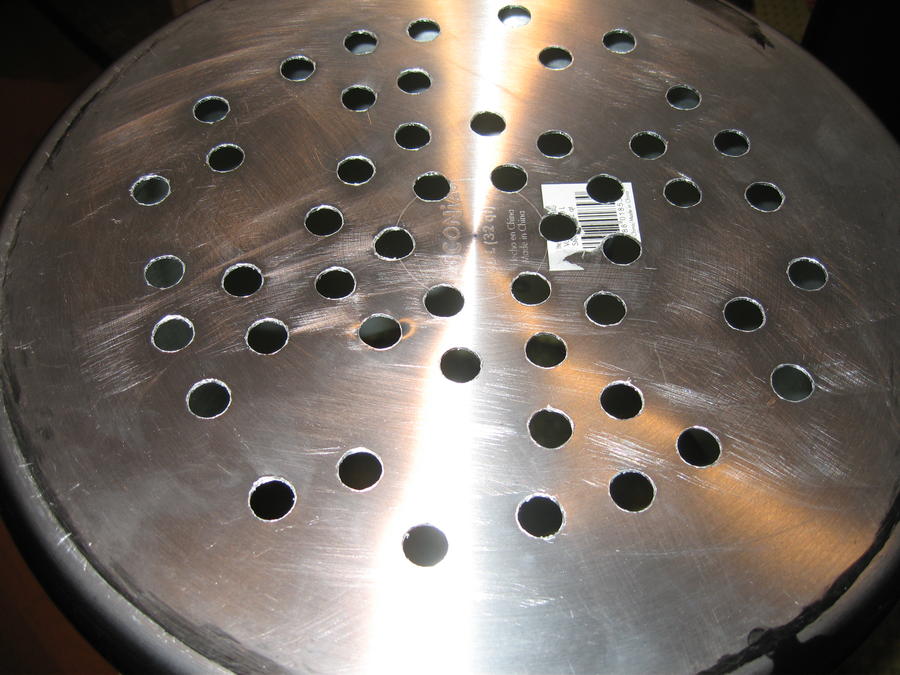
I used the steamer insert to mark the bottom of the pot and drilled it out using 1/2 inch holes. I didn't drill out the outer most holes with the intention that the pot will act as the heat sink.
Next I drilled the holes for the top grill grate. I have select different heights for the top grate. Because I will be leaving the steamer insert in and placing the bottom grill grate right on top of that, in order to leave sufficient space, I decided on drilling holes down 4 1/4 inches down which gives me about 5 inches from the rack to the top of the lid. (hope that is enough room) The three holes were spaced approximately 14 3/4 appart. I decided I wanted one hole dead center between the handles (with the temp gauge righ below it) so that the opposite side would have the most space for the logo. I measured the distance between the handles and center was about 8 3/4 inches.
The 3/8 inch hole for the temp guage was eyeballed so that the nut would fit past the upper bolt.

Here are the grate bolt and the temp gauge bolt fitted before paint.

Top down view steamer insert and bottom grill grate in place. Top bolts in place.

View with the top grate in place.
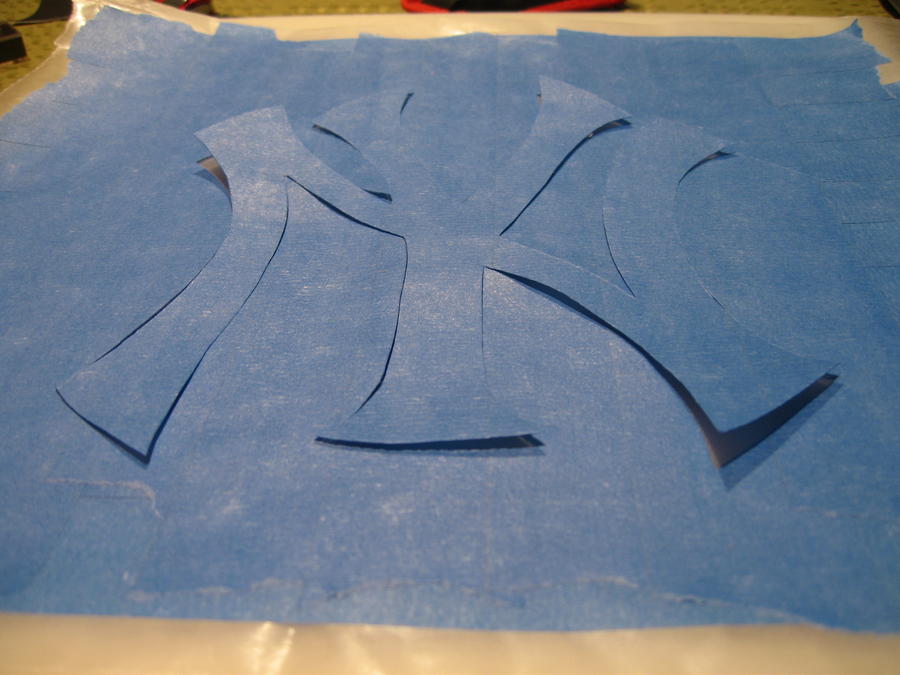
Then using Peavely's stenciling method, I prepared the Yankee logo using painter's tape and wax paper.

Cut out and ready for application

Pot all taped up for paint application. Decided to paint after holes were all drilled. Taped the handles too. When applying the logo stencil make sure to press hard. When I removed the stencil some paint got slightly under and I had to clean it up with some turpintine and q tips. I spray painted the pot with two coats of Rustoleum High-Temp Grill paint semi gloss. The semi-gloss is only very slightly less glossy than the smokey joe, but looks close enough for me.

Here it is with the Greatest logo on earth. Hopefully, this work of art will inspire the Yankees to a historic comeback in the ALCS.

Opposite side, the temp probe is right below the top grill grate nut (hiding it).
Only thing left is to make the ash cover and to give it a test run to see how the temps hold up. Updates will come one the test runs are done.
Thanks again for all the posts helping with the build. I was relatively easy and fun.
Last edited:


