Reposted to fix broken Links to images
SQWIBS 10-10-10-10 Canadian Bacon
I only posted a couple Bear Views as well.
BEAR VIEW
I got a bit tired researching Canadian bacon as everyone has their own way to make it, I wanted to simplify it and name it but keep it safe, so I came up with this 10-10-10-10
(hey it works for me).
Most Loins I get are 10 pounds so I figured this would be a nice formula to remember.
I add a few days to this formula to be safe. I also add an extra pinch or two of Tenderquick
I will refer to Tenderquick and any other ingredients once combined as "Cure"
"Prepping" Step 1:


"Curing" Step 2:


"Soaking" Step 3:


"Smoking" Step 5:


"The Rest" Step 5:


"Seal" Step 7:


This is what I ended up with
The RTE in the upper right hand corner of the vac-seal bags stand for Ready To Eat.
I figured I would play it safe because I am also working on Buck Board Bacon that will be marked RAW.
"Serve" Step 8:
You are going to want to try your Canadian Bacon out, so leave some out for frying to make some sandwiches. After all, you have been waiting nearly 2 weeks.


Well it was definitely a total success, the whole family liked it, I am glad we opted to keep the saltier taste and not soak any longer.
Our family is big into Breakfast for dinner, if you know what I mean!
After the rest, the only difference I noticed in the meat was that it was sweeter and a bit firmer.
Out of the three flavor profiles, the one that was more noticeable was the Honey, Brown Sugar and Cracked pepper, it wasn't better than the others but did acquire more of the outside flavor.
This is definitely worth doing, the yield after trimming, testing and picking, I would say would be at least 8.5 pounds from the 10lb loin.
BEAR VIEW
Thanks for Tuning in.
SQWIBS 10-10-10-10 Canadian Bacon
Before going any further Read this First.
LINK REMOVED READ BELOW
I am not going to go into the science, safety issues or specifics of curing, that will be your homework.
I suggest doing a bit of research before attempting to cure any thing.
Here is a link to the cure that I use it is called Morton[sup][emoji]174[/emoji][/sup] Tender Quick[sup][emoji]174[/emoji][/sup]
It will be YOUR RESPONSIBILITY to make sure your food is safe.
From Morton's Website.
Morton[sup][emoji]174[/emoji][/sup] Tender Quick[sup][emoji]174[/emoji][/sup] mix contains salt, the main preserving agent; sugar, both sodium nitrate and sodium nitrite, curing agents that also contribute to development of color and flavor; and propylene glycol to keep the mixture uniform. Morton[sup][emoji]174[/emoji][/sup] Tender Quick[sup][emoji]174[/emoji][/sup] mix can be used interchangeably with Morton[sup][emoji]174[/emoji][/sup] Sugar Cure[sup][emoji]174[/emoji][/sup] (Plain) mix. It is NOT a meat tenderizer.
CAUTION: This curing salt is designed to be used at the rate specified in the formulation or recipe. It should not be used at higher levels as results will be inconsistent, cured meats will be too salty, and the finished products may be unsatisfactory. Curing salts should be used only in meat, poultry, game, salmon, shad and sablefish. Curing salts cannot be substituted for regular salt in other food recipes. Always keep meat refrigerated (36° to 40°F) while curing.
I use this when making jerky as well.
Sorry, had to throw a disclaimer in there.I suggest doing a bit of research before attempting to cure any thing.
Here is a link to the cure that I use it is called Morton[sup][emoji]174[/emoji][/sup] Tender Quick[sup][emoji]174[/emoji][/sup]
It will be YOUR RESPONSIBILITY to make sure your food is safe.
From Morton's Website.
Morton[sup][emoji]174[/emoji][/sup] Tender Quick[sup][emoji]174[/emoji][/sup] mix contains salt, the main preserving agent; sugar, both sodium nitrate and sodium nitrite, curing agents that also contribute to development of color and flavor; and propylene glycol to keep the mixture uniform. Morton[sup][emoji]174[/emoji][/sup] Tender Quick[sup][emoji]174[/emoji][/sup] mix can be used interchangeably with Morton[sup][emoji]174[/emoji][/sup] Sugar Cure[sup][emoji]174[/emoji][/sup] (Plain) mix. It is NOT a meat tenderizer.
CAUTION: This curing salt is designed to be used at the rate specified in the formulation or recipe. It should not be used at higher levels as results will be inconsistent, cured meats will be too salty, and the finished products may be unsatisfactory. Curing salts should be used only in meat, poultry, game, salmon, shad and sablefish. Curing salts cannot be substituted for regular salt in other food recipes. Always keep meat refrigerated (36° to 40°F) while curing.
I use this when making jerky as well.
I only posted a couple Bear Views as well.
BEAR VIEW
I got a bit tired researching Canadian bacon as everyone has their own way to make it, I wanted to simplify it and name it but keep it safe, so I came up with this 10-10-10-10
(hey it works for me).
Most Loins I get are 10 pounds so I figured this would be a nice formula to remember.
- (10) pounds of loin (10) days in cure (10) Tablespoon of Mortons Tenderquick +(10) Tablespoons of brown sugar.
I add a few days to this formula to be safe. I also add an extra pinch or two of Tenderquick
I will refer to Tenderquick and any other ingredients once combined as "Cure"
"Prepping" Step 1:
- 10 pound Loin, loin is removed from the packaging and I remove as much fat as possible. You can chop the fat and fry it to add to beans and chili.
- Halved
- Quartered, each piece approximately 2.5 lbs. Each piece needs to be treated individually, what I mean by that is each piece has to have it's own measurement of Tenderquick cure based on the weight.
- I always add an extra pinch or so.
"Curing" Step 2:
- Tender Quick (1/2 ounce per pound of meat / OR 1 Tablespoon) for each of the 4 pieces.
- Equal amount of brown sugar.
- Mixed Brown sugar and Morton's Tenderquick (Cure)
- Ziploc bags with bags cuffed, (this idea comes from my good friend Bear, thanks dude)
- Place a little of the Cure in the bottom of the bag.
- Place the loin inside carefully.
- Place some cure on top of the loin. Turn on its side and pour the rest of the cure on the side facing up.
- Uncuff the Ziploc bag and seal.
- Work the cure into the loin real good, making sure to coat the entire thing.
- Once the loin is completely coated with the cure, open a small area of the Ziploc bag, fold the bag and loin tightly, forcing out as much air as possible. Reseal the Ziploc bag, this will help the meat cure once moisture is pulled out by keeping the liquid in contact with the loin.
- One Loin down 3 to go.
- Place the loins in a dish just in case of leaks.
- The loin will cure in the refrigerator for 10 days at 37*/38* Curing times: You should figure 1 day cure time per ¼ inch from center of meat out. In other words measure the total thickness of the meat and divide by 2. Divide this result by 0.25. The result of this is the minimum number of days suggested to cure.
- Note, most folks add an extra day or two, this insures a cured product.
- After a few days I remove the pan of loins, at this point there is a good bit of liquid, loins are massaged a bit then placed back in the refrigerator.
- After 8 days, loins are massaged again, I don't know if this is necessary because the loin is now in a brine of sorts, but most folks do rotate and flip almost every day.
- After 10 days of curing, it's time or the next step.
"Soaking" Step 3:
- Loins are removed from the refrigerator.
- Remove the loins from the Ziploc bags, rinse the loins then soak in ice water for 1 hour, changing the water once. This will draw out the salt.
- Place a wire rack on top of a dish. Pat meat dry, slice a piece off each for the fry test, some like to slice the middle, I slice from the end.
- Do a fry test using a few drops of oil or butter, slice a piece from the middle (optional) and the end. If too salty, soak another half hour in fresh ice water.
- These had just enough salt taste, not too much, my Wife said there was just enough salt taste, so at this point they are removed from the soak.
- Once you are satisfied with the fry test, season with your choice of spices some like to use onion powder, garlic powder, & black pepper (this is optional), place the loins on the wire rack on a pan and then place into the refrigerator UNCOVERED overnight to form a pellicle. These were naked.
- The next day remove the loins from the refrigerator.
"Smoking" Step 5:
- Open the GOSM door and fill the water tray halfway with hot water. Add your desired wood (I used Cherry)
- Preheat the smoker to 170°, lower if possible.
- Add your preferred glaze and spices, (optional)
- Honey, Brown Sugar & Cracked Black Pepper (Top)
- Sweet & Sour (Middle)
- Pineapple glaze (Bottom)
- Sweet & Sour (Top Left)
- Plain (Top Right)
- Pineapple glaze (Bottom Left)
- Honey, Brown Sugar & Cracked Black Pepper (Bottom Right)
- Honey, Brown Sugar & Cracked Black Pepper
- Sweet & Sour
- Placed loins in the GOSM at 170° with water in the water pan, cherry wood and all vents halfway closed. Choose your wood.
- Place the loins in the preheated smoker, smoke for 3 hours or so then bump the smoker temperature up to 180° smoke until an internal temp of at least 142°. Cooked pork is done at 145°, however with carry over heat you should reach 145°, if you are concerned take it to 145° then remove from the smoker.
- Pulled at 142° checking with a Thermapen in the thickest part of the meat.
- Removed the loins from the smoker, and foiled until loins are cool enough to be handled by hand.
- The following pictures are from spent wood from the smoke, you could smell it but not see it, I refer to this as Invisible Smoke.
"The Rest" Step 5:
- Once the loins have cooled about an hour, place in the refrigerator for 48 hours minimum, to mingle the flavors. We are now going to refer to the Loins as Canadian Bacon.
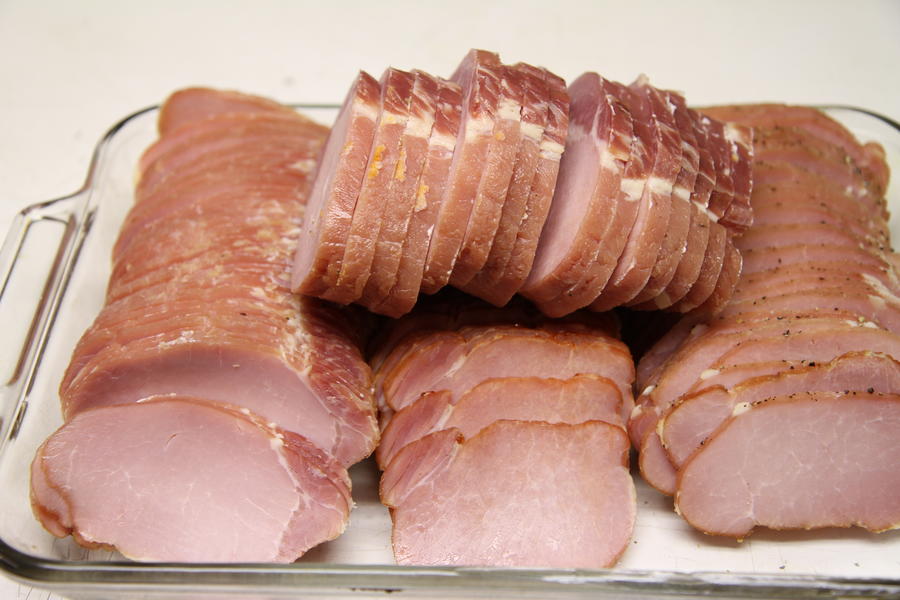
- After 48 hours remove the Canadian Bacon from the refrigerator and slice into 1/8" thick slices, 3/32" if you like them thick.
- You can slice them 1/2" OR 1/4" thick for ham steaks that fry up nicely for dinner. I tried slicing thin like lunch meat and did not like the results. I love my slicer, it's an "Oldie but a Goody".
"Seal" Step 7:
- Seal in Vacuum Seal bags, date and freeze.
This is what I ended up with
- Plain - two packs of six 1/4" steaks
- Honey - two packs of fifteen 1/8" slices (the one in the above picture is 14 slices, must have been the beer)
- Pineapple - two packs of fifteen 1/8" slices
- Sweet & Sour - two packs of fifteen 1/8" slices
- Mixed - One pack of twelve 1/8" slices, Mom
The RTE in the upper right hand corner of the vac-seal bags stand for Ready To Eat.
I figured I would play it safe because I am also working on Buck Board Bacon that will be marked RAW.
"Serve" Step 8:
You are going to want to try your Canadian Bacon out, so leave some out for frying to make some sandwiches. After all, you have been waiting nearly 2 weeks.
- Use a pat of butter or bacon grease and get some brown on those slices. I usually like to eat the pieces that come off the pan last, they get all that caramelized stuff and brown bits on them.
- Now fry up some eggs.
- Toast a Bagel or Muffin, throw a slice of cheese on there and top with a fried egg.
- Throw on some fried Canadian Bacon and a bit more cheese and add a bit of your favorite hot sauce.
- Slice that bad boy in half and enjoy.
- Mmmm, Mmmm, the egg is done perfectly for me. This is what I call, "Comfort Food".
Well it was definitely a total success, the whole family liked it, I am glad we opted to keep the saltier taste and not soak any longer.
Our family is big into Breakfast for dinner, if you know what I mean!
After the rest, the only difference I noticed in the meat was that it was sweeter and a bit firmer.
Out of the three flavor profiles, the one that was more noticeable was the Honey, Brown Sugar and Cracked pepper, it wasn't better than the others but did acquire more of the outside flavor.
This is definitely worth doing, the yield after trimming, testing and picking, I would say would be at least 8.5 pounds from the 10lb loin.
BEAR VIEW

Thanks for Tuning in.
Last edited:


