Stumps Clone Build

  • Some of the links on this forum allow SMF, at no cost to you, to earn a small commission when you click through and make a purchase. Let me know if you have any questions about this.
SMF is reader-supported. When you buy through links on our site, we may earn an affiliate commission.

leadssled

Newbie
Original poster
Apr 9, 2009
26
12
Knoxville, TN
I've been asked to post a thread about my smoker build, but I am not sure what "Build" section in most appropriate. So I am going to put it here in the "Other Builds" section. If it fits better somewhere else, perhaps a moderator will relocate it to the proper place.

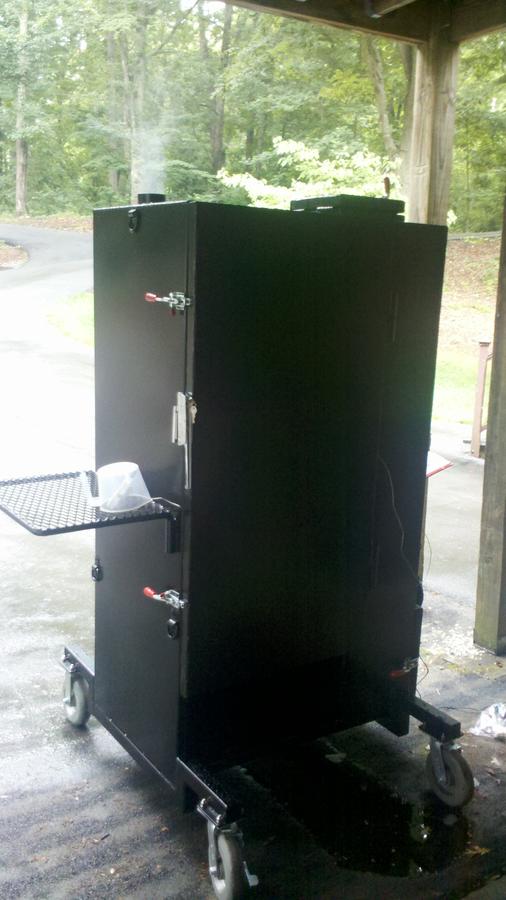
I joined this site and made a few posts before the forum crash, but have not been active since. Now that my big smoker is operational, hopefully I will make an appearance more often. I've been smoking on a small Brinkman charcoal water smoker since about 2007 or so. Back in early 2011 two friends and I decided to build our own smokers. I am a mechanical engineer, one is a machinist/tool maker, and the 3rd is a KCBS certified BBQ judge. We decided that we wanted a gravity-fed charcoal cabinet-style smoker, so we studied a bunch of "Stump's Clone" builds shown online and took what we thought were the best features and put our own design together. This thread will detail how we got to the end product.

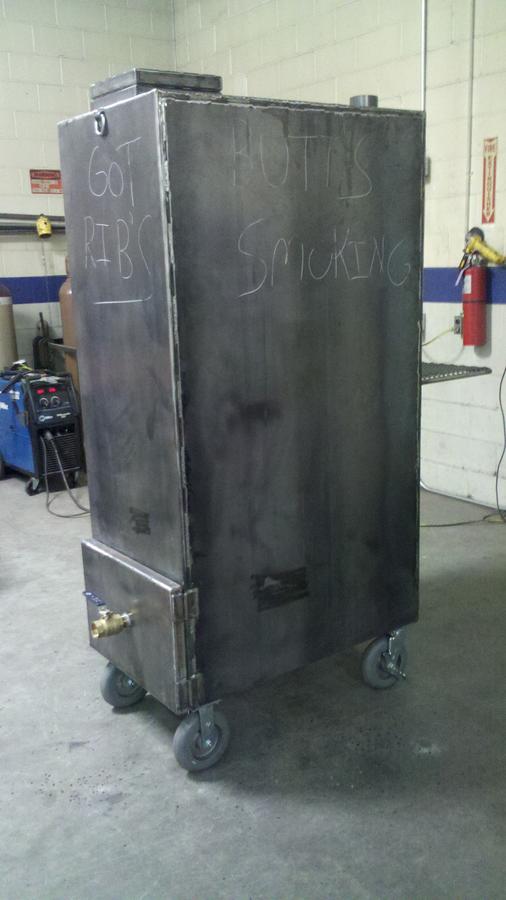
This was not a "hurry up project". We started in April 2011 and worked on it when we had time - busy lives. It was finally finished and at home for my first smoke on 6/10/12... so more than a year in the build of these 3 identical smokers.

I didn't take photos of the raw material or tubing/sheets cut to length/size. We all have seen that before. So my pics start with som of assembly already done. So here are the details:

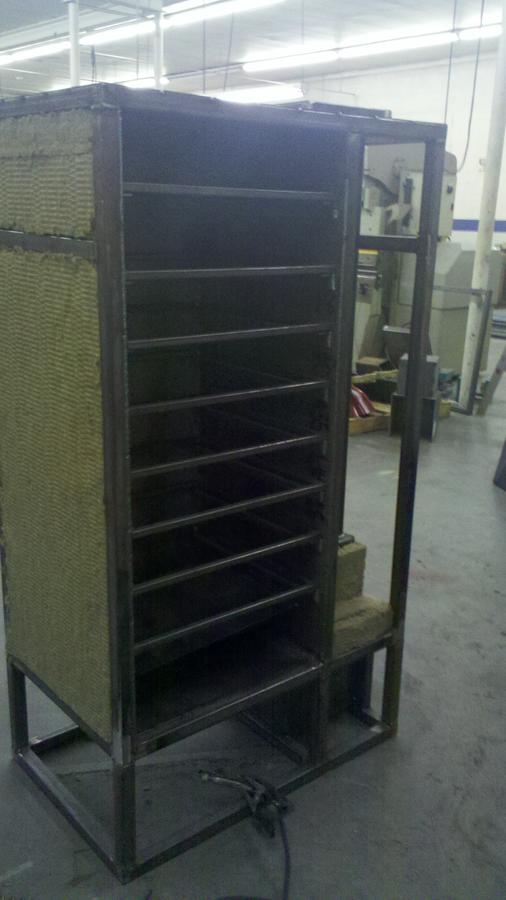
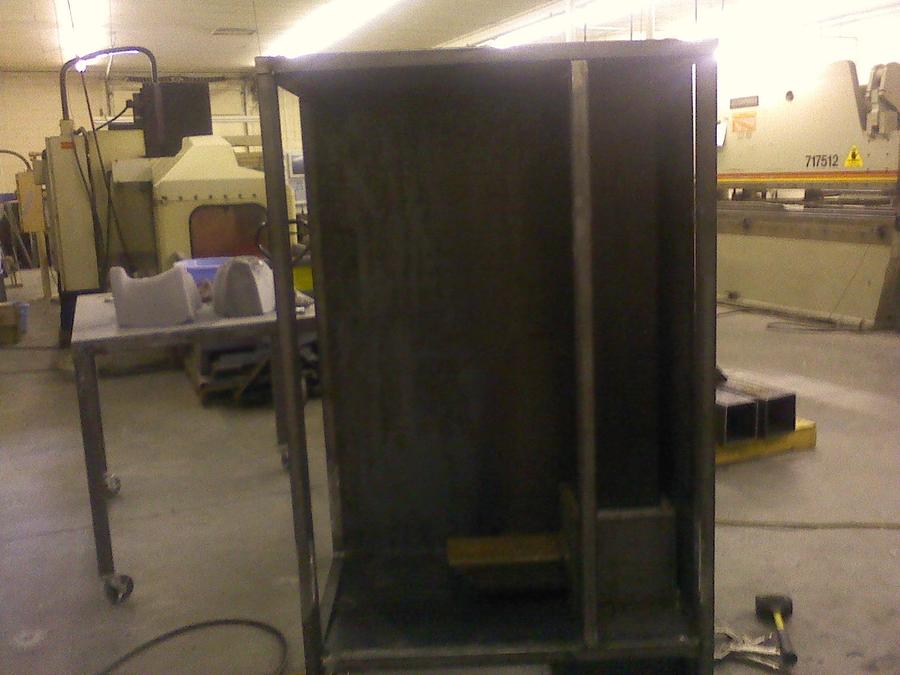
First of all, these pics were not taken in my garage. We all work together at these smokers were constructed in our metal fabrication and machine shop at work... after hours of course (well, mostly after hours).The first pics show the charcoal chute and firebox already constructed, the framework already welded, adn some of the inner sheet metal skin welded on. But you can still see the basic construction and design at this stage. Many of these are just crappy cell phone pics, so please forgive the quality of some of the photos.

The first pics were taken around 7/7/11.


The charcoal chute is 8"x8" and the heat transfer tube is 4"x6". The firs box is 10'X10"x10".

All of the tubing is 1-1/2" square and sheet metal is 14 gauge.


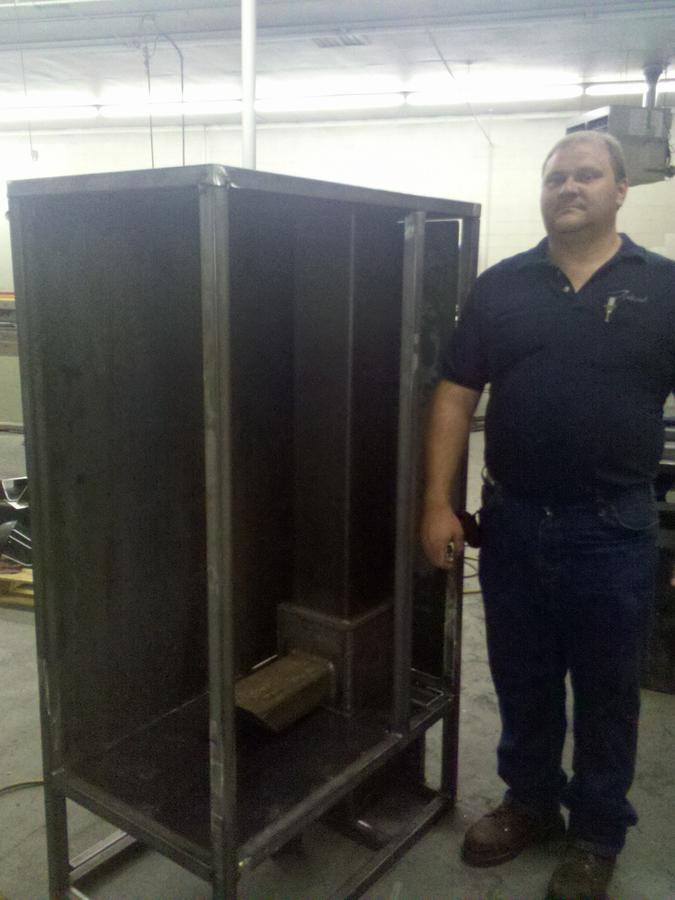
This pic is to show scope of size. Randall is about 6'4" tall. And this is before wheels/casters

have been added. We were targeting the build height suh that it would roll through my garage door.


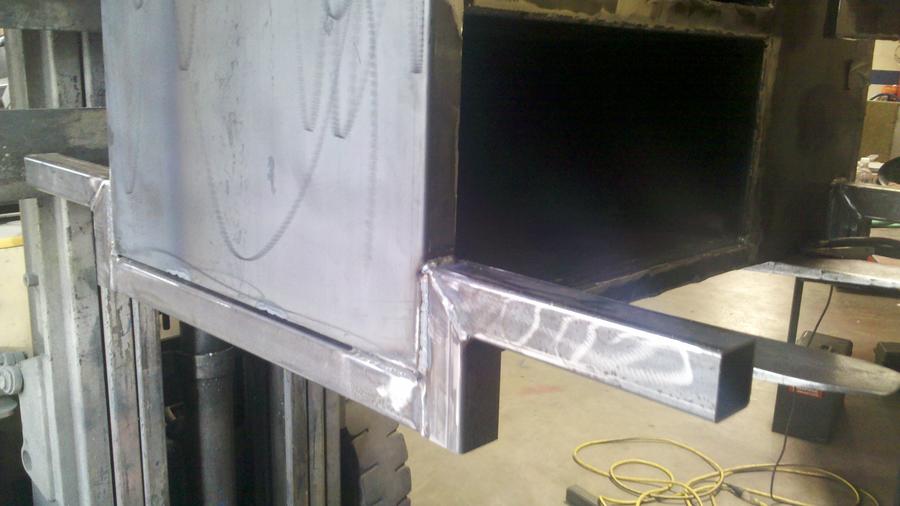
This is the fire box with the heat tube that delivers heat and smoke to the cooking chamber.


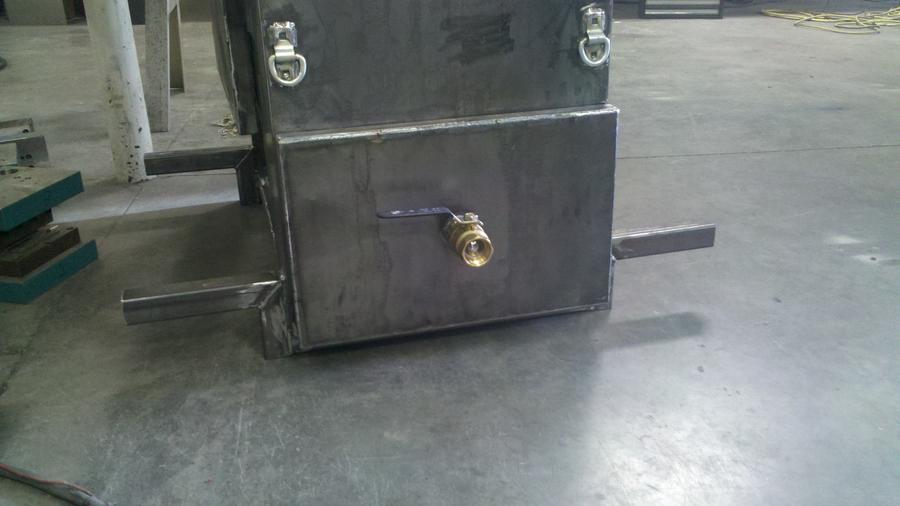
ThiThis is the ash trap under the fire box.


Opening for the charcoal feed chute on the left.The outlet for the flue on the

cooking chamber has not been cut yet.
 
Last edited:
  • Like
Reactions: bigjohnsbbqnv
Now we are around 8/4/11. These pics were taken during a "heat test". We lit a charcal fire in the fire box and used thermocouples in multiple areas of the cooking chamber to see how much temperature variation there was. There was no insulation, no gasket on the cooking door, and the doors were only clamped to the front of the cooking chamber and fire box. Even with less than optimal conditions, we only saw an 11 degree variation in temperature overall areas of the cooking chamber. With gasketing and insulation, we expect this to be less than 5 degrees on the finished smoker.


With the heat test deemed a success, we started to insulate and finish enclosing

the framework. These photos were taken around 10/11/11.


As mentioned earlier, we used 1-1/2" square tubing for the frame, which

allowed us to use 1-1/2" thick semi-rigid mineral wool insulation. It is

rated at 1200 degrees F and we purchased it from McMaster-Carr.


Last edited:
Were making a little more progress now. It is around 11/22/11 on the calendar.We're still adding

insulation, the outer skin isn't on yet, but we are making frames for the shelves..


1/2" square tubing is used for the frames for the food cooking racks.

The racks are spaced 5" apart.
 
Last edited:
Then busy lives interfered again. We took a long break for the holidays and early winter.

The next baatch of photos were taken around 3/1/12.


The outer 14 gauge sheet steel skin has been added.

In this pic, the entire smoker has been gone over with a grinder to remove sharp edges, smooth

out some of the welds, and remove welding slag. Then all of the flat surfaces were made smooth

using a DA sander.


A utility shelf has been as well. The shelf is sturdy enough to sit on and is easily removable.


Heavy duty greasable hinges have been used on the door.


Heavy duty mesh has been welded to the cooking racks and the sharp edges removed with a grinder.

The short L-channel above each shelf is there to prevent the shelf from tilting forward and falling

out when slid forward.


This is the ash box that will reside in the ash pit underneath the fire box.

The V/U-shaped cutout is for access to light the smoker using a propane

"weed burner" torch, and to add wood chunks for smoke.
 
Last edited:
The racks are 5" apart - plenty of room for 3 racks of ribs per shelf. That is 24 racks of ribs, maybe more.

Every other rack can be removed to make room for taller meat products such as turkeys and larger boston butts.


In this pic you can see that a diverter plate has been added above the heat chute.

It has 2 functions: 1) distribute the heat more evenly, and 2) prevent grease from dripping

onto the hot chute and causing a fire. The surface under the heat chute is sloped with a

drain hole at the lowest point. All grease that drips onto this grease pan will drain into

a can or pan that will be placed in the bottom area under the cooking chamber.


The angle plate on the door ensuresthat any grease dripping down the inside

of the door will be directed into the grease drain pan and not contaminate the

fire-rope gasket (gasket not added yet).


This is what happens when you leave you projects unattended in a machine/fabrication shop. :)


On 3/5/12 we test fit the wheels/casters. It was quickly apparent that this

arrangement was too unstable. The base for the wheels was just not wide

enough to be stable given the height and weight of the smokers.

Back to the drawing board....
 
Last edited:
We decided to add stepped "outriggers" to both widen the wheelbase and to lower the overall

height of the smoker. This would make the smoker more stable while rolling. It is now 3/23/12.


Now that the the wheel/caster "outriggers: are added to the bottom of the smoker, it is

ready to go to the powder coating shop.


After another lull in the calendar, the smokers came back from the powder-coating shop.

We decided to go the extra mile and have the smokers powder-coated rather than painted.

It is a great, functional finish that is much more durable than paint. The owner of the

powder coating shop that the machine shop uses regularly did a "buddy deal" on coating

these smokers and did them at cost. So it really didn't cost THAT much more than paint.

I chose a "high heat" black that is supposed to be good to 800 degrees F.


The following pics were taken in late April 2012. The powder-coating is done and both the toggle clamps

and slam latch have been mounted.


In these photos from 5/25/12, the smoker is essentially finished except for adding

the fire rope gaskets on all of the coal chute. fire box, and cooking chamber doors.

The plan is for me to get the smoker home and take care of that there.


Last edited:
It is now 6/3/12 and the smoker is now home. The fire rope gaskets have been installed

and it is time for the innagural smoke.


Remeber the design goal to roll through my garage door? Here is the clearance.

It clears the garage door jamb by 3/4" when the charcoal chute door toggle

clamp is in the "down" position. Good enough!


For the first smoke, I am doing something relatively short and easy - pork ribs.

The smoker was first seasoned with vegetable oil on all of the internal cooking

chhamber surfaces and holding the temperature around 350-400 degrees

for at least an hour. Then the temps were backed down to 225F for the rib smoke.


There's no sense jeopardized hundreds of dollars of meat on the innagural

smoke on a brand new smoker (I'm a bit paranoid :) ). So I only smoked

3 racks of ribs to get started - of course they are covered with yellow mustard

and Jeff's rib rub  recipe.


I use an IQ110 for smoker temperature control. I use a couple of Maverick wireless

thermometers to verify the IQ110 cooking chamber temperature setting and to

monitor the temperature of the meat.


It was raining and the IQ110 instructions cautioned to keep it dry, so I fashioned

a "high-tech" rain sheild from a piece of cardboard.


The smoke is finally rolling!


The final product was some damned good ribs. I think we can call this smoker

build a success.


The end result is that we have a new family heirloom. This thing will last forever.


Some final stats: The cooking area is 24-1/2" wide, 22" deep, and 43" from the bottom

shelf to the top of the smoker. I can smoke a butt-load of meat in here. Mission accomplished.


Total investment in materials was just under $1350 including $250 for the powder-coating.

We believe the smokers weigh in the neighborhood of 900 lbs.


I hope that you have enjoyed my smoker build thread. This was a fun project!

If you are interested, I have posted a "Q-View" thread of a much larger smoke here:

http://www.smokingmeatforums.com/t/126233/big-smoke-multiple-meats-with-q-view
 
Last edited:
congrats!!! looks great. How well does the pitmaster IQ perform with that? Being that its so big i would've thought that it wouldn't be able to keep up. Reason I ask is i'm in the middle of a build myself and am considering one. But well done though!
 
 
Thanks everyone!
How well does the pitmaster IQ perform with that? Being that its so big i would've thought that it wouldn't be able to keep up. Reason I ask is i'm in the middle of a build myself and am considering one. But well done though!
 
The IQ works great with this smoker. I was a little concerned about that in the beginning too since the IQ uses only a 10 CFM fan. But with the insultaed cooking chamber, this smoker is so efficient that very little airflow is required to maintain temperature. Once up to temperature, I am only buring between 1 and 1-1/2 lbs. of lump charcoal per hour to maintain 225F... and that includes opening the door ebery 60-90 minutes to mist the meat. Because there is so much mass, it does take about 90 minutes to reach 225F from a cold start. But the IQ has no problem at all maintaining that temperature. It is surprising how infrequent the fan runs when cooking.
 
Looks great !

I am just starting a stumps clone build. I ordered the steel Friday and will pick it up this week. ALL pieces of steel is going to be cut to length so when I get it home I can start welding her up.

Are there any things that you would change to the smoker now that you have it running?
 
The only thing that comes immediately to mind is that if doing it over again, I would maybe like to leave more spacing between the doors and the frame when the doors are closed so that a thicker "tadpole gasket" could be used. Having a recessed channel for the tadpole poertion of the gasket would be even better, but would require additional fabrication. We've had a little bit of nuisane with keeping the gasket glued to the door. Each of us has re-done our gaskets at least once. But overall, the smokers have performed very well and I wouldn't make major changes.
 
Thanks for the props, guys! I've been very happy with it so far.
thumb1%20copy.gif
 
SmokingMeatForums.com is reader supported and as an Amazon Associate, we may earn commissions from qualifying purchases.

Latest posts

Hot Threads

Clicky