My first UDS build, a work in progress......Now with QView!

  • Some of the links on this forum allow SMF, at no cost to you, to earn a small commission when you click through and make a purchase. Let me know if you have any questions about this.
SMF is reader-supported. When you buy through links on our site, we may earn an affiliate commission.

freakynorm

Meat Mopper
Original poster
Aug 4, 2012
181
35
Mount Vernon, Washington
I have never done anything like this before. I have never done any slow smoking or BBQ before. I have hardly any tools and I am also completely mechanically declined as opposed to inclined as some people are.

I was originally going to buy a cheap offset smoker, then I found sites where people were modding them to make them even better. I figured it would end up costing me $200 for the smoker and another $100 or so in parts. Then I stumbled upon a UDS build thread and thought this would be a cheaper alternative and it looked like a lot less hassle as far as cooking went. It seemed like the offsets needed a lot of attention and the UDS was more of a set it and forget it type deal.

Here's my build so far. Comment, suggestions, criticisms are all heartily welcomed. I really want to do a good job on this and turn out some delicious comestibles.

It took a few weeks to find a drum. I ended up getting it from a organic farm out in BFE. It was a closed top drum with a 2" bunghole and a smaller bung, not sure how big.


Since I didn't have any tools to speak of really, I went and picked up a 4 1/2" angle grinder along with the appropriate safety equipment and some accoutrements to facilitate the build as well as the needed parts.


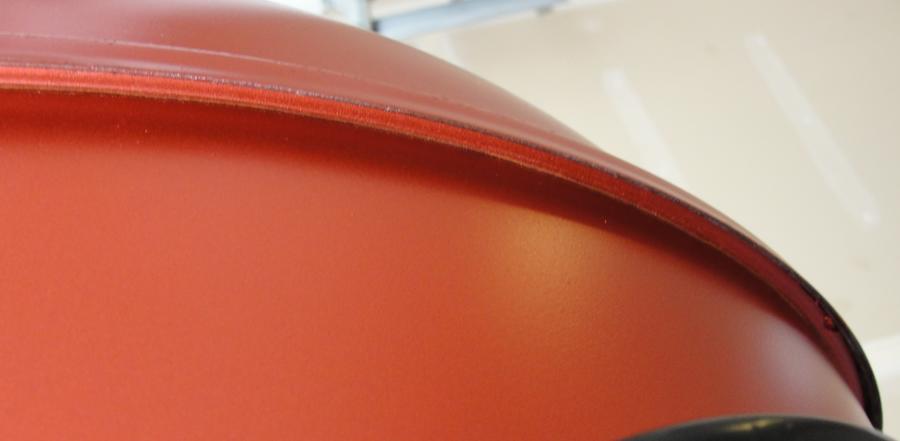
First I had to get the lid off. So I grounded the edges down to separate the lid.


The drum had contained saffron oil so I was hoping for no liner but I was wrong. I took a wire cup brush and tossed it on the angle grinder and it seemed to come off without too much effort. Unfortunately we're not allowed to do a burn barrel here and I live a block from the fire department so I didn't feel like risking it. So my neighbor is going to let me use his weed burner to blast it a bit.

.


I didn't really like the way the lid fit on the barrel though. I ended up scoring a 22.5" Weber grill off Craigslist for $30. The Weber lid is almost a perfect fit, I just need to grind the sides down just a little bit and it will be a near airtight fit.


I wasn't able to drill holes or anything yet because somehow my tape measure went missing. So instead I worked on the charcoal basket. I picked up a 24x24" sheet and just cut it down the middle to keep it nice and easy. I mounted it to a 13.5" Weber charcoal grill using bolts, nuts and fender washers to hold the expanded metal together and used stainless steel zip ties to attach it to the grate. Then I put on some longer bolts to elevate it and will be adding a cheapo pizza pan as an ash catcher.


I had a question on this part though. The actual grate is about 3.5" off the ground. I was going to put the pizza pan on and have it be about 1" off the ground. Is that better so that air can circulate under the ash pan as well or should I trim the bolts to get the grate a bit lower? Or does it make no real difference? I was reading that I should mount the cooking grate so it sits 24" up from the charcoal grate for the best results, is that the general consensus these days?

After that I made a little wiggle rod basket pickeruper and called it a day. That's enough work on my day off.
icon_lol.gif


Last edited:
You will love how easy the UDS is to keep the temp. you want all day long
icon14.gif


My charcoal Basket will last 16+ hours (thinking it will go past 20 hours but never had to let it burn that long)

first time you use it. fill the basket with unlit coals then all you need is about 10 lit coals to put on top.

I have found out that the temp could be 50 degrees differents from one side of the grate to the other.

then I put a water pan under the grate and the temp was within 5 degrees from one side to the other.

If you have any questions just ask on here (SMF Folks love to help out) or you can PM me.
 
For some reason, most of the hardware places around here have a very limited selection of stainless steel fastener products. Do you think zinc plated is ok? Should I hit the pieces with a weed burner then a wire brush just to be safe?

Also, I know galvanized steel is a no-no inside the barrel but I was thinking of putting a elbow joint and pipe to bring up the ball valve, would it be ok to use galvanized on that part? I would think so since it's not getting heated up at all but I am such a newbie to any kind of handyman type work, I thought I would ask.

Any suggestions on where to pick up high temp primer and paint? I have looked at auto part stores, Walmart, HD, Lowes and no one has it.

I finished the charcoal basket today and should be picking up a weed burner later today or tomorrow to burn out the drum, then wire wheel it clean for priming and painting.


You can see my helper Patton peeking in through the background in the above shot. Of course he has informed me he is willing to be a trash compactor for any leftovers, fat chunks, bones and juices. So helpful.......

 
So I snagged some pallets and did a burn out today.


The liner is burning off but not completely.


Still the heat should make it nice a brittle and it will come off a lot easier once I put the angle grinder to it using a knotted wire wheel.


While the barrel burned I went and stripped the paint and rust off the Weber kettle lid. I then primed it with VHT Red Oxide high temp primer and painted it with VHT High Temp Engine Enamel Fire Red.


Here's a close up. I really like the color on it.


Once I paint the barrel, it's going to look like a giant fire hydrant. Between the hydrant looks and the smell of charred smokey meat emanating from it, I think when my dogs see it in action they will be in heaven. Carl sat and watched the barrel burn as he day dreamed of the delicious food stuffs that would be produced in the near future.


Next build I will definitely be shelling out for a new unlined drum. The burning out and getting rid of the liner is such a hassle. It's worth the extra money to just not have to bother with it.
 
I know absolutely NOTHING about building a UDS, but I am damn good with dogs!

Patton and Carl can come to live at my house with Molly (min. dachshund) and her cat.

Looks like you've got your arms around the UDS, so-to-speak.
 
Last edited:
I primed and painted the barrel. Not the best job obviously but not too bad considering I completely suck at this type of stuff. Tomorrow once the paint is set up, I will add on the screws, valves and such.

I put a coat of olive oil in it to keep the rust away. I was thinking maybe even trying my first fatty to help season it. Should I let it season and smoke a few hours before I put a fatty on it or can I do it from the get go?


I finished it up this morning. Got other errands to do today so wont do the maiden smoke today. Definitely this weekend though.

The finished product....


Just some basic handles and a cheapo thermo for the moment. Amazon will be delivering my insta read and Maverick thermos later today....


I installed a nm/se conduit for the thermo probes....


Got the basket loaded and a few briqs in the chimney for the minion method.....


Got a nice tight fit on the Weber lid. The barrel warped a bit on burning it out, so did some more grinding to get it nice and snug....

 
Dumb question, but I've got a UDS build on the horizon so this is something I want to know.  How do you clean the ashes out of the bottom of the UDS after the smoke is done?   Shop vac or something?

Also, what is the point of the screw caps on the bottom?  I get the ball valve for oxygen control and therefore temp control.  But if you're just going to cap and seal the other screws on the bottom, what's the point?

Good looking smoker though.  I'm looking forward to building my own.
 
I've read some people use a ash catcher pan underneath the charcoal basket like I did. That should probably get the majority of the ashes. I've read where people rinse em out and reseason em. Some even just tip it over and pour it all out.

The screw caps are for getting up to temperature quicker than just one ball valve, also things like chicken are best cooked at a bit higher temp, so with multiple valves open you can run at a higher temp consistently. I am still new at this stuff but that's how I am coming to understand it all.
 
Great job Freaky! That is one nice looking UDS. And by the way... you don't give your talents enough credit.
 
Thanks, Wjordan.
biggrin.gif
The real test will be when I try to cook something tomorrow. Gonna start with a sausage fatty I think. Get some spicy Italian sausage and fill it with some sauteed peppers, onions, mozzarella and a lil marinara sauce. Then Sunday I am going to try some St Louis spares. I got my instaread thermo and the Maverick 732. Going to read up on how to use that sucker tonight and bust it out tomorrow.
 
 
Got it fired up for some seasoning and gonna cook a fatty on it in a lil while. I let it get up to 450 for a while, 2 intakes open, ball valve wide open. I was getting nervous because I was getting the ugly white billowing smoke for a while. So I read up on things and it said it could take a while for it to mellow out and sure enough after 20 mins or so it did.

I am going to need to build a shelf and/or get a card table or something to set everything on. Other than that, I am pleased with the results so far.

I am going to run to the store to buy my fatty ingredients then grill it up when I get home. Then tomorrow, gonna do some spares.


I got the Maverick set up in there, along with the cheapo probe thermo and a cheapo grate thermo. The probe and Maverick are about 2 inches from each other, with the cheapo reading almost 50 degrees less than the Maverick. Is it ok to use the grate clip that comes with the Maverick? I always thought it was bad to have to probe resting on metal.


Carl was quite puzzled when he saw the varying temps...


Carl and Patton were happy to keep me company as I am learning to fine tune everything...

 
[QUOTE name="freakynorm"]I have never done anything like this before. I have never done any slow smoking or BBQ before. I have hardly any tools and I am also completely mechanically declined as opposed to inclined as some people are.
[/QUOTE]

Great job Freaky! That is one nice looking UDS. And by the way... you don't give your talents enough credit.

Yeah, I was gonna bust his chops, too, for saying he was "mechanically declined!"

Great job, fn!
 
Ok, my first smoke was a success. I've never smoked before, never eaten a Fatty before. I made 2 spicy Italian sausage ones filled with a little marinara, mozzarella, mushrooms, peppers and onions. I sweated out the veggies a bit before adding them in. I decided to do one with the bacon wrap and one without. I tossed a smokey sweet store bought rub on both and tossed em in. No QView of the preparation since I was alone and had dirty hands. :)

I cooked em for almost 3 hours, till internal hit 160. I cranked up the heat the last 30-45 mins to try and crisp up the bacon a bit. I hada few pieces of cherry and apple wood in the charcoal basket full of the regular Kingsford Blue.

Here they are right before coming off the grill....


I used the cheapest, thinnest bacon ever. This is about the only thing it could possibly be any good for. No way could you use it to make BLT's or add it to burgers or morning breakfast. It was almost transparent it was so thin. But it worked nicely for this application. It wasn't super crispy but it was cooked fully and added a good flavor. I was a bit nervous because I don't like to mess with anything when I make sausage and peppers for dinner. But the combo of rub, bacon, and slow smoking was really good. I ended up putting a few slices of each one on a hoagie roll. It was awesome.

I kinda liked the one without the wrap better because, even though it had split due to me overfilling it and the sausage sticking to the wax paper, it developed a nice bark to it. It really complimented the spiciness of the sausage. The wife really loved it too. I went and shared a few pieces of each with my neighbors and they both said it was awesome. My one neighbor was shocked because she said she could see the UDS out of her window and she couldn't believe it was a dingy old barrel just a week ago. She thinks it looks like it was store bought. Success!! :)


Love the smoke ring and that bark. Yum! Can't wait for the ribs tomorrow. I've never cooked ribs before so should be interesting. The rest of these guys will go great tomorrow with some eggs on a toasted bagel methinks. :) I even ate the potato I used for the grill probe lol.
 
completely mechanically declined as opposed to inclined as some people are. This looks awesome. Great job! I have an electric Cookshack. Everyone always love what I cook with that, and now need to make one of these. Did I read correctly you got to 450 degrees. CS would never get that hot. Skin on Turkey or chicken needs more than I can get with the CS.
 
SmokingMeatForums.com is reader supported and as an Amazon Associate, we may earn commissions from qualifying purchases.

Hot Threads

Clicky