Smoker mod Ideas

  • Some of the links on this forum allow SMF, at no cost to you, to earn a small commission when you click through and make a purchase. Let me know if you have any questions about this.
SMF is reader-supported. When you buy through links on our site, we may earn an affiliate commission.

jon thomas

Newbie
Original poster
May 15, 2013
28
10
South East Missouri
Ok  was given an ECB  so took it on its maiden voyage with mixed results.

So with that said, it is time to try and perform some MODS and get it tuned in the best it can be.

I do know there are hundreds of messages and videos on moding ECB's

that is helpful and gives me ideas.  but  most say what they did and not so much why - what they generally smoke and how it helped that process or what they would do different if they where to mod it again.

yes I am a bit of an information junkie and  I like picking brains to get a compilation of the best ideas.

so first obsearvation

This unit needs sealed

it billows smoke from around the door

from most of the screw holes (very minimal)

and most of the corners

For the screws I figure deal with it or maybe add a heat resistant washer that fits the screw snuggly

for the corners I am wondering if I may be able to get away with just filling the gabs with a liquid metal like JB weld?

and for the door I am not sure what to do to be honest.

So anyone who has attempted these issues I am intrested in good solutions or what you may have done diffrently if you had to do it again.  the why is self- explanitory I want to keep the heat and smoke where it belongs as much as possible

Thanks for any information you can provide.

Jon
 
I was hoping for  a few ideas by now maybe --  Not sure if the smoker I have is considered and ECB  after reading the newsletter on modding them.

So here is a stock Photo for now  (storming outside , I will get pics of mine and what I have done when it clears up a little)


What i have done so far is I added a second temperature gauge above the stock one basicly above the "M" on Brinkman

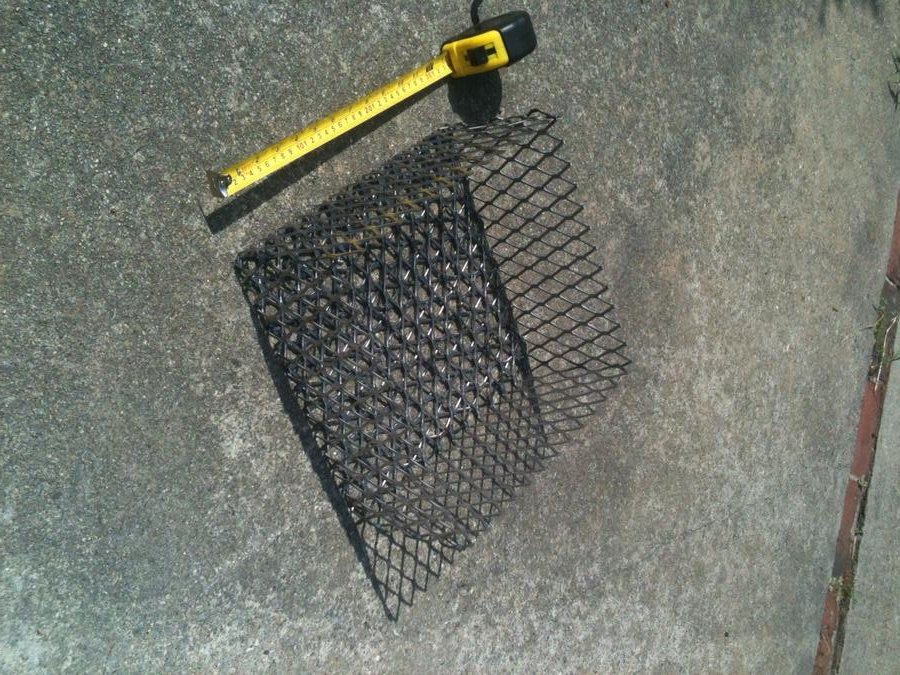
and I cut a piece of non galvanized carpenters cloth and wrapped the edges if it around the edges of the charcoal bowl then pushed it down in  to keep the coals of the bottom of the pan.

looks like the sun is trying to come out for a little bit I will try to get some pictures if it gets a little nicer (We have that storm front that hit oklahoma yesterday starting to move in 
icon_eek.gif
)
 
Well it is still raining here so did not get to much done today

here is the bowl so far


this was done to the opposite side as well


I do plan on doing something a little more permanent for a grate but thought this would work for now

 I also emailed J.B. Weld -  they informed me the original formula once fully cured is non-toxic and NSF  they also said it will with stand constant temps of 500 degrees and spike to 600 for short periods .  So once the rain stops I plan on sealing the leaky corners and any minor gaps in the cabinet seams.

ps. one last thought - would putting 4 small whole in the lip of the charcoal bowl so I could suspend it with s-hooks from its holder to get it a little closer to the air inlets be a bad idea? could do it later and just remove the s-hooks if it was not benefical

thanks for any insights.

jon
 
Jon, morning... and welcome to the forum.....    I think you need more space, under the wire screen, for ash collection....    Charcoal baskets seem to be what is the "new normal"....   Lots of places for air to keep the coal burning.....   Home made baskets can be made to fit any smoker...   Round baskets are make for UDS, (Ugly Drum Smokers).....   The theory, so they work well, lots of clearance under the basket for ash to collect in before the ash plugs off the air flow....  many unlit coals can be put in the basket for a long burn / smoke session...  The minion method makes for up to 20 hours of continuous smoke...   flavor wood chunks can be buried in the unlit coals for flavor throughout the smoke..... The minion method is doable using lump or briquettes.....  

Below are 2 links....   one for the minion method......  the other for making a charcoal basket......  Dave

http://www.smokingmeatforums.com/t/85924/the-minion-method-explained-w-tutorial

http://www.smokingmeatforums.com/newsearch?search=charcoal+basket
thanks for the information  read the link on the baskets  seems easy enough  

the metal used most of the trailer manufactures use

and my kids have worked at most of them  between my house and town (about 5 trailer manufactures) 

so getting scrap next time i head to town should be easy.

 and there is a fabrication shop about 5 min walk from my house  so maybe they will have a press to bend it.

I will read the link on the minion method later tonight when there are less distractions

but for now I am going to go clean up the smoker and seal the leaks I noted the best I can (Nice day Finally)

and I plan on smoking this weekend for Memorial day.  So I want to have the smoker Functioning better than my first try

I will get some pictures today of my smoker and what has been done to it so far then we will go from there with what else I need to modify

Jon
 
OK here are the pictures of my smoker.


as you can see in the top pic  i have added a second temperature gauge

and the bottom pic is just the inside of the smoker

i had planned on sealing some leaks today but noticed a loose nut.  so i took a wrench and screw driver to every fastener.  i bet 85% of them where able to be tightened over 1/2 turn  and when i was done with this most of the spots that you could see daylight threw vanished.  i am just guessing this was originally bought pre-assembled 

so after i fire it up this weekend i will make notes of any leaks..

my next thought is possibly adding two more hinges and cutting the door in two just below the bottom tray  so i can add water  , coals, wood  with out opening the food area...

just not sure yet how i want to attempt it
 
I would have put the new temp guage below the stock one towards the center of the smoker.

Trash the ceramic charcoal bowl and get a grill wok from Lowes or Home Depot for $15. Get you 4 bolts and nuts to put thru the bottom at each corner to make little legs for it to stand on to get airflow under your coals.

Get some high temp gasket seal from Walmart for $5 a tube and seal around all the doors and the temp gauge.

Fill the water pan with lava rocks that you use in a gas grill.

After these few mods your ECB will run a chimney of charcoal at 250 all day long.

I always open one side of my bottom damper fully with the opposite top exaust open so smoke is pulled up and across the body of the chamber. Remember to always point your damper into the wind to get plenty of air to your fuel.

hope that helps!
 
SmokingMeatForums.com is reader supported and as an Amazon Associate, we may earn commissions from qualifying purchases.

Latest posts

Hot Threads

Clicky