Replacing Thermal Cutoff Switch MES 40

  • Some of the links on this forum allow SMF, at no cost to you, to earn a small commission when you click through and make a purchase. Let me know if you have any questions about this.
SMF is reader-supported. When you buy through links on our site, we may earn an affiliate commission.

Victor

Fire Starter
Original poster
Jul 18, 2012
62
16
Houston, Texas
Can I replace the thermal switch on the MES 40 from inside the cabinet, without dismantling the back cover on the rear of this unit?

I need to replace my element, and also thinking about replacing this switch also.
 
No you cannot. There is a shoulder on the switch that "holds" the switch in position. You will need to take the back off to get to the connectors.
 
Ok, thank you sir. Well, if I'm going to have to drill out all of those rivets to accomplish that task, I may as well cut an access plate into the back panel.

And, I suppose I will go ahead and wire up an Auber WSD-1501GPH PID that I've been wanting to do, and make all my trouble worthwhile. I'll utilize the built-in thermal switch with the new controller.
That's the way to go :)

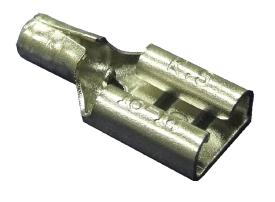
Since you are undertaking this task it would also be very very wise to change all the connectors to hi temp stainless steel ones rather than the cheap easily corroding connectors that are on there.

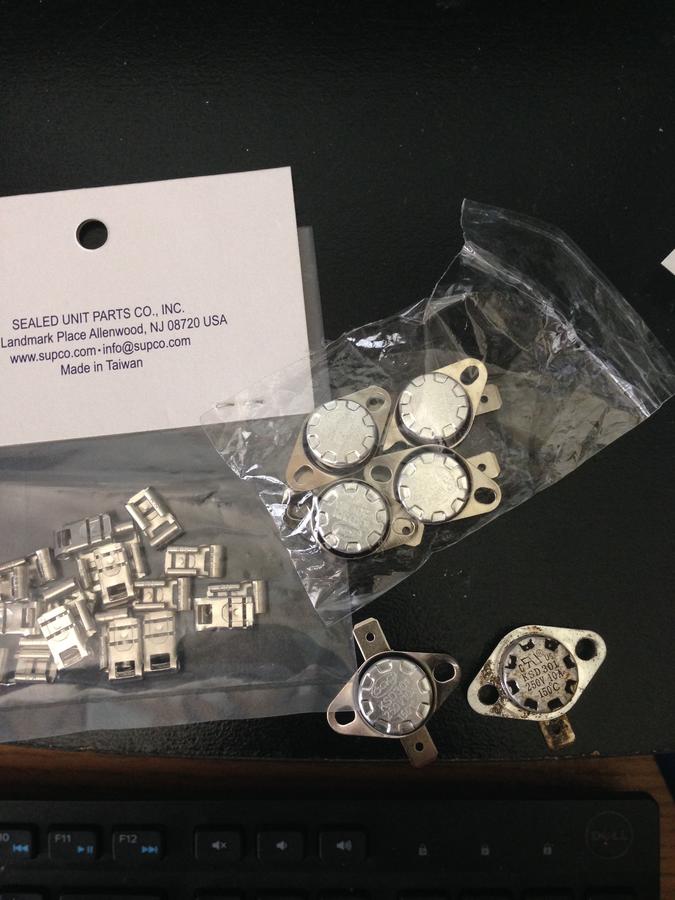
The Supco T1111c are ones to look for that would do the trick for a few bucks :)


Also those safety Rollout Limit Switches (KSD301) can be a little delicate so here is a link to a 5 pack for a few bucks should you damage one while putting on the new connectors:


TIP: Put the new hi temp spade connectors on the Rollout Limit Switch FIRST and then attach the wires to the connectors.  This will help avoid damaging the rollout switch.  My method is to put a connector on each tab.  Then position the switch so that it is standing on one connector while the other is pointing up in the air.  Then take a hammer and start tapping the top connector on and it will start going on while the bottom connector will also start going on, these things are a stubborn fit but MUST be put all the way on. You can then rotate and tap the other connector until they are completely on. 

You do NOT want any wiggle what so ever on these connectors on the tabs or they will cause resistance which will generate heat which will melt down the plastic in the switch and burn it out.

Best of luck :) 
 
I already had those very same links bookmarked from searching this forum. Thanks for the tip on the connectors to the limit switch. I'll certainly utilize that tip.

It will probably be a couple of weeks before I start. I'm very busy with work, and the heat and humidity doesn't motivate me much right now.
I hear you about the heat and humidity.  You have humidity way worse than I do up in Dallas. 

Report back when you get everything going :)
 
Ok, thank you sir. Well, if I'm going to have to drill out all of those rivets to accomplish that task, I may as well cut an access plate into the back panel.

And, I suppose I will go ahead and wire up an Auber WSD-1501GPH PID that I've been wanting to do, and make all my trouble worthwhile. I'll utilize the built-in thermal switch with the new controller.
When I do mine I think I'll just measure the location on the inside of the smoker and find the location on the back of the smoker and dremel cut a 4"×4" access panel without removing the entire back and may use the wire between the element and snap disc and terminate the outside power cord hot to the other side of the snap disc or run both the power cord hot to the snap disc and the hot from the disc to the element both together on the outside back of the smoker. As long as the terminated wires are covered. I'm making this as simple as possible and accessible for future dilemmas that may arise.
-Kurt
Dr. K, that's exactly what I did when I rewired mine. I used a dremel to make a access panel to the snap disk and used the existing wiring between the snap disk and the element. I also used the existing wiring between the heater element and the bottom panel. Pics of the mods can be found here.

http://www.smokingmeatforums.com/t/260975/its-alive-the-auber-masterbuilt-hybrid-the-frankenbuilt
 
Hi...I associated my Fireboard with a cable I made with a 2.5mm barrel plug toward one side, and a JST type connector on the other. That way I can return to stock as simple as unplugging the fix link and stopping back in the MB link.

The Fireboard will detect a temp drop when you open the top, and will kill the fan for a while that you set on the F/B.
 
SmokingMeatForums.com is reader supported and as an Amazon Associate, we may earn commissions from qualifying purchases.

Hot Threads

Clicky