
I trust everyone had a great day.
Its been a busy few weeks.
My goal was to complete this project by the time our youngest son got out of the Marines. It was complete, but due to weather we celebrated this past week-end with a party. 13 pizzas and a great time with our closest friends.
Before I begin, I will not give a complete details rundown like the smoker. I got these plans from a "mate" for a donation of 30.00. His website is Traditional Ovens. A lot of info on his site, but for the donation, he'll send you about 3000 pictures of 3 different builds. He also provides you with detail specs and material list. My rundown will be a brief description. I only feel it fair to the gentleman I got the plans from. If you happen to have "The Bread Builders" book, it is very similar in every way. I do better with pictures then a book, that why I chose to give $30.00.
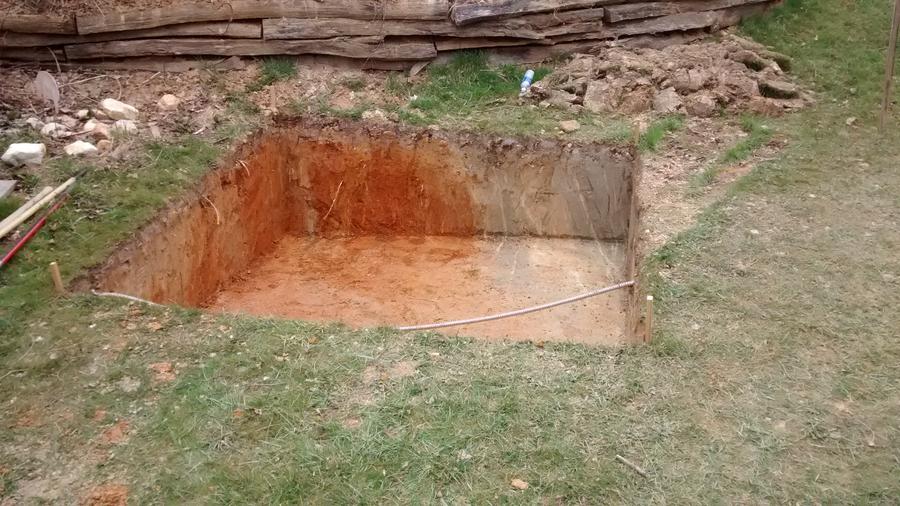
It begin with a square hole, 1/2in. rebar on a 1 foot grid.
Poured 10in. of concrete into the hole. You may ask, why so much concrete. The footing is the one thing that can't be fixed if it fails. My rough guess of the weight of this oven to be around 6000 lbs. Over kill maybe,but my footing will not give way.
Ok Dave, another perfectly square footing. Dug most of it with a square point shovel if that tells you anything as to how soft it is. Not a good mix of earth here. One reason why the footing needs to be thick. Soft on one side, hard on the other.
Well, it all starts with a hole in the ground. For me, the bottom of the footing has to be 16 in. deep. The conduit is the power going to the smoker.
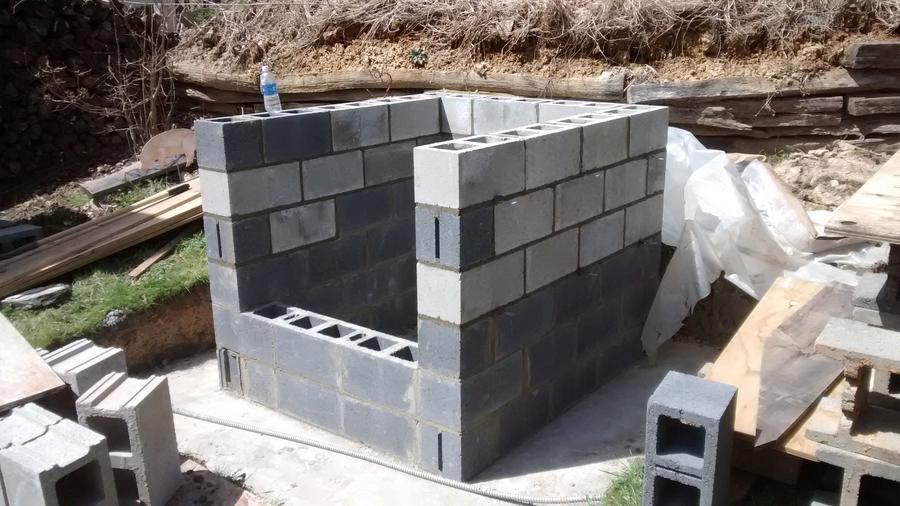
Footing poured and block are complete. Ran short on block so I had to go to the local box store and get a few more. All they had were the heavy ass concrete block....
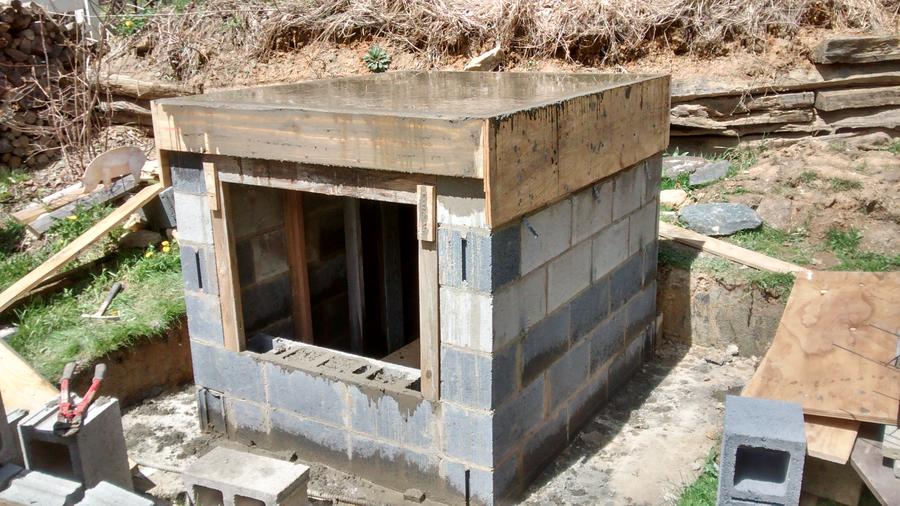
Pouring of the top. As you can tell I build knock down supports under it till it sets. I left them in until I was ready to start the brick. I used simple tile board for the base to pour on. It worked well, but I did hold my breath for a few hours. About 1 yard of concrete for the top.
I thought I had a couple pictures of the hearth being laid. I was wrong. Here, my forms are in place to pour the outer edge so I can start the dome.
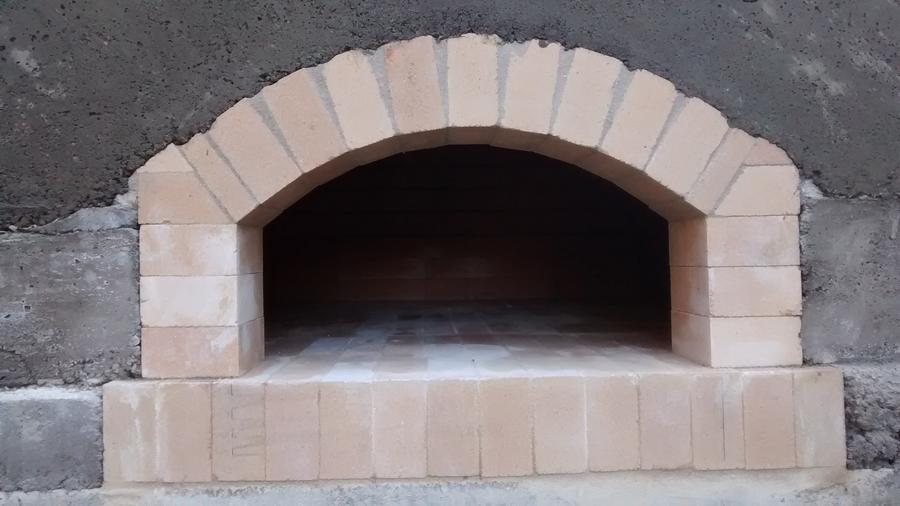
Here you can see the hearth. They are laid side by side. No fire clay involved.
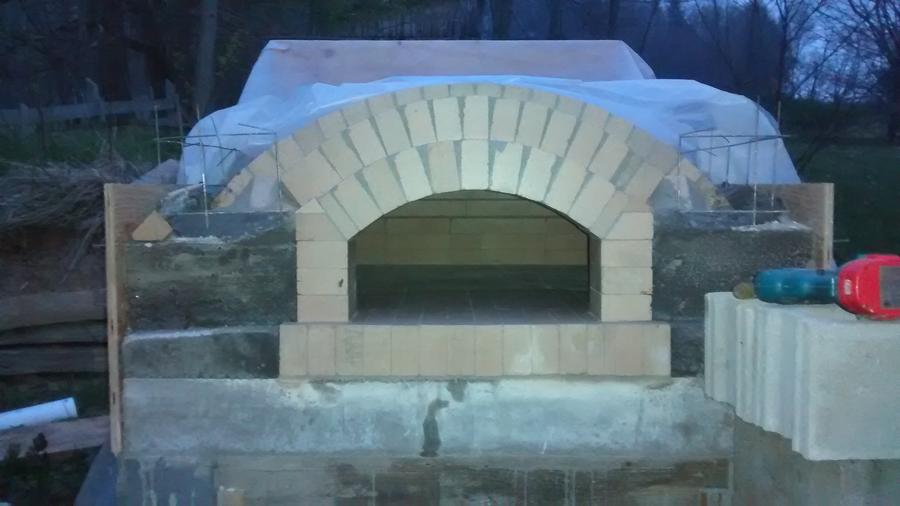
They arch has begun. Not perfect, but it works. All points touch, only fire clay in the open part of the joint.
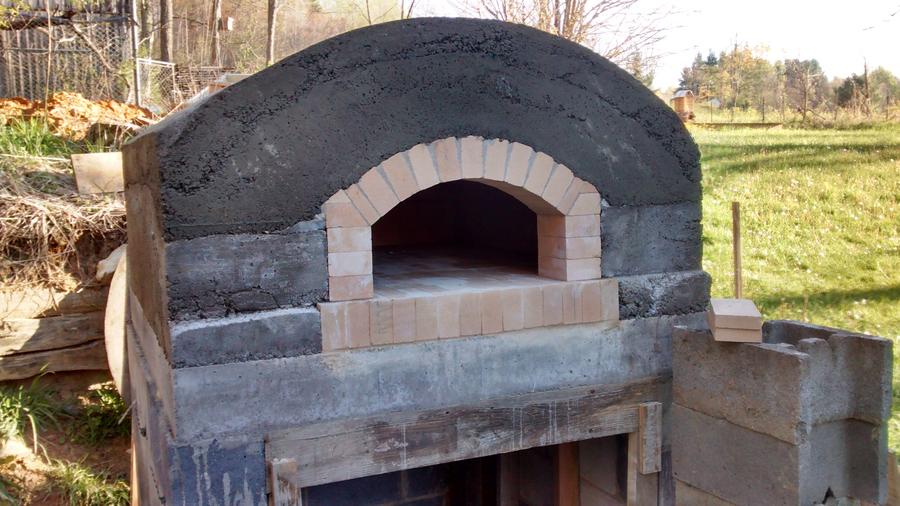
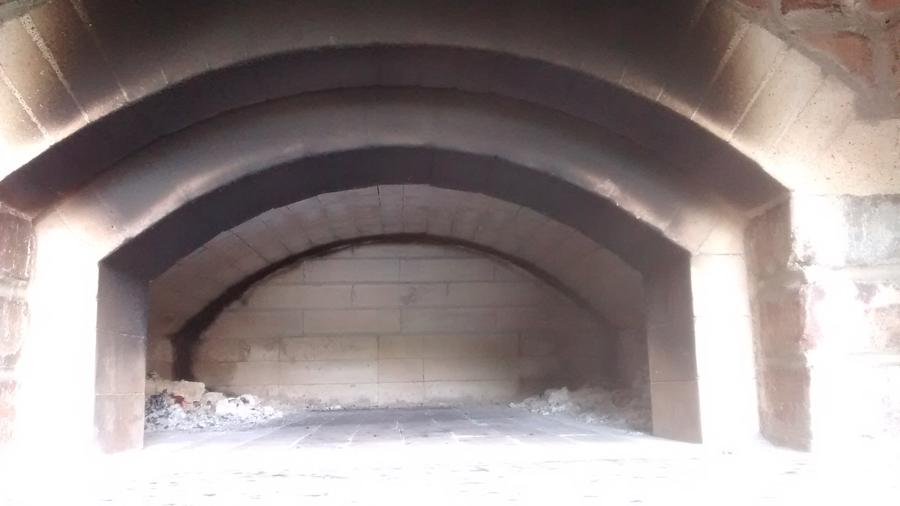
Not sure why the color is so goofy, but the vault is complete and the opening arch is complete.
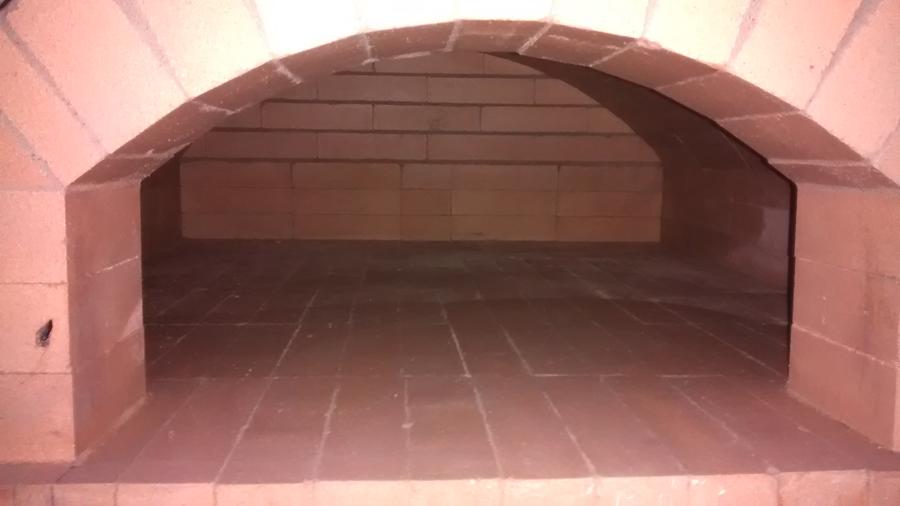
Inside view
The brick in the vault have to be able to move under intense heat. To make this happen you have to provide a barrier. The vault is wrapped in foil. This keeps access water out of the firebrick and it keeps the concrete cladding from sticking to the vault.
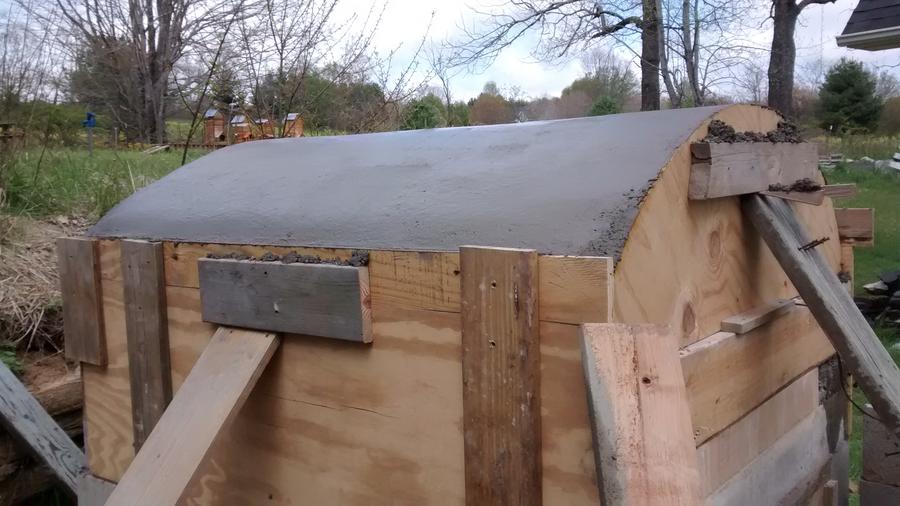
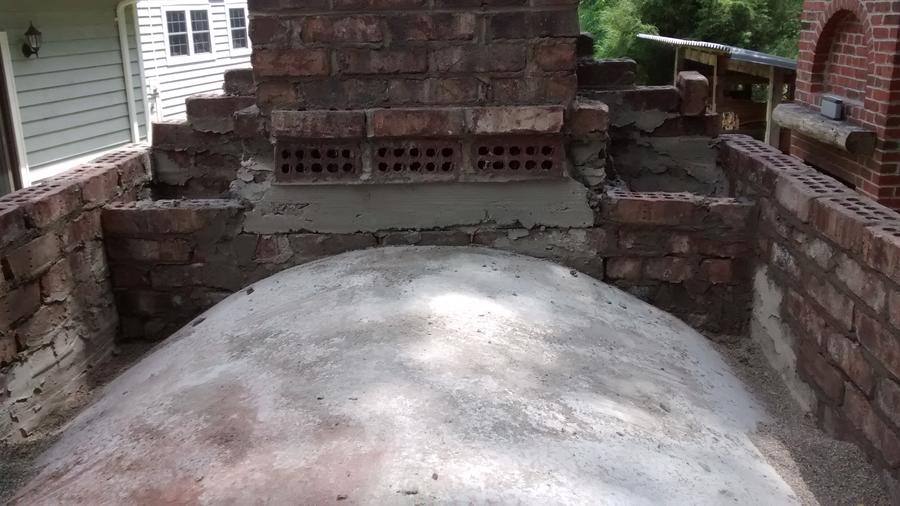
Concrete cladding. The more you have the better heat storage you have. Mine is 6in thick. Another yard and half of concrete.
Forms are off, starting to look really cool now.
Due to weather and just being lazy, by the time I started laying brick, it had been 45 days so I started curing the oven. Very small fires at a time. A little hotter each day.
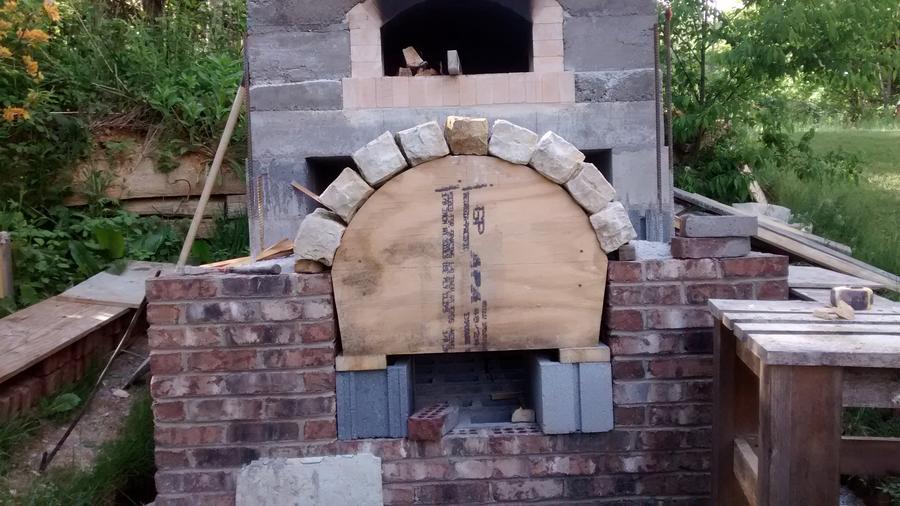
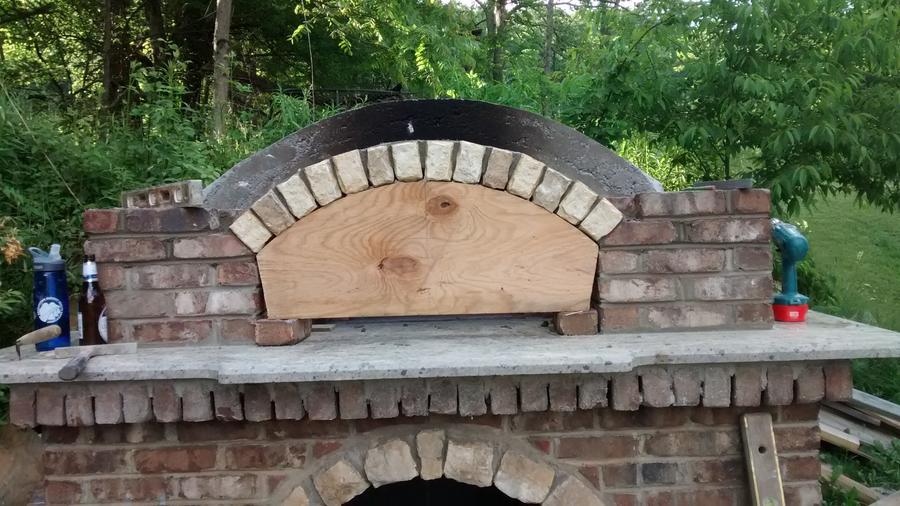
Ready to start the storage arch. I poured these outside piers. These rock are 16in. long. A lot more weight then brick. I didn't want to take a chance of it pushing so I poured the outside just to be safe. I also left this form in until I had laid over them.
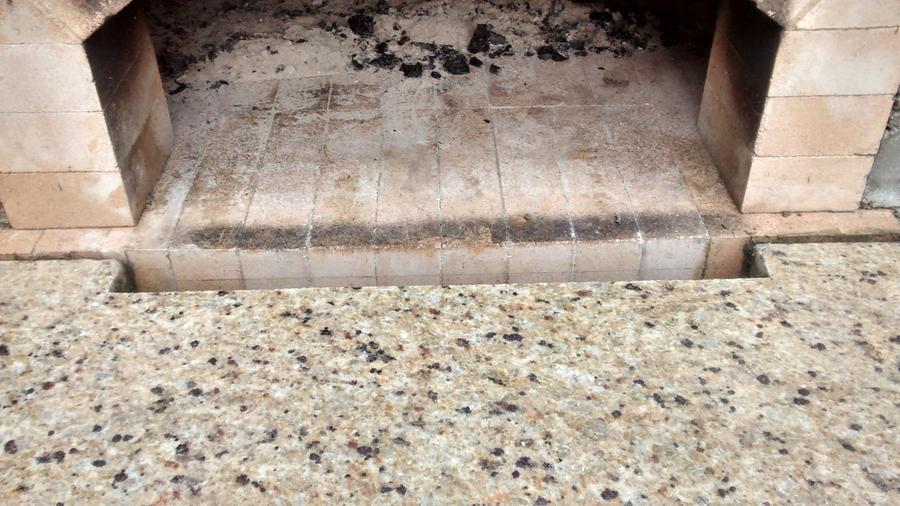
Forming for the outside hearth. After going to several granite top places I found the perfect used granite top.
Form for the 2in. clean out. Ready to pour
Poured the base flat. I'm ready for the granite top.
For a few beers, I got a few neighbors to help be set the top.
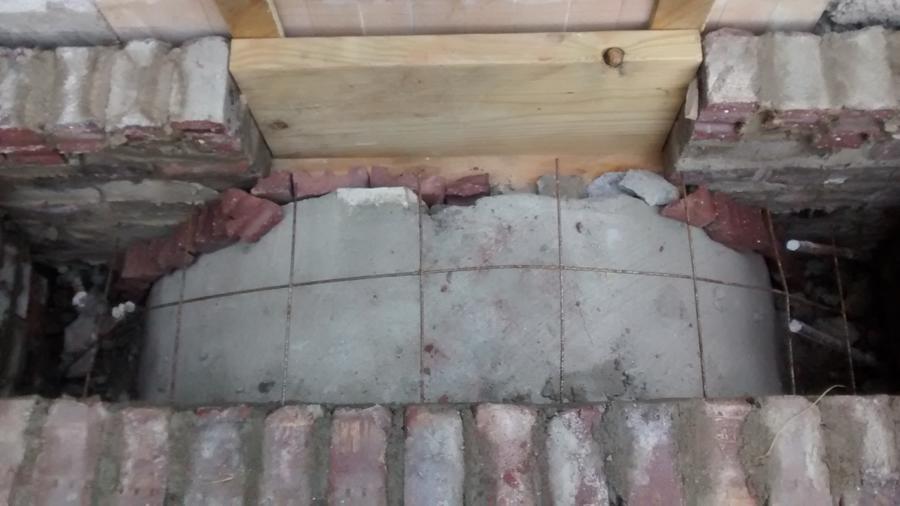
A view of the clean out.
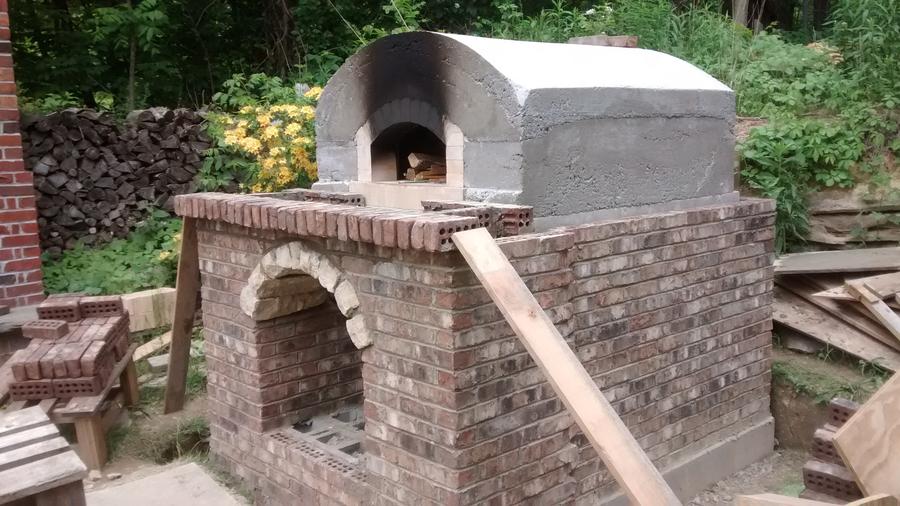
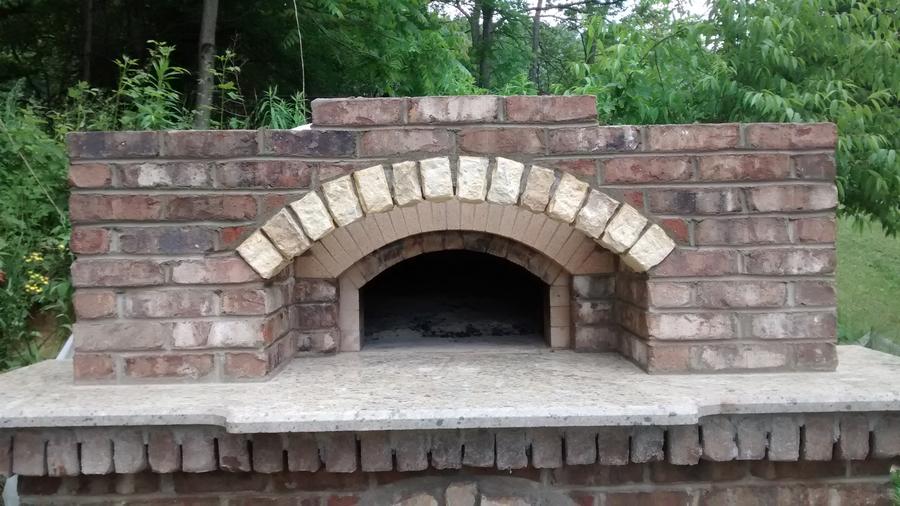
Secondary arch complete
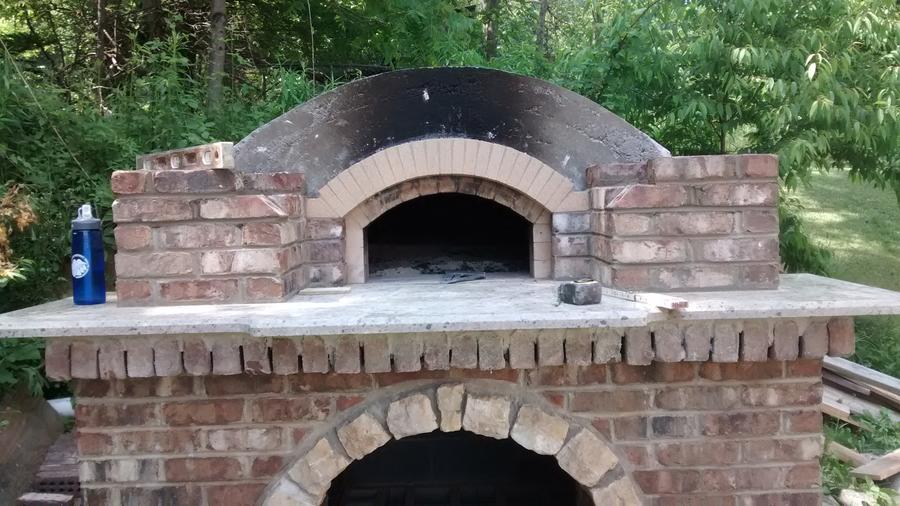
Outside arch complete
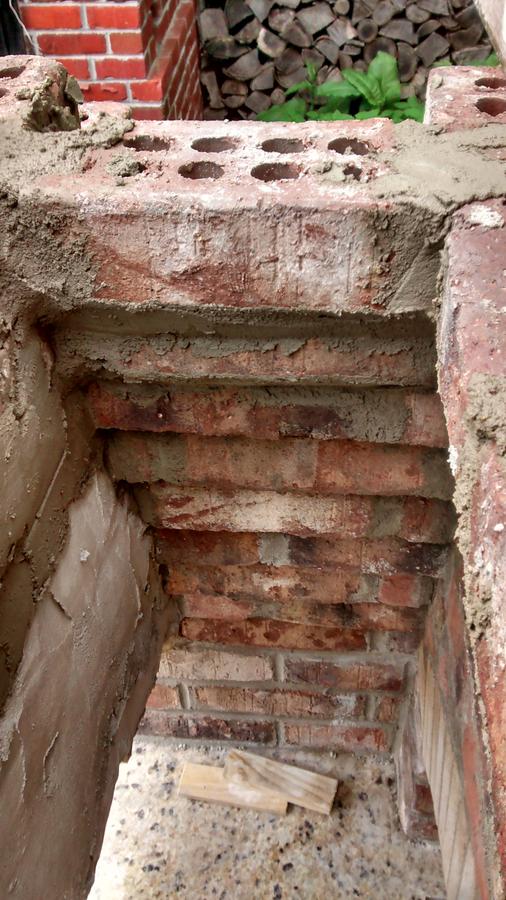
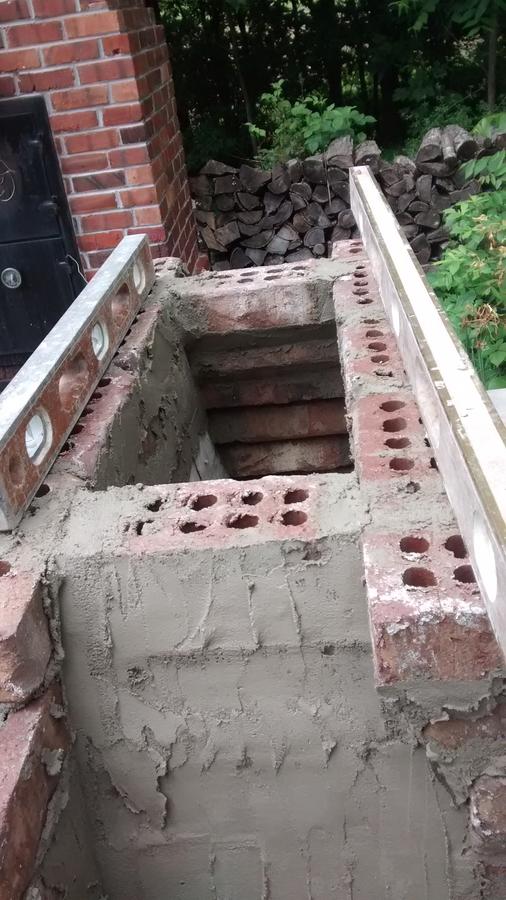
I'm ready to start stepping it in to the flue
Stepped down to set the flue liner
Getting closer...
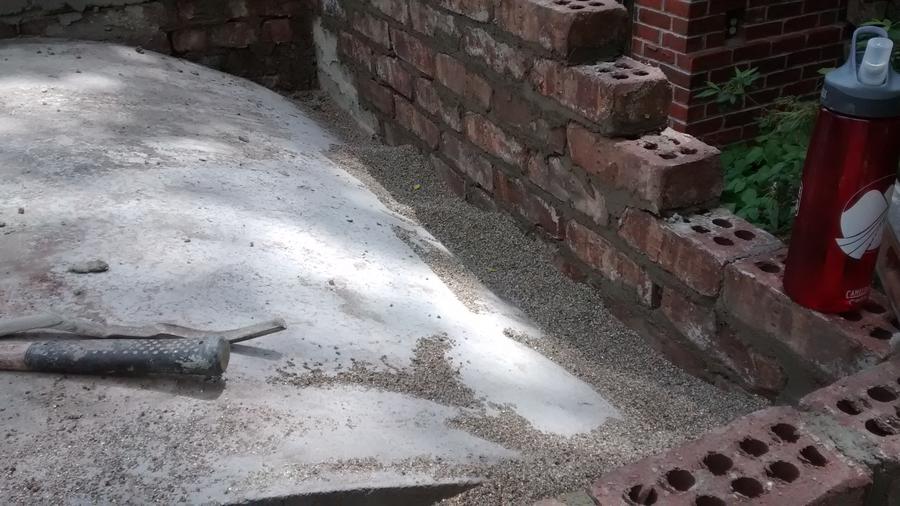
Vermiculite in all voids
Brick are ready for the roof system.
Mixture of vermiculite and concrete to make a nice 6 in. of insulation. Before I put the roof on, I also poured about 3 in. of dry vermiculite over the whole dome.
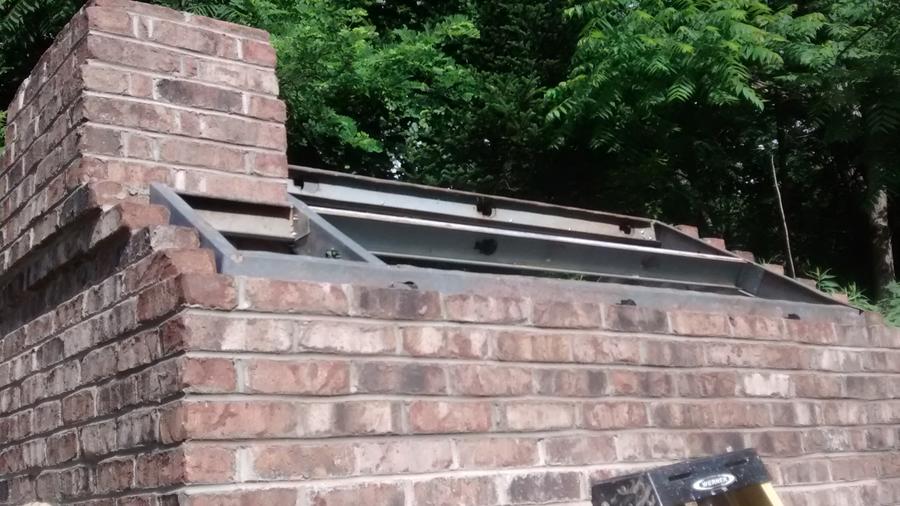
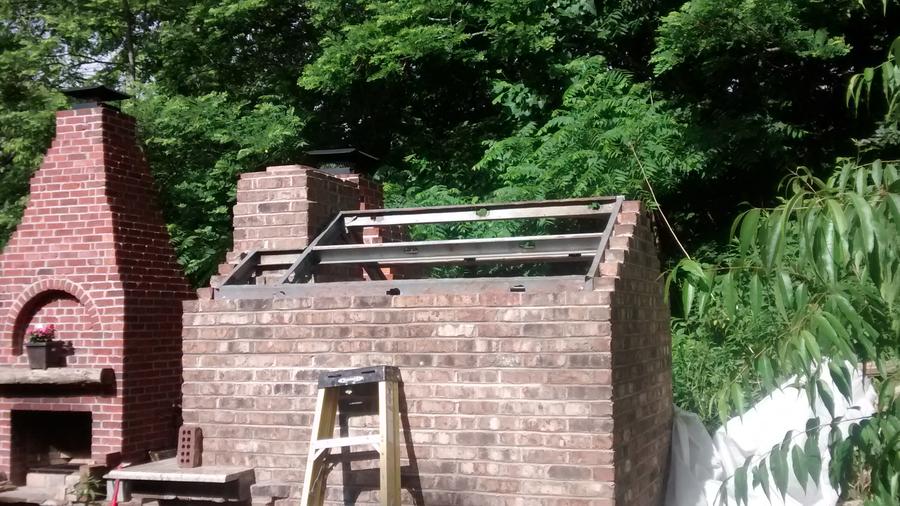
Being paranoid, I used some old metal studs I had for my roof system.
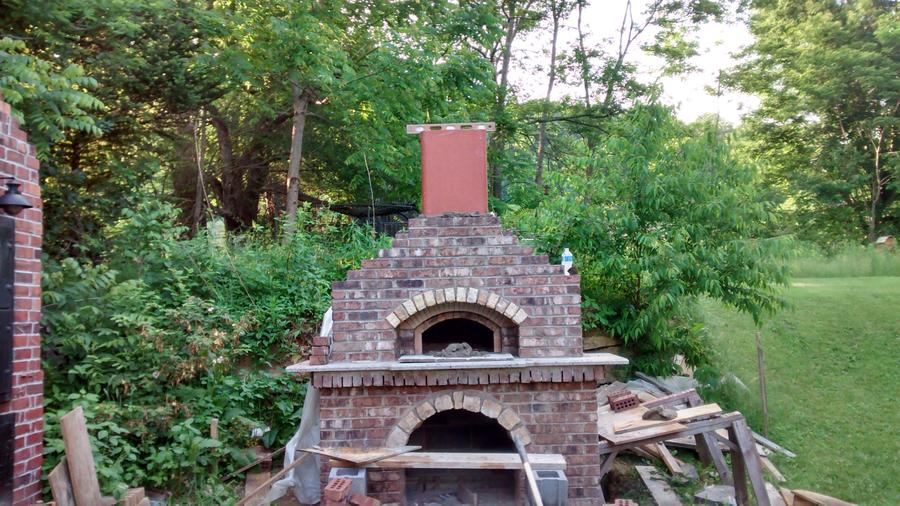
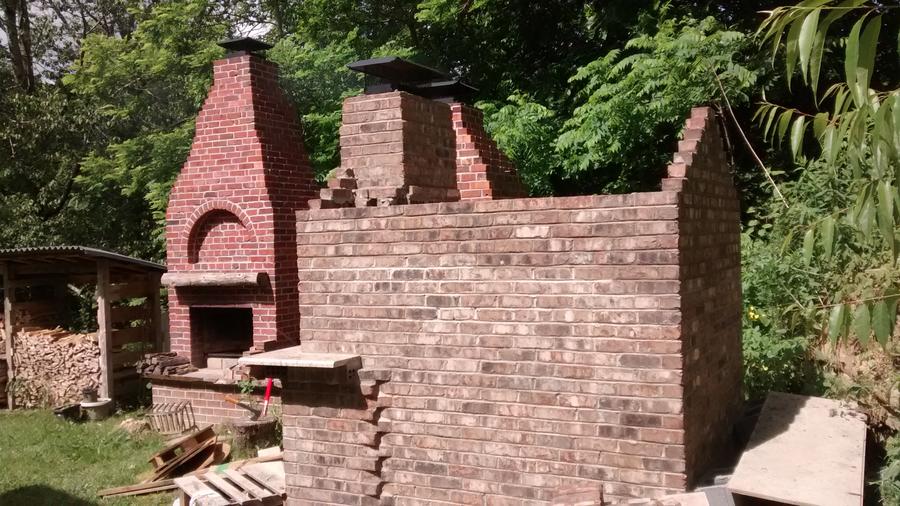
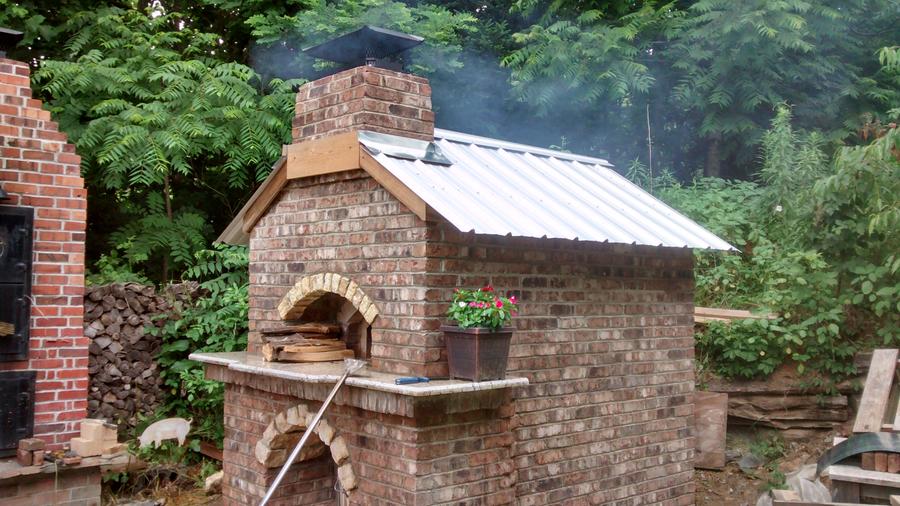
Roof system complete. Wood trim complete. We plan to have a plaque made in honor of our son that will mount in the middle.
White hot. Its time to make pizza...
I made my oven 8in wider then what was spec. I like the coals on the side instead of back. That way I can see what the crust is doing. I'll see if I can get some product pictures from our guest. The party was a big hit.
If you have questions please ask.
I hope this isn't out of line. I know we are a smoking site, but the art of brickwork ovens and brick smokers to me go hand in hand.
Cheers my friends.
Wes
Its been a busy few weeks.
My goal was to complete this project by the time our youngest son got out of the Marines. It was complete, but due to weather we celebrated this past week-end with a party. 13 pizzas and a great time with our closest friends.
Before I begin, I will not give a complete details rundown like the smoker. I got these plans from a "mate" for a donation of 30.00. His website is Traditional Ovens. A lot of info on his site, but for the donation, he'll send you about 3000 pictures of 3 different builds. He also provides you with detail specs and material list. My rundown will be a brief description. I only feel it fair to the gentleman I got the plans from. If you happen to have "The Bread Builders" book, it is very similar in every way. I do better with pictures then a book, that why I chose to give $30.00.
It begin with a square hole, 1/2in. rebar on a 1 foot grid.
Poured 10in. of concrete into the hole. You may ask, why so much concrete. The footing is the one thing that can't be fixed if it fails. My rough guess of the weight of this oven to be around 6000 lbs. Over kill maybe,but my footing will not give way.
Ok Dave, another perfectly square footing. Dug most of it with a square point shovel if that tells you anything as to how soft it is. Not a good mix of earth here. One reason why the footing needs to be thick. Soft on one side, hard on the other.
Well, it all starts with a hole in the ground. For me, the bottom of the footing has to be 16 in. deep. The conduit is the power going to the smoker.
Footing poured and block are complete. Ran short on block so I had to go to the local box store and get a few more. All they had were the heavy ass concrete block....
Pouring of the top. As you can tell I build knock down supports under it till it sets. I left them in until I was ready to start the brick. I used simple tile board for the base to pour on. It worked well, but I did hold my breath for a few hours. About 1 yard of concrete for the top.
I thought I had a couple pictures of the hearth being laid. I was wrong. Here, my forms are in place to pour the outer edge so I can start the dome.

Here you can see the hearth. They are laid side by side. No fire clay involved.
They arch has begun. Not perfect, but it works. All points touch, only fire clay in the open part of the joint.

Not sure why the color is so goofy, but the vault is complete and the opening arch is complete.
Inside view
The brick in the vault have to be able to move under intense heat. To make this happen you have to provide a barrier. The vault is wrapped in foil. This keeps access water out of the firebrick and it keeps the concrete cladding from sticking to the vault.

Concrete cladding. The more you have the better heat storage you have. Mine is 6in thick. Another yard and half of concrete.
Forms are off, starting to look really cool now.
Due to weather and just being lazy, by the time I started laying brick, it had been 45 days so I started curing the oven. Very small fires at a time. A little hotter each day.
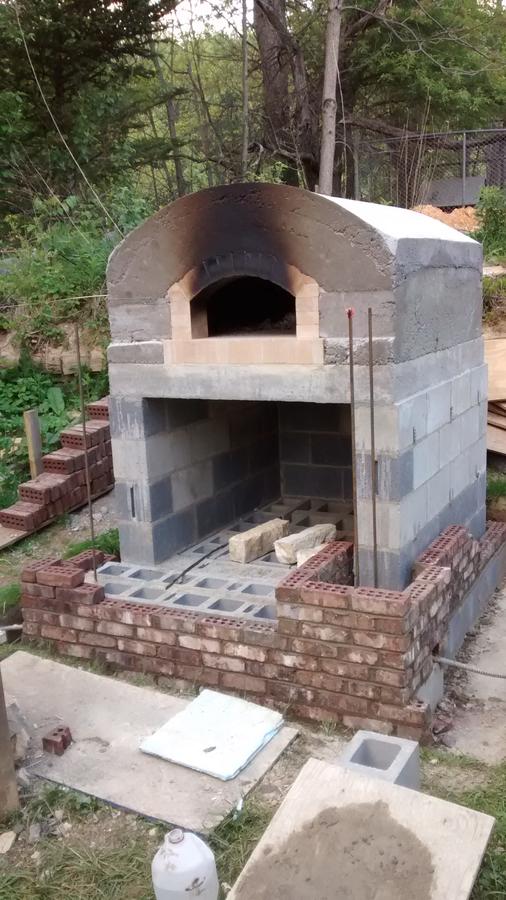
Ready to start the storage arch. I poured these outside piers. These rock are 16in. long. A lot more weight then brick. I didn't want to take a chance of it pushing so I poured the outside just to be safe. I also left this form in until I had laid over them.
Forming for the outside hearth. After going to several granite top places I found the perfect used granite top.
Form for the 2in. clean out. Ready to pour
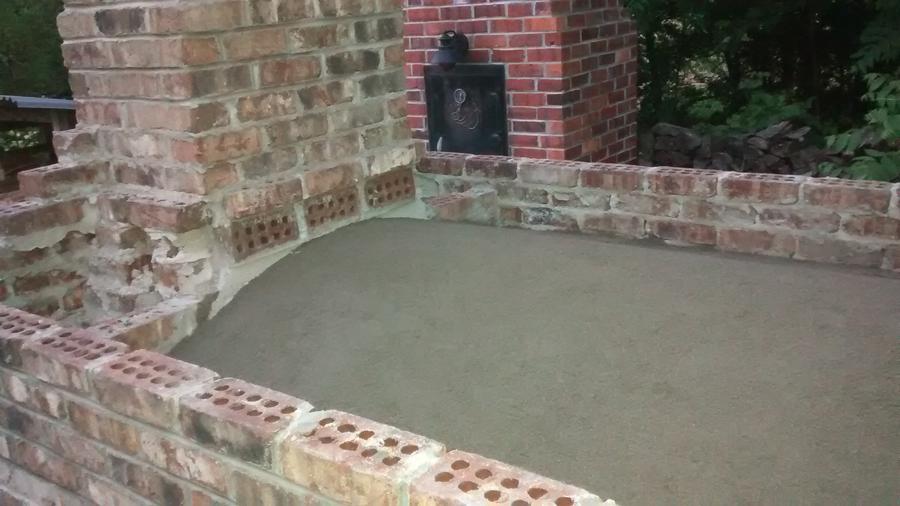
Poured the base flat. I'm ready for the granite top.

For a few beers, I got a few neighbors to help be set the top.

A view of the clean out.
Secondary arch complete
Outside arch complete
I'm ready to start stepping it in to the flue

Stepped down to set the flue liner
Getting closer...

Vermiculite in all voids
Brick are ready for the roof system.
Mixture of vermiculite and concrete to make a nice 6 in. of insulation. Before I put the roof on, I also poured about 3 in. of dry vermiculite over the whole dome.
Being paranoid, I used some old metal studs I had for my roof system.
Roof system complete. Wood trim complete. We plan to have a plaque made in honor of our son that will mount in the middle.
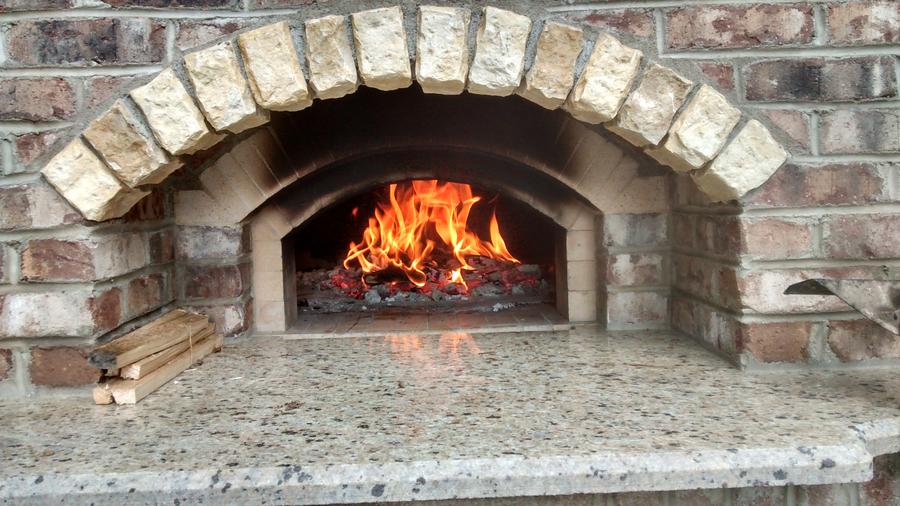
White hot. Its time to make pizza...
I made my oven 8in wider then what was spec. I like the coals on the side instead of back. That way I can see what the crust is doing. I'll see if I can get some product pictures from our guest. The party was a big hit.
If you have questions please ask.
I hope this isn't out of line. I know we are a smoking site, but the art of brickwork ovens and brick smokers to me go hand in hand.
Cheers my friends.
Wes
Last edited:


