Started my first UDS build today. Back to the basics!!

  • Some of the links on this forum allow SMF, at no cost to you, to earn a small commission when you click through and make a purchase. Let me know if you have any questions about this.
SMF is reader-supported. When you buy through links on our site, we may earn an affiliate commission.
With the vents I have I can get hot and can keep nice and low.
 
Good, thanks guys, that's what I was thinking. I've already purchased two 1 inch nipples for it and was going to either return 2 of the 3/4 inch or use one of them for my temp probes.
 
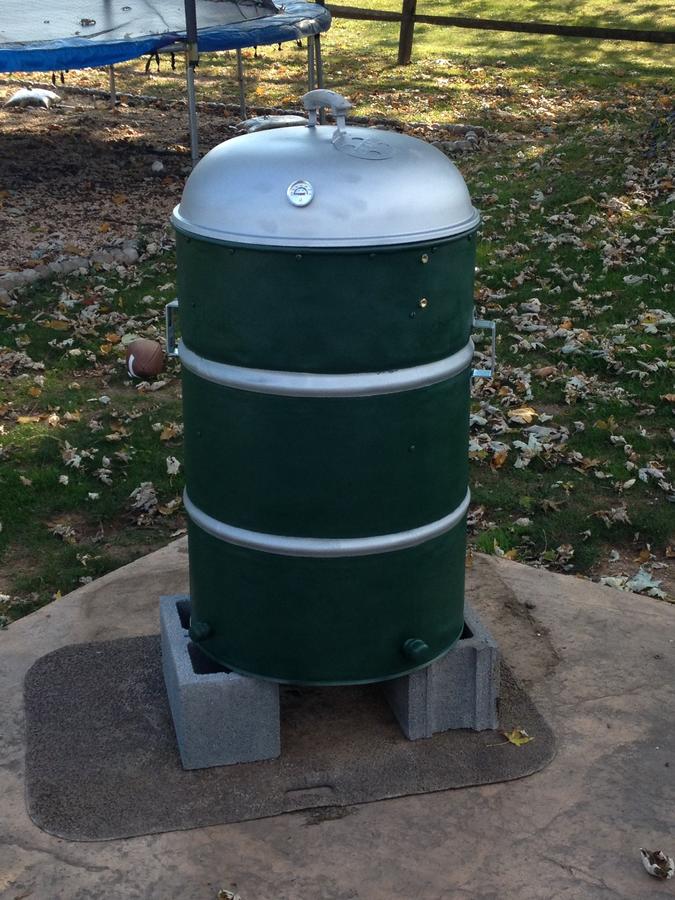
Got a good day of work in on the uds today. I decided to paint the ribs of the drum silver and the body green, after a certain football team who happens to stink this year. Here it is with the first coat on and the ribs taped up.

I decided to go with 2 3/4 intakes and 2 1 inch intakes. For the 3/4, I drilled 1 inch holes with the step drill bit and for the 1 inch, I drilled 1 1/4 inch holes. The pipe nipples fit perfectly. I actually had to use a pipe wrench to get them in. Sorry, I didn't get any pics of this part. I spaced them evenly around the drum at 17 1/4 inches and 2 inches up from the bottom.

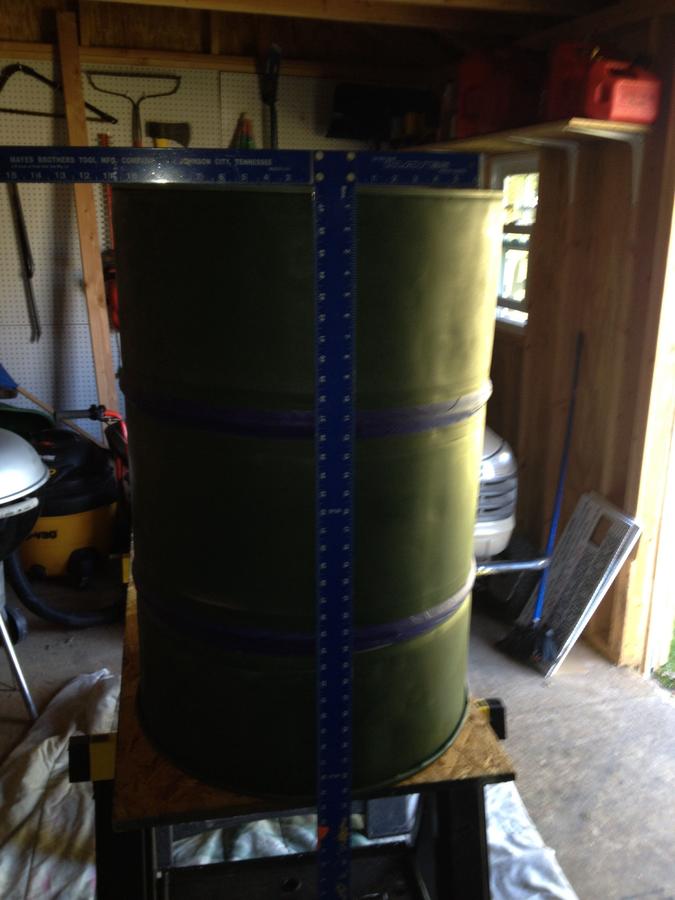
I changed the 3 inch bolts to 4 inch bolts for the legs of my charcoal basket. That makes it sit about 17 inches high. I also decided to add a grate 1 inch above the basket to grill and place a heat diffuser on. The bolts for the middle grate went in at 28 inches, which is 24 inches exactly from the bottom of the basket. I used a T Square to make sure everything was lined up. After lining everything up, I drilled 1/4 inch holes around the drum in line with the air intakes. I cleaned up the rough edges on the interior of the drum with a grinding bit on my Dremmel. I then placed 1/4 x 1 1/2 ss bolts, nuts and washers in for the cooking grates to sit on.

Next, I went to work on the lid. My 
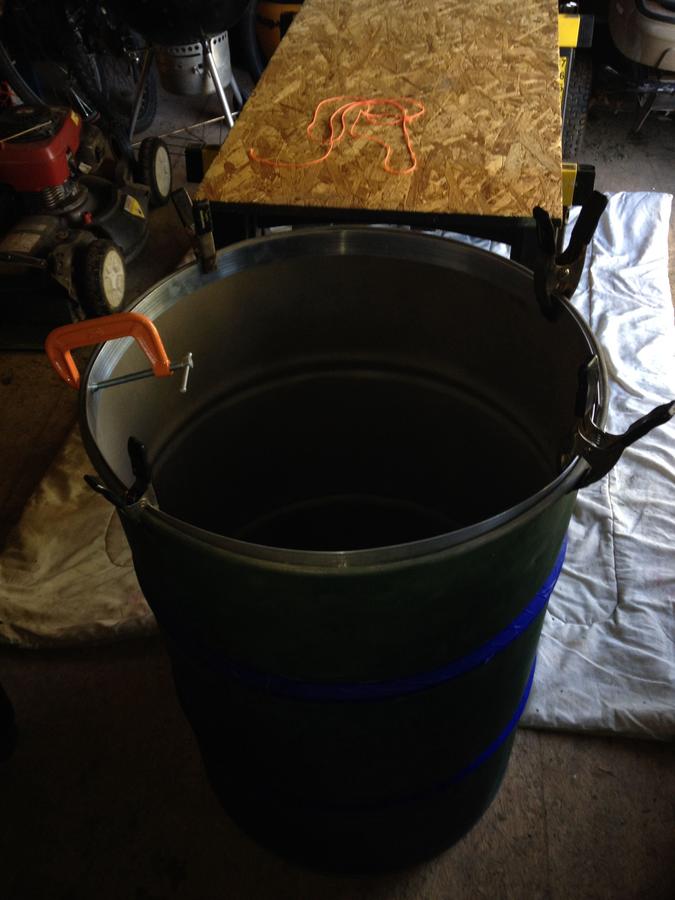
weber kettle lid didn't fit. I decided against cutting a 2 inch ring off of my kettle and used a 1/8 x 1 3/4 piece of aluminum. To measure the interior diameter, I used a piece of 1/16 aluminum flat bar I had and clamped it to the interior. I marked it, then placed it on the 1/8 piece to get an exact measurement.

I then took the 1/8 piece and cut it on my chop saw with a metal cutting blade. This is where I went overboard. I drilled 1/4 inch holes just under the lip of the drum at 5 inch intervals all the way around the drum. My thinking was it would pull the aluminum bar as tight as possible to the wall of the drum. Probably overkill, but too late now.

Next I took the 1/8 flat bar and clamped one end into the drum. I then kind of worked the rest in and into a semi circle shape. I used another clamp and clamped it in halfway around. I pushed it straight against the wall and worked it to have a half inch sticking up out of the top. I placed a clamp inbetween the hole I was working on and the next hole. I then used the existing holes in the drum as a guide and drilled 1/4 inch holes into the aluminum. I secured them with 1/4x1/2 ss bolts. Every 4th or 5th hole I used 1/4x1 1/2 ss bolts for the top cooking grate to sit on.

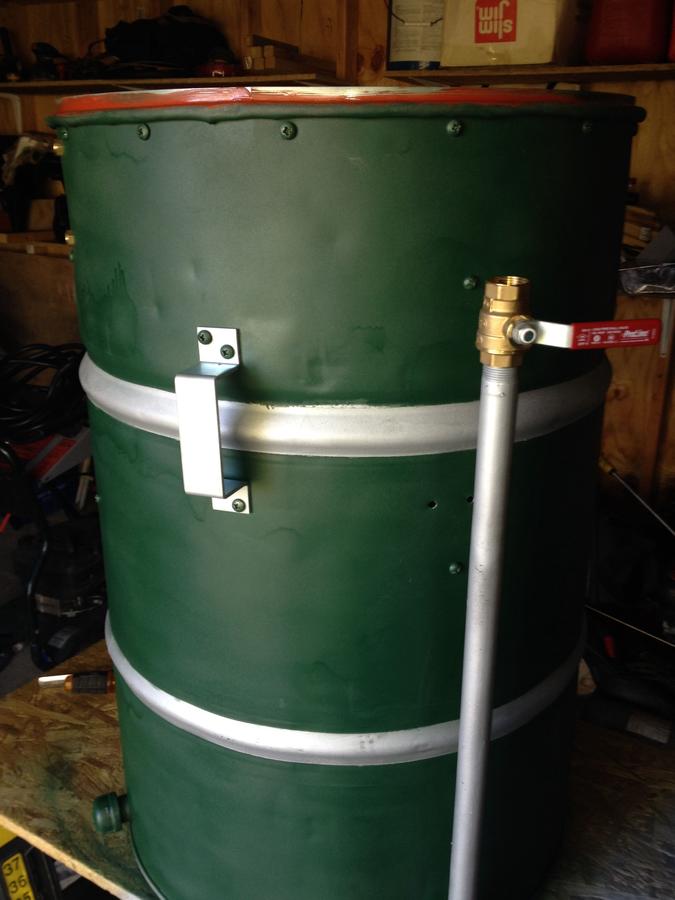
After it was in and secure, I added high temp silicone to make it air tight.

I then drilled 1/2 inch holes, which you can see in the above picture, for my temp probe intakes. I'm using brass grommets for that. I put tape behind it and put a second coat of paint on the drum.

I should have it all finished tomorrow. I'll add the final pics tomorrow as well as my final cost.
 
Don't be afraid of country style ribs. We get the here and they are cheaper than chicken. I think I like them better than just about anything we smoke here.
 
I was just looking at a huge family pack of them in the store the other day. I've never tried smoking them, but I will give it a shot, thank you!
 
Wow i wish you would have shopped around on the sand blasting.  I found a company that would sand blast and high heat powder coat for 80 dollars.    Sand blasting does make things easier that's for sure. Good luck on the build and ask if you need help. 
 
Thank you David and thank you FWlsmoker. I wish I would have shopped around too! They originally quoted me a lot less on the phone, but upped it when I showed it to them in person. A second place called me back after it was too late and quoted $50. Now I know better for next time. I'm still glad I had it blasted though.
 
Got up early and finished the uds today. Twas a good day!
I read over what I posted last night and was mistaken on the intakes for my temp probes. I used 1/4 inch brass bushings, not grommets. I also bought caps for them so they can be closed off if I'm not using them. I screwed them in with a socket and they are very tight.

Next I painted and added my 3/4 x 2 ft pipe with a brass ball valve on top for air control. I drilled holes to secure it with a ss u-bolt. When I screwed on the brass valve, my u-bolt didn't fit. So I just used the 3 inch bolts I had left over from my charcoal basket along with the flat bars from the u-bolts. Problem solved. I also added handles to make carrying easier.

I then attached a 12 inch pizza pan to the bottom of my charcoal basket by marking and drilling where the bolts (legs) sat. Once they were through the holes, I just used 1/4 ss caps on the bolts to hold the pizza pan in place. I also took 2 ft of stainless steel cable and fastened to the top of the basket to act as a handle. It cost under $2 and was an easy fix. I just ran it across the center of the top and weaved the excess in the sides of the expanded metal to hold it in place.
 
I sprayed the interior down with cooking spray to season it. I filled my charcoal basket about half full with regular charcoal and some chunks of Hickory. I filled a chimney up about half way and lit it. Once they were good and grey, I dumped them in the basket and put it in the smoker. This was about 3 this afternoon. I had all the intakes open and it rocketed to 400. I closed all but 1 3/4 and had the ball valve about half open. That brought me down into the 350 range. It sat there for a couple of hours while I mowed my lawn. The top grate averaged about 10 degrees cooler than the middle grate. The temp started creeping up again, so I added a heat diffuser (another pizza pan) on the third grate and closed off the 3/4 intake. The temps seemed to level out. I checked it at 9:30 and the top grate is sitting at 226!

I do have a question for you guys. The lid does not sit as tight as I would like. I tried adding 1/2 inch oven rope, but the lid did not fit, so I removed it. There is a small area where I noticed some smoke leaking out, I added a picture below, but I don't think you can see the smoke. Is this a major deal that I should be worried about or is this pretty normal?
Nice looking build. Sorry to hear about your $80. blast! My powder coat company charged me $75 to blast it and my lid inside and out and powder coat the exterior. $25 to just blast it.

Leaks aren't to critical unless you aren't able to maintain a constant temp. Air leaks can contribute to temp spikes, especially in windy conditions.  If you can maintain a constant temp then you should be okay. One thing you could do is after you put the lid on, wrap the oven rope around the seam and tie it on like a bow tie. There is another member her that did that with an ECB and it sealed it up and worked great.
 
Thank you dirtsailor! That is an awesome idea and I never would have thought of that!
 
Last edited:
Thank you David, I forgot to put in there that I did put on high temp silicone.  I used the red stuff and spray painted over it after it dried.  The lid just seems to sit on the 1/8" flat bar a little loosely.  Maybe I'm just being too picky.
 
 
Thank you David, I forgot to put in there that I did put on high temp silicone.  I used the red stuff and spray painted over it after it dried.  The lid just seems to sit on the 1/8" flat bar a little loosely.  Maybe I'm just being too picky.
No such thing as to picky. I don't like air leaks. Your leak on the top shouldn't make much differance. But it looks better when the smoke is coming out of the stack.

David
 
My lid leaks smoke pretty good.

Seems to cook good thou.
 
Last edited:
SmokingMeatForums.com is reader supported and as an Amazon Associate, we may earn commissions from qualifying purchases.

Hot Threads

Clicky