Firebox build for 60-75 gallon reverse flow how am i doing?

  • Some of the links on this forum allow SMF, at no cost to you, to earn a small commission when you click through and make a purchase. Let me know if you have any questions about this.
SMF is reader-supported. When you buy through links on our site, we may earn an affiliate commission.

bigmel

Newbie
Original poster
Jun 5, 2017
21
12
Edmonton alberta
Still new here but ive been reading alot trying not to jam the place up with too many questions. I am building my firebox right now. I went 22" ×22" × 20 high. Vent is a foot give or take. Im still looking for a 60-75gal tank to mate with it. How does it look so far? Any suggestions? Going to reinforce the door with flatbar cross and the angle on the ash tray will hold the expanded metal cage for the wood. Is the size ok? Vent ok? Wanted to make a front load side vent. Any help is greatly appreciated as im in the middle of it as i type.
 
I got my tank today so im gonna be cutting and building right away. Its a 5 foot by 20 inch tank overall so im pretty sure the firebox is a good size? Also planning a 4 inch pipe exhaust so i hope thats enough! Any insight would be greatly appreciated probaly start building this weekend.
 
Move the top cut of your door to about  3-4" past 12 o'clock.    Dave O has some detailed pics.   This will lower your door weight and make the cut out smaller.   Smaller the cut out the less it can warp.
 
On a 20" cc I would make my top cut at 12:00 and the bottom cut 1" below 3:00. Your 4" exhaust will work 5" would be better in my opinion.
 
I have cut many a tanks and pipe. The size of the hole or how you cut it plays very little into the outcome of it. If the vessel is stressed over years of use or rolled short then compressed to weld once you open it up they usually spring and need tweaking. I will say this I have found it a lot easier to fix the door not attached to the cooker I apply my door straps and refit the door then weld on the hinges.
 
  • Like
Reactions: isaac
That is actually Damn good advice kam59! Im going to take it off and do it in the table! The hinges arent 100% and the door still has a twang to her. It went sideways before i had even cut half the door out so the tank was probably stretched and tacked/ welded to begin with. I had to use a comealong to get the 1/2 inch bow out just to put the hinges on and cut the other half of the door.
 
That is actually Damn good advice kam59! Im going to take it off and do it in the table! The hinges arent 100% and the door still has a twang to her. It went sideways before i had even cut half the door out so the tank was probably stretched and tacked/ welded to begin with. I had to use a comealong to get the 1/2 inch bow out just to put the hinges on and cut the other half of the door.
 
I have seen them do some weird things that is why a lot of the builders have gone to framed out doors . My big cooker "Bahama Mama" jumped so bad when I cut it out that I designed my coffin door for her.

The door was cut 6" below 12:00 and only 50" wide. Both the the tank and the door sprung.


My little cooker "Little Mama" is a 24" x 55" the doors were cut on 12:00 and 1" below 3:00 with little to no springing.


Last edited:
Another great day in the weldbay! Got alot more done. I took the damn door off and have it clamped with heat. Hope she straightens out! Getting pretty excited for my first burn in!
How hot do you run it and for how long?
Also how long does the stack have to be? It seems excessive but thats roughly what the calculations had it at?
I would lile to cook something on her by the weekend.
 
I usually run my cookers to 325°. I rinse them out build a fire then dry her out once she is dry I lightly spray the inside with Pam and heat her up to 325° for a few hours. I usually will have 10 to 20 lbs. of leg quarters ready after that to throw on.

As far as your exhaust what is your cooker and firebox dimensions as well as your exhaust diameter?
 
Exhaust is 4" the firebox is 22x22x20. And the tank is 5 foot by 20" i went 30" high on the stack after the elbow
 
The reason your exhaust size increased in length is because your firebox 50% larger than needed. If you could have gone with a 5" exhaust you could have been down to 24". I am not a big fan of tall exhausts because it sometimes forces you to run the cooker hotter to create a clean draft. It will work fine once you learn where her sweet spot.
 
Last edited:
Exhaust is 4" the firebox is 22x22x20. And the tank is 5 foot by 20" i went 30" high on the stack after the elbow
Mel, evening....  Your exhaust if fine...  The calculations of the entire build should be based on the size of the Cook Chamber...   The Fire Box is primarily a source of heat and doesn't figure into any calculations EXCEPT for the ease of maintaining heat for cooking...  1/3 the size of the CC is the norm...   Bigger is fine....  Easier to bulk up on coal for cooking.... 

Upper and lower air inlets to the FB makes for fine tuning of the heat and smoke.... also helps to even out temperatures across the cooking surface....  

Any design you prefer is fine....    Lower inlets for controlling the air to the heat source...    Upper inlet for moving heat and smoke from the FB to the CC....   Many members have subscribed to this design and verify how well it works...  All of this stuff is explained in the link I provided in a previous post...  

 
Last edited:
Hey dave. Thats great to hear! Its my first build so im learning fast lol i did top and bottom vents as it just made sense when i was reading. Ill know by the weekend how she burns i hope. For sure going to have to do an rtv gasket tube on the cc door as the bow has made everything just a hair off even after 4 hrs of just heating and beating seams and flat bar its just not snug.
 
  • WoodyG
  • Trader Feedback: 0
  • badge_smokeblower.v1829729808.png
  •  
  • offline

Hi Woody, does your smoker have any flap that covers the halfpie cut out in the fire box to control the smoke and heat? I saw one like that. Thanks, Pat
Hey pat. I just wanted to add to my last post. Right now I am smoking some cheese


Now I am truly convinced you don't need a flap or dampener between the FB and CC. It's holding temps steady at 80 deg left to right. I'm a true believer in DaveOmak's calculator.

++++++++++++++

80x80px-LS-028c12c8_LOGOREDOJUNE.jpeg

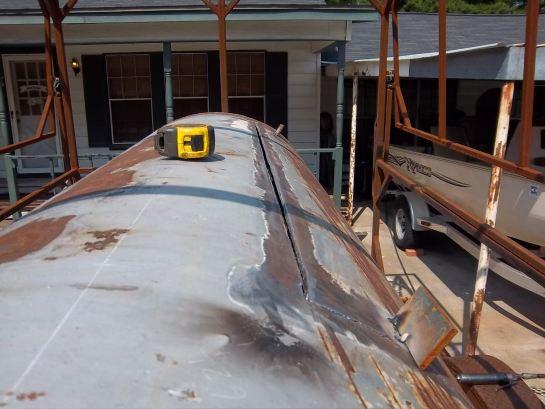
After a number of discussions with Dave and others with their builds here, I had come to the conclusion I needed to try a mod for my RF pit.  Mine is a fuel hog, I start my fires with 20#'s of charcoal in a coal basket I built, then start chunking splits on the coals once the top layer gets going good and it burnsw through some wood at comps and long smokes at the house.  Dave has mentioned a number of times about needing and having an upper air intake (at or above your fire) on the firebox to not only help with draft, but also for fuel consumption as well.  So I finally made the change this past week and got a smoke in Sunday. 

Here is the mod:


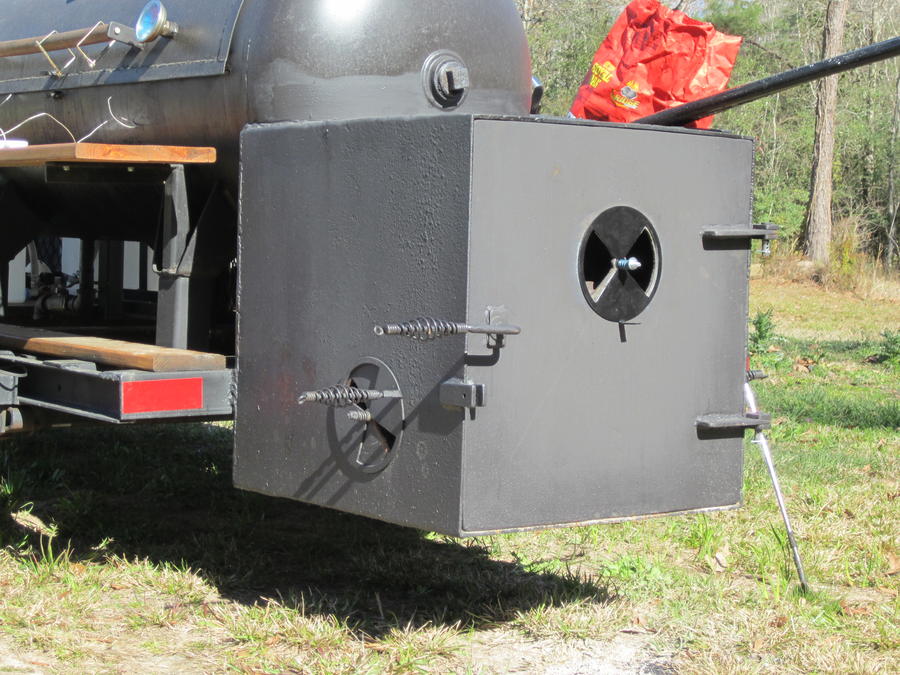
You can see my original intakes, I have one on either side of the firebox.  The new one is just above the opening to my basket, so it will be above or at the top of my fire.

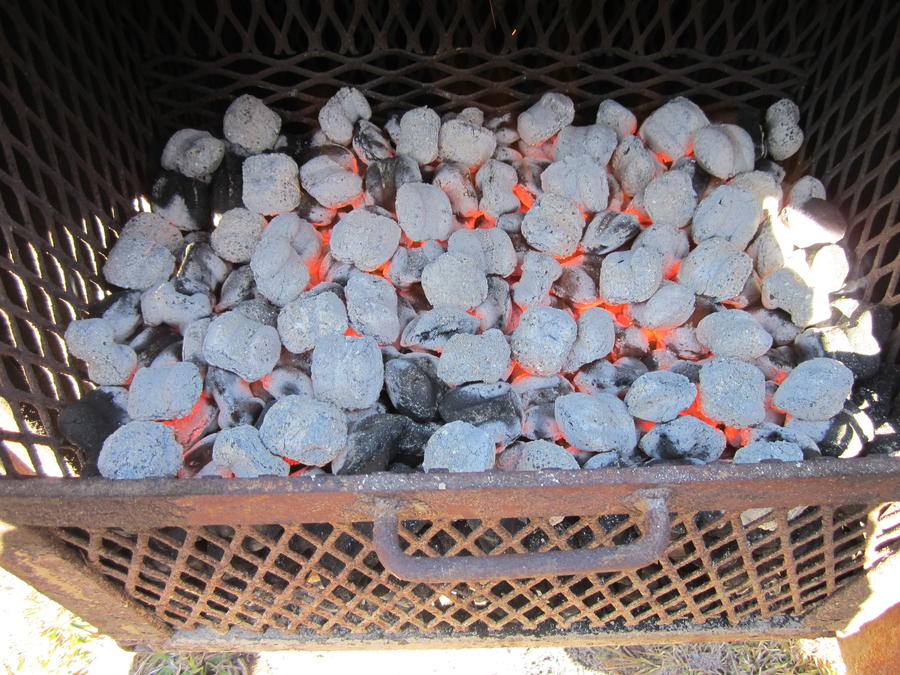
Here is the basket with the lit coals on top starting to burn good:


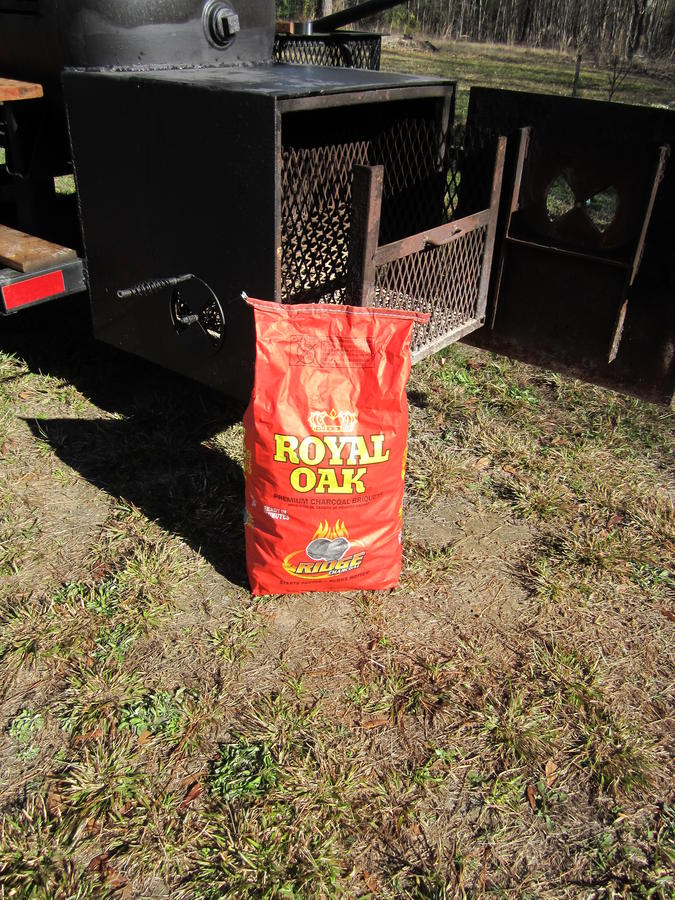
At this point, I threw on 3 splits (12" long x 3" wide triangle shaped splits), 2 of oak and 1 of hickory.  Exhaust and intakes all fully open until I get above 225, then Ill start closing down the intakes, the lower ones to maybe only 1/8 open and the upper to 1/2 open. This was the quickest the pit has ever settled in at 250, Probably had it there within 30 minutes, usually it takes at least 45 to 60 minutes for it to settle in.  So far success...now as far as fuel consumption, I do feel like it gave me a better burn time, the charcoal I started with was Royal Oak briquettes, I have always been a Kingsford guy, mainly cause Lowes has the two 20# bags on sale a few times a year for less than $20, buit a few weeks ago a local store ran the Royal Oak 16# bags at $6.99 each, so I picked up 6 bags.  I used some at my last comp and this was my second cook with them, I hope I can find some more on sale soon.


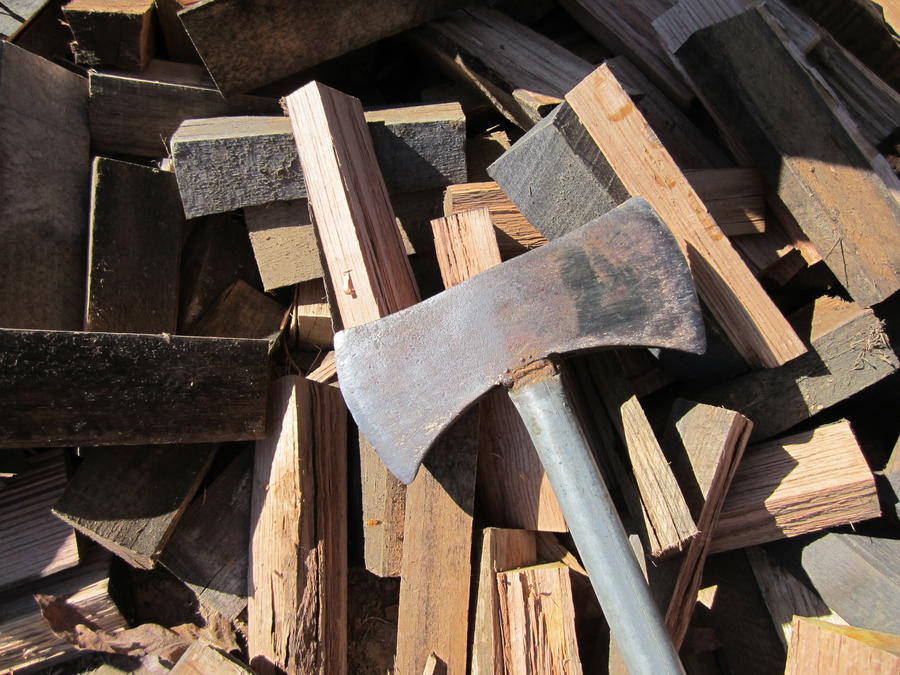
Here are the splits I use, they are oak 4 x 4's I get from work (I run a pallet mill).  I split them at a diagonal and they work out great.  There are also a few pieces of Hickory on top there.  I show the axe to just give a point of reference of size:


80x80px-LS-028c12c8_LOGOREDOJUNE.jpeg

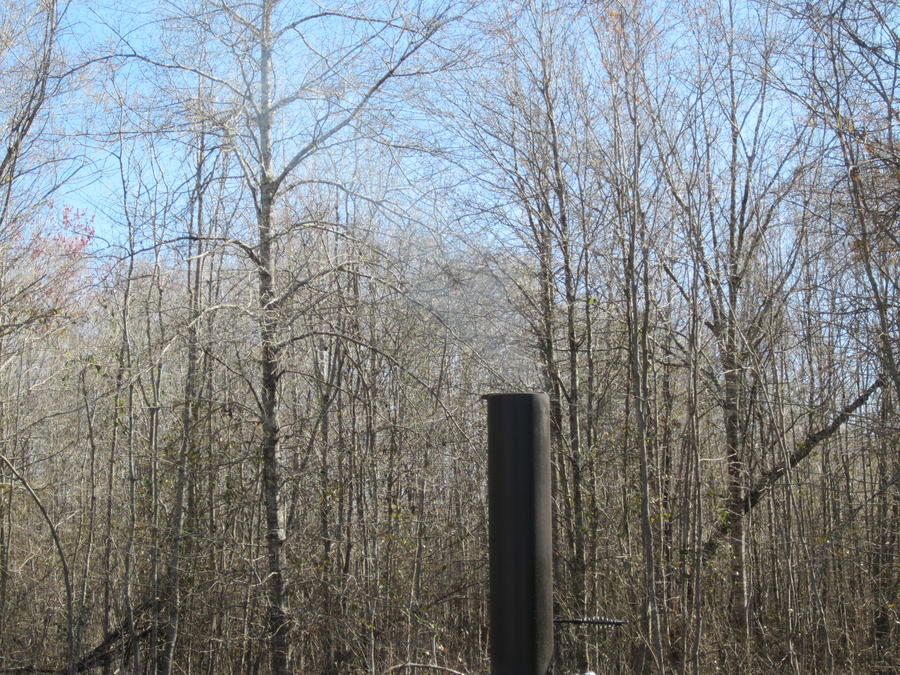
Here is a shot of the thin blue, almost Ninja smoke right after I started shutting down the intakes to steady my temp:


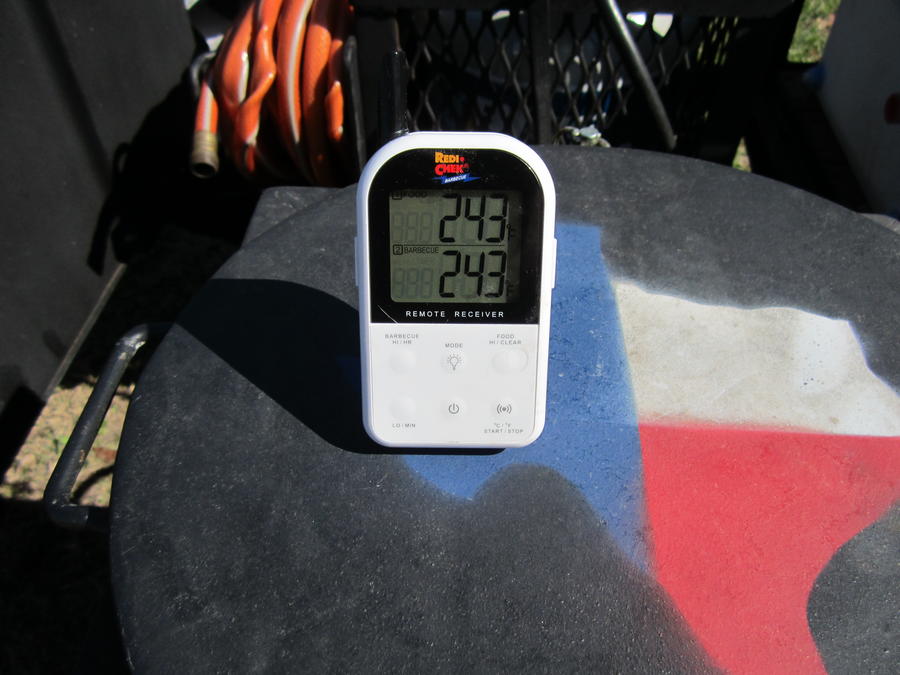
My target temp for smokes on my pit is always somewhere between 225 and 250, here it is once I adjusted all the intakes and got the temps steadied.  The probes are on either end of the 4" long bottom grate on my pit.


Once I got everything leveled out and the meat on, I left for church.  I left at 10:00 AM and returned to see this on the Maverick at 12:45 PM:


Not too bad, nearly 3 hours later.  The food side probe was on the firebox end of the pit with the BBQ probe on the other side.  Threw a couple sticks of hickory on and let it ride.  This will really be nice at comps, get everything going around 2AM, then get into my tent and get 3 to 4 hours sleep, get up by 6, get the ribs on and make some breakfast!  Going to be nice.   

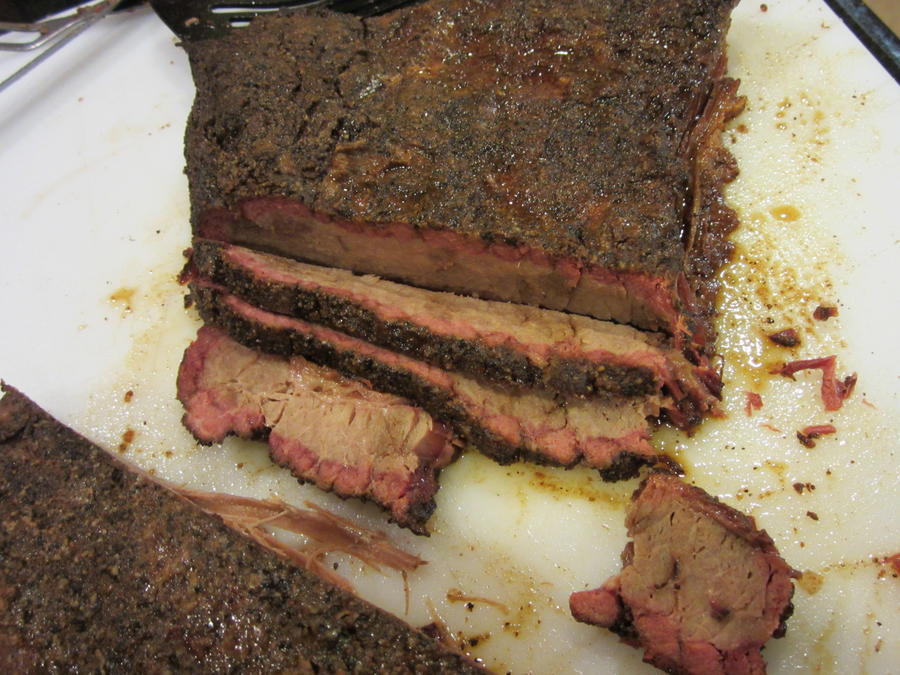
Here is a shot of the brisket point from this cook:


This was out of the fridge, cold last night when I got home from work.  Didn't feel like waiting on the oven to warm it up, so I sliced it and nuked it, I was hungry!

So I guess my conclusion on the mod was that it was a success.  I have always been able to control the temps pretty good since I built it last year, but it really seemed to settle in quickly this time.  I have also been able to get a good 2 hours or so after I started the cook without having to add any wood or worry about it, but I was still well above 225 on both ends of the pit, 2 hours and 45 minutes later, so I can only assume I would have had another hour or so if I had needed it.  Without the upper intake, when I added wood, depending on the fire, I would have to crack the door just a bit until the stick got burning good or I would get a heavier smoke, but with the mod, I just added wood and closed the door.  I would highly reccommend placing your intakes higher.

Thanks Dave for all your input.

+++++++++++

80x80px-LS-ab33d83f_13643-Langandfirstsmoke021-1.jpg

Nice mod. I don't think Dave has given anybody bad advice and this is spot on.  I like the ninja thin blue smoke coming out of that stack.  Sweet ring on that point!

++++++++++
 
Hey dave. Thats great to hear! Its my first build so im learning fast lol i did top and bottom vents as it just made sense when i was reading. Ill know by the weekend how she burns i hope. For sure going to have to do an rtv gasket tube on the cc door as the bow has made everything just a hair off even after 4 hrs of just heating and beating seams and flat bar its just not snug.
My experience with tank steel is moving cold works better than heat Mel. If you can bend beyond fit then whack it most times it will succumb to that better than heating and beating. If your door is within 1/8" a gasket of High temp black permatex RTV will work great. Place plastic wrap over the chamber opening and apply the RTV to the flange then ease the door down and let it set over night. The next day open the door and trim off any excess. If you are faced with a bigger gap LavaLock self stick works well.

http://bbqgaskets.com/cook-chamber/lavalock/self-stick.html

I hope this helps. 
 
Awesome advice kam! Thats gonna be the plan. Did the burn in and season tonight and shes rolling like a boss! Got temps dialed in even with a 2" deep waterbath over the baffle. Pretty happy even with the leaky door. So once thats fixed were gold!
Dave you can really tell with those small top holes how well the heat moves and clears the fire box. What an awesome upgrade!!!! I cant thank you guys enough
 
SmokingMeatForums.com is reader supported and as an Amazon Associate, we may earn commissions from qualifying purchases.

Latest posts

Hot Threads

Clicky