Masterbuilt heating element replacement????

  • Some of the links on this forum allow SMF, at no cost to you, to earn a small commission when you click through and make a purchase. Let me know if you have any questions about this.
SMF is reader-supported. When you buy through links on our site, we may earn an affiliate commission.
Thanks for the reply dr k. Good to know about the extension cord, I have a 25ft 10 gauge so making the assumption it is sufficient. Also love the plywood shelter idea, stealin* that!

I have the two cleaned wires connected back to the element legs and I crimped the connection with pliers to ensure it was a tight fit connection. I fired the smoker back up but unfortunately it still heats up to about 230 degrees then cools down even with the red heating light still going. Guessing it’s a bad heating element? Going to get a replacement and hopefully that gets it back up and running again. Any ideas or thoughts on the issue would be appreciated. Thanks again


Best,

Zack
If it heats to 230* then cools with the heating light on, on the controller, it can be the dime size snap disc over heat sensor failing on the back wall, opening the circuit to the element at too low of a temp instead of over 302*. Some have tried an ice cube on it to cool it down quickly to see if it heats up again. I don't have an access like the newer models to bypass it so I'd have to cut an access panel with a dremel tool to get to it. Just checking to see if the two tests in last post were good or bad with 12 OHMS and no continuity on one leg with the one probe and the other probe on the chassis. I have marked on the back of my smoker where the snap disc sensor is in case I have to bypass it with a quick cut out, cutting horizontal from above then two vertical cuts to avoid the wires that come up from the bottom of the smoker.
 
Last edited:
If it heats to 230* then cools with the heating light on, on the controller, it can be the dime size snap disc over heat sensor failing on the back wall, opening the circuit to the element at too low of a temp instead of over 302*. Some have tried an ice cube on it to cool it down quickly to see if it heats up again. I don't have an access like the newer models to bypass it so I'd have to cut an access panel with a dremel tool to get to it. Just checking to see if the two tests in last post were good or bad with 12 OHMS and no continuity on one leg with the one probe and the other probe on the chassis. I have marked on the back of my smoker where the snap disc sensor is in case I have to bypass it with a quick cut out, cutting horizontal from above then two vertical cuts to avoid the wires that come up from the bottom of the smoker.

“Just checking to see if the two tests in last post were good or bad with 12 OHMS and no continuity on one leg with the one probe and the other probe on the chassis.” - Will confess dr k I’m not familiar with doing this. I assume this is with a multimeter? I’m not capable of doing that sorry.

I’m going to try the ice cube test that daveomak suggested earlier in this post when I get back home from work.

So it won't turn back on after it cools to say, 70 degrees or so ??? if it's the over temp snap switch it should.... ONLY because your smoker warms up when turned on....

The snap switch is the round button thing on the left side, back wall of the smoker body.....

Try this... put an ice cube on it to cool it off fast and cold... The smoker should turn on when that is done..... unless something is haywire with the "re-wire" project you did...

What all did you re-wire ?? Can you check the continuity of the wires to heating element connections ?? Are the connections solid and tight. ??

I’m now thinking it might be a blown Temperature Control Switch (TCO) as that makes the most sense with the known symptoms. Thinking about replacing it which is what another member did with success it seems...
Happy New Year to everyone from TexasCoast!

Well here is my report on replacing the Element in the MES 30.

I actually found Two problems, a Blown Electric Element and the Temperature Control Switch (TCO) was also blown!

I replaced both of these items and the MES is up and working again.

The TCO is the small dime size sensor inside the back of the smoker, mine was located on the left side of the back panel.

You will need to take off the back of the unit to get to the TCO, it is contained in a small metal enclosure.

The TCO can be checked with a multimeter, it should show 0 ohms, if the meter shows infinity then the TCO is bad.

Below is what I ordered from Amazon.com to replace the TCO.
[h1]Amico 5 Pcs KSD301 Temperature Control Switch Thermostat 150 Celsius N.C.[/h1]
150 Celsius converts to 302 Fahrenheit, the max. temp for the MasterBuilt Electric is 275deg. so I figured 302deg. F. would be safe.

I have had the unit running between 250 & 275 deg. for most of the day, No problems.

I hope this Post helps someone else. I thought my unit was DOA for sure!

I will be ordering another Element just to have in hand!


...Any info on replacing that part on the 20070311 model? dr k you mentioned we’re not able to bypass on our models but can you still replace it? Does anyone have a step by step procedure for that who doesn’t mind sharing it? Would be very helpful.

This is what I’m looking at for a replacement. Want to maintain that 302* max that masterbuilt utilizes.


Thanks, Zack
 
“Just checking to see if the two tests in last post were good or bad with 12 OHMS and no continuity on one leg with the one probe and the other probe on the chassis.” - Will confess dr k I’m not familiar with doing this. I assume this is with a multimeter? I’m not capable of doing that sorry.

I’m going to try the ice cube test that daveomak suggested earlier in this post when I get back home from work.


I’m now thinking it might be a blown Temperature Control Switch (TCO) as that makes the most sense with the known symptoms. Thinking about replacing it which is what another member did with success it seems...


...Any info on replacing that part on the 20070311 model? dr k you mentioned we’re not able to bypass on our models but can you still replace it? Does anyone have a step by step procedure for that who doesn’t mind sharing it? Would be very helpful.

This is what I’m looking at for a replacement. Want to maintain that 302* max that masterbuilt utilizes.


Thanks, Zack
Once you access the snap disc safety switch/sensor you may as well put on high heat connectors like the element. So cut the lugs off and strip the wires and wire nut them together to bypass the snap disc and see if that solves the problem then order parts. You can always run it this way, keeping an eye on it more just for runaway smoker potential.
 
MB uses cheap connections.... Corrosion causes resistance... resistance causes heat.... Clean the element legs with sandpaper... Strip back the wiring to good wire... Solder the wires to the legs... tin both first... then cover with shrink wrap.... Good connections, no heat...
 
Once you access the snap disc safety switch/sensor you may as well put on high heat connectors like the element. So cut the lugs off and strip the wires and wire nut them together to bypass the snap disc and see if that solves the problem then order parts. You can always run it this way, keeping an eye on it more just for runaway smoker potential.

MB uses cheap connections.... Corrosion causes resistance... resistance causes heat.... Clean the element legs with sandpaper... Strip back the wiring to good wire... Solder the wires to the legs... tin both first... then cover with shrink wrap.... Good connections, no heat...

I want to replace both the element connections and the snap disc connections with high heat connectors but I’m really not familiar with soldering and wouldn’t want this to be my first thing I try. I’m going to replace the element with a standard replacement kit from ApplianceFactoryParts.com and then the snap disc from Amazon I previously sent a link for. I realize these are temporary fixes and the issue could easily happen again but I just want to get it back working normally as soon as possible.

Thanks again for the help

- Zack
 
i changed my mind... I’m going to replace the original MES connectors with new high heat connectors for both the heating element and the snap disc (TCO). I need to do this by cutting off original connectors, strip the wire back to slide new high heat connector in, and then I need to crimp the new connection in place and not solder (don’t have a soldering gun and have never soldered before so need to crimp). Once new high heat connections are installed I’ll plug them back into the burner element spades and the snap disc spades and crimp them with pliers to secure. Then I’ll cover all wires with heat shrink wrap and cover the new connections with high heat polyimide film tape. Thought? Will crimping and not soldering new high heat connectors work here? Below are the connectors I plan to use.

 
Be sure to use DE-OX of some kind where you crimp and where the connectors slide together.... They have it in small tubes... You box store has it in 1 oz. tubes.... in the electrical dept....
AND clean the wires etc. with sand paper... Oxidation is resistance which will cause it to burn up the stuff again....

417yZZcJr4L.jpg
Right, will do. Thanks
 
So I identified my problem as a bad KSD301 Thermostat. After I popped open the back I replaced the thermostat and it started working again like normal. No problem reaching and keeping max 275*.


Issue I now have is while trying to determine the cause of my initial problem I disconnected the burner element from its wires. Now reconnecting them and crimping them together and covering with anti-oxidant compound results in the left side wire smoking. Nothing crazy but it’s definitely reaching smoke point. Right side connection seems ok. I added a picture which shows the connection, it’s hard to see the smoke but it’s there. Is this something I can fix by crimping harder? Or will this eventually burn off? Maybe too much compound?


Or is it time to cut off original connector and replace with high heats like my original plan was? Didn’t want to do that but will if I have to.


Any thoughts would be appreciated

257410D2-5FE8-43E7-AB5C-BB4295091EE3.jpeg

2002C757-E758-42B8-B05C-F4E466D337E3.jpeg


Thanks
 
The De-Ox is supposed to be a coating between the connectors... Put it on before assembly... Some on the outside is OK also...
 
So I identified my problem as a bad KSD301 Thermostat. After I popped open the back I replaced the thermostat and it started working again like normal. No problem reaching and keeping max 275*.


Issue I now have is while trying to determine the cause of my initial problem I disconnected the burner element from its wires. Now reconnecting them and crimping them together and covering with anti-oxidant compound results in the left side wire smoking. Nothing crazy but it’s definitely reaching smoke point. Right side connection seems ok. I added a picture which shows the connection, it’s hard to see the smoke but it’s there. Is this something I can fix by crimping harder? Or will this eventually burn off? Maybe too much compound?


Or is it time to cut off original connector and replace with high heats like my original plan was? Didn’t want to do that but will if I have to.


Any thoughts would be appreciated

View attachment 388488
View attachment 388489


Thanks
The problem with the alum Mes quick disconnects is that unacceptable tiny strip that crimps to the wire. If corrosion has compromised it there's even less contact so it's unsuitable for the 10 amps going through it so more resistance is higher heat. It's going to disintegrate. New high heat lugs crimped on will contact more wire with the longer barrel. You may have broken strands inside the insulation at the lug that is smoking the insulation. You may have to use a razor to cut through the high heat braiding before striping the insulation inside to keep the strands intact. Time for new lugs.
 
The problem with the alum Mes quick disconnects is that unacceptable tiny strip that crimps to the wire. If corrosion has compromised it there's even less contact so it's unsuitable for the 10 amps going through it so more resistance is higher heat. It's going to disintegrate. New high heat lugs crimped on will contact more wire with the longer barrel. You may have broken strands inside the insulation at the lug that is smoking the insulation. You may have to use a razor to cut through the high heat braiding before striping the insulation inside to keep the strands intact. Time for new lugs.

The De-Ox is supposed to be a coating between the connectors... Put it on before assembly... Some on the outside is OK also...

Thanks daveomak appreciate the info. I redid the connections with better use of the de-ox but still see slight smoking from that left connection.

Going to bite the bullet and follow dr k advice (well I guess everyone’s advice) and cut off the old MES connectors and rewire new high heat connectors. I have the new lugs coming from amazon today so hoping to have this fixed sometime soon. Will post if this solves the problem or not, assuming there’s somebody out there this might help.

Thanks again for the help.
 
Dr K and others,

I used the high-temp connectors in May 2017, and my 20070311 ran great for 18 months, and then repeated the problem again right at Thanksgiving 2019 (of course!). I was able to smoke the pork shoulder on my weber grill with SnS, but I really, really want to use my MES.

I still have some high-temp connectors and will replace the connector on the right side again (that's the one that burns up), but I was wondering if there's anything else I can do to improve my chances, or should I just check the connection every 12 months? Daveomak, you recommended DE-OX, will that help, and can I apply it after the fact (specifically, I'd like to repair the connection today and order the DE-OX and apply it when I receive it). I have the connector itself and the "joint" (is that the right word?) where I splice my new wire to the thin Masterbuilt wire.

Ok, I found something called DeoxIt at Amazon as well (). Would I buy this and the DE-OX, or is this enough? Since I would have it tomorrow, that would be great.

One other question. Masterbuilt sells the replacement heating element for $20. Would that fix the problem, or just postpone it?

Ok, shoot, I liked - another question. Do any of you know whether newer MSE models have this problem? If they fixed it, I could start watching for a good sale (even next Black Friday a year from now) and have two smokers. :-)

Thanks!
 
Last edited:
Dr K and others,

I used the high-temp connectors in May 2017, and my 20070311 ran great for 18 months, and then repeated the problem again right at Thanksgiving 2019 (of course!). I was able to smoke the pork shoulder on my weber grill with SnS, but I really, really want to use my MES.

I still have some high-temp connectors and will replace the connector on the right side again (that's the one that burns up), but I was wondering if there's anything else I can do to improve my chances, or should I just check the connection every 12 months? Daveomak, you recommended DE-OX, will that help, and can I apply it after the fact (specifically, I'd like to repair the connection today and order the DE-OX and apply it when I receive it). I have the connector itself and the "joint" (is that the right word?) where I splice my new wire to the thin Masterbuilt wire.

Ok, I found something called DeoxIt at Amazon as well (). Would I buy this and the DE-OX, or is this enough? Since I would have it tomorrow, that would be great.

One other question. Masterbuilt sells the replacement heating element for $20. Would that fix the problem, or just postpone it?

Ok, shoot, I liked - another question. Do any of you know whether newer MSE models have this problem? If they fixed it, I could start watching for a good sale (even next Black Friday a year from now) and have two smokers. :-)

Thanks!
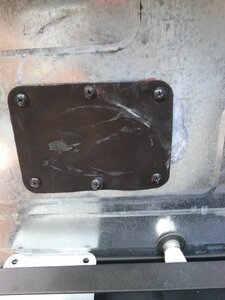
The OEM aluminum connectors and being in contact with the steel element spades and the wire maybe aluminum (I don't know if it's copper) but these opposing metals will create aluminum oxide and corrodes the joint creating a loose contact and more resistance = more heat till it disintegrates. If you tin the wire so it's coated in molten solder and when solid slide it into the lug and heat till molten and add solder to the lugs or directly solder the tinned wire to the element spades, then no oxygen to create alum oxide if the wire is aluminum. I peeled the rubber gasket off the element access plate and streched the holes over the screw heads. I can peek periodically when the smoker is unplugged to check the lugs. I lean a board against the back off the smoker so nothing hits the access area. My holes in the back are mostly stripped so the screws are in them and the rubber gasket keeps me from stripping them more from removing the plate.
CAM00866.jpg
 
Thanks for the info. I took the back plate off and found the left wire completely burned off at the blade/spade connector. There is very little left to the blade and what is there is rusty and has a hole in it. Can I attach a new blade(male end on the element) or solder directly to the element?
 
The heating element in my MES 30 fried. It arced on the plate underneath it some how. I'm assuming it was the 800 watt element as that is what is listed as the replacement. Could I use the 1200 watt kit in my smoker?
 
SmokingMeatForums.com is reader supported and as an Amazon Associate, we may earn commissions from qualifying purchases.
Clicky