"Ducting down" to grill from smokestack

  • Some of the links on this forum allow SMF, at no cost to you, to earn a small commission when you click through and make a purchase. Let me know if you have any questions about this.
SMF is reader-supported. When you buy through links on our site, we may earn an affiliate commission.

griffjoe

Newbie
Original poster
Jun 6, 2016
15
18
I know there have been other threads on this, so apologies for starting a new one. The most recent I saw was several years old.

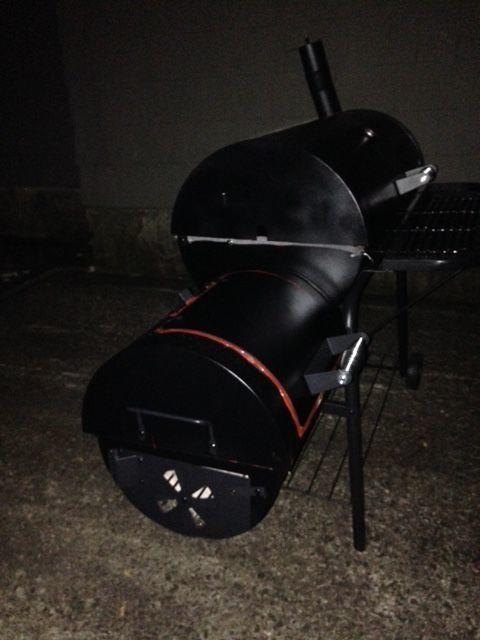
I've just put together a cheap offset smoker, and tightened it up pretty good with RTV and Nomex gasket material. The burn-in went really well.

Following advice found in various forums, I picked up some 3" flexible aluminum duct, intending to run that from the chimney to grill level.

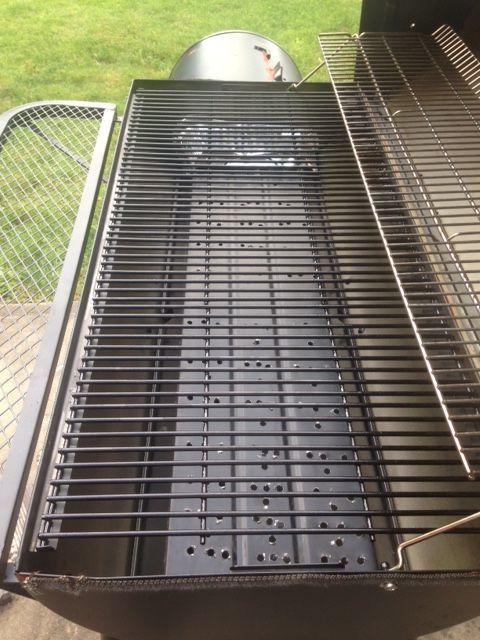
I've improvised a baffle and a heat/smoke distributor along the bottom of the cook chamber.

My problem is, I'm in love with the warming rack. I love smoked baloney, and the warming rack seems a good place to smoke some baloney and sausages. If I leave the warming rack in, the way this smoker is set up, it will crush the duct every time I open the cook chamber.

My question is: How important do you think the chimney-to-grate duct is, for temperature regulation?

I'm doing a test cook on my new smoker this weekend, with a couple of grill-level thermometers. This should give me a good idea whether I need a smokestack duct or not. But if anybody who's been through this drill already has an educated opinion, I'd sure listen to it.

Thanks for any advice.
 
I wouldn't add the duct. Personally I think it would just mess up the air flow.
That's just my opinion.
Try it without the duct and see how it works.
 
Thanks for the encouragement! The after-market thermometers (which I forgot to take to NJ with me before final assembly and seasoning burn) will show me a lot during the test cook. (Pictures to follow, no matter how the test cook goes.)
 
Post some pics of your setup...would love to see it and pics work alot better when asking questions as well.

J
 
It's a pretty standard horizontal offset smoker, Char-Broil 1280. It came with a shaped steel tray intended be suspended below the grills, to hold charcoal for direct heat grilling. I drilled out the tray and inverted it, to distribute heat and smoke evenly through the cook chamber. The tray is just a few inches short the length of the cook chamber -- perfect for mating with a baffle. For a baffle, I'm using a heavy-duty aluminum foil pan, cut to the contours of the tray.


So here's what the finished product looks like. I cooked a picnic shoulder and a rack of baby backs Saturday night. I had trouble getting temp much past 160. I used two Weber charcoal baskets designed for offsetting the coals from the meat in a kettle grill. I kept piling on pre-lit coals, but couldn't get the heat up.

The chimney drew beautiful blue smoke. That's a plus.

I cooked the meat for about 13 hours; then, we finished it off in the oven for an hour at 350 (less time for the ribs). It was delicious and smoky, but the picnic shoulder didn't pull well.

Weekend after next I'm going to be cooking for somewhere in the neighborhood of a hundred folks. (Not on this rig alone.) The oven is going to be *very* busy with side dishes, and finishing off several roasts will not be an option.

So here are things I know I can (and will) do:

- Glue some heavy-duty aluminum foil (or something stronger, if I find it) with RTV, across the openings intended to accommodate a rotisserie. Obvious point of thermal loss there.

- Glue some exhaust header wrap over the gap between the top and bottom halves of the cook chamber. (Again, using RTV.) I layered several strips of Nomex gasket material in there, but there are still gaps. I think the wrap, "taped" along the back, would help there.

- Get a bigger coal basket than the two little Weber baskets. They're shaped in a way that doesn't give maximum efficiency to the burn, though they did keep the coals from falling to into and being smothered by their own ashes.

- I don't know how pliable the material is in the charcoal tray (shown in this photo drilled full of holes, reverse of its intended orientation, and laid in the chamber instead of hung from the grates). Pretty sure it's sheet steel. If it is pliable enough, I want to flatten the angle of the bends along the sides of the tray, to make it catch the sides of the cook chamber higher up, and hopefully, let more heat into the chamber.

- Drill more holes in the charcoal tray-turned-heat-channeler, to try to free more thermal energy into the cook chamber.

Going to try all of the above steps. If that doesn't work, I'm falling back on a solution I came across on another forum, where the guy used an aluminum foil pan for a baffle (note my baffle in the photo) and then aluminum foil cookie sheets as "tuning plates". He claimed great success with that setup, as far as keeping the heat and smoke even across the chamber.

If all else fails, I may re-visit the duct as a way of keeping thermal energy in the cook chamber higher. I'm no physicist, but it seems to me that if the heat can't run right out the chimney at the top, and has to instead exit at grill point, a higher-temperature stasis might build up right about grill level,
 
Offsets need to breathe a little. In all the offsets I have owned, I have started my fire with a lit chimney of charcoal and then I burn wood splits for fuel.
I would be a little concerned that you could only cook your meat to 160. It sounds like you still got some experimenting to do before your big cook.
 
You might want to read Dave's Tutorial at the top of the reverse flow section,and add an upper firebox damper directly across from the firebox to cook chamber opening, although daves research shows this for reverse flow smokers it does the same thing for crossflow side firebox smokers,drawing the heat out of the firebox,making it move through the cook chamber, evening out temps. on a crossflow I've found extending the stack down creates stale smoke,and reduces the draft draw through the cook chamber.

Mike
 
Thanks! Here's what wound up working for me: I gave up on the re-purposed steel charcoal tray shown above. I used the same aluminum foil "baffle" shown above, and laid a couple of well-perforated heavy-duty foil cookie sheets atop one another on the fire box side. Left the away side completely open. I used lump charcoal. With one chiimney of charcoal, both sides in tandem went up to about 290F, and then settled back to about 250. The upper chamber ran about 40 degrees hotter. That may even out. At first, right, left and top were out of balance. This confused me, because burning briquets last night, everything burned even, top, left and right.

Top matters, because there's a "warming rack" up there big enough to accommodate a couple of picnic shoulders. I'm also planning to smoke a bologna.

I opened the cook chamber to add another cookie sheet and realized that in wrangling the smoker out of the garage this morning, the "baffle" had worked away from the intake port. Once I straightened that out, everything evened out again.

Lump charcoal is key. I couldn't get the fire hot enough last night with briquets. Lump put the box right where it needs to be.

I'm glad I got it dialed in! I have to cook next weekend for 75-100 folks. It's taken me the last three weekends, but I'm very comfortable with this beast now. In addition to this, I've got two 22.5-inch Weber kettles that I've used a dozen times, and a Brinkmann cabinet smoker that I've used four or five times.

Between them all, I'm gonna be as busy next Friday as the pit tender at Franklin's Barbecue.
 
I just got the same 1280 grill/smoker.  Can you show pics of your finished baffle?  Just not sure I quite understand.  You said you used aluminum foil and also some cookie sheets??  

Good luck on the large cook you're doing.  

Thanks.
 
Not aluminum foil, exactly. One of those heavy-duty disposable aluminum pans. A picture earlier in this thread shows the "baffle" when I was trying to use the charcoal tray, drilled with holes, to distribute heat and smoke evenly through the cook chamber. It didn't work out too well. The tray rides too low in the cook chamber, even after I flattened out the sides.

The attached photo is not my setup, but it accurately p9ortrays what my setup wound up looking like.

You have to get the "baffle" molded snugly to the fire box port. One thing I found out is that because it's so light, it's easy to knock the baffle loose as you're wrestling the smoker around.

 
SmokingMeatForums.com is reader supported and as an Amazon Associate, we may earn commissions from qualifying purchases.
Clicky