- Mar 27, 2014
- 23
- 11
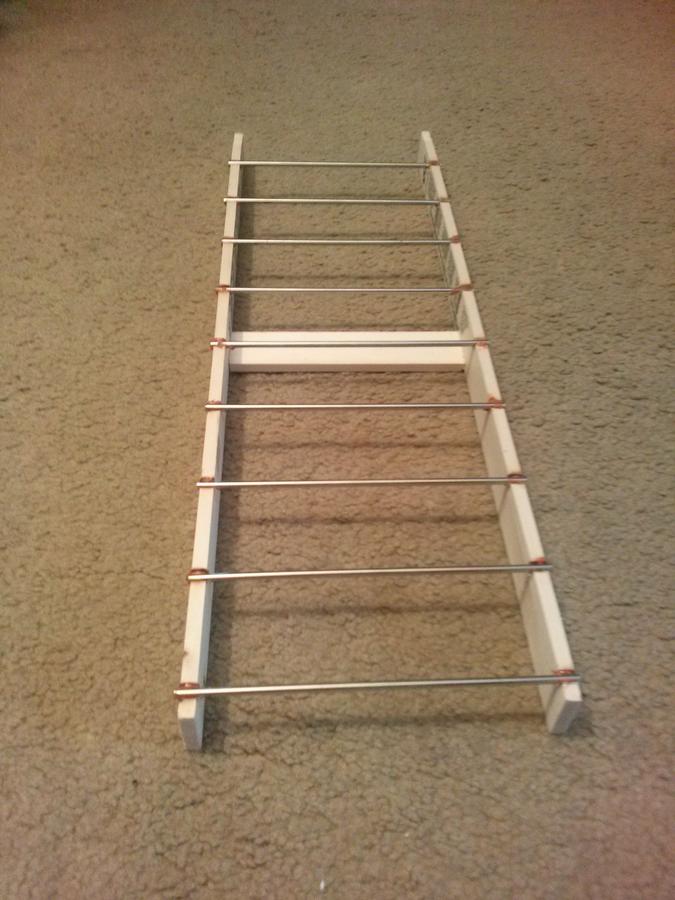
I have the mailbox hook up to my MES smoker and have been using the AMNPS smoker tray and pellets. I have used pellets from Amazin, Menards and Bass Pro Shop. I always had some difficulty keeping the pellets lit. I followed the instructions keeping them flame lit for about 15-20 min and once the flame went out I put the tray in my mailbox and had great production for maybe 10 min. I would go back and sure enough the pellets were out. I have tried microwaving them as some suggested to dry them out, I have tried putting them in my food processor and adding the dust and crumbled pieces to the pellet tray thinking this would help but to no avail. I tried adding more holes to the mail box and again still struggled with the pellets remaining lit where I could set it and forget it, because if I wanted to smoke overnight while I slept, nothing more frustrating then having the pellets burned maybe 1/4 row and stop. I believed the problem to be air flow and there just wan't enough air flow to keep the pellets lit and I believe I have solved that problem with great success.
I purchased a small DC fan off Amazon.. Product Scythe Mini KAZE ULTRA 40mm Silent Mini Fan (SY124020L) $7
This fan had a small molex connector that wasn't going to work for me, so I purchased a DC Coaxial Jack and wired it to the fan motor wires. $2, I then purchased a DC 300mA AC Adapter $5 that allows me to adjust the input voltage to the fan and thus change the speed.
Today I tested it without fail, this worked absolutely perfectly The fan kept the pellets burning thru a entire row where all that was left was pure ash. I took some photos of the process along the way for reference.
The DC Coaxial Jack I got from FRYS Electronics store as well as the AC adapter that was on sale.
This is the DC Fan, its only 1 1/2 inches wide. You can see the white molex connector.
This fan came with an adapter wire with the female portion of the molex connector attached.
The fan has the male portion of the molex connector. I left that connection in place because
in the event the fan ever dies I won't have to rewire anything, just install the new fan and
plug it in using the molex connector.
DC Coaxial Jack, Female end $2
Inside the DC Jack, you need a small soldering iron and solder the positive terminal to the
center post and the negative wire to the hole in the terminal, then the wires get crimped
at the end by the metal tabs to hold wires from getting pulled out.
Male end of the AC Adapter that fits the DC Jack
AC Adapter with 6 or 7 voltage settings, up to 12 volts this one goes.
After soldering the wires to the inside of the jack I used 2 sizes of heat shrink tubing, Red one for the small
wires and another Blue larger that went over the end of the jack and over the Red heat shrink tubing.
This also secures the wires from being pulled out of the jack.
End of mail box with the outline of the fan.
I used a 1 1/4" inch hole saw as the fan frame is 1 1/2" wide this would have opened the hole too
large and would have interfered with the screw hole openings. This actually made the opening
exactly that of the fan diameter. Plus it left enough room for the mounting hardware.
Hole made with hole saw. You can see little room between hole and where screws will end up.
Fan attached to the door of the mail box. The 3 large holes above were previous
attempts at getting more air into the mail box.. I covered those up with foil tape.
Fun running
I took extra wires that I soldered to the wire adapter that plugs into the wires going to the fan. This way
I can unplug the fan from the wires that attach the DC Jack and protected it with heat shrink
which is the red heat shrink on the left side. I secured the wires using tie wraps along the
bottom of the mail box. Basically the wires that are attached to the DC JACK on the right side
in the photo is really just a pigtail, the left side of the photo where you see red heat shrink has
a female molex connector on the end, this is then plugged into the wires of the fan that you can see
on the left side of the first photo. Should the fan die I can easily replace it and just plug it into the
existing pigtail that has the DC Jack at the end.. I took a photo of that setup.
This photo shows how the fan comes with a male end of a molex connector. The fan kit
can with a pigtail to plug into the fan, it was that pigtail I soldered longer wires to that then
was soldered to the DC Jack. I just unplug the AC Adapter when I am done, however, should
I need to replace the fan its simply unscrew the 4 screws and unplug the connector.
AC Adapter plugged into DC Jack
You can see how small the fan is. These fans come in all sizes but this size seems perfect, creates just
enough air flow to keep pellets lit. I can run this fan down to about 7 volts, anything less and the
fan stalls, but I can run it at 12 volts, slightly faster then the 10VDC operating voltage.
Perfect blue smoke leaving the smoker
Hope this helps those who struggle with keeping pellets lit.
I purchased a small DC fan off Amazon.. Product Scythe Mini KAZE ULTRA 40mm Silent Mini Fan (SY124020L) $7
This fan had a small molex connector that wasn't going to work for me, so I purchased a DC Coaxial Jack and wired it to the fan motor wires. $2, I then purchased a DC 300mA AC Adapter $5 that allows me to adjust the input voltage to the fan and thus change the speed.
Today I tested it without fail, this worked absolutely perfectly The fan kept the pellets burning thru a entire row where all that was left was pure ash. I took some photos of the process along the way for reference.
The DC Coaxial Jack I got from FRYS Electronics store as well as the AC adapter that was on sale.

This is the DC Fan, its only 1 1/2 inches wide. You can see the white molex connector.
This fan came with an adapter wire with the female portion of the molex connector attached.
The fan has the male portion of the molex connector. I left that connection in place because
in the event the fan ever dies I won't have to rewire anything, just install the new fan and
plug it in using the molex connector.

DC Coaxial Jack, Female end $2

Inside the DC Jack, you need a small soldering iron and solder the positive terminal to the
center post and the negative wire to the hole in the terminal, then the wires get crimped
at the end by the metal tabs to hold wires from getting pulled out.

Male end of the AC Adapter that fits the DC Jack

AC Adapter with 6 or 7 voltage settings, up to 12 volts this one goes.

After soldering the wires to the inside of the jack I used 2 sizes of heat shrink tubing, Red one for the small
wires and another Blue larger that went over the end of the jack and over the Red heat shrink tubing.
This also secures the wires from being pulled out of the jack.

End of mail box with the outline of the fan.

I used a 1 1/4" inch hole saw as the fan frame is 1 1/2" wide this would have opened the hole too
large and would have interfered with the screw hole openings. This actually made the opening
exactly that of the fan diameter. Plus it left enough room for the mounting hardware.

Hole made with hole saw. You can see little room between hole and where screws will end up.

Fan attached to the door of the mail box. The 3 large holes above were previous
attempts at getting more air into the mail box.. I covered those up with foil tape.

Fun running

I took extra wires that I soldered to the wire adapter that plugs into the wires going to the fan. This way
I can unplug the fan from the wires that attach the DC Jack and protected it with heat shrink
which is the red heat shrink on the left side. I secured the wires using tie wraps along the
bottom of the mail box. Basically the wires that are attached to the DC JACK on the right side
in the photo is really just a pigtail, the left side of the photo where you see red heat shrink has
a female molex connector on the end, this is then plugged into the wires of the fan that you can see
on the left side of the first photo. Should the fan die I can easily replace it and just plug it into the
existing pigtail that has the DC Jack at the end.. I took a photo of that setup.

This photo shows how the fan comes with a male end of a molex connector. The fan kit
can with a pigtail to plug into the fan, it was that pigtail I soldered longer wires to that then
was soldered to the DC Jack. I just unplug the AC Adapter when I am done, however, should
I need to replace the fan its simply unscrew the 4 screws and unplug the connector.
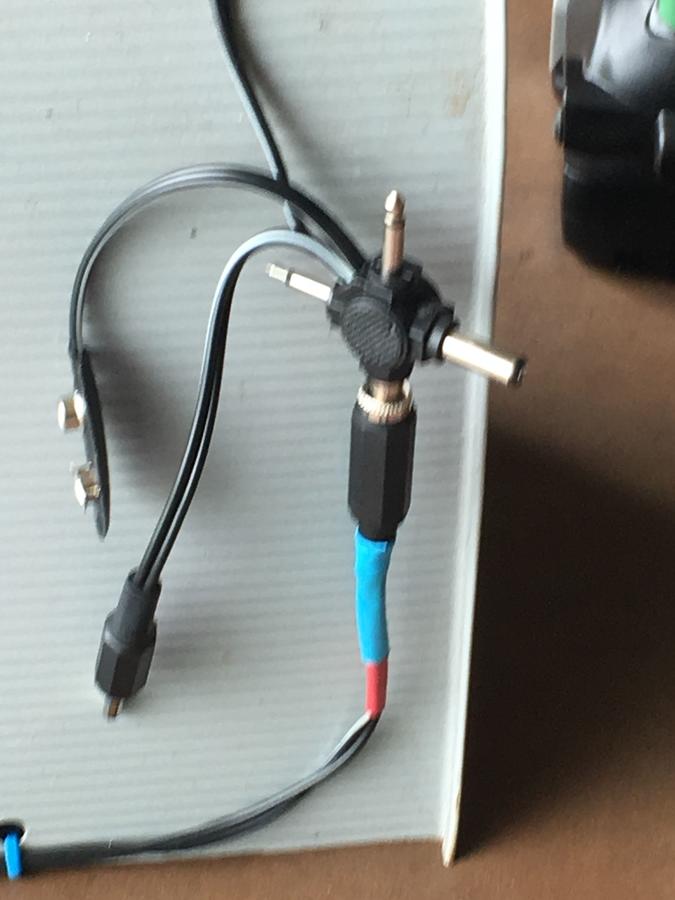
AC Adapter plugged into DC Jack

You can see how small the fan is. These fans come in all sizes but this size seems perfect, creates just
enough air flow to keep pellets lit. I can run this fan down to about 7 volts, anything less and the
fan stalls, but I can run it at 12 volts, slightly faster then the 10VDC operating voltage.
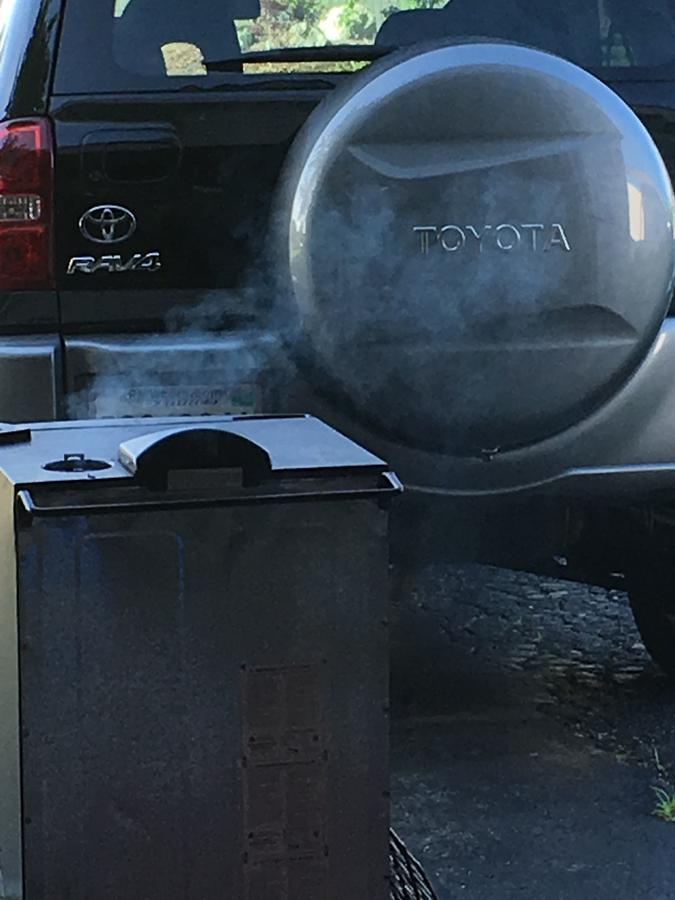
Perfect blue smoke leaving the smoker
Hope this helps those who struggle with keeping pellets lit.