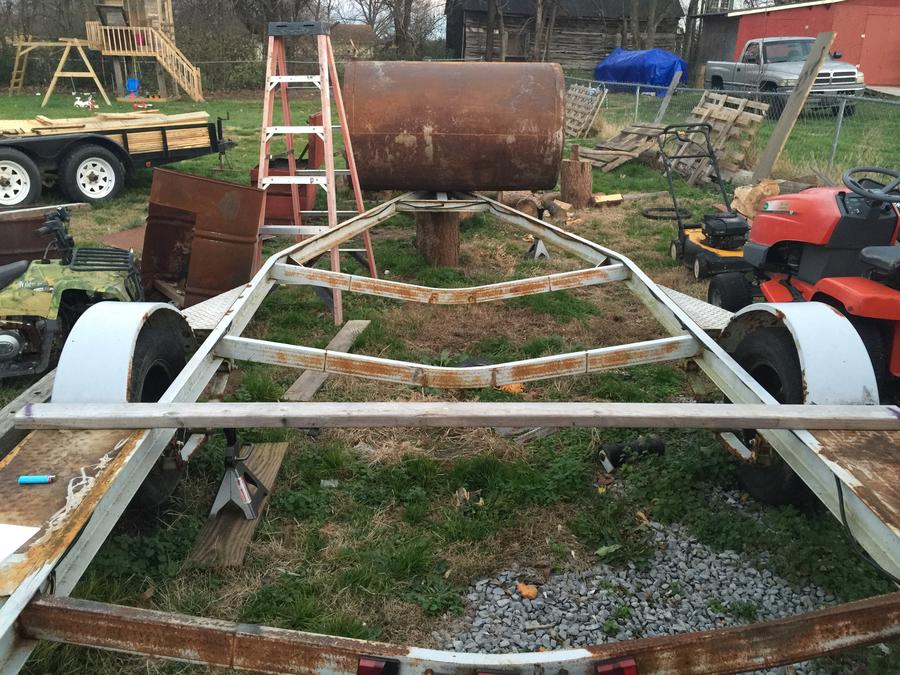
Center Feed RF build

  • Some of the links on this forum allow SMF, at no cost to you, to earn a small commission when you click through and make a purchase. Let me know if you have any questions about this.
SMF is reader-supported. When you buy through links on our site, we may earn an affiliate commission.

tnhollerbach

Smoke Blower
Original poster
May 20, 2015
82
10
Omaha, Nebraska
Alright, so after a ton of planning and patience I am beginning my build, I really cant wait to get thing running!!! I will get some pics up as soon as I get a chance but I have a question that hopefully someone can answer or give advice on.

I have started cutting the door for my cook chamber, I have only cut the top seem and about halfway on each side until I get the trim and hinges on. I already notice that the door is springing a little on the top cut so I see this being a problem.

Does any one have any solutions on how to stop the door from spring to badly, maybe some braces or ribbing? Just looking for ideas!

Thanks in advance!!!
 
What are you using for cutting? Main reason for distortion is to much heat being transfered throughout metal. You can work to cool the metal faster after the cut or heat up the entire piece being worked to have it warp less because its all under heat. Thats a difficult thing to work with in that state I might add. Plasma torches do your best cuts with less heat distortion.. Cutting wheels are the worst tool to use. Gas torch is in the middle. You might need to have someone with a hose of cold water running over the metal shortly after your pass to reduce the warping.
 
Trippy, i am just using a cut off wheel on a 4 1/2 in angle grinder- i guess inshoukd clarify that the metal didnt really warp. It more of kinda sprung if that makes sense.

I dont feel like it got real hot but i am not a metal expert or metal curring expert whatsoever so i probably just dont knownwhat im doing. Lol
 
With a lot of cylinders you find the metal was rolled to a point then welded together. The metal was not rolled into a cylinder where it was a point, that it did not need the joint pulled or pressed to make a match. Naturally the metal has a pulling action to open up the arch or pull in the arch. This is a common effect with tanks that have only one weld seam. This is a common effect in trees that grow in a arch. The lumber naturaly pulls when cut becuase it grew with stress.Still the cutting wheel heats up the area that is being cut grinding out the metal. The thinner the blade helps to reduce that but it also requires more wheels.  Cut and cool metal cut and cool metal will help lots. Your welding the flap over the edge gap will cause you warping if not using techniques for heat control.

Hope that answered some of your questions about the pulling action your getting.
 
Trippy, yeah that helped on knowing why. I appreciate your input.

Dave, thanks that is what I'm looking for, my tank walls are only like 1/8in what thickness would you recommend for the support ribs?
 
Last edited:
Trippy, yeah that helped on knowing why. I appreciate your input.

Dave, thanks that is what I'm looking for, my tank walls are only like 1/8in what thickness would you recommend for the support ribs?


Depends on the size of the tank ... I'd go with 3/16 and use 2-3 on the door..... Your objective is to control the warping...
 
Quote:
Depends on the size of the tank ... I'd go with 3/16 and use 2-3 on the door..... Your objective is to control the warping...
That is my thought, I was thinking 2 supports, my tank is 3ft round. My door opening will be approx. 55" L x 20" W, may be a little bigger on the width.
 
I think that I am right on with the typical configuration of the door. I'll see if I can't get some pics posted this evening!!
 
Last edited:
Got a little work done this weekend, not much but it is a pretty big accomplishment for me. I am not a metal worker and do not claim to be but I am pretty proud of the fabrication of my door supports/hinges/handle. Going hopefully get a couple lessons in welding tomorrow and get these things welded up!!

Also, I talked to the guy who is fabricating my firebox that I gave up on, Ended up they got it all finished and accidentally shipped it out with a order of boxes they fabricated for some company. After 6 months they finally admitted they messed up. So they are going to cut it again and weld it and only charge me the price for material. Which is about a $200 savings for me. I'm ok with that!!! I wasn't ready for it 6 months ago anyway! I should have it by Tuesday!!

anyway, here is my progress from the weekend.


Tack those ribs in place the using about 1" welds every 6-8 inches or so, weld them in place... You do not want to fully weld the ribs... that will cause warping.... Let each weld cool before moving on to the next, just for insurance on the warping...
 
Tack those ribs in place the using about 1" welds every 6-8 inches or so, weld them in place... You do not want to fully weld the ribs... that will cause warping.... Let each weld cool before moving on to the next, just for insurance on the warping...
I was curious about that Dave, I wasn't sure if it was better to weld the entire seem or just tack them on like you said.  In general, what is the best practice on when to weld an entire seem or when a tack is sufficient? Thanks for the heads up though!!
 
I would tack the door ribs.... the door seals... the RF plate... the air adjusting holders... ... Basically anything that is non structural....

Full welds can warp anything if not done correctly... counteracting weld stresses is a science... Tack everything in place... with plenty of 1/4" long tack welds... Then weld a bit here.... move.... weld a bit there.... trying to rotate around the piece about 180 deg. or so....

On the door flange seals, blind welds work well... use 18-20 ga. for the door seals... It doesn't need to be thick metal... only seal up air... on those you can weld a spot every 4-6 inches... weld up the end holes first... then the center... then the ends... then the center... etc .. to keep shrinking the seal strip....
Thanks dave, I think I understand premise behind welding seams, but I am now confused on what a bllind weld is, what a slot weld is and what spot weld is. I really know nothing about welding, so please forgive me asking so many questions.

Are you saying that I can use 18-20 ga flat bar for door seals on my CC? And are you also saying that with one of these methods of welding I can weld through that 18-20 ga flat bar into the tank lid as opposed to tacking the edge of the flat bar to the lid. I had planned on using 1/8 x 2 flat bar for the seams?
 
Drill a hole in the door seal strip, then weld where the hole is.... drill the holes off center to allow for room to move the seal over the door gap.. 1/2 - 3/4" overlap should be sufficient... More if you are planning of using some sort of sealing tape etc...

1/8 X 2 is good.... or 1/16 X 2 would work also.. it's only holding in air....
 
Last edited:
Dave Thank you! I understand that now. I checked out a couple videos and I see what you are saying.

Well I am off for the week so Hopefully be able to get some things done. taking one welding lesson this evening so we will see!
 
SmokingMeatForums.com is reader supported and as an Amazon Associate, we may earn commissions from qualifying purchases.

Latest posts

Clicky