I've been planning for a while, to share a couple of additional mods I've made to my Master Forge Vertical Gasser. I wanted to get in a few smokes first in order to verify they work and actually add some value. What I've learned in one case, is that sometimes what seems like great innovation doesn't always pan out like you've planned it. In other cases you might actually exceed your expectations.
I've had my smoker for about 4 yrs now and over time have made most of the mods that people, a whole lot smarter than me, have thought up and implemented. They have been very beneficial for the most part.
I've sealed the doors with rope gasket (actually switched, after a couple years, from the rope type to the flat surface type, for a much smoother and tighter overall fit.
I've cut the front and rear edges of the water pan down and drilled holes on the pan sides for better heat distribution and smoke pass through.
Additionally I drilled a hole near the top for one of my digital probes to fit through. I provides great temp readouts without opening the door.
The one issue I couldn't really solve to my satisfaction though was the lack of "mass" this smoker has, which at times leads to having a very difficult time keeping up temps, especially in those cold Iowa winters; or consistent heat retention when doors are opened.
I didn't love the idea of filling the water pan with sand or other mass creating options because, to be honest, I like to use the water pan for what it's there for, keeping a humid environment. I know there's some debate on this but to each his own. I myself like the water for at least the first 70% of the smoke.
I literally woke up in the middle of the night with a thought about how to solve the "mass problem" and add some insulation at the same time. A couple quick drawings later I had a rough plan. My son in law has the same smoker and we'd been learning together about fine tuning our smokers, so I ran the idea by him.
The "Master Forge Mega" is Born
Our idea was to line the sides and back walls with 3/8 inch plate steel (yup, that's gonna be heavy!)
When cut to the inside dimensions the plates would fit perfectly inside the holder ribs for the racks and the back wall would be completely covered.
We measured our dimensions and got quotes for the plate steal at a local iron works. They were a great resource. From the time they provided a quote and got our order to time the plates were cut and punched amounted to just over 2 hours on a Saturday afternoon.
Now that's service!
A friend of mine who had recommended them manages an electro plating service in town. After having the plates made he offered to nickel plate them for free. This was turning into a fun project.
Plates immediately after being cut and punched.
We had the iron works punch holes in all four corners so we could bolt the plates to the outside walls of the smoker. We then also drilled out holes where bolts within the smoker would interfere with a nice flush mount. For the most part we got pretty close.
Next they went off to the plater for a couple of days.
Pretty nickel plated plates
We also had considered heat transfer of the out walls once the plates got warmed up in the smoker. We decided this would be a good time to add some heat shield material between the plates and the smoker walls. We felt this would be a far more complete solution in that it would insulate and limit heat xfer. We were able to find the perfect material on
Amazon.com.
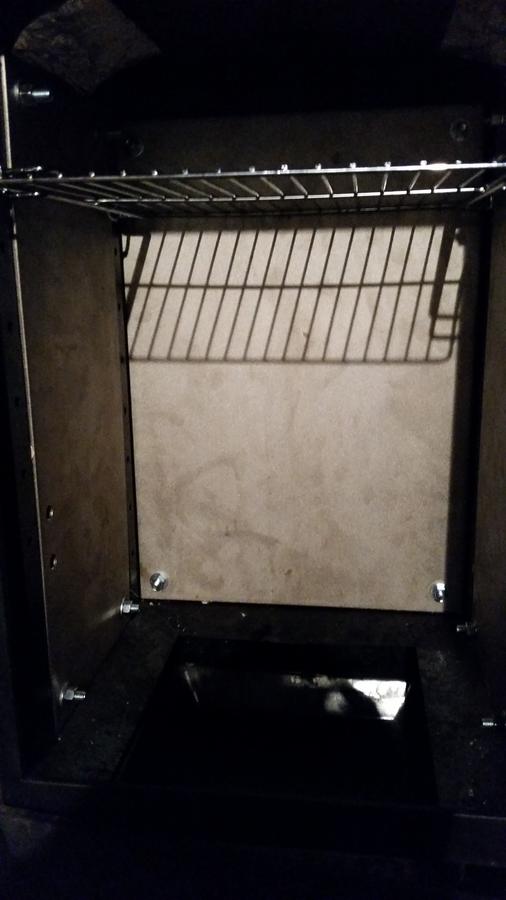
Cut Insulation and trial fitting into Smoker
Next we rough fit the plates into the smoker
We used duct tape to hold the corners of the insulation secure.
This helped prevent the insulation from twisting when we drilled holes through the exterior walls.
The last step was to bolt the panels in place
Final Product with a couple of proud Master Forge "Mega" owners
But will it smoke?!
After a few smokes we're pretty darn impressed. I'm convinced I'm using less propane due the great insulation this mod provides.
Further, the temps are far more stable. I can get to a steady 225 for example, and if I want to move up or down by 5-10 degrees all I need to do at this point is tweak the lower two vents.
Opening and closing the door to check progress also causes a much shorter and less severe temp drop.
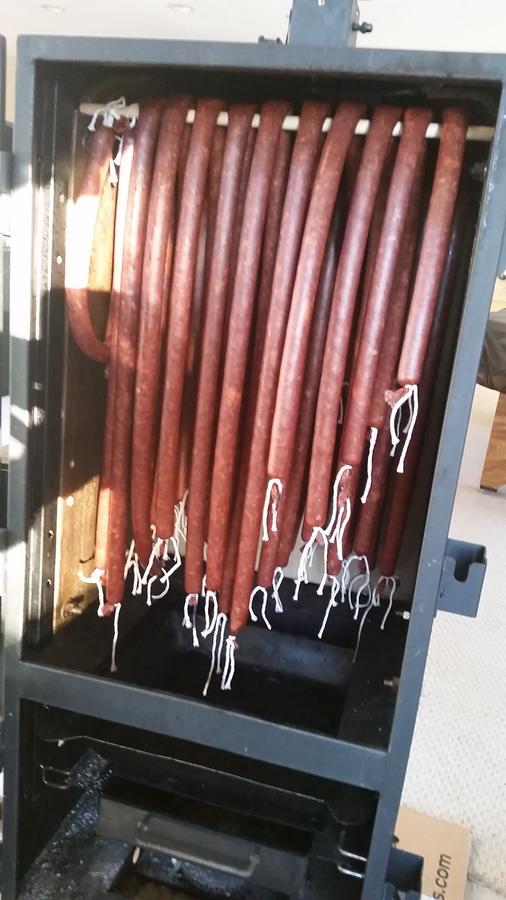
First racks of ribs were falling apart good!
The first boston butt put through the new config turned out better than ever as well.
Makes me hungry just looking at the pics....
All in all I couldn't be happier with the final product. The smoker is now about 65 lbs heavier than it was. Those plates are HEAVY, and the results we hoped for exceed our expectations. When the smoker is steady state at 225 degrees I can place my hand on the side of it and it is warm to the touch. Prior to the mod water splashes would sizzle off the side of the smoker. I love the efficiency gains.
I don't suppose this mod is for the faint of heart, but we had fun pulling it all together and the results speak for themselves.
I've had my smoker for about 4 yrs now and over time have made most of the mods that people, a whole lot smarter than me, have thought up and implemented. They have been very beneficial for the most part.
I've sealed the doors with rope gasket (actually switched, after a couple years, from the rope type to the flat surface type, for a much smoother and tighter overall fit.


I've cut the front and rear edges of the water pan down and drilled holes on the pan sides for better heat distribution and smoke pass through.

Additionally I drilled a hole near the top for one of my digital probes to fit through. I provides great temp readouts without opening the door.
The one issue I couldn't really solve to my satisfaction though was the lack of "mass" this smoker has, which at times leads to having a very difficult time keeping up temps, especially in those cold Iowa winters; or consistent heat retention when doors are opened.
I didn't love the idea of filling the water pan with sand or other mass creating options because, to be honest, I like to use the water pan for what it's there for, keeping a humid environment. I know there's some debate on this but to each his own. I myself like the water for at least the first 70% of the smoke.
I literally woke up in the middle of the night with a thought about how to solve the "mass problem" and add some insulation at the same time. A couple quick drawings later I had a rough plan. My son in law has the same smoker and we'd been learning together about fine tuning our smokers, so I ran the idea by him.
The "Master Forge Mega" is Born
Our idea was to line the sides and back walls with 3/8 inch plate steel (yup, that's gonna be heavy!)
When cut to the inside dimensions the plates would fit perfectly inside the holder ribs for the racks and the back wall would be completely covered.
We measured our dimensions and got quotes for the plate steal at a local iron works. They were a great resource. From the time they provided a quote and got our order to time the plates were cut and punched amounted to just over 2 hours on a Saturday afternoon.
Now that's service!
A friend of mine who had recommended them manages an electro plating service in town. After having the plates made he offered to nickel plate them for free. This was turning into a fun project.
Plates immediately after being cut and punched.

We had the iron works punch holes in all four corners so we could bolt the plates to the outside walls of the smoker. We then also drilled out holes where bolts within the smoker would interfere with a nice flush mount. For the most part we got pretty close.
Next they went off to the plater for a couple of days.
Pretty nickel plated plates

We also had considered heat transfer of the out walls once the plates got warmed up in the smoker. We decided this would be a good time to add some heat shield material between the plates and the smoker walls. We felt this would be a far more complete solution in that it would insulate and limit heat xfer. We were able to find the perfect material on
Amazon.com.
Cut Insulation and trial fitting into Smoker


Next we rough fit the plates into the smoker


We used duct tape to hold the corners of the insulation secure.
This helped prevent the insulation from twisting when we drilled holes through the exterior walls.
The last step was to bolt the panels in place

Final Product with a couple of proud Master Forge "Mega" owners

But will it smoke?!
After a few smokes we're pretty darn impressed. I'm convinced I'm using less propane due the great insulation this mod provides.
Further, the temps are far more stable. I can get to a steady 225 for example, and if I want to move up or down by 5-10 degrees all I need to do at this point is tweak the lower two vents.
Opening and closing the door to check progress also causes a much shorter and less severe temp drop.
First racks of ribs were falling apart good!

The first boston butt put through the new config turned out better than ever as well.
Makes me hungry just looking at the pics....


All in all I couldn't be happier with the final product. The smoker is now about 65 lbs heavier than it was. Those plates are HEAVY, and the results we hoped for exceed our expectations. When the smoker is steady state at 225 degrees I can place my hand on the side of it and it is warm to the touch. Prior to the mod water splashes would sizzle off the side of the smoker. I love the efficiency gains.
I don't suppose this mod is for the faint of heart, but we had fun pulling it all together and the results speak for themselves.