My Fridge Smoker Chronicles

  • Some of the links on this forum allow SMF, at no cost to you, to earn a small commission when you click through and make a purchase. Let me know if you have any questions about this.
SMF is reader-supported. When you buy through links on our site, we may earn an affiliate commission.
this is the best controller you can buy. http://www.mementotech.com/newauber/index.php?main_page=product_info&cPath=8&products_id=381

ive used them on all my builds, the most programmable, the best options as it shows house and internal food temp at the same time, up to 6 stages of cooking, multiple settings to ensure the smoker is running perfect and will never bur an element out (this is especially important when using a finned strip heater, which are great element but require some adjustments fro power input when mot used with forced air which this controller will do)

I looked every where, theres nothing tht does what this does as a complete package. Worht every penny. I have them in commercial kitchens on smokers i've built for restaraunts and work amazing
 
That looks awesome.  It is a little more than I want to spend on one, but maybe I will splurge.  Did you attach yours permanently. or do you set it on top while using it?  Got pics?
 
 
this is the best controller you can buy. http://www.mementotech.com/newauber/index.php?main_page=product_info&cPath=8&products_id=381

ive used them on all my builds, the most programmable, the best options as it shows house and internal food temp at the same time, up to 6 stages of cooking, multiple settings to ensure the smoker is running perfect and will never bur an element out (this is especially important when using a finned strip heater, which are great element but require some adjustments fro power input when mot used with forced air which this controller will do)

I looked every where, theres nothing tht does what this does as a complete package. Worht every penny. I have them in commercial kitchens on smokers i've built for restaraunts and work amazing
That's the PID that I use, and I've been very happy with it.
 
they are very similar in their function but the link to the one you are asking about is just the controller as a stand alone. You still need to buy the 2 temp probes and a SSR (solid state relay) to control the power flow to the element. I looked at this option on my last build, they didn't have them when I started building smokers 2 years ago.

By the time you add up the 2 temp probes and the relay switch to make it usable it costs more than the plug n play 1800w dual probe controller I linked to. It is exactly as it says, plug it in and use it. Your link still needs additional components to make it work.

I removed my controller from its original case and mounted it in a new metal box. I ran all the wiring through the inside with high temp oven wiring and the temp probes go through the wall inside the new controller box into the smoker as well. 

I was looking for a cleaner look. I am helping a buddy with a build right now and we are going to leave the controller as is, ill rune the wiring through the smoker, including the temp  probes, and connect the heating element wires into an electrical box on the back with a plug in to go into the controller. the temp probe ends will come out the back somewhere, probably out the exhaust for ease of replacement if ever needed. Then he can keep it in the house until he wants to smoke something then just plug everything in because his smoker will remain outside. Its not really worth all the extra hassle.to put it in a other box. one of the component breaks very easily. ive replaced it 3 times on 2 controllers. I bought an extra for the next time I put my smoker back together. I stole a few parts to finish a smoker I sold to a restaurant .
 
Last edited:
its not that hard to do it if you want the look. just need a dremel or similar rotory tool to cut out the plate so it fits. I used plastic bolts, nuts and washer to mount it, a few electrical banks to connet everything and it works great. In th ecold weather we get I added a bypass switch so that I can turn the element on and pre-heat the smoker. When the temp probe reads below 32f the controller doesn't work.

I flip the switch for a few minutes and it brings the temp to 40-45f and then switch the direct off and let the controller take over from there.

ill get some pics of inside of control box so you get an idea of how up sometime this week.
 
So I got in a tiny amount of work over the weekend.  Get in work when you can.

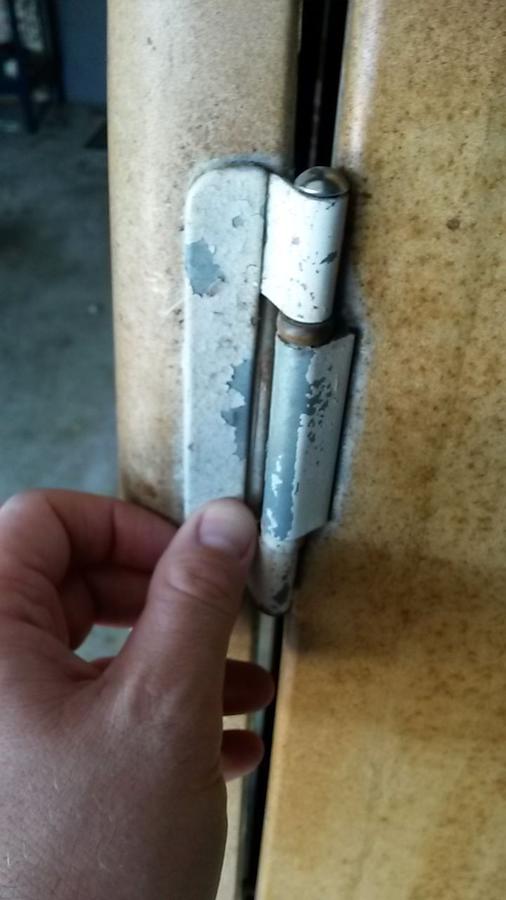
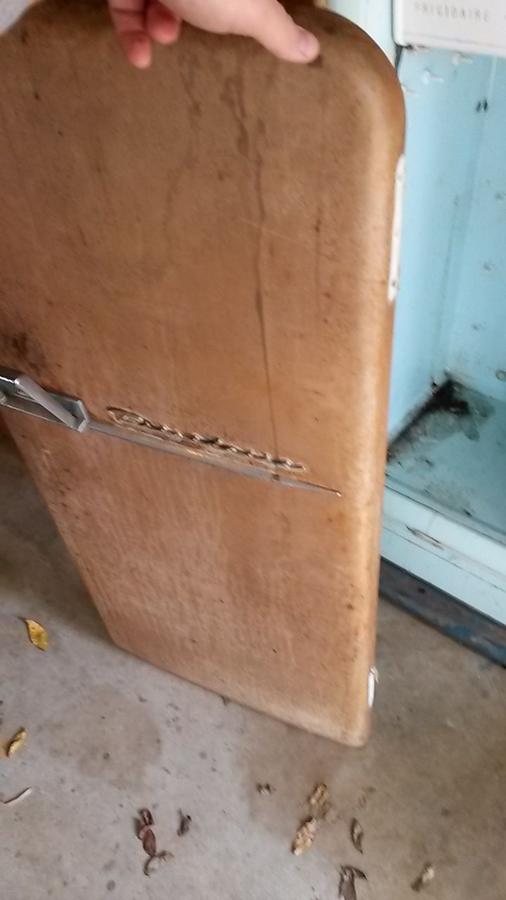
I took off the door. I was afraid I was going to mess up them up on removal but I did not.


I popped the screws off, and boom, door removed.


My door did insulate the whole door.  This bottom part has a metal cover, with nothing under it.  There is a good bit of rust, but I believe I should be able to fix it.


It was at this point my wife cam into the garage in a towel and told me I had better get in the shower or we would be late or her fathers 60th birthday party.

The next day I took off the door emblems, and handle.  A lot easier than I thought it would be.


Here are my chrome pieces after I scrubbed them with baking soda/dish detergent and rubbed them down with tin foil and water.


Here is the type of rust/pitting I have going on.


There is also this piece that has white paint in it to make the name pop out.  Going to have to repaint it.

 
A couple of questions I have at the moment:

1.  Should I put the sheet metal all the way over the door?  Or do I re-use that lower cover?

2.  I want my chrome pieces to look good, suggestions.  I don't think I want to put them back like they are.
 
if you can put the sheet metal over the whole door, no point using the old piece on the bottom. It will work better with a full sheet top to bottom.

as for making the chrome look better, there isnt really anything you can do about the pitting that i am aware of other than getting them re-chromed, if you even can.  
 
When sheeting the door, lay the door flat.... put screws in the 4 corners... run a string X wise of the door and tighten the strings... where the strings cross, in the center of the door, shim the door until the X strings in the center "JUST TOUCH"... the door is now in "plane" and will fit properly when closed.... that step IS important to get a good seal on the door......


Dave
 
 
On that door you will want to put a brace in middle running across it!
ya, ill second that, even if its just a couple of 8g a few inches wide. one  in the middle, or two pieces evenly spaced.

It will prevent bowing from the insulation on the inside which will cause sealing issues
 
When sheeting the door, lay the door flat.... put screws in the 4 corners... run a string X wise of the door and tighten the strings... where the strings cross, in the center of the door, shim the door until the X strings in the center "JUST TOUCH"... the door is now in "plane" and will fit properly when closed.... that step IS important to get a good seal on the door......


Dave

Could you explain the shim the door until. They just touch part in a little more detail?

Using the string to form an X in the middle of the door, if one corner of the door goes up, the string 'X gap" will open... as the door is adjusted, using shims, wedges, when the strings just touch, the door will be flat and in "plane", flat, original position...... Try it with a piece of cardboard and string taped to the corners to see an example..... It is difficult to explain.... I learned this trick from a carpenter installing double doors that do not have a "mullion" in the center or whatever it is called...


This has pictures.....
http://www.thisiscarpentry.com/2013/08/09/problem-free-prefit-doors/
 
Last edited:
Been a couple of weeks, and not a lot accomplished.  Between rugby games, Thanksgiving, and Christmas events, I did not have a lot of time.  

Side Note:  I got a quote on re-chroming my handles. $450.  Looks like I'm going to use a buffer wheel.

I tied to scrub the door clean, no go, so I sanded it all off.  It actually looked decent after.  Now I just need to fix the rust spots, add in bracing, prime, paint, fix handles, reassemble the handles, insulate, buy/fix/affix sheet metal backing, and finish the rest of the fridge lol.


I removed all the plastic from around the edges, and now there is "wood".  It has to go right?  What is it?  Masonite?  I think I read on here that it is basically support for the plastic, but since I will replace with metal, I won't need it.  Am I correct?


Most of the fridges I have been around have had the compressor underneath, it come out the back to the compressor coils, and then into the fridge.  This one has nothing on the back, and the coils are underneath and run in between the two tubs.  


Below is a few pics I thought someone might be interested in. As a way of keeping them, in case I need it later, I am going to post it.  The first of which is the 1976 phone book I found inside the compressor area.


SmokingMeatForums.com is reader supported and as an Amazon Associate, we may earn commissions from qualifying purchases.
Clicky