250 Gallon Reverse Flow Trailer Build

  • Some of the links on this forum allow SMF, at no cost to you, to earn a small commission when you click through and make a purchase. Let me know if you have any questions about this.
SMF is reader-supported. When you buy through links on our site, we may earn an affiliate commission.

law dog

Newbie
Original poster
Aug 7, 2015
14
11
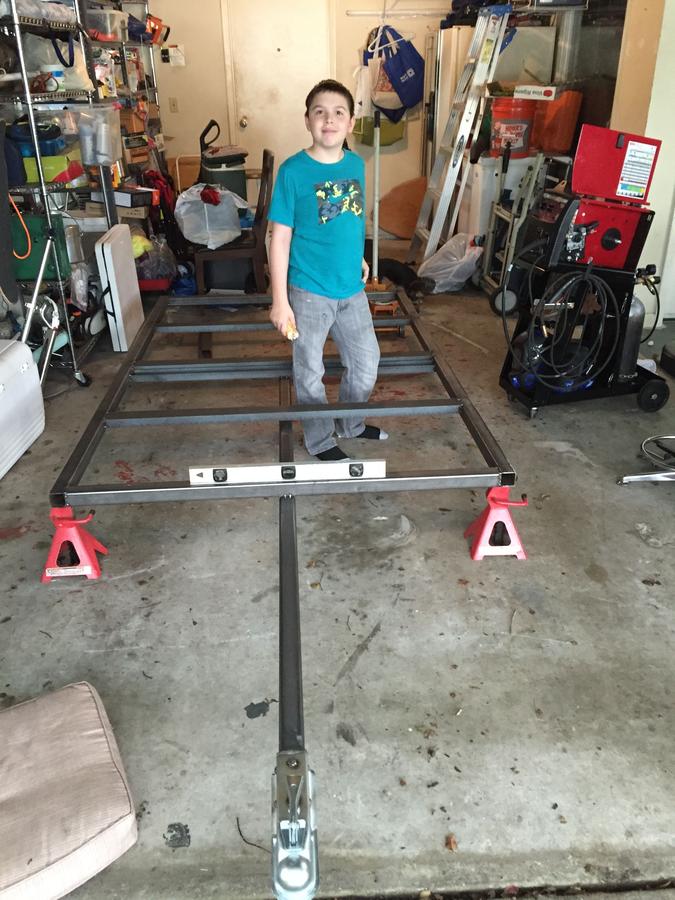
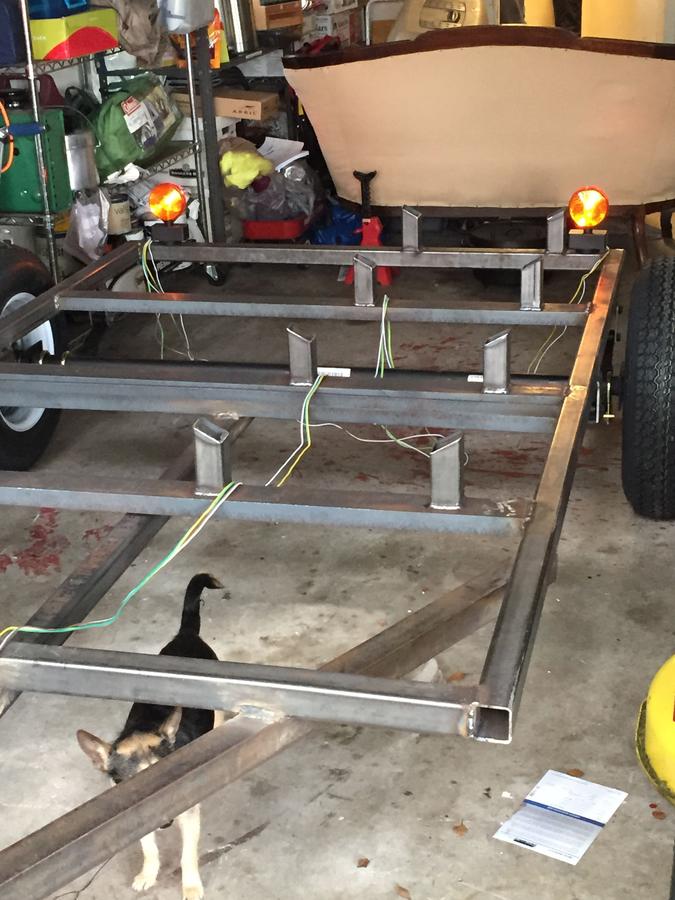
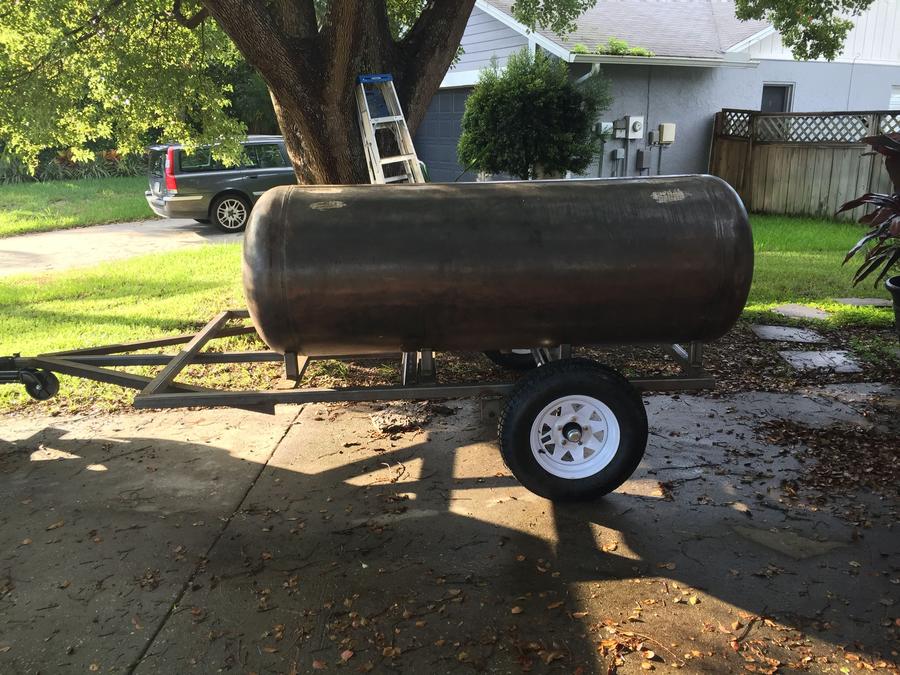
Greetings everyone...I have been browsing this website all year looking for ideas and I'm hooked!  When I say that I started from scratch, I REALLY had to work from the ground up.  I had never even touched a welder (nor did I know anyone that had one)…so, I took a welding class at a local vocational school here in Tampa.  A few months ago, I came across what I believe to be a 250 gallon propane tank.  It was a bit rough, but nothing that a few weeks with a wire brush on a grinder couldn’t fix (not fun!).  My children and I began fabricating the trailer out of steel tubing.  Once the axle and tires were installed, we made the small uprights to cradle the tank on the trailer.  We managed to get the tank on the trailer using a “questionable” series of pulleys and ropes attached to the oak tree in my front yard, with the other end on my wife’s truck.  At this point, the tank is just sitting on the trailer and I have outlined where I want the doors to go.  I am a little nervous about cutting into the tank due to concerns that other posters have mentioned involving warping of the doors and tank.  I am renting a plasma cutter this week and would like to get all of the heavy cutting (tank doors, firebox cut-out and the six pieces for the firebox) done on the same day (to save $).  I was able to get two full sheets of 1/4” steel at the scrap yard and should be good to go once I get the surface rust brushed off. 


     I am a little nervous and want to proceed cautiously…so…I wanted to ask everyone the following questions:   

Here are some photos of my progress...I would love some suggestions!  Thanks guys!!!


  1.  I recently read a post that mentioned that the smoke box should be welded onto the tank before I cut the doors to minimize warping.  Is this true?

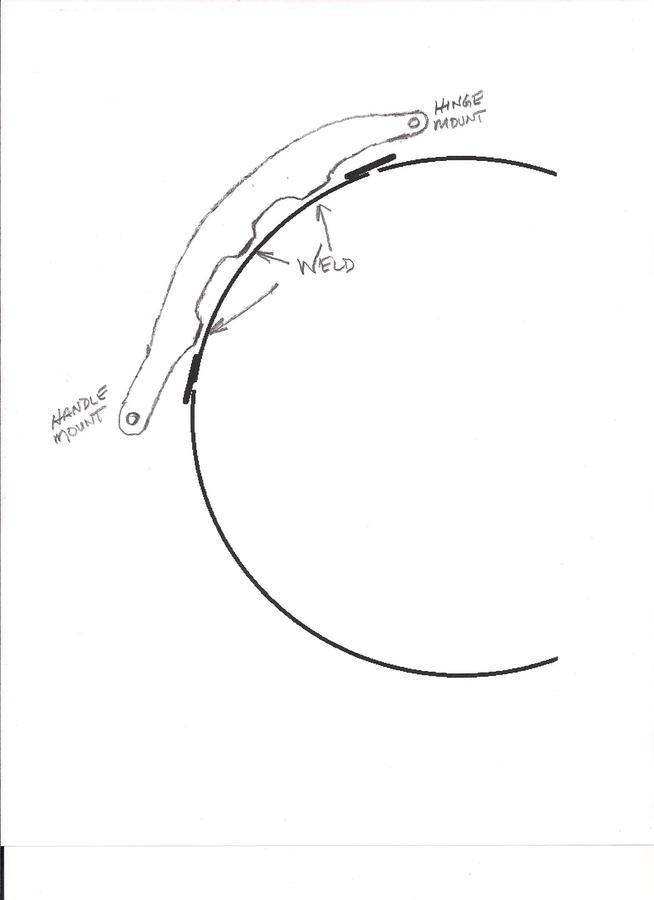
  2. Should I weld steel ribs onto the doors to prevent them from warping and curling outwards? 

  3. I was looking at the Feldon’s firebox calculator and was surprised at how big the firebox needed to be!  The recommended firebox size for a 250 gallon tank is 19,250 cubic inches.  I was planning on using a box size of 25” high x 30” wide” x 26” long (19,500 cubic inches).  I had to reduce the height of the box due to my concerns over ground clearance.  What is the minimum ground clearance recommended?  Also, is 25” high insufficient?  (The fire will undoubtedly hit the top of the firebox…but, if I go taller I will probably bottom out if I hit a bump in the road).  Recommendations???

  4. I recently purchased some 3” bullet hinges for the fire box and smoker doors.  They were pretty inexpensive (2 for $10).  Does anyone have any experience with these hinges? 


Question about the firebox...I am making my firebox out of quarter inch plate. I have read that you should insulate the top plate at a minimum...can anyone tell me if it would be beneficial to install some angle iron near the top of the firebox on the sides and place another quarter inch sheet just below (1"-2") the top plate of the firebox?
 
Thanks Ribwizzard... I'll post some pics of my progress tomorrow
 
Good morning all...I installed the double roof barrier (1/4") for the firebox (see pic) and finished welding the firebox together. Today im going to cut the doors and inlet vents on the firebox. I know that some people put a slot on the bottom of the firebox for the ashes to fall out while cooking (Ribwizzard)...any recommendations for size of the ash vent? (My firebox is 30.5"x27"x25").

Also, I purchased some 1 1/2" flat bar for the door trim...how much of an overlap is recommended? I plan on installing an insulating strip around all of the doors.
 
The firebox door is cut, hinges welded on and the trim is installed. It is starting to take shape. [emoji]128516[/emoji]

 
Well, I finally got the firebox welded on, doors cut and the reverse flow plates installed. I decided not to put a drain valve at the bottom of the reverse flow plates since I will be using drip pans to catch the drippings and add moisture anyway. (I also like the idea of being able to get to the bottom of the tank if something needed to be adjusted (i.e., the size of the firebox to cook chamber opening). I still have lots of work to do, but it is finally starting to look like a smoker!

 
Looking good so far. I would still recommend a drain.
You're not going to catch all the drippings, and you're going to need to clean it out .
Possibly spraying it down...

Great job on the build!
 
Since my last post, I have installed the door trim, smoke stack and the cooking grates. I still have a ton of work to do, but the weather has been beautiful and I'm having fun putting it together! Have a great day everyone!!!


Looks good. 

I have a 250 gallon tank in the exact same size and shape that I am going to build. What sizes are your cook grates? And I take it that your firebox is not insulated?
 
Thanks bud... The lower 2 grates are 30.5" x 28.5"...the 2 upper grates are 30.5" x 21.5". The firebox is not insulated; however, I did install a double roof with 1/4" plate with a 1 1/2" air gap. I live in Florida and was not too concerned about retaining heat in the firebox as it is made of 1/4" steel. There is a photo in this string that shows the double roof on the firebox.
 
Today I made 2 (out of 3) firebox dampers and reinforced the inside of the firebox door with 1/8" angle iron. I have attached a photo of the firebox door...does anyone know if this is sufficient to keep the firebox door from warping?????


It's been a while since I have posted...but I've been plugging away at it. The smoker is now fully functional and works like a champ! (I really appreciate everyone's input and advice)
I still am working on the back side of the trailer (wood box, griddle, etc). The smoker is currently primer gray and will painted soon!
 
  • Like
Reactions: jcbigler
SmokingMeatForums.com is reader supported and as an Amazon Associate, we may earn commissions from qualifying purchases.

Hot Threads

Clicky