UDS out of homemade Stainless drum / Build pics!!!

  • Some of the links on this forum allow SMF, at no cost to you, to earn a small commission when you click through and make a purchase. Let me know if you have any questions about this.
SMF is reader-supported. When you buy through links on our site, we may earn an affiliate commission.

willis68nova

Newbie
Original poster
Sep 9, 2015
19
10
PA
Hello Everyone!

I have some questions on my venture to build a UDS and I am hoping someone can help.  I have access to a stainless drum that someone made just out of sheet stainless and welded both ends shut.  The original thought for this person was to make it into a lawn roller but it never got completed.  So here I am contemplating making a UDS out of it as far as I know nothing was ever stored in this container.  The drum itself is 36" tall and 24" wide.  So a couple questions:

Is all stainless safe for making cookers (I am not sure what stainless was used on this drum)?

Are these dimensions close to the 55 gallon drums normally used?

I am thinking of using black pipe found at HD, is this safe to use?

I will be posting pics here soon.  Thanks for any and all help!

Willis

Here are the beginning pics of my build:


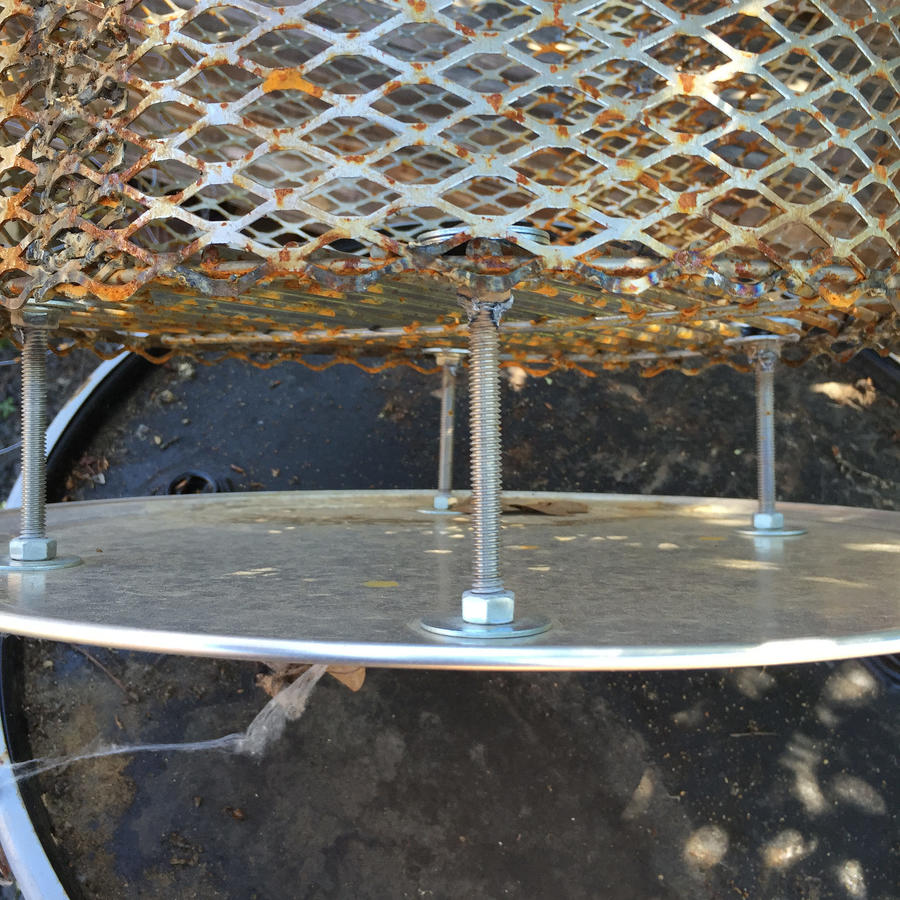
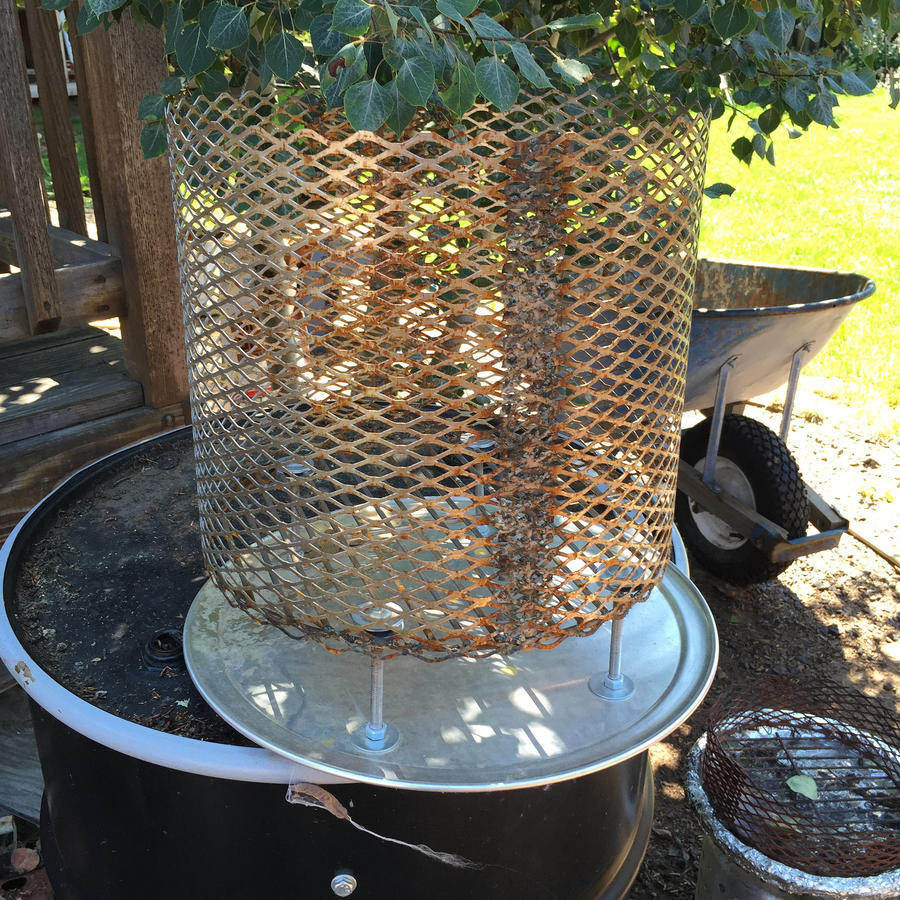
More progress, stainless is a pain to work with.  Glad I have the plasma cutter when I need it.  We tried to drill holes that didn't work so well..
 
Last edited:
Stainless is stainless of course there are diffrent bimetal mixtures but fore the most part all good for cooking.

Black pipe they use an oil based sealer on to remove use acetone and steel wool. And it willbe fine.


Drum will be fine at those dimensions.
 
Thanks Creator for the response.  One other question, I have been seeing people putting the black pipe on with a nipple through the drum usually a 3/4" one but it is fully threaded.  How do they make it stay on the drum?  Does it thread through and just stay?  Do they weld it?  Do they use a nut like item on both sides?  Might be an odd question but if people use a nut like item do they need to use stainless or can they find them in black pipe?  Thanks
 
Do you know how to build the burner? You cannot just hook propane to pipe and light. If thats what your planing on doing. But I went an had pipe over threaded so threads are 2.5 inches in and put a floor plate on mine. Reversed since plate is tapered you must be able to gring last 3 threads out to screw on through. Heres a pic
 
Yes you can just thread the black pipe into your drum for the air intakes. Keep in mind with stainless it might be a bit harder than steel. When I have built my UDS's I use a step bit to drill the holes and make them Just a hair shy of the pipe diameter. Most black pipe nipples are tapered so they will tighten as you thread them on. My last build I used (3) 3/4" inlets and used gate valves instead of ball valves to save money. The three gate valves were less than one ball valve! For exhaust I used the bung holes in the lid, which you don't have. I have a total of 3" for the exhaust. These are left open all the time when cooking. Temps are controlled by the inlets only. Make yourself a good charcoal basket/ash catcher. Easy to do with some expanded metal a pizza pan and some bolts. You will want your basket too be elevated about 3"-4" off the bottom. Use bolts to make feet and attach the pizza pan to the bottom of the bolts. There ya go, UDS 101.

Not sure what the discussion on propane above was about.
 
I am actually looking at doing a charcoal/wood box for the fire box.  I was also looking at using the black pipe threaded stand off like you have in your second picture.  These would be for my air intakes.  Thanks for the responses.
 
Great info everyone!  I want to get pics up.  I am hoping to build this before our next camping trip.  Can't wait!
 
Added some pics let me know what you think.  I am thinking of doing 4 air inlets, one with a ball valve (1") I just so happen to have the 1" black pipe nipple at the house.  Unless the 1" ball valve is an arm and a leg I will be doing that one in 1" and the rest 3/4".  Then I will be working on building the fire box.  Any thoughts on that?  Size? etc...?  Thanks
 
Thanks for the reply wimpy.  I am overly concerned with accidentally using galvanized steel.  Are the conduit nuts plain steel, black steel, or stainless?

Is this what you are talking about?  Conduit Nut from HD

I see these say they are zinc plated. But down further they say galvanized steel.

Or do you have a link to a non-galvanized nut?
 
Zinc is part of galvanization process. Hundred of theories on this if not one, not going there. Heat them red with a torch so they gas off if it makes you feel better. Almost all uds builds use them. Check out uds builds in search bar, plenty of pics and step by step info.
 
So I was able to come up a with an idea for a fire box and I am looking for some thoughts/input.  So I was wondering what I could use for an ash pan.  Then I remembered someone I know had a really old keg that was scrap (not usable to hold liquid any more) and they don't know what to do with it.  So I stopped to check it out and it is about 15" across at it thickest point (center).  So I think cutting the bottom off of would work perfect as an ash pan.  Then I got to thinking more about it and once I cut the bottom off and flip it over the rest of it technically turns into a stainless pot.  So hmm....could I use this as a fire basket?  It will not hold any liquid anymore (but charcoal should be fine) because of leakage issues and metal issues but I am thinking with some work I could make a fire basket.

So my question is....how much of a pain will it be for me to drill a ton of 3/4" or 1" holes all over this stainless pot?  Has anyone done this (drilling of holes) or for that matter what I am describing above?
 
Drill a test hole and see how it goes. I would gonwithnsmaller holes though. 1/2"-9/16" and a bunch of them. It'll take time and probably a bunch of bits or a bunch of time sharpening bits.

Honestly it''d be easier to get two sheets of the expanded metal from Home Depot or lowes and wire or weld together a basket.
 
Sailor,

   Thanks for the reply.  I am thinking the same thing.  I might just try some test holes and see. It is stainless so I know it won't be the easiest thing to drill.  I have to look but I might have a metal hole saw that could possibly make easy work of this.  I agree the easier way is the expanded metal I am thinking of ideas to keep it on the cheap so we will see.  I know expanded isn't expensive but this is free.....but with sweat equity in drilling holes..
biggrin.gif
 .  I guess I will only know how much of a pain it will be if I attempt it.  Any thoughts on the hole sizes of 3/4" or 1"?  Too big for charcoal? I will be using mostly briquettes and possibly some lump.

Thanks
 
Last edited:
 
Sailor,

   Thanks for the reply.  I am thinking the same thing.  I might just try some test holes and see. It is stainless so I know it won't be the easiest thing to drill.  I have to look but I might have a metal hole saw that could possibly make easy work of this.  I agree the easier way is the expanded metal I am thinking of ideas to keep it on the cheap so we will see.  I know expanded isn't expensive but this is free.....but with sweat equity in drilling holes..
biggrin.gif
 .  I guess I will only know how much of a pain it will be if I attempt it.  Any thoughts on the hole sizes of 3/4" or 1"?  Too big for charcoal? I will be using mostly briquettes and possibly some lump.

Thanks
Yes I would go smaller. The more you can keep the charcoal in your basket the longer burns you'll get ans less fuel waste. Especially true for the bottom. I'd go for 1/2"-9/16" Here's a couple photos of mine. As you can see the ash catcher is attached. This is the expanded from HD, Lowes


Looks good sailor.  Thanks for the pics too.  It makes sens to keep the holes smaller to make the coals burn longer.  Once I test out drilling I will decide which direction I will go.  Is that one sheet of expanded for the top part?  If so what is the length and height you used to make the circular top part?  
 
Hey guys - just jumping in about the stainless beer keg for willis68nova.

I started my first UDS build not too long ago, with a stainless drum and stainless beer keg.

I cut the keg in half using an air-drive angle grinder and cut-off wheel.

Caveat here - make sure all pressure is released prior to cutting (use your thumb to depress the ball valve on top).

My keg held about a half-gallon of festering, year-old beer that had built up a lot of pressure.

When my wheel got through the keg steel I ended up wearing a lot of said sour beer on my face and safety glasses.

Later, I exploded a cutting wheel trying to bore holes in the keg - again, safety glasses saved the day.

In answer to your question - the standard hole saws I bought were good for one or two holes, getting dull quickly due to heat.

What I found that worked best (for me) was a 7" cutting wheel for my circular saw.

I simply used that wheel (6 of them, to be exact) to cut hundreds of slits in the steel keg for ventilation. 

If you look closely at the back of the keg you can see two holes that burned up my first hole saw. 

 
I cut the keg in half using an air-drive angle grinder and cut-off wheel.
Caveat here - make sure all pressure is released prior to cutting (use your thumb to depress the ball valve on top).

My keg held about a half-gallon of festering, year-old beer that had built up a lot of pressure.

When my wheel got through the keg steel I ended up wearing a lot of said sour beer on my face and safety glasses.
Sorry Kype but I have to laugh out loud
icon_eek.gif
 on this one!  I homebrew too and know all to well the dangers/fun times had with pressurized kegs!

This is cool though because I think the shape of your keg is very similar to the shape of the keg I am thinking about using.  Thanks for stopping by and sharing this gives me another suggestion on how to make air holes.  

Thanks again!
 
SmokingMeatForums.com is reader supported and as an Amazon Associate, we may earn commissions from qualifying purchases.

Latest posts

Hot Threads

Clicky