Gravity Fed Smoker Build - Stumps Clone

  • Some of the links on this forum allow SMF, at no cost to you, to earn a small commission when you click through and make a purchase. Let me know if you have any questions about this.
SMF is reader-supported. When you buy through links on our site, we may earn an affiliate commission.

goldman smokers

Newbie
Original poster
Aug 12, 2015
24
25
Burbank, California
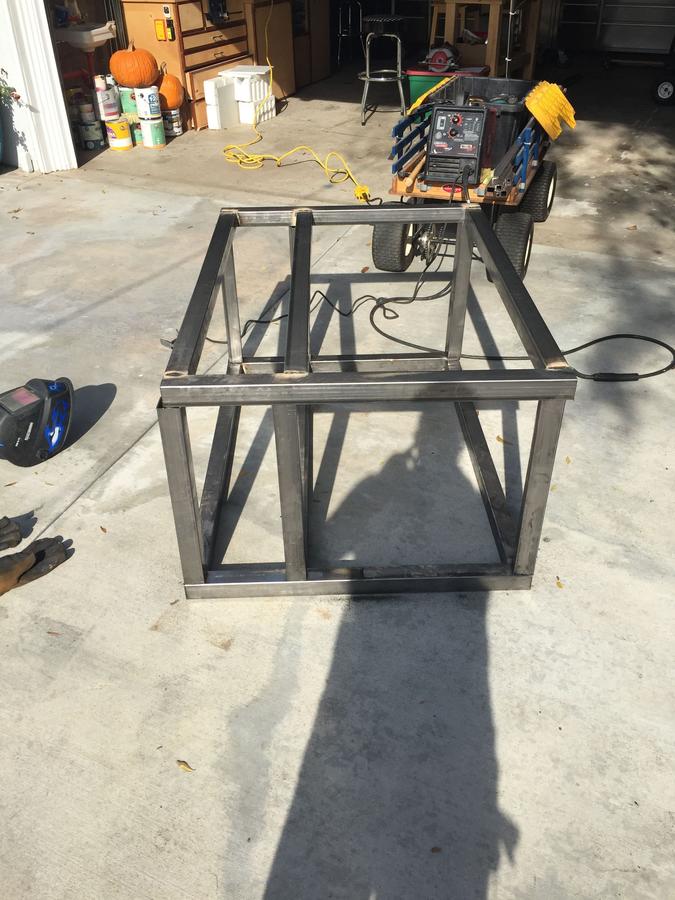
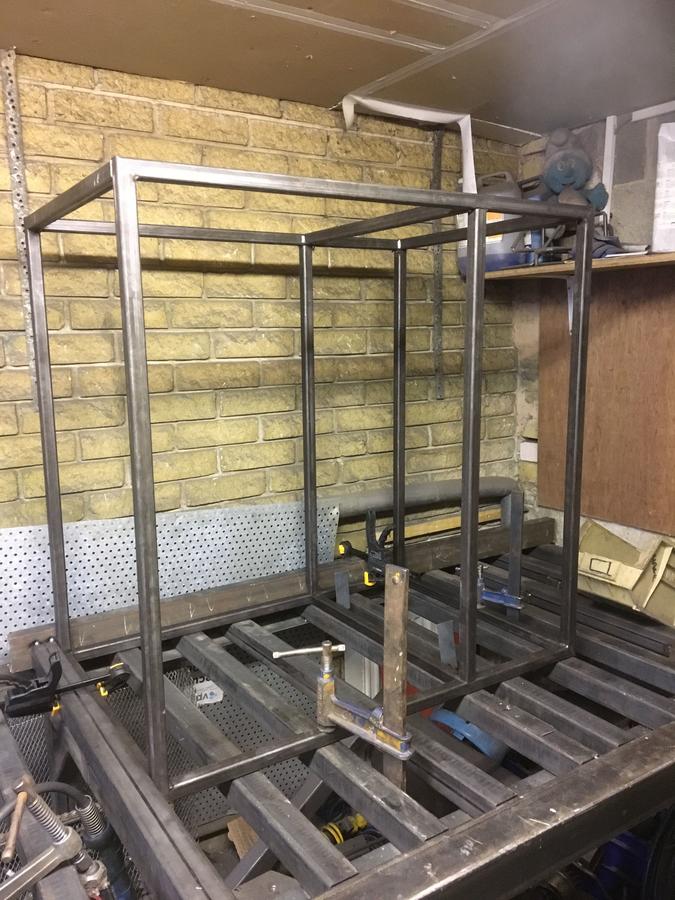
Well... I have done it! I completed my first smoker. I was inspired by the Stumps Smoker; though I don't want to say clone. I have used this forum countless times and thank everyone for posting pictures because it inspired me and helped me build mine.

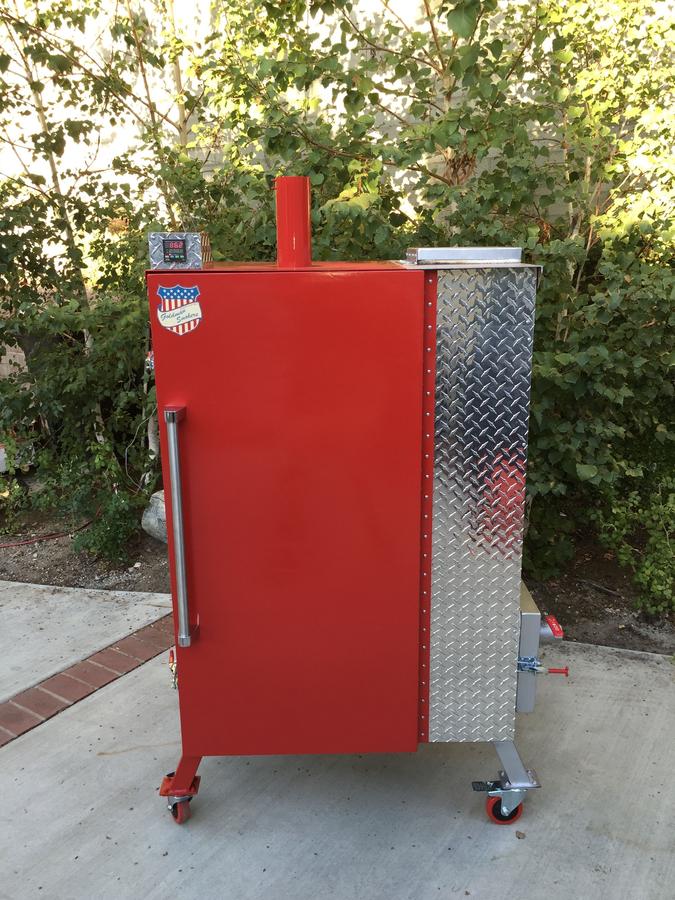
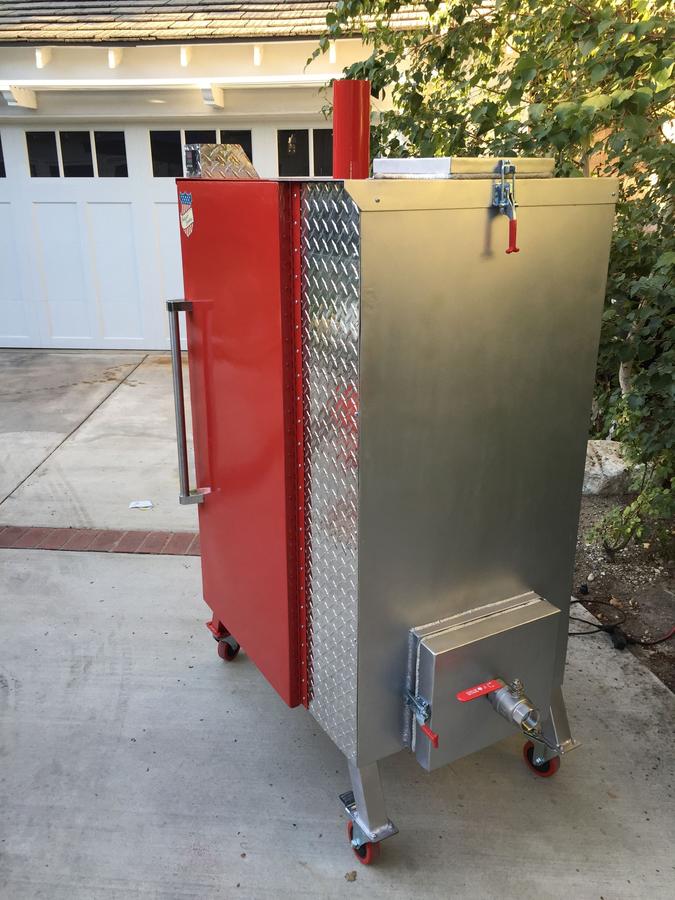
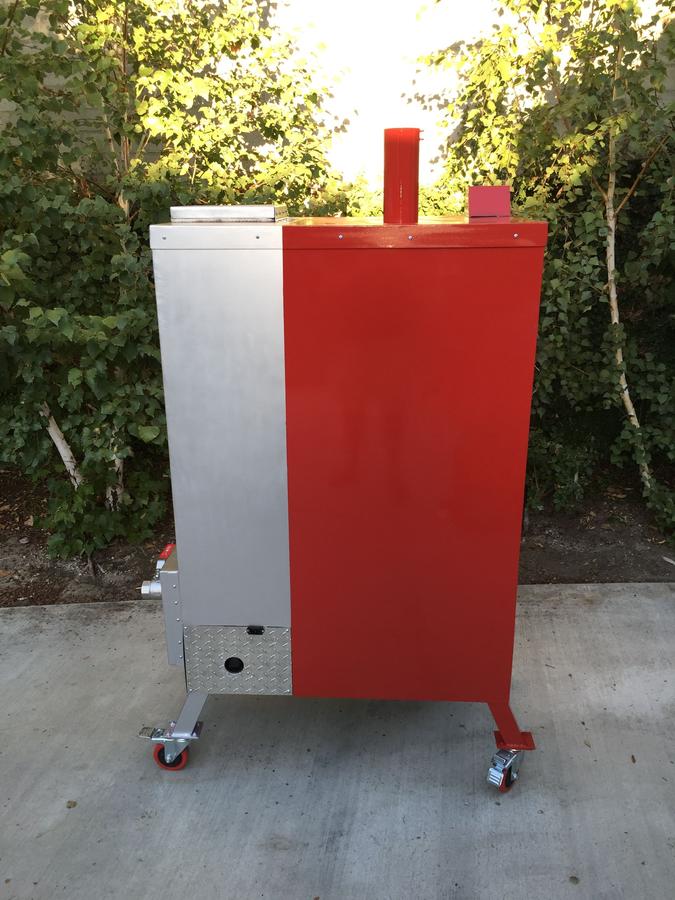
My gravity fed smoker has an internal fan and wiring for hassle free electronically controlled temperature regulation. In can run on 12v DC or 120v AC. The steel cost me $800. The entire temperature system cost $50. I painted it with Rustoleum paint, the red paint is their 500 degree Ford Red Engine Paint, the silver is their 1200 degree Metallic Silver Ultra High Heat paint. I did this because I was concerned about that side panel getting too hot from the firebox. Results look great! I purchased the paint on Home Depot's website $100. It took 7 cans of red and 2 silver. The door handle is from a Viking Dishwasher that I bought on eBay for $40. The 1.5" ball valve is from Smokey Maple and is 304 Stainless Steel purchased on eBay for $35 (super cheap!). Red Casters were purchased from Home Depot in store (and they are super smooth). The final build cost was about $1300 and it took me about 5 months every other weekend to complete.

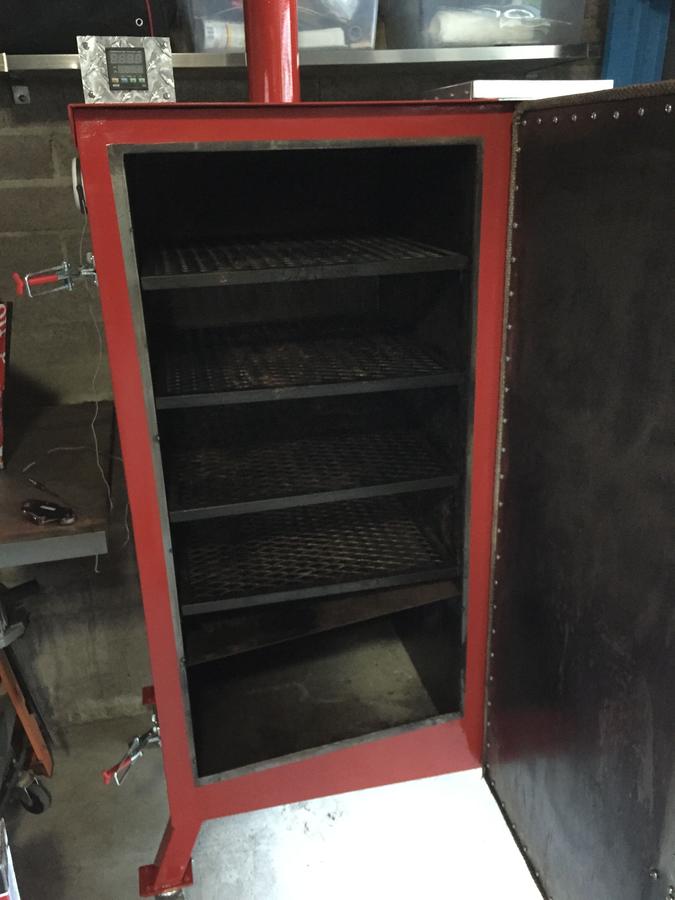
Of course I had to polish it off with my own logo cause it just turned out so great and works so great! The fan kicks on every half hour, boosts the fire and then shuts off. I have been cooking my pork butt at 270 for 8 - 10 hours and it's marvelous. Same temp for ribs but only 2.5- 3 hours in there. I put a pan of water on the bottom shelf, leaving me 3 shelves to cook on. 

If anyone needs advise, help or links I am happy to help so don't hesitate to message me.


Last edited:
Thanks for the great feedback. I am posting my 2 drawings. I had never seen a gravity fed smoker in real life before I made this and so there may be better ways to design it but attached are the drawings from which mine was made mine. Each box on the graph paper represents 2". The chimney width is out of scale and I used I pipe with an outside diameter of 3.5". I built a tapered chute. I have been told that lump charcoal will have less of a tendency to get caught up and clog. What is not shown is the depth of the smoker. It is 24" deep not including the door. I used 2" 14ga square tube for the frame so that left me with a cooking area lightly less than 22" deep. This is an important depth because a full pan for a well unit (commonly used in restaurants) is slightly smaller in length CLICK HERE to see what I am talking about. Anyway I hope this helps someone or sparks a discussion on what could have been done differently.


I am adding a few build photos so you can see how it's put together. On par with everything out there. You may notice that originally the temperature control unit was inside and completely different than the one I ended up using. The one I first attempted to use was a cheap $12 temp control unit which is not a PID (PID unit is predictive so that as it reaches temperature it will turn off prior to getting to the temperature so it doesn't fly past your desired temp.) The original temp unit used a thermistor which is proprietary to the Chinese temp controller. Which means you'll never get a replacement. It worked great for about 30 minutes and then thermistor wire melted rendering the whole temp unit broken. The second unit I bought was $35. It uses a K thermocouple which has temperature insulated wires. This worked fantastic for about 6 hours and then the whole temp unit melted. I realized that no matter how much I insulated the temp controller there was no way to mount it that close to the chute. I decided to mount it on the exterior in a custom enclosure. You can google this TA4E. Which is the temp controller I used in the end since it was 12v and can read out in fahrenheit. It's quite advanced but there are youtube videos on how to set it up. I powered it with a 12v 5w transformer $10 and a $10 12v fan from amazon. Since there is hardly any current you don't need an external relay. For the inside wiring I used thermocouple wire, I just bought thermocouples and cut the sensor off. There are 2 wires in a thermocouple and they are very thin so I used both wires for every connection. Meaning I used 2 wires for 12v+, 2 wires for 12v- and so on. The top comes off the smoker so you can access all the wiring and replace anything as time goes on. If anyone decides to buy the same temp controller let me know and I'll give you all my values I used to set it up and I am happy to explain how it works.


Last edited:
Hi good looking smoker. I have time during the Winter months and would like to have a go at one of these. Have yo got the drawings you can send me?

Smokin Monkey [emoji]133660013031[/emoji]
 
Need to talk with you on this project. Been researching this and so far you have given the best info. What would be the easiest way to get ahold of you?
 
I also need to talk with you.  I am building a unit thats about 3 times this size of your smoker.  I am wondering if I need to scale my hopper 3 times to yours to get the right amount of heat. 
 
Sorry for the late reply work has had a strangle hold on me. I believe that it all comes down to fire management. I used a temperature controller and fan. This means when the temps in the cook box drop the fan turns on to boost the fire temp and thus the temp in the cooking box. That said a larger cooking box is going to be harder to keep warm which means that fan is going to be working more. Your temps will be less even throughout for sure. But if that fire is raging to keep it warm enough throughout then it maybe be considerably hotter near the fire than away from it. I'd say scale up and make sure if you go wider you get that smoke to really travel around that deflector plate. That could be your biggest challenge. Scaling up would mean a more even fire. I might make mine slightly deeper and wider. Mine was 8" x 8" at its widest point maybe 9" x 9" and if it's a huge smoker then 10" x10". Too big you'll have your temps creeping up on you and might have a problem staying level. What this means is really your hopper or chute size defiantly doesn't need to be 3 times the size. Mine can take a full 18lb bag of charcoal and run 20 hours on that so yours could take more but it may not be necessary to run that long. My longest smoke had been 10 hours. I'd scale up but marginally. I'd seek other people's input also because this is the type of thing that if you get it wrong there is not going back to modify it.
 
So it's been two years of cooking and I learned a few things. Especially regarding my temp controller. Upon initial startup the temperature will swing well beyond my desired temp. The PID unit almost seems not to work. But this isn't the case. The trick is as it approaches your desired temp. About 25 degrees below your desired temp you have to hold the AT button and the PID will restart the learning process gradually raising the temp. Second thing I've learned is don't use competition or professional charcoal it's impossible to regulate the temp. Lastly is I bought new wire for my smoker that is 16ga high temp insulated. Since the wire passes near the fire box I was using thermocouple wire which I was doubling up because it was too thin. This new wire will be plenty thick
 
Last edited:
Also I got a Pelican cooler for my warm box and holy cow does it work well. Holds a brisket 5 hours and comes out so hot I can't hold it. I considered a Yeti and a couple other brands but liked that the Pelican was a little cheaper and had wheels. Also it out performed everything on YouTube videos.
 
Last edited:
I love that and I am honestly jealous I didn't think of it. That makes so much sense for space and storage. You could even mount a butcher block to the top what's your plan?
 
It's sat on a lift table at the moment so I can raise and lower it while working on it.

Thinking of making a stand with wheels on it. Will be putting a handle on each side for lifting. 1 inch box about 3 inches long with 3/4 round bar fitted through box and welded should do it.

Though of fitting a stainless steel tank next to the fire chute, with a tap on the front so you have hot water?

I have a full size one with the frame already fabricated (do not no why, as I have enough ovens as it is)

 
Apologies if I missed it. Is there a reason for the tapered charcoal chute?

Awesome build!

Jason
 
SmokingMeatForums.com is reader supported and as an Amazon Associate, we may earn commissions from qualifying purchases.

Latest posts

Hot Threads

Clicky