
Fellow Meat Smokers,
I finished my smoke house a few weeks ago after several months of working part time on it. I posted the detailed pics as construction progressed in the Photo Albums section of this website. It’s called “Building My Old Smokey”.
Dave suggested that I start a thread in this forum so others can learn, ask questions and comment on the build. I will attempt to walk thru the steps as I built the smoke house; feel free to ask questions. I hope this description helps others; it was written as a guide for novices.
There are a lot of smoke house builds on this site and they all look great and appear to work very well. Although designs are similar for some, they all have modifications that make them unique. I was unaware of this website until after I was nearly finished with construction; wished I knew sooner. My design wouldn’t change but my stress level probably would be much lower.
I used a small Brinkman smoker for years and then got a 5’ side firebox welded well-casing pit. I used it for years and still enjoy it. I was limited to size of meat and couldn’t hang sausage on the pit, so I wanted to make a permanent smoke house. We raise our own beef and pork, so I wanted to expand my sausage making skills. With a few books and memories from my grandfather’s smoke house, I decided to design and build a smoke house.
I don’t have plans or a material list but the detailed pics in the picture album should show the basics. I will gladly answer questions. I have considerable construction experience, but it’s not necessary to build a smoke house. If you can’t drive a nail in wood, you can build a smoke house like mine or better. It will take longer to build but the end result will look good and function well.
Prior to beginning construction, I had several objectives:
The concrete for the slab was reinforced with rebar due to the weight. Some things for the beginner to remember:
The pic below shows the chimney formed. The slope on my chimney was 10 degrees, but as stated above, horizontal will work with proper venting.
The firebox was half buried so I had to build a small area to be able to use it and some type of drainage. The pic below shows a temporary trench that drains into the pasture. I eventually used 4” black plastic drain pipe so the trench wouldn’t be noticeable. Pics in the album show the trench covered.
The pic below shows the installed fire box door. I bought it for a few bucks on ebay and refurbished it. I had to build a frame. When building the frame, I added a vent at the bottom of door in case the door vent wasn’t sufficient. It was a waste of a lot of time – the door vent ensures a good draft and does a great job regulating air flow. My granddaughters acid stained the top to look more like a rock.
The pic below shows the smoke house base completed. I had extra stone so I used it for a walkway.
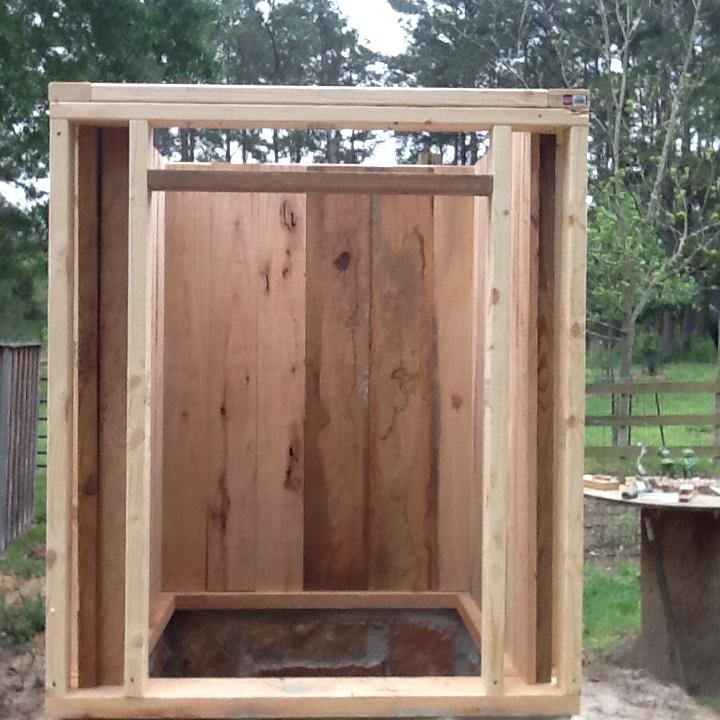
I started framing the smoke house. I wanted the interior to be solid wood so I used old oak that I had laying around. I routed the boards to ensure a tighter fit, but this is not necessary.
I placed a small door in the stone for access to be able to hook up a propane tank if needed. Now that I've used the smoke house, this was a waste of time. Below is pic of access door (white square in stone).
The pics below show the roof framed and vent installed. The remainder of the work was putting on the siding to match the workshop.
The pic below shows 2 of the 3 racks. The third rack is next to ceiling. All racks are actually dowels that can either hold a stainless grate or used to hang different types of meat.
I wanted some protection for the thermometers. I installed a dial but placed a copper tube to the inside of smoke house for running the probe of an electronic thermometer. Before I pull the meat out, I use a more accurate meat thermometer.
I decided to make the door; I wanted it double thick for insulation. It was a lot of work but not necessary.
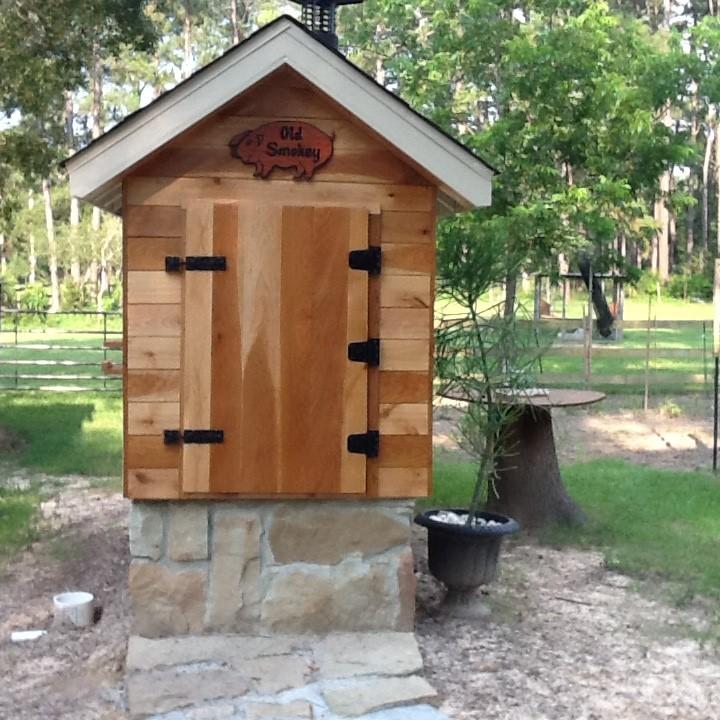
Below is one of the pics of the final smoke house. There are more pics in the album. The album also has pics of some of the meat I’ve smoked since building it. The stone and double interior walls make it very easy to maintain the temperature in the smoke house and it doesn’t fluctuate quickly (unless you open the door). It will be interesting to see the difference this fall/winter.
I hope this helps someone thinking about building a smoke house.
I finished my smoke house a few weeks ago after several months of working part time on it. I posted the detailed pics as construction progressed in the Photo Albums section of this website. It’s called “Building My Old Smokey”.
Dave suggested that I start a thread in this forum so others can learn, ask questions and comment on the build. I will attempt to walk thru the steps as I built the smoke house; feel free to ask questions. I hope this description helps others; it was written as a guide for novices.
There are a lot of smoke house builds on this site and they all look great and appear to work very well. Although designs are similar for some, they all have modifications that make them unique. I was unaware of this website until after I was nearly finished with construction; wished I knew sooner. My design wouldn’t change but my stress level probably would be much lower.
I used a small Brinkman smoker for years and then got a 5’ side firebox welded well-casing pit. I used it for years and still enjoy it. I was limited to size of meat and couldn’t hang sausage on the pit, so I wanted to make a permanent smoke house. We raise our own beef and pork, so I wanted to expand my sausage making skills. With a few books and memories from my grandfather’s smoke house, I decided to design and build a smoke house.
I don’t have plans or a material list but the detailed pics in the picture album should show the basics. I will gladly answer questions. I have considerable construction experience, but it’s not necessary to build a smoke house. If you can’t drive a nail in wood, you can build a smoke house like mine or better. It will take longer to build but the end result will look good and function well.
Prior to beginning construction, I had several objectives:
- Smoke house had to match the house and workshop (wife’s only requirement)
- Use leftover materials from other projects to minimize cost
- Inside dimensions of firebox – 2’X2’, inside dimension of smoke house – 3’X3’
- Make sure roof over storage
- Good draft – no stale smoke lingering in the smoke house
- Drain easily
- Chimney at least 5’ so can be used for cold smoking in winter
- No plywood or resinous wood inside smoke house
- Good thermometer placement
- 3 racks with space for water pan

The concrete for the slab was reinforced with rebar due to the weight. Some things for the beginner to remember:
- If drain pipe is pvc, make sure the elbow is low in the slab so the plastic doesn’t melt. The pic above shows a temporary piece of pipe that was removed after the slab dried.
- Ensure the slab, chimney and fire box slabs are square with each other. This can easily be done by pulling a string across the area; the string will be used as a guide that shows the middle of the slabs.
- Make sure the slabs are large enough for the materials used to build the sections. For example, I wanted a 2’X2’ firebox. I used 4” stone, 1 1/2” firebrick and wanted a 2” air space so my slab needed to be 39”X39”.

The pic below shows the chimney formed. The slope on my chimney was 10 degrees, but as stated above, horizontal will work with proper venting.
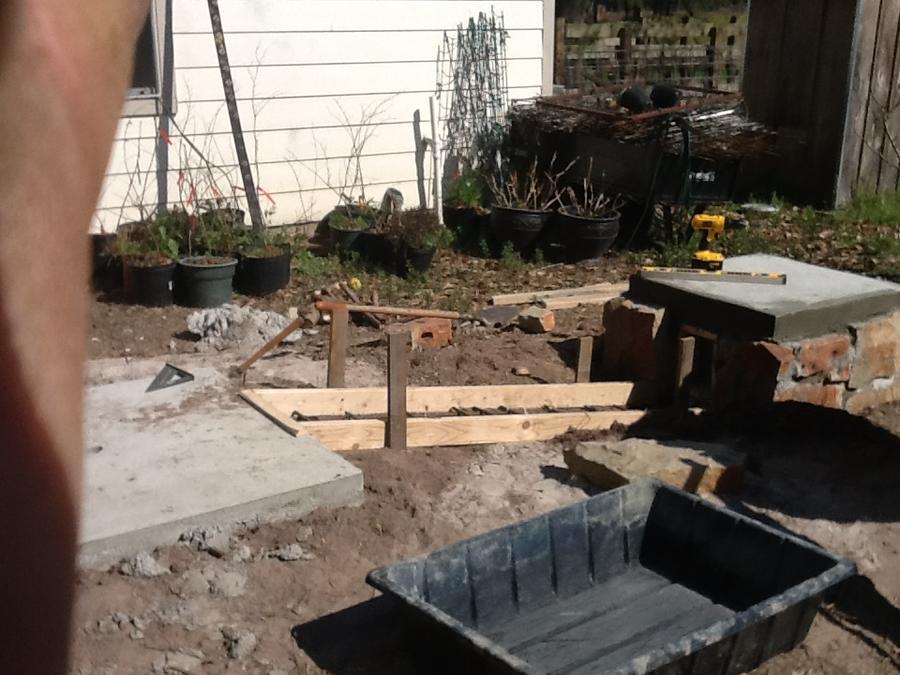
The firebox was half buried so I had to build a small area to be able to use it and some type of drainage. The pic below shows a temporary trench that drains into the pasture. I eventually used 4” black plastic drain pipe so the trench wouldn’t be noticeable. Pics in the album show the trench covered.

The pic below shows the installed fire box door. I bought it for a few bucks on ebay and refurbished it. I had to build a frame. When building the frame, I added a vent at the bottom of door in case the door vent wasn’t sufficient. It was a waste of a lot of time – the door vent ensures a good draft and does a great job regulating air flow. My granddaughters acid stained the top to look more like a rock.

The pic below shows the smoke house base completed. I had extra stone so I used it for a walkway.

I started framing the smoke house. I wanted the interior to be solid wood so I used old oak that I had laying around. I routed the boards to ensure a tighter fit, but this is not necessary.

I placed a small door in the stone for access to be able to hook up a propane tank if needed. Now that I've used the smoke house, this was a waste of time. Below is pic of access door (white square in stone).

The pics below show the roof framed and vent installed. The remainder of the work was putting on the siding to match the workshop.


The pic below shows 2 of the 3 racks. The third rack is next to ceiling. All racks are actually dowels that can either hold a stainless grate or used to hang different types of meat.

I wanted some protection for the thermometers. I installed a dial but placed a copper tube to the inside of smoke house for running the probe of an electronic thermometer. Before I pull the meat out, I use a more accurate meat thermometer.


I decided to make the door; I wanted it double thick for insulation. It was a lot of work but not necessary.

Below is one of the pics of the final smoke house. There are more pics in the album. The album also has pics of some of the meat I’ve smoked since building it. The stone and double interior walls make it very easy to maintain the temperature in the smoke house and it doesn’t fluctuate quickly (unless you open the door). It will be interesting to see the difference this fall/winter.
I hope this helps someone thinking about building a smoke house.

