
- Jun 12, 2013
- 3
- 10
Hello everyone. I've read the forum for a long time, but its time for my first post. I own a chargriller pro deluxe which has been a good smoker for me. My wife and I just had a baby last week, and since I am home for a couple weeks, I thought it would finally be time to make some modifications to my smoker, which I thought I would share with everyone.
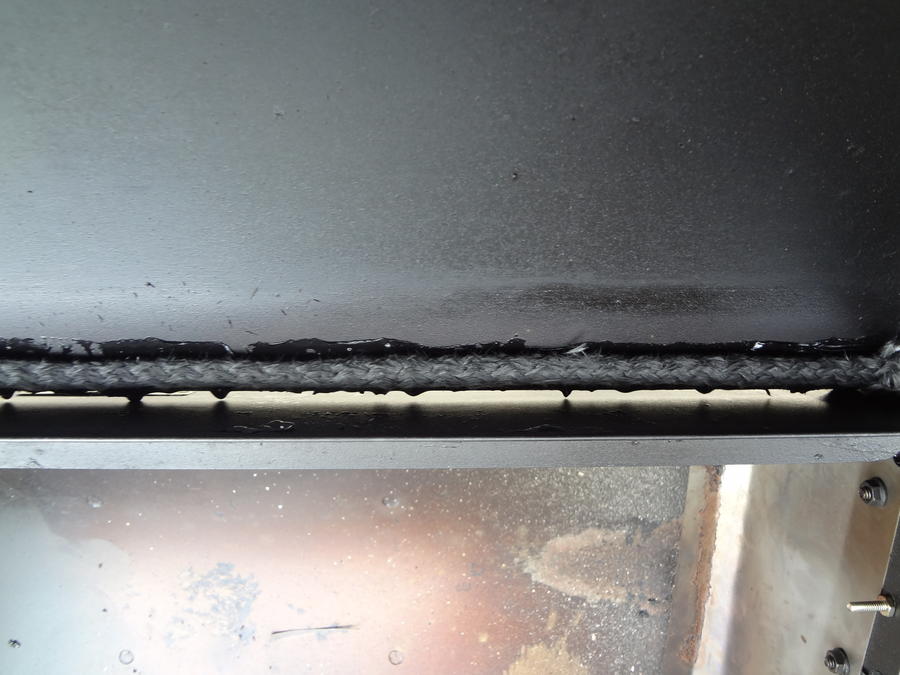
The first issue I had was all the leaking air around the cooking chamber. I fabricated a bracket around the front and the sides, and used wood stove gasket in the grove. The lid closes down tightly on the gasket.
I then also glued on gasket to the bottom of the lid on the back. When the lid closes, this fully seals up the back side of the cooking chamber. I got a little messy with the gasket adhesive. Below is a shot of the lid fully open showing where it was glued on at.
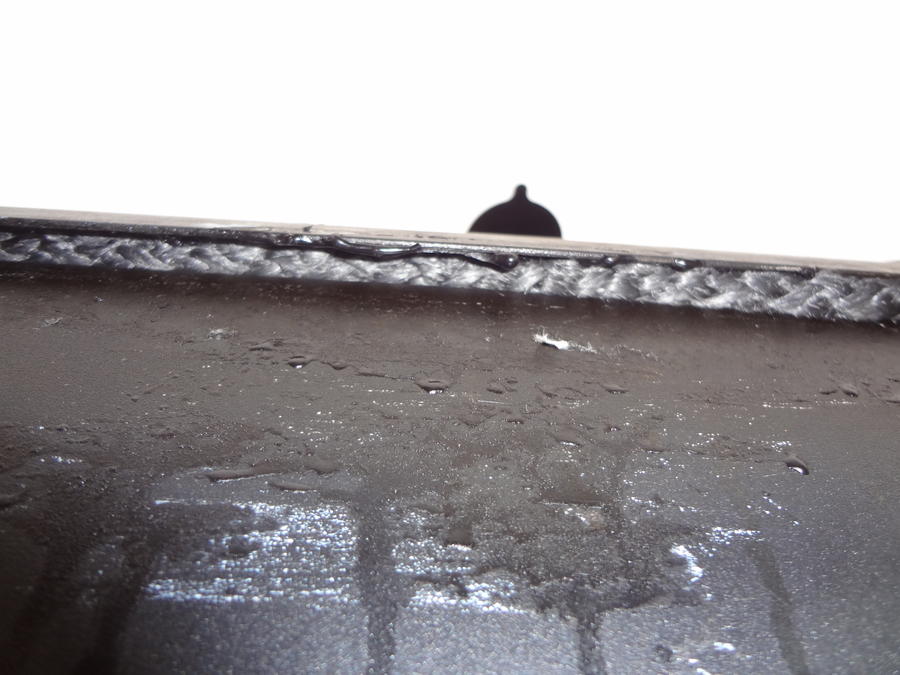
Below is a picture from the bottom showing the gap sealed off when the lid is closed.
After a test smoke, and to burn off any fumes, I had no smoke coming out of the cooking chamber, except the stack. This sealed up the unit very nicely.
My next issue was to even out cooking temperatures. I like having the charcoal grate on the unit, because it makes a nice spot to hold my water pan. I decided I wanted to keep it in the smoker. First I fabricated some new brackets that would hold the grate fairly high, but they didn't stick up like the stock adjustable height hangers.
Now I needed a way to direct the heat down under the grate, allowing the grate to also act as my damper. I used some 20 gauge sheet metal, and bent it so that it deflected under the grate.
Here is a shot from inside the fire box, looking into the cooking chamber.
Now I also used red, high heat rtv silicone to seal up the gap between the fire box and cooking chamber.
Another issue I was having, was all the leaks around the door of the fire box. You can see by this picture, how the heat leaked on the top so bad, that it has taken off the paint.
To resolve this issue, I used the rtv silicone again to seal it up. I ran a large bead all along the fire box opening, and placed wax paper over it. I then closed the door and let it dry. This caused the sealant to dry and be formed around the gaps of the door. After the first test smoke, there was no escaping heat. I got it so hot that it started to bubble the paint on the painted wood handle of the door. I may need to get a different handle soon. I was glad to see i didn't have any leaks.
The above picture also shows the new and improved chacoal basket. I formed a piece of sheet metal to create a U shaped basket for the charcoal. This will help burn the charcoal using the minion method. The threaded rods let the basket hang on the channels inside the fire box, leaving plenty of clearance on the bottom for air flow.
The final, small modification I made, was drilling out 2 larger holes in the left side, by the the outer shelf of the smoker. This is where I place all of my Temperature probes during smoking. Now I can put all of the probes (i will be using 6 of them tomorrow) through these holes and run them into the meat.
When I ran my test smoke after modifying, I only had a 6 degree temperature difference in opposite ends of the smoker. I did run an extension for the exhaust tube down to the grates today, which should only help with the temps inside the cooking chamber. I did place new thermometers at the grate level of the lid, but I still prefer to place a digital temp probe in the cooking chamber, suspended just above the grate, to get a more accurate reading.
I figured since I will be up throughout the night with the new baby, I might as well get him smoking some meat at an early age. I have two 9 lb boston butts and three 6 lb pork loins I will be smoking. Along with some baked potatoes. I will try to post some pictures of the first smoke with the modifications tomorrow.
The first issue I had was all the leaking air around the cooking chamber. I fabricated a bracket around the front and the sides, and used wood stove gasket in the grove. The lid closes down tightly on the gasket.


I then also glued on gasket to the bottom of the lid on the back. When the lid closes, this fully seals up the back side of the cooking chamber. I got a little messy with the gasket adhesive. Below is a shot of the lid fully open showing where it was glued on at.
Below is a picture from the bottom showing the gap sealed off when the lid is closed.
After a test smoke, and to burn off any fumes, I had no smoke coming out of the cooking chamber, except the stack. This sealed up the unit very nicely.
My next issue was to even out cooking temperatures. I like having the charcoal grate on the unit, because it makes a nice spot to hold my water pan. I decided I wanted to keep it in the smoker. First I fabricated some new brackets that would hold the grate fairly high, but they didn't stick up like the stock adjustable height hangers.

Now I needed a way to direct the heat down under the grate, allowing the grate to also act as my damper. I used some 20 gauge sheet metal, and bent it so that it deflected under the grate.
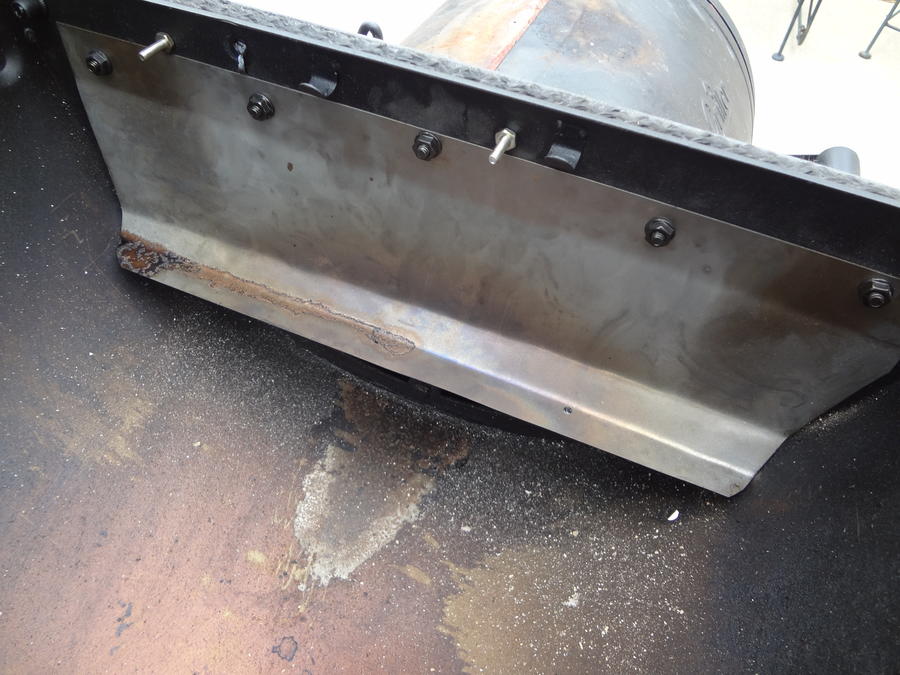
Here is a shot from inside the fire box, looking into the cooking chamber.

Now I also used red, high heat rtv silicone to seal up the gap between the fire box and cooking chamber.

Another issue I was having, was all the leaks around the door of the fire box. You can see by this picture, how the heat leaked on the top so bad, that it has taken off the paint.

To resolve this issue, I used the rtv silicone again to seal it up. I ran a large bead all along the fire box opening, and placed wax paper over it. I then closed the door and let it dry. This caused the sealant to dry and be formed around the gaps of the door. After the first test smoke, there was no escaping heat. I got it so hot that it started to bubble the paint on the painted wood handle of the door. I may need to get a different handle soon. I was glad to see i didn't have any leaks.
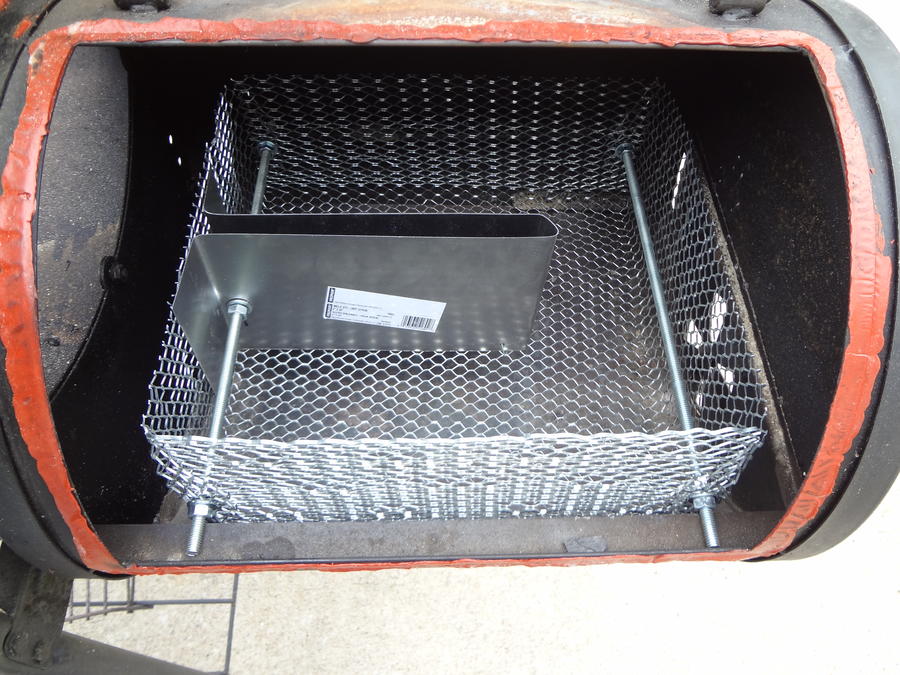
The above picture also shows the new and improved chacoal basket. I formed a piece of sheet metal to create a U shaped basket for the charcoal. This will help burn the charcoal using the minion method. The threaded rods let the basket hang on the channels inside the fire box, leaving plenty of clearance on the bottom for air flow.
The final, small modification I made, was drilling out 2 larger holes in the left side, by the the outer shelf of the smoker. This is where I place all of my Temperature probes during smoking. Now I can put all of the probes (i will be using 6 of them tomorrow) through these holes and run them into the meat.

When I ran my test smoke after modifying, I only had a 6 degree temperature difference in opposite ends of the smoker. I did run an extension for the exhaust tube down to the grates today, which should only help with the temps inside the cooking chamber. I did place new thermometers at the grate level of the lid, but I still prefer to place a digital temp probe in the cooking chamber, suspended just above the grate, to get a more accurate reading.
I figured since I will be up throughout the night with the new baby, I might as well get him smoking some meat at an early age. I have two 9 lb boston butts and three 6 lb pork loins I will be smoking. Along with some baked potatoes. I will try to post some pictures of the first smoke with the modifications tomorrow.


