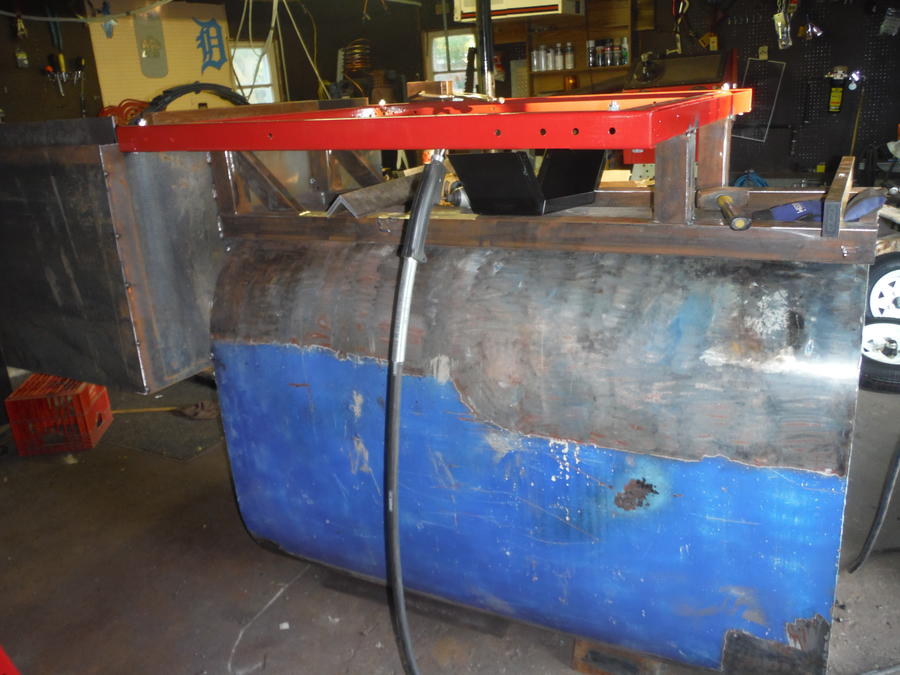
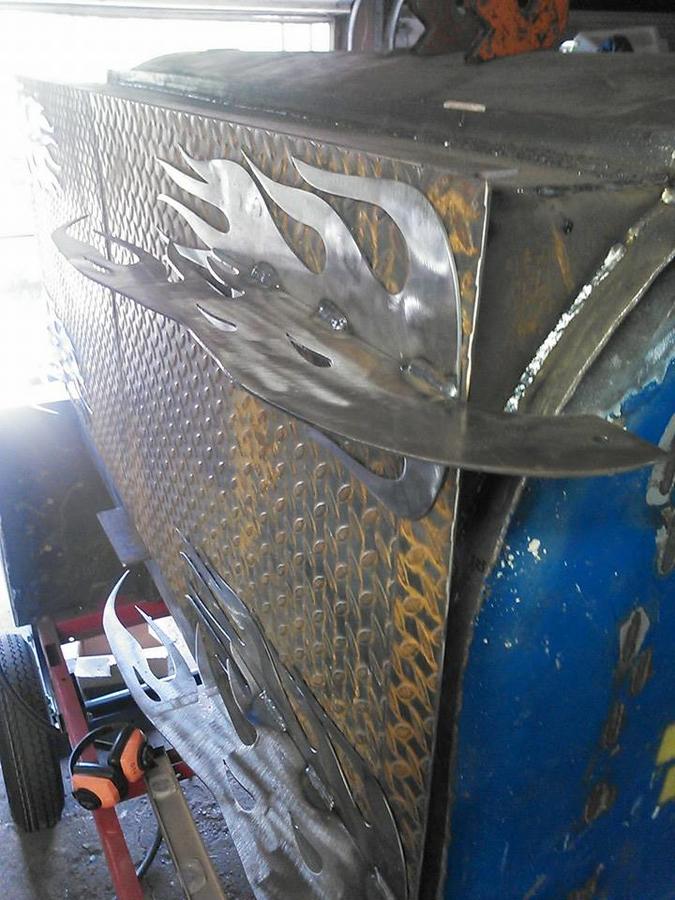
275 gallon RF Flame Smoker Completed

  • Some of the links on this forum allow SMF, at no cost to you, to earn a small commission when you click through and make a purchase. Let me know if you have any questions about this.
SMF is reader-supported. When you buy through links on our site, we may earn an affiliate commission.
2nd stack opposite FB would defeat purpose of RF design. RF plate radiates / distributes heat. Smoke enters CC opposite FB and then flows across food to exit exhaust. You can put a dummy stack on if you want that look. RF smokers are distinctive by stack on FB side.

RG
 
2nd stack opposite FB would defeat purpose of RF design. RF plate radiates / distributes heat. Smoke enters CC opposite FB and then flows across food to exit exhaust. You can put a dummy stack on if you want that look. RF smokers are distinctive by stack on FB side.

RG
     Hi RadioGuy and thanks for commenting to make sure I am not doing something stupid.....lol... I fully understand the working of the RF smoker. My reasoning for the second stack is a bleed off for when I want to turn the whole thing into a warmer at the end of a cook when serving for long periods of time. I would install a dampener at the bottom of the pipe to seal it off when I am in RF Mode... It will also balance out the build while it wont be used all the time...

Dave.... What is your thought on this for the Giant warmer??????

QUOTE

LenDecaturAL

Check out the dual stack design on M7's thread, post 33, he has an upper and lower stack on the firebox end as a method to be able to adjust air flow high and low within the cook chamber. Given the height of your tank, this may be a better option....

http://www.smokingmeatforums.com/t/...-trailer-mounted-with-storage-compartments/20  

Hi LenDecaturAL, Thanks for the link....That is a great idea with the dual stacks at different heights... More to ponder on that one...

Dave.. Would like your thoughts on this one too...

Thanks Everyone for the info... Keep it coming....

thumb1.gif
 
Work I got done today on the build... Tore down the trailer and wire wheeled the whole thing... Bought new Tires today also as the old ones where dry rotted. I will sand blast the rims and powder coat them.  The paint on the tank is very thick and have to use a 40 grit flap disc to remove the primer and paint... Still have a bit of that to remove...  Built a frame for under the tank to sit on and also support the FB.


First time seeing the dual stacks.... I like it...

About using the smoker as a warmer..... Proper built with air inlets (2) in the FB.... and proper sized exhaust... and proper RF plate and opening at the end.... and proper space under the RF plate......

All one has to do, to control the heat so it acts as a warmer is........ Cut the air to the fire 10-30% to reduce the heat output..... Then open the upper air inlet a bit to increase "flow through air" to the Cook Chamber...... VOILA...... instantly cooled down CC.... and the temp can be regulated using the air controls on the FB.....

The second stack in the CC at the opposite end..... I've seen them.... don't know how they help the heat air flow.... or why it would... The smoker is functioning as a result of convection currents... hot air rising..... differential pressure between the top of the exhaust stack and the inlets on the FB... (that , by the way, is the primary reason to have a very well sealed smoker)..... so, having one more stack could disrupt the delicate balance in the smoke/heat flow.... at least, that's my thinking.... could be wrong, been before, will be again....

these designs of smokers work VERY well and have attributes most folks don't realize.... Built correctly and VERY well sealed, they are efficient.... The second air inlet in the FB provides EXTREME control over the smoker.... most folks WILL NOT take the time to learn how to operate a 2 air inlet smoker..... I think they are afraid to burn wood to test it out... tweak the settings... etc..... wood must be darn expensive where they are from...
 
Last edited:
Thanks Dave for the insight... I am going to delete the 2nd stack that I added. What you explained made perfect sense. I am one of those ppl that like to "Dial" things in and be able to use them in different ways just by adjusting certain things....

Thank you for the explanation on what we are trying to create here.... and it sounds like I will have a warmer too... cool...
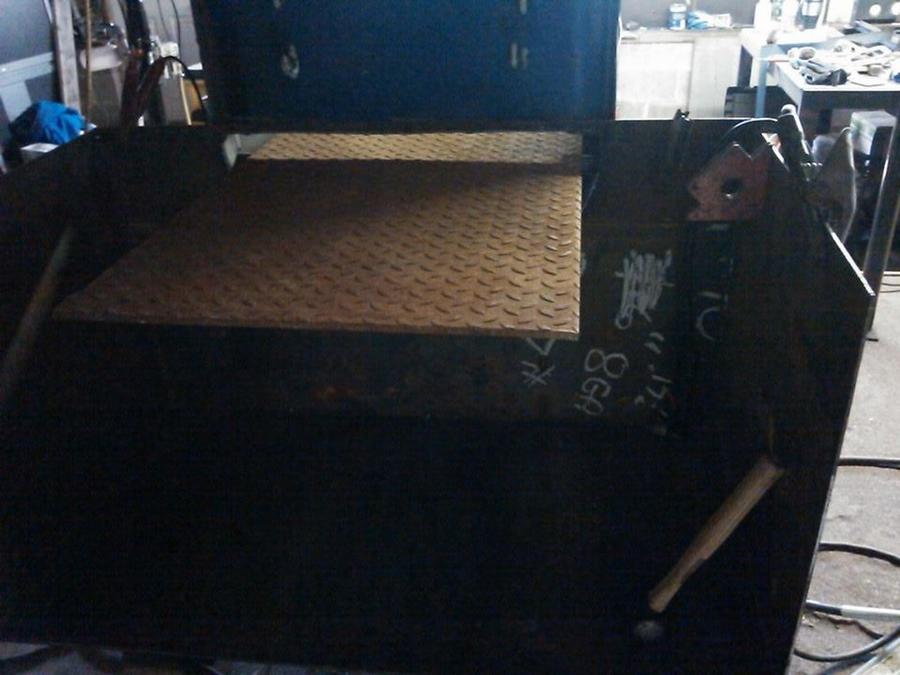
thanks everyone for the input...
 
Looks like you really did your homework...good luck on the build. I'll be watching for updates. (And I hope you leaned on the grinder a little harder when sanding off the University of Michigan "M"!) LOL Go Spartans!
 
Looks like you really did your homework...good luck on the build. I'll be watching for updates. (And I hope you leaned on the grinder a little harder when sanding off the University of Michigan "M"!) LOL Go Spartans!
Thanks, Dave and others had a lot of input plus my own research... Should be perfect when done...

LOL.... I am not much of a sports person, But it was some tuff stuff and really did lean on it... Who knows, maybe that is just how Michigan rolls...lol...

Back to the build now... Just stopped in the house to Make a few parts in cad and cut them out on the CNC... Back to work... Thanks for the comments
 
Todays Progress photos

Cut some parts on the cnc to Hold frame to trailer...


Frame all shaped and ready to except the Tank, The frame brackets that extend down will pick up the weight of the off set FB and transfer the weight to the trailer. This will relieve stress from the tank.


While welding a plug whole in the tank it caught fire on the inside. So I decided to take it outside and cut my half moon out and burn it off... Did not let it over 400 degrees which is about the time it wants to warp from the fire burning... Hit with the hose each time I heard it ping.... Fire burns clear now.. so I should be good to go...


Build cost to Date...

Tank = $ 20.00

Trailer = $ 25.00

Steel for frame = Free

New tire and tubes = $ 65.00

labor for bead break on tires = $ 15.00

total to date = $125.00
 
Today I got the tank cleaned out after burning it off yesterday. Mounted it to the frame on the trailer and welded in the flange lip that goes between the FB/CC. I will take a trip tomorrow to get the plate for the FB and get that started... I forgot to mention yester day how I got my template fro cutting out my half moon for the FB/CC. Since I could not fit the tank into the CNC machine I put a piece of cardboard in the CNC with a marker taped to the head of the Plasma Cutter and ran the program ... It drew the perfect template and just cut it out and trace to the tank...


I had a bit of bad luck that caused me to go backwards the other day... A word of advice...When using old trailers, always check your wheel bearings, races and tires before you start to make sure they are all good. I knew I needed new tires and tubes. I went to sandblast the rims today and while getting ready to tape off the races I noticed very bad pitting in them. Found them online for 20 each side as the trailer is vintage 60's. With the money vested in tires, tubes, bearings and time blasting and powder coating rims... I could afford to buy a new trailer for 179.00 .

That said I had to do some un-building and remove the trailer from the smoker.

The new trailer is mounted now and as you notice I am doing it upside down.... I am moving the axel just even with the front of the FB. This should give me around 100 lbs of tongue weight.

I have part of the FB built now.


Quick update.... Pic below is heating some angle iron in the forge to make some bends to raise the suspension of the trailer.


Got it upside right now sitting on the suspension.


FB is 100 % welded on what is there...


The top of the CC is about 6' tall...


After cut... got love how this steel tries to go back to flat...lol


Got some supports put in to weld the angle slides into.


Thanks for looking and feel free to ask question or add comment...Thanks
 
Did some more work yesterday on the smoker... I got the hinges cut and installed... The hole are for plug welds so that you can not see any welds when it is finished...


they turned out sweet... Now to make the cam locks for the doors......
 
Cool flame job on the hinges! Check the wire stock!!! I hate to make a run to the welding supply and run out of something else a couple days later! You are getting really close now, I know mouths are watering for some pig. 
drool.gif
 
 
Cool flame job on the hinges! Check the wire stock!!! I hate to make a run to the welding supply and run out of something else a couple days later! You are getting really close now, I know mouths are watering for some pig. 
drool.gif
Good call on the wire stock... did not even think of looking at it as I was so focused on finding the screw on cap that I looked for half an hour before finding it at the base of the gas cylinder...lol...
 
SmokingMeatForums.com is reader supported and as an Amazon Associate, we may earn commissions from qualifying purchases.
Clicky