New cast iron pizza pan

  • Some of the links on this forum allow SMF, at no cost to you, to earn a small commission when you click through and make a purchase. Let me know if you have any questions about this.
SMF is reader-supported. When you buy through links on our site, we may earn an affiliate commission.
Thank God someone approves of my little projects. I got a lecture from my wife for running the the self cleaning cycle with > 85F temp outside. And I thought I was smart for making use of low electricity rates (holiday today in Canada).

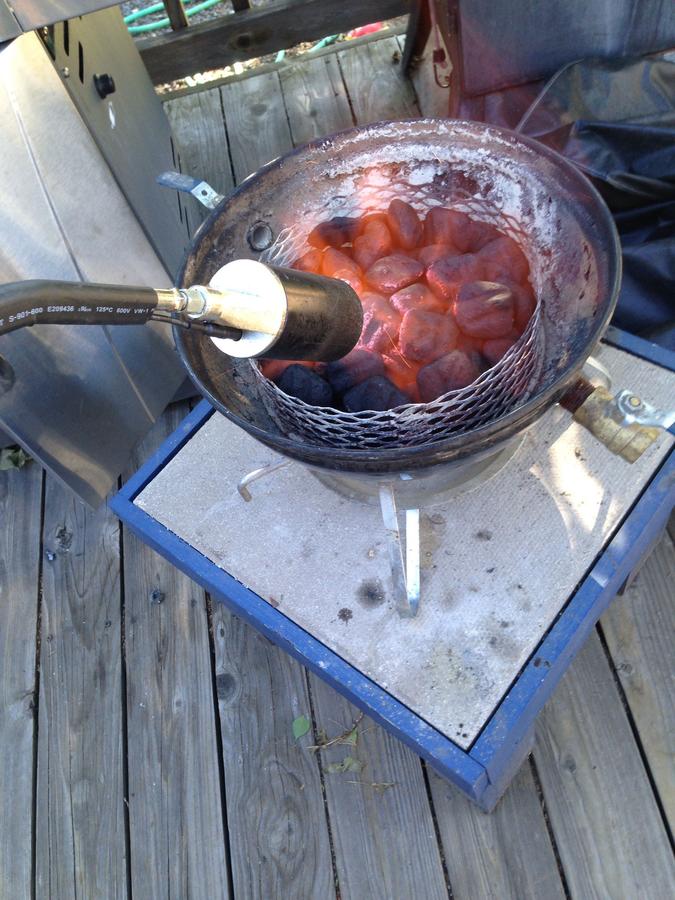
Yep been there done that! Found out my weed burner does the same thing, outdoors and faster! Just need a non flammable place to do it! Here's a pic of the weed burner in action, unfortunately not burning cast iron! . I'll have to get one next time I do some cast iron..

 
I've been seasoning a lot of pans lately. I like to warm the pan just so you can still handle it  with your hands and put the flax on it. Turn the oven to 475 and leave it there until the smoking stops and then turn the oven up to 525 for another 15 minutes. Seasoning pans is like cooking. You want the oil to polymerize but do not want it to get too hot for too long so the new seasoning starts to degrade. If you use a paper coffee filter to put the oil on it will result in less lint. You want to put the oil on as thin as possible and do multiple coats.

Since yours is still oily I would out in the oven at 500 until the smoke stops and apply another coat. My electric oven takes about 30 minutes to heat up and get the pan to stop smoking and then the 15 minutes at 500 (roughly 45 minutes total).
 
Too bad I didn't bother to check what it looked like an oily coating. I was going to rebake when I touched and noticed it wasn't "wet" but a nice glass-like coat. So all is good so far.

Pans are in for the 2nd bake (after applying oil again). Pushed the heat to 500 after 45min. Can't wait to see the results.
 
I seasoned 2 skillets and a Lodge fish fryer pan today. I did 2 rounds of seasoning but they look like they could use another.
 
I was aiming for three "bake" cycles. But after the second one the bottom on one of the pans is still rough - nowhere near what you got in the pics above. I will probably go for 5. I noticed the area around the spout (where I suspect I didn't wipe off all the excess oil) looks much better. Very smooth , the finish I would expect on the bottom too. Could it be that I am wiping off too much of the oil before baking?
 
I agree with Dave. Some pans have scratches and they take a little longer ti fill in using light coats but it is still the best way to do it. I must not have wiped out enough oil on 1 of my pans yesterday and have spotting in the bottom. This time it is not too bad but I have had a few that I re stripped to get them nice. If this happens you can season more or times or start cooking with it and it will eventually even out.


These are 2 different pans that have a lot of scratches from use. The scratches will fill in and the pans will have a nice cooking surface but it going to take a few more thin coats. You can see how the oil spotted more on the bottom picture. They will also get darker after a few more coats.
 
One step that is important is to put the pan in the oven upside down..... Don't know if you caught that..... I think it keeps the oil from "puddling" on the cooking surface....
 
 They look great! They will seem like they cook a little dry for a while. I've been using lower heat than with a teflon pan. I let the pan heat up then oil then food. I actually watch my eggs slowly cook and turn white now instead hearing the sear when they hit the pan. Eggs slide around better with spray Pam than teflon.
 
I've tried a new pan with the factory seasoning. It started to come off at the first hand wash. LOL

Scraped the original seasoning off it (and off another new one) and off they went in the oven along with the stubborn one (that one is in for the 4th bake).
 
Done re-seasoning my old and trusty frypan. I put it thru 5 cycles. I can't believe I can see my melon's reflection in the coating. A few more bakes and I don't need a mirror to shave when camping. LOL

Very happy with the results. Can't wait to cook on it.


Got two more lodge pans (new) in the process. Two cycles in. They need at least one more.

The Grand Canyon camp dutch oven will follow. That thing takes the whole oven. It will be a beauty if I get the same finish as on this pan.
 
Last edited:
The new Lodge pans don't have the milling work that the old pans have. They will start to fill in with seasoning after a while. After seasoning a new lodge pan it will look rough but if you warm your pan on low heat then spray with Pam and drop your eggs in they will slide around better than Teflon. The trick is not to get the pan too hot. If the egg hits the pan and immediately sizzles and turns white on contact, the pan is too hot and it will stick.  You did great job on that pan and it looks very nice!
 
SmokingMeatForums.com is reader supported and as an Amazon Associate, we may earn commissions from qualifying purchases.

Latest posts

Hot Threads

Clicky