Sous Vide Venison, SQWIBS First

  • Some of the links on this forum allow SMF, at no cost to you, to earn a small commission when you click through and make a purchase. Let me know if you have any questions about this.
SMF is reader-supported. When you buy through links on our site, we may earn an affiliate commission.

sqwib

Smoking Guru
Original poster
OTBS Member
Sep 25, 2007
5,962
1,034
Philadelphia
This is not smoked but wanted to share.
[h3]Sous Vide Venison Roast[/h3]

This is my first foray into Sous Vide Cooking.

I actually started reading up on this method when I was in the process of making a Corned Beef Brisket for my Brothers St. Patrick's Day Party (still in progress).


I was intrigued by what I have read thus far on Sous Vide cooking and felt this is something I simply must try. I am the kind of person that if I get an idea in my head I won't be happy till I try it, if I don't try it, the idea just keeps floating around in my head and drives me crazy, there are times when I have to grab a piece of paper, letter, box anything to write on and start scribbling diagrams, notes, recipes etc... just to try and get it out of my head.

While working on this project, I would wake up in the middle of the night and my mind would race with all the information I have been reading about that day, I would just lie there wide awake and put stuff together in my head... good or bad, I don't know but it does motivate me, the same is true when I built the Frankensmoker.


I started building the setup for the Corned Beef I was going to cook in a few weeks, meanwhile, Mom said she had a Venison roast to give me, apparently the last venison they cooked up was inedible due to it being impossible to chew and mom figured I could use it for something, she ended up giving the unpalatable meat to my sisters dog, REALLY... Oh boy! I let her have it, I said "MOM!, next time you have unpalatable piece of meat, give it to me and I'll make stew or jerky"

Anyhow, I though that this would be a a great time to test my Sous Vide machine, hell I was just as excited as I was nervous, I really wanted this to work.


When I was building the controller last weekend, a few buddies stopped over and had a few beers as they watched me build the controller, yes they think I'm OFF!
We got the munchies and I remembered the 18 month old pit cooked pork loin I was thawing to use in a dish, I grabbed it from the refrigerator and tossed it on the slicer and sliced it paper thin served with some dipping sauce and we were golden. Yep its great to have a refrigerator and meat slicer in the workshop.


The whole time I was putting this thing together, my Wife Unit was looking at me like I was nuts.
 

OK, enough rambling, lets do this!

  • Setting up the Sous Vide machine, the outlet on the left is for the roasting pan, this is switched by the temperature controller, the outlet on the right is a constant hot, this powers the circulator (35 GPH submersible pump) that is inside the water bath, this is to prevent cold/hot spots.

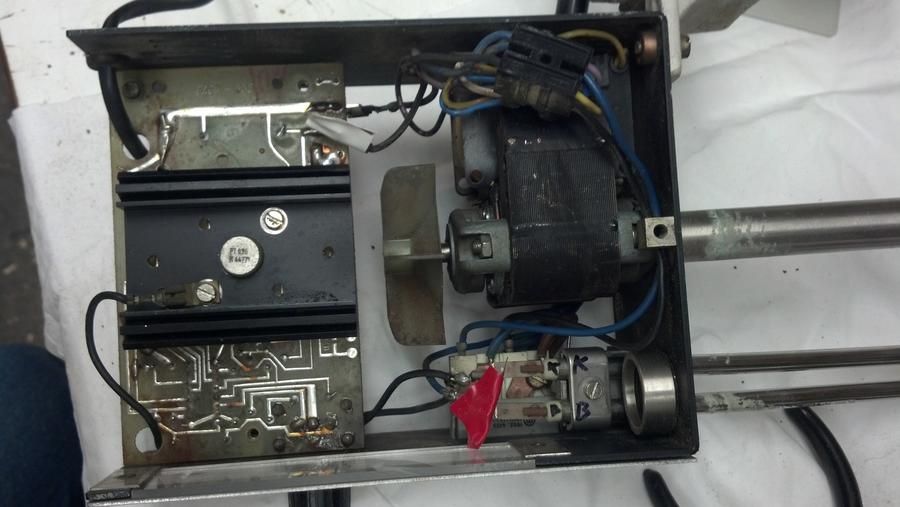
Temperature controller settings
  • Heating/ Cooling HC = H
  • Minimum set limit LS =  55°C (131°F)
  • Set temp = 56°C (132.8°F)
  • Maximum set limit HS = 57°C (134.6°F)
 
12971300214_517b409c83_c.jpg

 
12971020143_6266864c93_c.jpg

 
  • The venison roast was removed from its package, still frozen.
12971290674_dbc6a2c471_c.jpg

 
12971324084_8e4207c67c_c.jpg

 
  • Mopped with Soy sauce and Worcestershire Sauce.
12970906655_90b5f97bbf_c.jpg

 
  • The venison is broiled for 5 minutes on each side and then is vacuum sealed. I hit the seal button as soon as the liquid was pulled close to the sealing mechanism. Tip, leave a large tail for thicker meats for easier sealing.
12971314594_1f4013883b_c.jpg

 
  • The venison is Placed in a Sous Vide Bath at 56°C (132.8°F) to cook 45 hours making sure it was not touching the sides or bottom.
12970897945_b6c56e2698_c.jpg


  • "Everything is as it should be", now we wait.
12971309044_e0e968c30d_c.jpg


  • The venison roast in the bath 35 hours later, still sealed tightly and not floating... all is good!
12971026143_a7d0ceebb0_c.jpg


  • The venison roast is removed from the Sous Vide machine after 46 hours in the bath. The moment of truth, the bag is cut open and the liquid is poured off, no off smells and all looks good so far. I decided on ditching the liquid and not making a gravy, had it been beef, a gravy would have been made.
12989171724_fe5e80fee4_c.jpg

 
  • The roast is removed from the Vacuum Sealed pouch.
12989169284_a285539c1e_c.jpg


  • The roast is then placed in a hot skillet with some EVOO to brown, gotta get some of that Maillard reaction going.

12988897163_dbb4bb153f_c.jpg

 
12988894663_5f4a4c27a8_c.jpg

 
12989161534_f8fccfb39f_c.jpg

 
  • Slicing the best I can.
12988890763_6f64a06c28_c.jpg

 
12989156034_dda3f477cc_c.jpg


  • After patiently waiting two days I was about to find out for myself if this was as extraordinary as I heard it was.

  • The venison was extremely easy to carve, OK that's a good sign, it was incredibly tender and had a great texture/mouth feel to it, OK so far so good. The taste was great as well, success! The closest thing I can compare this to, is lamb. My parents were amazed at the finished product, my Dad even said it was tender, (the same man that thinks pudding is chewy). It really blew my mind, there was no gamey taste or that "chalky" like texture you can sometimes get from venison or at least from my experience.

12989151254_0e1b0bae6f_c.jpg


Was I lucky, was it a good piece of meat to begin with, were my taste buds numb? My son Stephen liked it, HUH! that's just crazy talk. I'm not a big venison person and eat it rarely, but this has to be, without a doubt and all bullshit aside, the best piece of venison I have ever eaten.

Notes:
 

One of my concerns with this cook was the temperature swing I was getting, since I was using a Celsius temperature controller, the swing was pretty significant as you can only set the controller with a one degree (1.8°F) minimum set limit. The temperature controller was set for 56°C and was set to kick on one degree under, using the roaster pan as a heat source the temp would climb to 57.9° Celsius due to the carry over heat from the pan.
 

54.9°C = 130.82°F

57.9°C = 136.22°F
 

So a 3° variance in Celsius x 1.8 is a 5.4°F swing, granted my lower limit never got below 54.9°.  I do however have another temperature controller coming in that is rated in Fahrenheit and will swap out the Celsius temperature controller, I can live with a 3° swing but not a 5.4° swing.

I am also currently working on an immersion heater, hopefully this will give me better control of the water bath.


After I get a few cooks under my belt and build my new Sous Vide Immersion Heater, I will be playing around with combining this with Pit cooking, Smoking, frying etc...

In closing,

After researching this to death and reading so many great things with this method, it was a no brainer, I just had to try it, I was hoping that all the great things I read about Sous Vide cooking were true and not folks just trying to convince themselves that cooking Sous Vide was nothing short of miraculous, especially after plopping down hundreds of dollars on a Sous Vide machine or making their own machine. Sometimes we just don't want to face the music!

I have read all the science behind it and it all makes sense to me, well sort of, when explained in layman's terms, but it still blows my mind.

I have to admit I was very skeptical of this method and my first test was a total success and I highly recommend giving this a shot!.

 
Wild Temperature swing is perhaps because your controller is not a PID controller, it is just a digital thermostat.

Do you have a circulating pump in the bath? 

Very nice cook! Perfect meat.

dcarch
 
Last edited:
 
Wild Temperature swing is perhaps because your controller is not a PID controller, it is just a digital thermostat.

Do you have a circulating pump in the bath? 

Very nice cook! Perfect meat.

dcarch
Yes it has a submersible pump, I believe the overshoot is the result of the method of heating (roaster) not the controller, by the time its up to temp, the roaster is still putting out heat and needs to equalize, the other problem is ovious, C Vs, F so a 1 degree celsius change means a 1.8 degree Farenhet change.

This will all be rectified when I finish my immersion heater.
  • Testing... all works ran it to 160°, got tired of waiting.
  • opened up
  • gutting

Going to wire the PID into the heater after the circulator so the circulator stays on.

Dual Digital Display PID Temperature Controller.

 
Nice work.   I have a DIY Sous-vide machine (crockpot with PID) too.  LOVE it.  Best $30 Ive ever spent
 
Here are step by step instructions:

 http://www.instructables.com/id/Simple-Sous-Vide/

Here is a link to my part list.  I ended up NOT using the Solid State Relay.


Added bonus:  I am able to connect my electric smoker to the controller and allow the Sous-vide control control my smoker temps.   (if you do this, you will need to use a probe that can withstand heat up to 300 degrees)
 
 
Can or has, anyone posted DIY directions?  I am not an electrician or anything but hell, if I can make one for 30 bucks, I would definitely give it a shot.  Sounds very interesting..
I would not advise you (or anyone else) to try to make one unless you have a very good working knowledge and experience with power electrical work.

It is not rocket science, but you are dealing with high power and high voltage, and it is water everywhere.

You need to read up on everything, especially on the principle of electrical grounding. If you end up making one, have an electrician examine what you have done.

Good luck.

dcarch
 
I like that you have a rack in yours.  I assume the second plug going to your controller is a water circulator? If so, what kind did you use?
 
 
I would not advise you (or anyone else) to try to make one unless you have a very good working knowledge and experience with power electrical work.

It is not rocket science, but you are dealing with high power and high voltage, and it is water everywhere.

You need to read up on everything, especially on the principle of electrical grounding. If you end up making one, have an electrician examine what you have done.

Good luck.

dcarch
Although a good idea to know what you are doing when using electricity, I disagree with dcarch.  This project is as basic of a wiring project as they come.  Follow the instructions and its easy and safe.
 
For $50 + shipping  I'll make anyone a controller box.   You'll need to supply the manual crockpot.
 
SQWIB, looking at the components inside the box, I see that you are using a hot water heater heating element.

A suggestion; you may want to consider a different layout or mounting method. As far as I know, a hot water heater has metal –to-metal contact in the mounting, and it can conduct a lot of heat to the metal case. Also, a hot water heater must operate inside water. If water evaporates and gets low, which happens often for long sous vide cooks, the heater can over heat, burn things around it and then self destruct.

dcarch
 
 
Although a good idea to know what you are doing when using electricity, I disagree with dcarch.  This project is as basic of a wiring project as they come.  Follow the instructions and its easy and safe.
I am 1000% disagree with you. It is not that simple at all to put the whole thing together. It is very unsafe, life and death, to advise an inexperienced individual to take on a project in power wiring.

There are at least 10 pins to wire up with the controller, with polarity concerns. How does one know to evaluate if the internal relay can handle to high watt heater? If a SSR is used, which side is to the PID and which side is to power?  how to wire it in series to the power and heater ----- etc. etc.?

Sorry.

dcarch
I see what you are saying.  The way I made mine and the way SQWIBS made his is different.  I use the crockpot to heat the water. The crockpot is then cycled on and off by the PID controller to regulate water temp.  Mine has three components: PID Controller, Power Switch, Power Outlet.     
 
For those that can't build...

My Aubers PID that I use on my MES 30 smoker analog is also good for Sous vide

They make waterproof temperature probes. Several months ago I had an old restaurant warming tray that I filled with water, hooked it to my Aubers PID put some chicken in a freezer bag then into the pool and covered it with a piece of cardboard.  Came out great, even though I was embarrassed by my half-assed setup.

So yeah I got some stuff to work out.  My setup will work, I just need to come up with a real lid and some type of tray or bracket, best thing might just be to cut down an old grill grate, if I have something that wants to float.  I have since purchased a vacuum packer .  That might solve my floating problem.

Anyway, I have what I need.

Just need some time to play with this.
 
 
SQWIB, looking at the components inside the box, I see that you are using a hot water heater heating element.

A suggestion; you may want to consider a different layout or mounting method. As far as I know, a hot water heater has metal –to-metal contact in the mounting, and it can conduct a lot of heat to the metal case. Also, a hot water heater must operate inside water. If water evaporates and gets low, which happens often for long sous vide cooks, the heater can over heat, burn things around it and then self destruct.

dcarch
These things are designed as Immersion heaters for labs and Sous Vide cooking designs are similar, they are completely safe and will not heat the metal, most of the resistance is in the coiled area and that is where the heat is concentrated.

What you see in the picture is how the machine was built less the circuit board. I did not add anything, its the design of the manufacturer.


My first Sous Vide cook was at 133° for 46 hours, there was almost no evaporation whatsoever.

The machine I am working on now will have a lid, the only way I can see evaporation being a problem is running the machine at much higher temperatures with no lid.
 
 
I am 1000% disagree with you. It is not that simple at all to put the whole thing together. It is very unsafe, life and death, to advise an inexperienced individual to take on a project in power wiring.

There are at least 10 pins to wire up with the controller, with polarity concerns. How does one know to evaluate if the internal relay can handle to high watt heater? If a SSR is used, which side is to the PID and which side is to power?  how to wire it in series to the power and heater ----- etc. etc.?

Sorry.

dcarch
There are no polarity concerns on this setup and it is easy, the hardest part is adjusting the PID


Guys make these all the time for heat control on their smokers.
 
SSR needs to be connected to the PID with correct polarity.

Type "K" thermal couple sensor often does not tell you which way polarity is to be connected to the PID correctly.

Pork sous vide often at around 150F.

Duck legs often at 170F.

Vegetable sous vide often at 185F.

Water evaporates much quicker at those temperatures.

dcarch 
 
 
I like that you have a rack in yours.  I assume the second plug going to your controller is a water circulator? If so, what kind did you use?


Yes one outlet stays hot for the water pump, the other outlet is switched by the thermostat.


12793388664_85751cdbd3_b.jpg


12792959055_5dce8ed898_b.jpg


12793030825_1d46cc79e4_o.jpg

110V LCD Digital Temperature Controller Temp w/ Sensor Thermostat Control relayCarlon Marine Conduit Box E987N 4 X 4 X 4 (50 CU. IN.) PVCLutron CARS-15-TRH-BR

12793061553_1ceb01ebd2_o.jpg


12792959385_ff43f79c6c_o.jpg


12907216865_c622ca40f0_o.jpg

C14 Receptacle

Amp Rating: 10A
C13 18 AWG Universal Power Cord 10 Feet
Amp Rating: 10A
Home Depot Ideal 10-Piece In-Sure Push-In Wire Connector Set
I strongly suggest these connectors in Lieu of wire nuts.


12907532134_eea2b8b26f_o.jpg


12792959425_1eaa390831_b.jpg


12792958815_2d8a35a88a_o.jpg

Radio Shack Technology Speaker Terminal Plate Push Release with RCA Design

Speaker Connector
I decide to add this for easy probe replacement.
Aqua Culture:Aquarium Air Pump
"caution" do not use above 160F, or unit will melt and deform
Hamilton Beach 22-Quart Roaster Oven, Stainless Steel

For the cooking vessel I decided on a roaster for my first machine.

I figured the roaster be used for other things as well.

As you can tell, I'm not an electrician either lol

 
Last edited:
SmokingMeatForums.com is reader supported and as an Amazon Associate, we may earn commissions from qualifying purchases.

Latest posts

Hot Threads

Clicky