
After a couple years of heavy use on my gasser, I decided to go a step further than just the necessary mods on the chip box and water pan. I did both of those in the beginning and have to say it made my life much easier and turned out some good grub, but I like to tinker with things and just couldn't leave well enough alone. Here is the surgery so far with more to come before it is released from the shop.
First on the list was to scrap the lousy vent on the back and fab a
real smoke stack to help with some draft.
Rear vent gone
Smoke stack built and attached
Rain cap built ... adjustable in up or open position
Rain cap in down or closed position
Hopefully this one addition will help provide some good draft which will
help with my second mod.
Next on the list is my upgraded version of the mail box mod. I have used the mail box with my AMNPS for both
cold smoking as well as hot smoking and just figured I would try to clean it up a bit.
Ammo box sliced up a bit. Not an original idea but I sure do like the cheap cost and ready made size
Top vent added that will come thru the floor of the gasser
Ammo box fits in very nicely between the legs on the side above the cart that
was built to move around easily. (custom chip box in background)
Smoke inlet fits in nice beside the burner. Still need to fab a hood to double as
a smoke diffuser and grease shield, but its moving along nicely.
The last mod that I have done right now is something I have wanted to do for a while.
I robbed a side burner off an old grill and decided to transplant it to try to help achieve
a lower temp for my jerky and sausage.
Old burner out and ready to retire
Transplant cast burner with brass diffuser ready to fab a mount
Transplant burner mounted and ready to go
Transplant in place. It looks off center in the pic but that is just the angle.
It is really centered. This burner is rated at 10k btu as compared to the
original that is 15k btu, so I am hoping it will help with a lower bottom end temp
of around 140 as well as still hit a top end of 275. Shouldn't be a problem.
Keep your fingers crossed....lol.
This is where the surgery sits right now. There are several more operations that are scheduled and should be very beneficial. Stay tuned for more updates very soon.
Till then....embrace the smoke.
First on the list was to scrap the lousy vent on the back and fab a
real smoke stack to help with some draft.

Rear vent gone

Smoke stack built and attached

Rain cap built ... adjustable in up or open position

Rain cap in down or closed position
Hopefully this one addition will help provide some good draft which will
help with my second mod.
Next on the list is my upgraded version of the mail box mod. I have used the mail box with my AMNPS for both
cold smoking as well as hot smoking and just figured I would try to clean it up a bit.

Ammo box sliced up a bit. Not an original idea but I sure do like the cheap cost and ready made size

Top vent added that will come thru the floor of the gasser
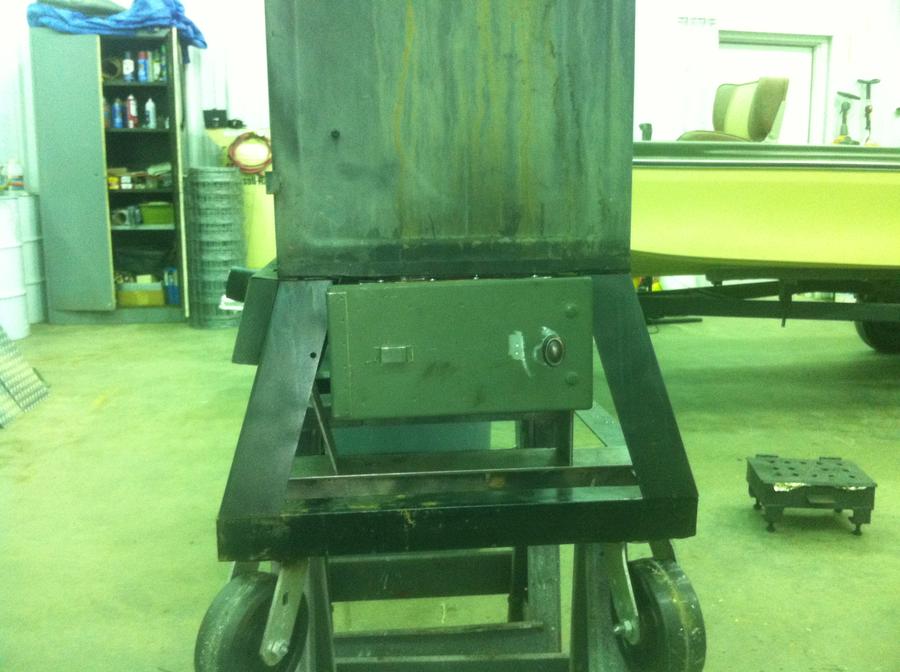
Ammo box fits in very nicely between the legs on the side above the cart that
was built to move around easily. (custom chip box in background)

Smoke inlet fits in nice beside the burner. Still need to fab a hood to double as
a smoke diffuser and grease shield, but its moving along nicely.
The last mod that I have done right now is something I have wanted to do for a while.
I robbed a side burner off an old grill and decided to transplant it to try to help achieve
a lower temp for my jerky and sausage.

Old burner out and ready to retire
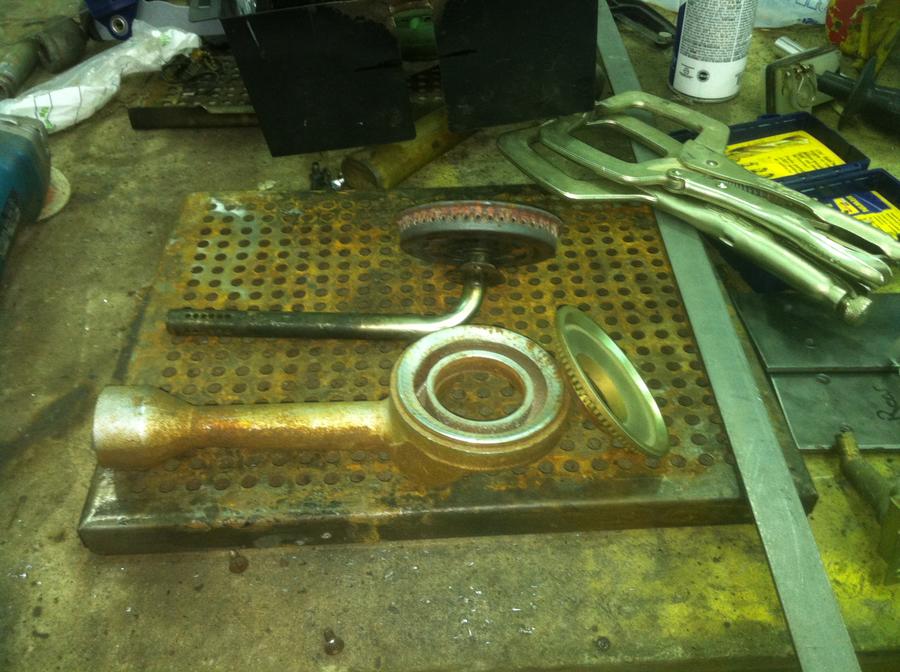
Transplant cast burner with brass diffuser ready to fab a mount

Transplant burner mounted and ready to go

Transplant in place. It looks off center in the pic but that is just the angle.
It is really centered. This burner is rated at 10k btu as compared to the
original that is 15k btu, so I am hoping it will help with a lower bottom end temp
of around 140 as well as still hit a top end of 275. Shouldn't be a problem.
Keep your fingers crossed....lol.
This is where the surgery sits right now. There are several more operations that are scheduled and should be very beneficial. Stay tuned for more updates very soon.
Till then....embrace the smoke.

![IMG_1101[1].JPG](/media/img_1101-1-jpg.318526/full?d=1507229423)
![IMG_1102[1].JPG](/media/img_1102-1-jpg.318527/full?d=1507229423)
![IMG_1103[1].JPG](/media/img_1103-1-jpg.318528/full?d=1507229423)
![IMG_1111[1].JPG](/media/img_1111-1-jpg.318529/full?d=1507229423)

![IMG_1113[1].JPG](/media/img_1113-1-jpg.318533/full?d=1507229423)
![IMG_1115[1].JPG](/media/img_1115-1-jpg.318534/full?d=1507229423)
![IMG_1118[1].JPG](/media/img_1118-1-jpg.318539/full?d=1507229423)
![IMG_1119[1].JPG](/media/img_1119-1-jpg.318540/full?d=1507229423)
![IMG_1120[1].JPG](/media/img_1120-1-jpg.318541/full?d=1507229423)
![IMG_1138[1].JPG](/media/img_1138-1-jpg.318542/full?d=1507229423)
![IMG_1154[1].JPG](/media/img_1154-1-jpg.318543/full?d=1507229423)
![IMG_1156[1].JPG](/media/img_1156-1-jpg.318544/full?d=1507229423)
![IMG_1147[1].JPG](/media/img_1147-1-jpg.318545/full?d=1507229423)
![IMG_1139[1].JPG](/media/img_1139-1-jpg.318546/full?d=1507229423)

