- Nov 19, 2013
- 5
- 10
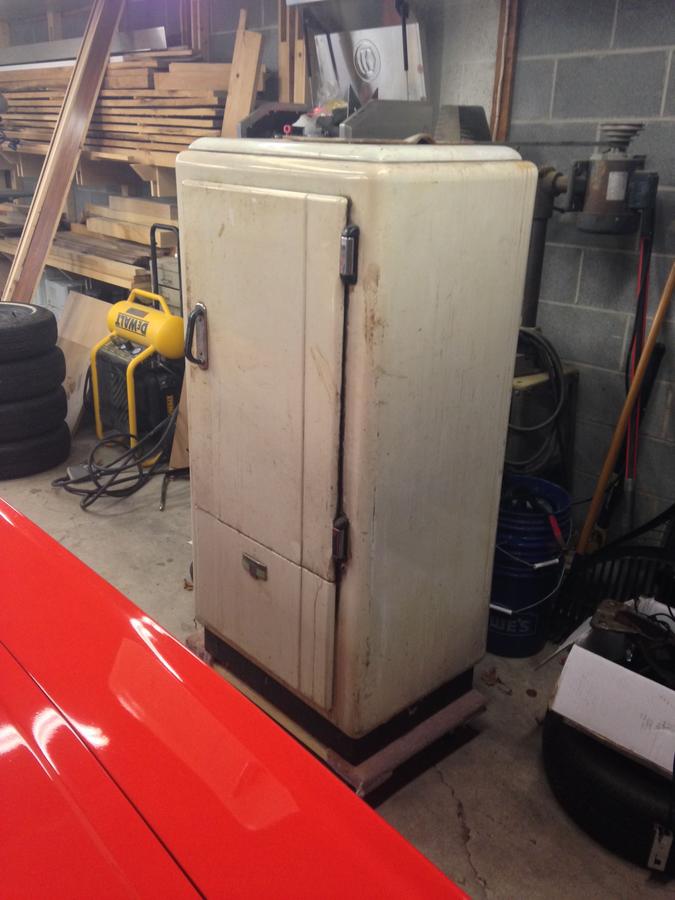
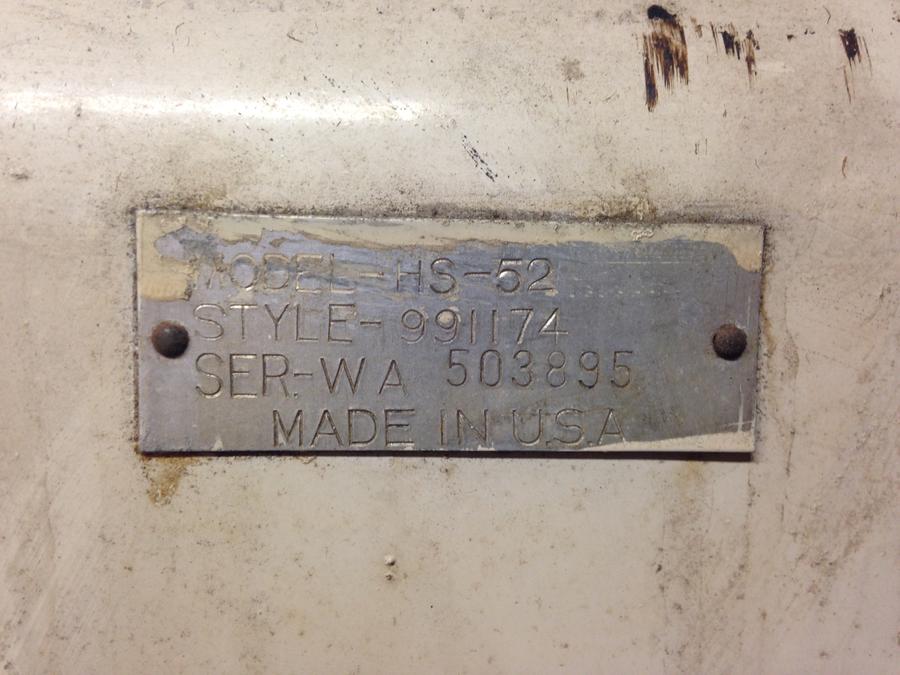
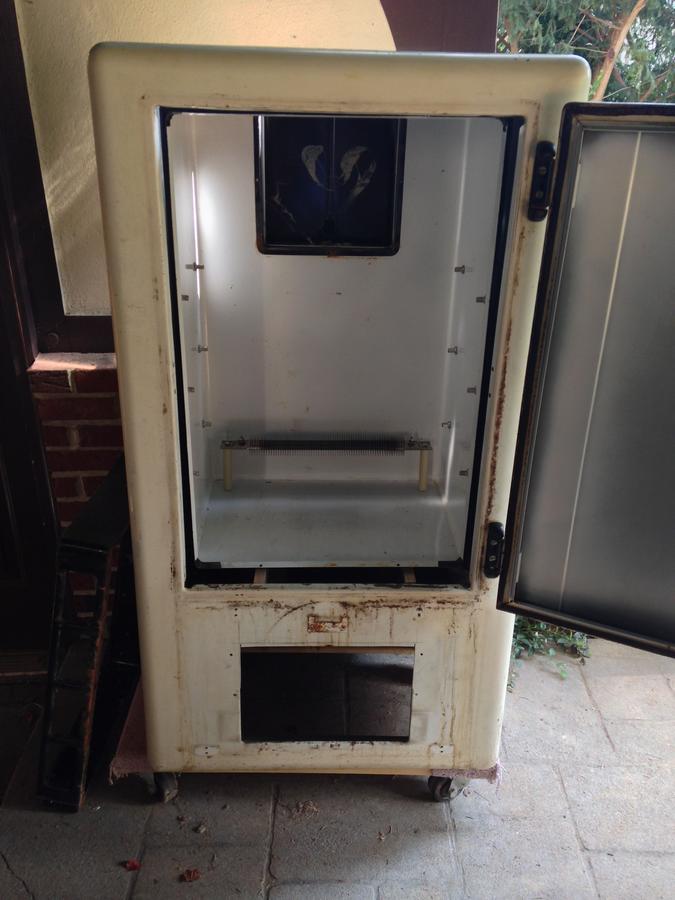
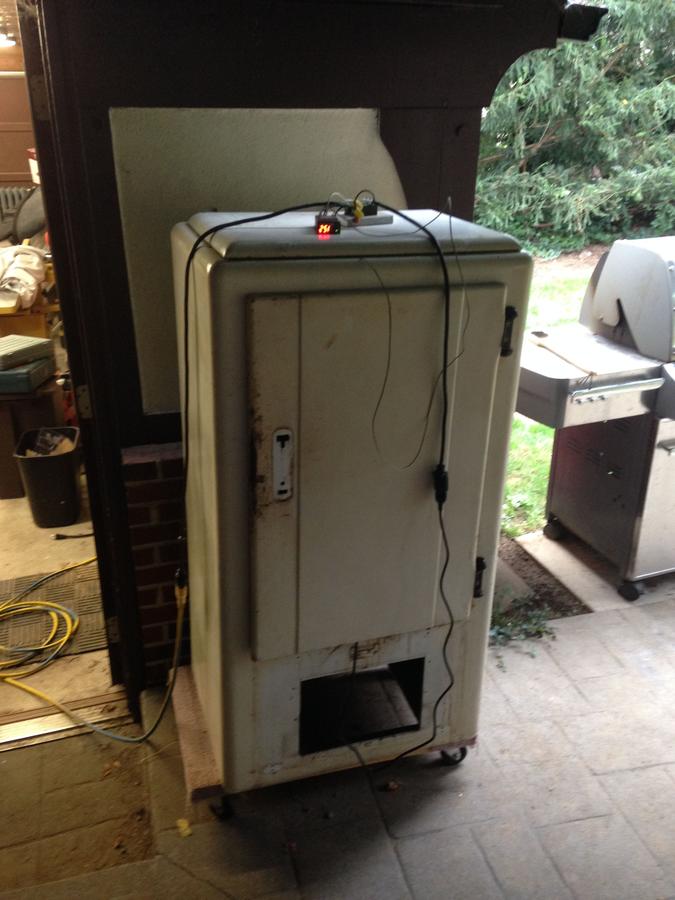
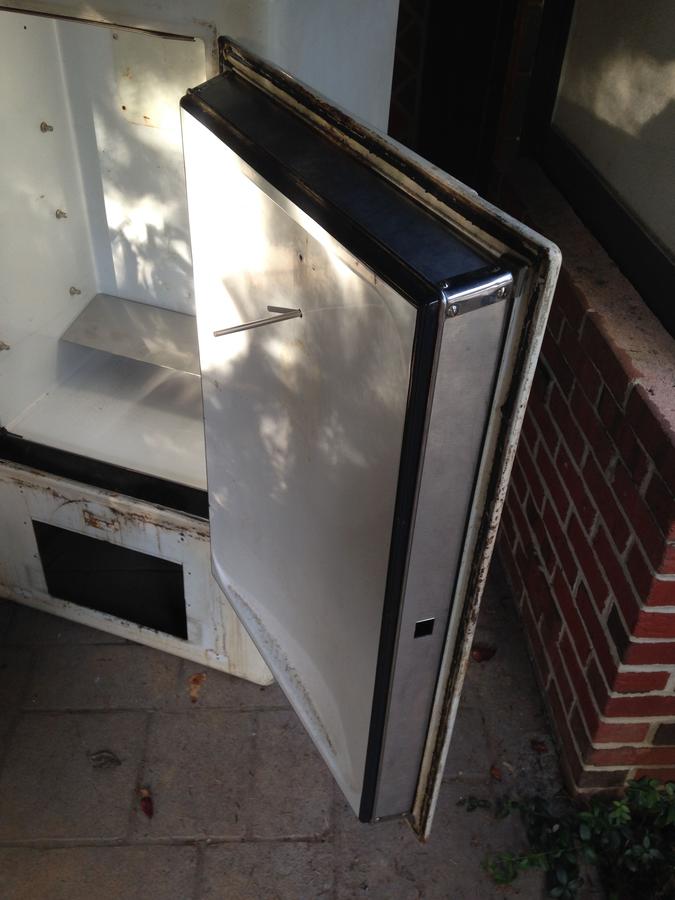
A friend of mine was moving and offered me a Westinghouse HS-52 refrigerator; in working condition. I debated keeping it as a beer fridge in the garage but ultimately decided it's too old and too inefficient to keep as refrigerator. I think it's circa 1930's - 1940's based on one or two others I've found on the internet.
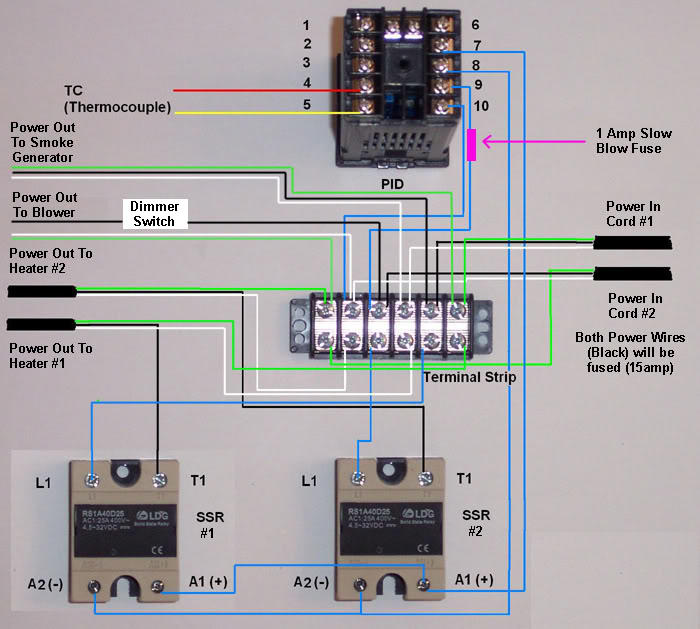
I have been running a laboratory PID on a red vertical Brinkman smoker for years. It works great if it's sunny and still outside; if it's below 70 or windy, it has trouble keeping temperature. 'que view here: https://plus.google.com/photos/1145...s/5713993606450446033?authkey=COHroe_owdbW_gE
I debated buying the smallest backwoods smoker for a time but I really wanted the electric heating element. So here we go...
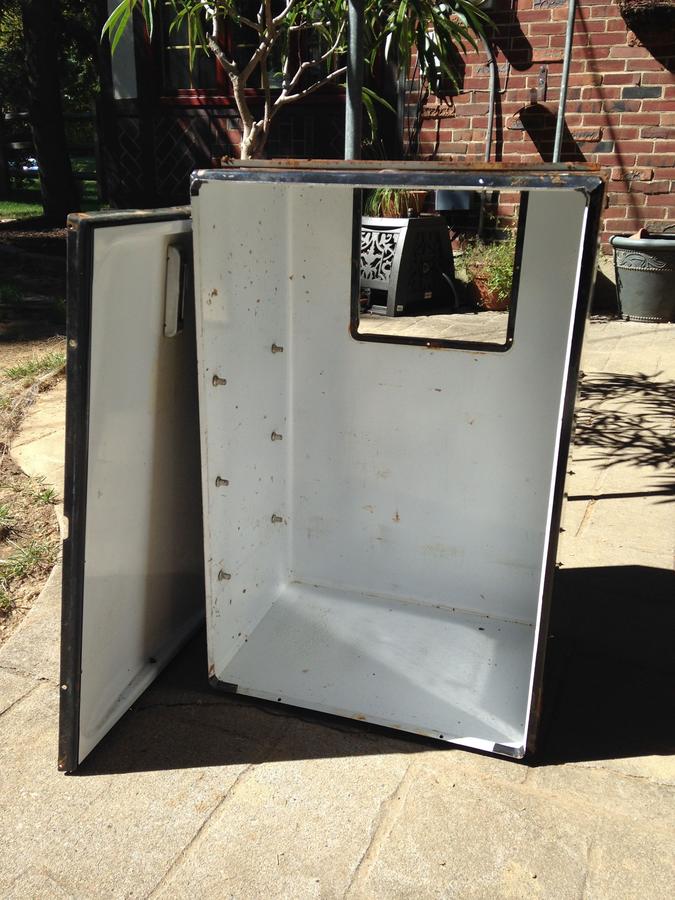
I didn't get any photos of disassembly. There were a few extra coats of paint on it which masked some key screws. Had I found these, disassembly would have been a great deal easier. In the end I broke out the plastic strips which connected the inside box to the outside carcass and just tore it apart. It used two steel packing straps to support the weight of the box and prevent it from crushing the insulation, a brown fibrous hair type material. I kept all the hardware and trim pieces for reassembly.
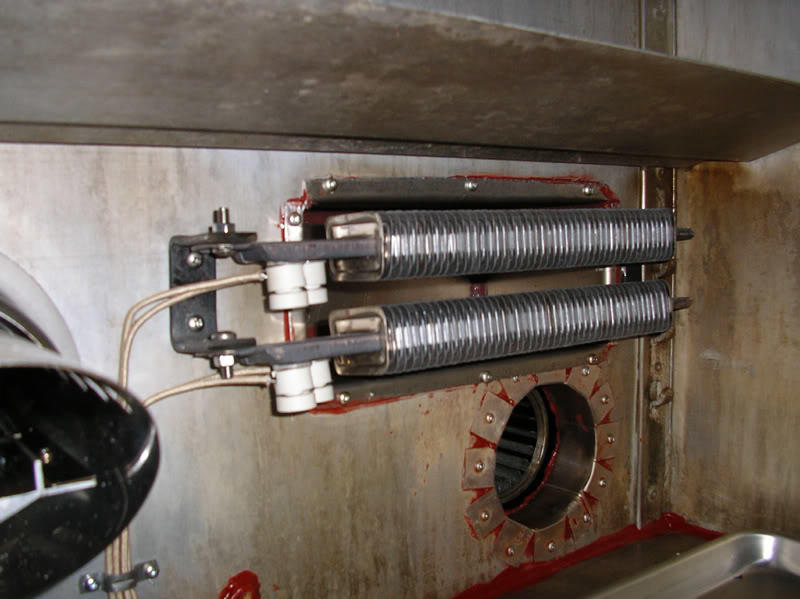
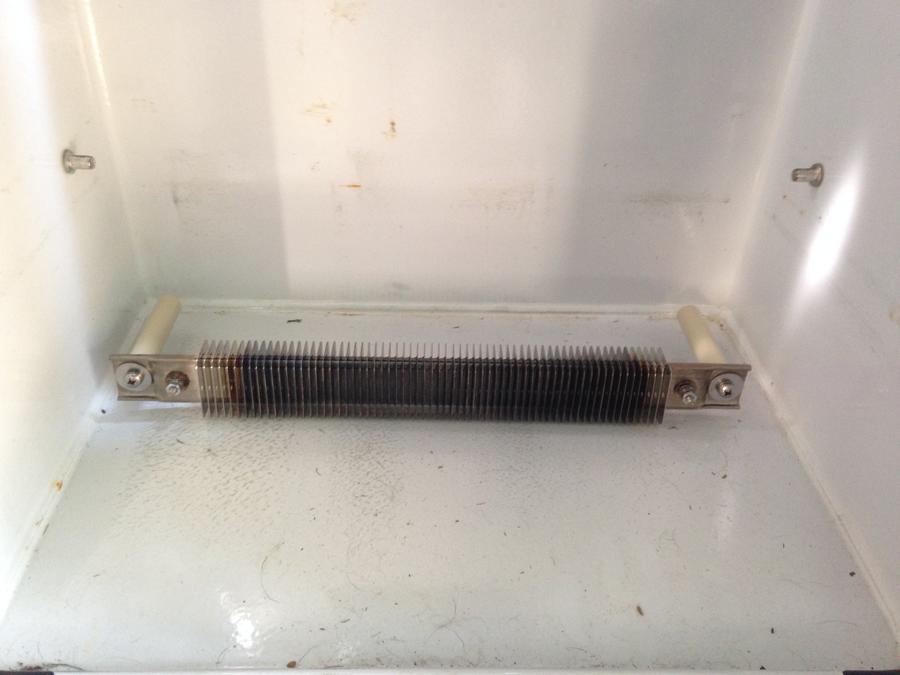
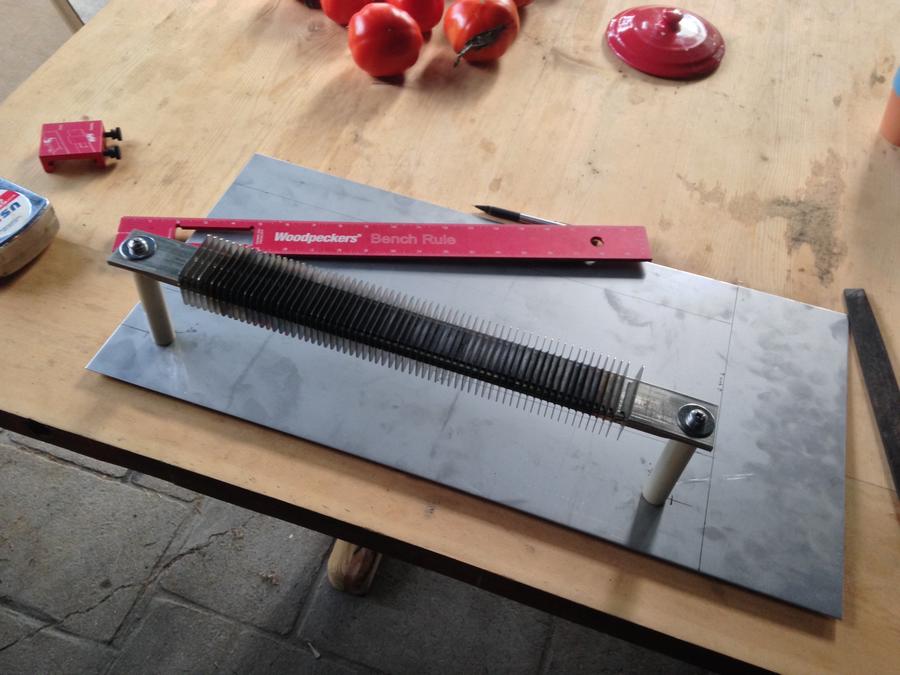
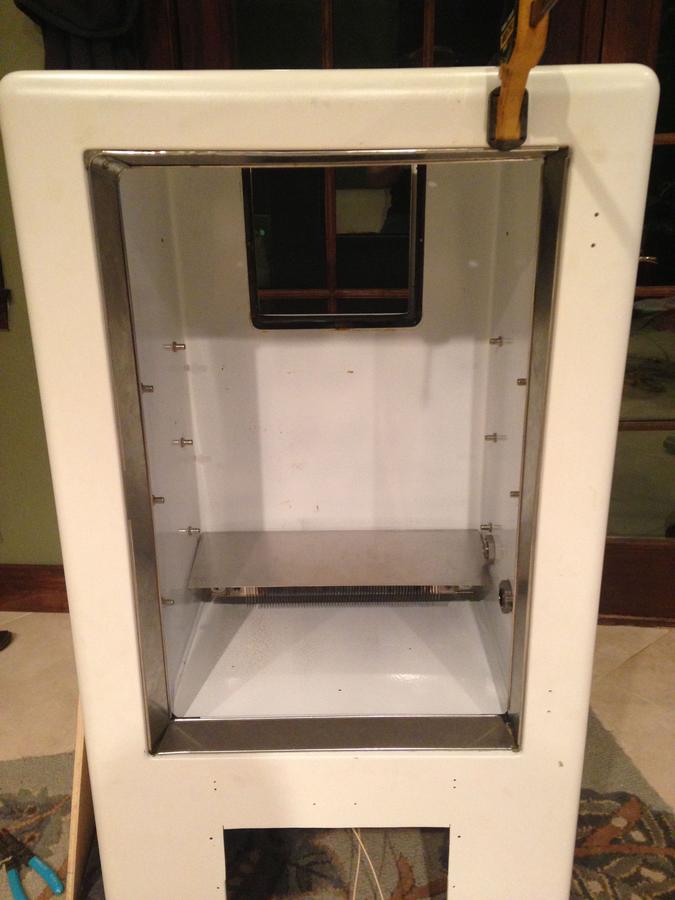
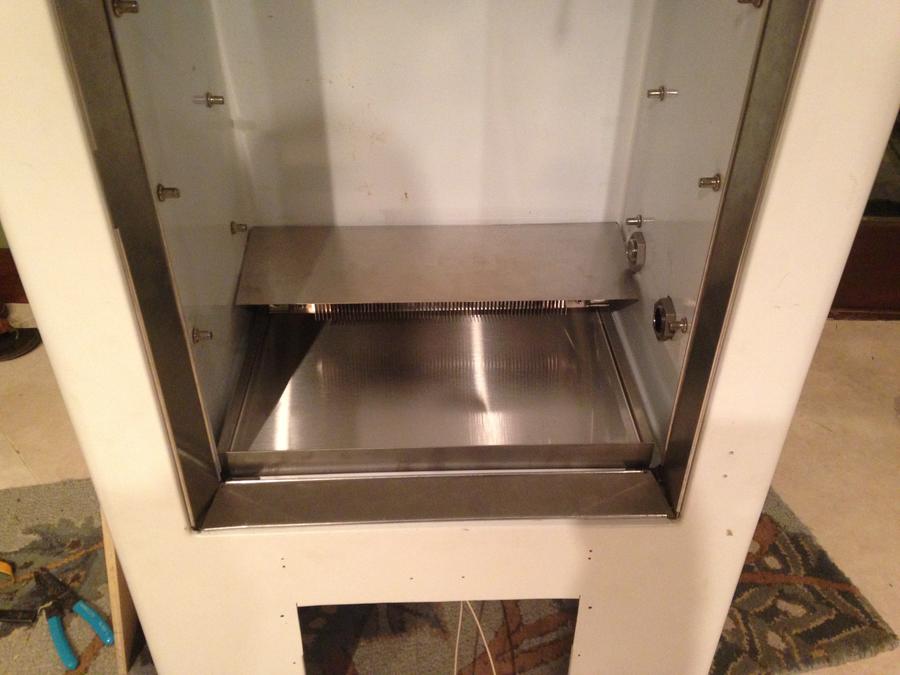
I decided to mount a 1500W heating element in the lower back side of the inner box. After seeing some alarming threads on smoker fires, I decided to add a shield over the element. I used a piece of 304 stainless.
I did a quick trial run and could not get a reasonable temperature... I'm going to need to insulate. A lot!
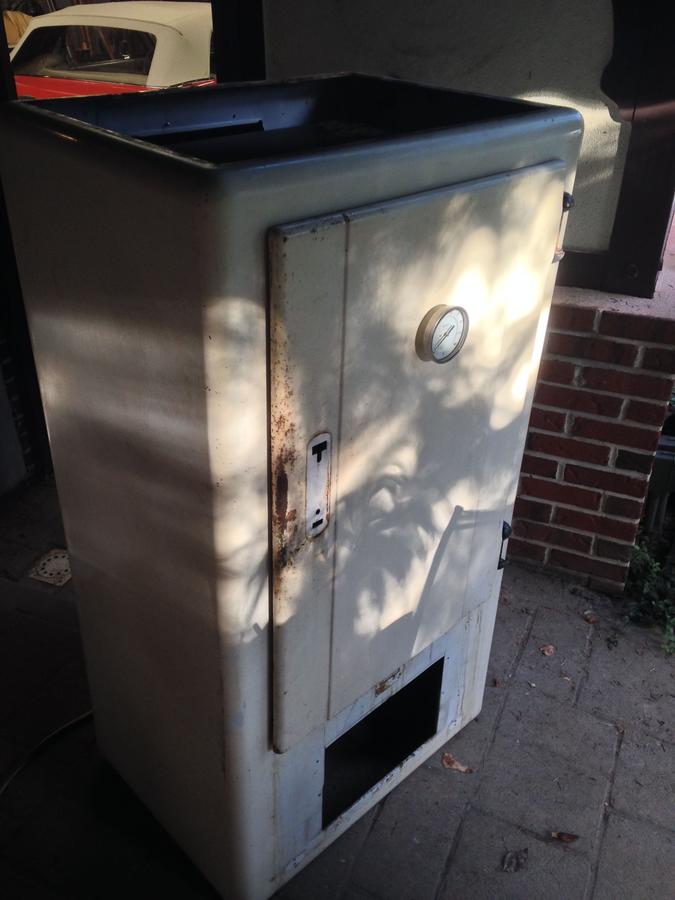
I reached out to a local sheet metal shop to reproduce the plastic strips I had broken during disassembly. I reassembled the door shell as a trial run. The original trim pieces and the stainless steel look really sharp. I mounted it on the carcass to check fit and position a thermometer.
At this point, there's not much more I want to do before I paint and insulate. I sent all of the parts out to be blasted and epoxy primed. The inside box has a porcelain coating which I am going to keep. I plan to paint everything else. In the meantime I got busy with life and lost the weather... now the parts are back, clean and primed, so I am reassembling indoors. Fortunately, my wife loves bbq as much or more than I do, so the mess is greeted with a smile.
I'm doing another dry assembly to see how much damage I might do to the paint. I have to choose a paint as well. I was originally planning a white pearlescent tri-coat, but that now seems way overkill and costly for a smoker that is going to sit outside. I better figure this out though or it's going to stall again.
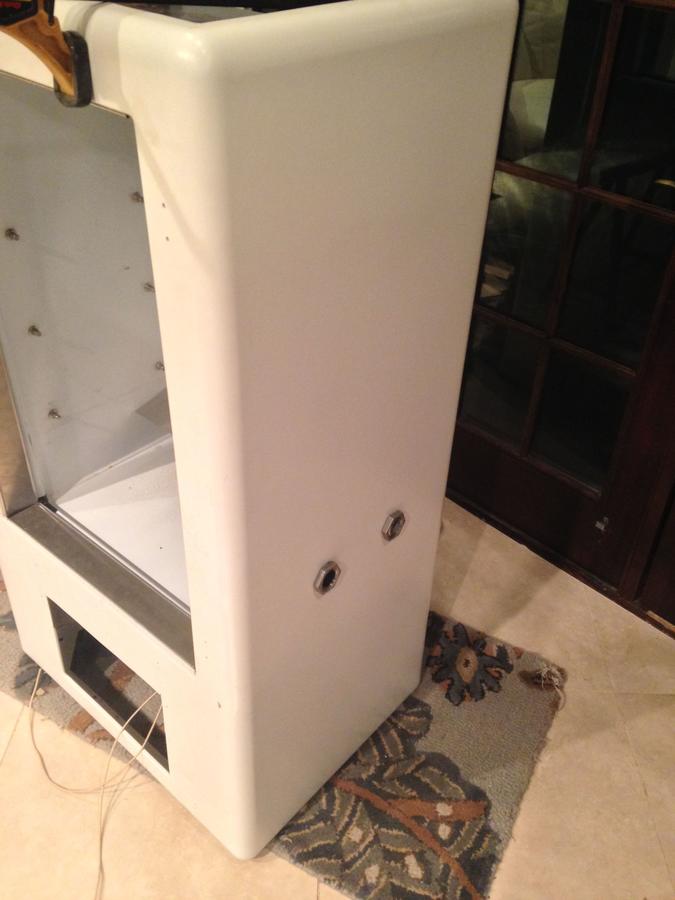
You can see the holes I put in the box and carcass to let in air and smoke.
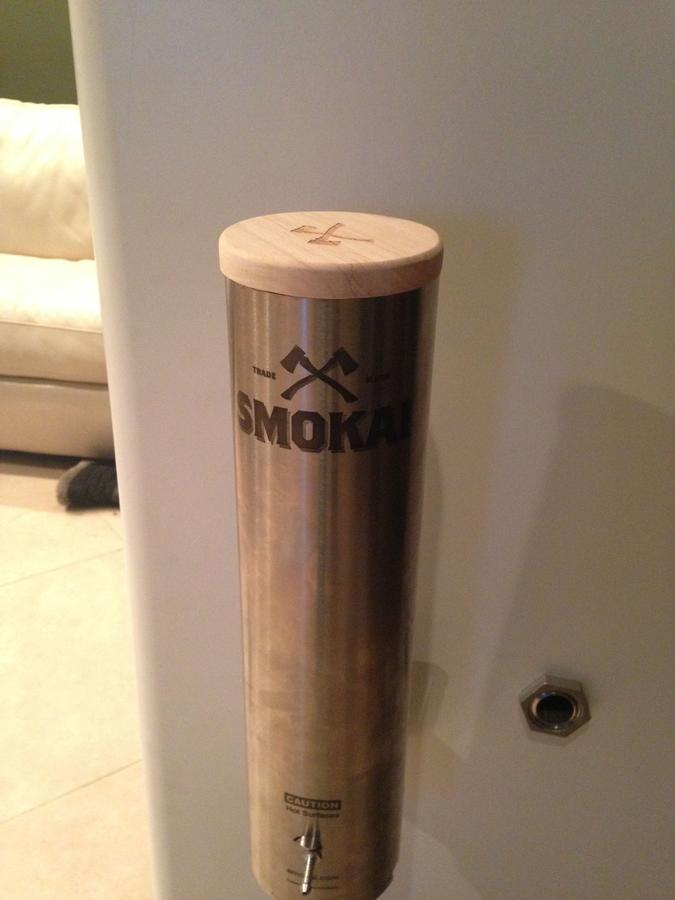
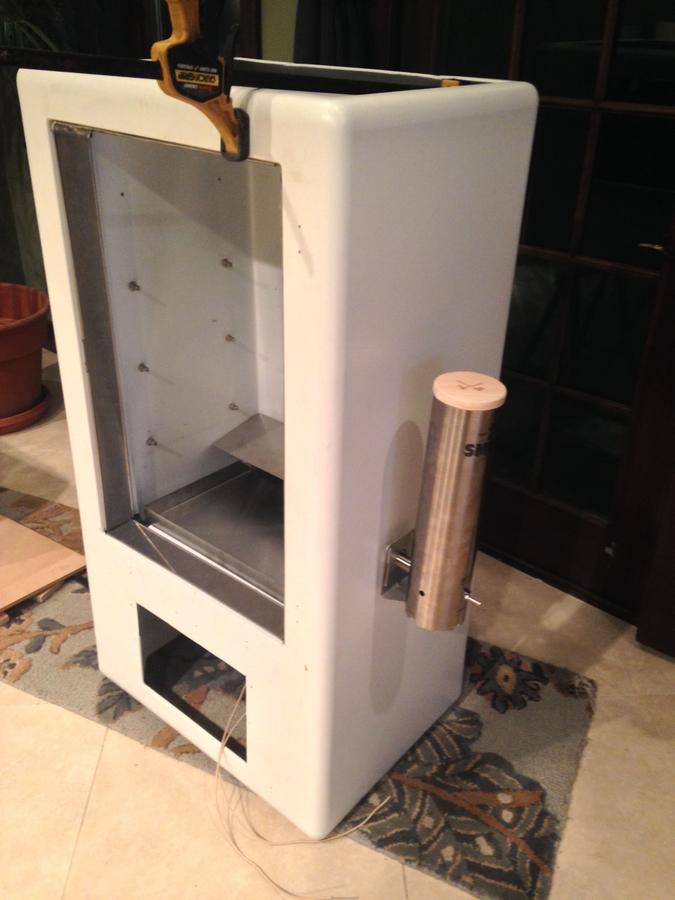
One of the first things I did after I found this forum was decide to use a smoke generator instead of reusing the Brinkman heating element and a cast-iron skillet. I decided to go with a Smokai because the build quality looked superior to the other generators I saw for sale. I chose the larger 3l model because it suggested 12+ hours between refills, that was probably overkill. It is really large, the 1l model would probably have been sufficient.
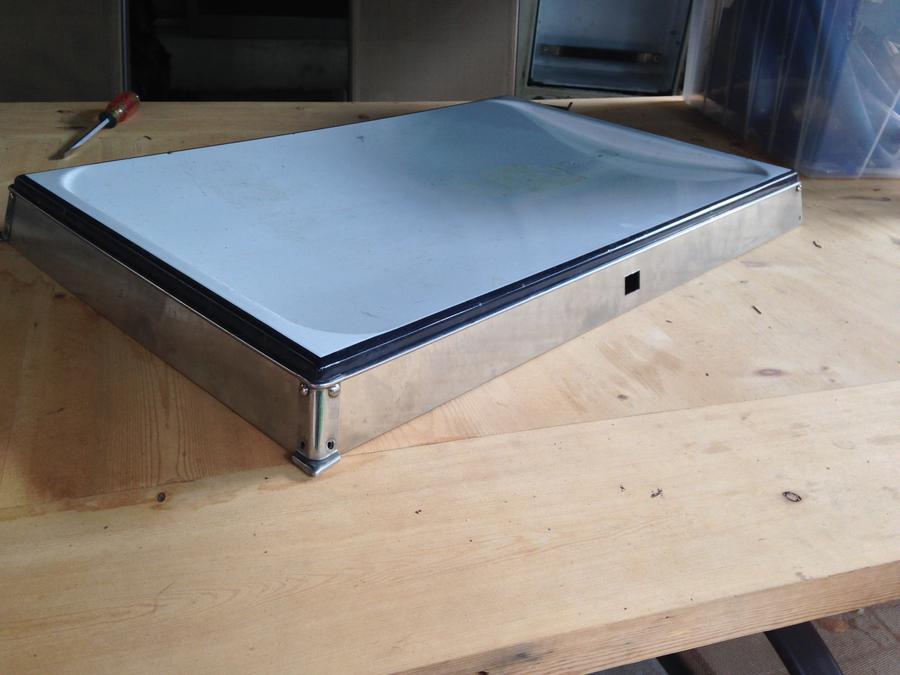
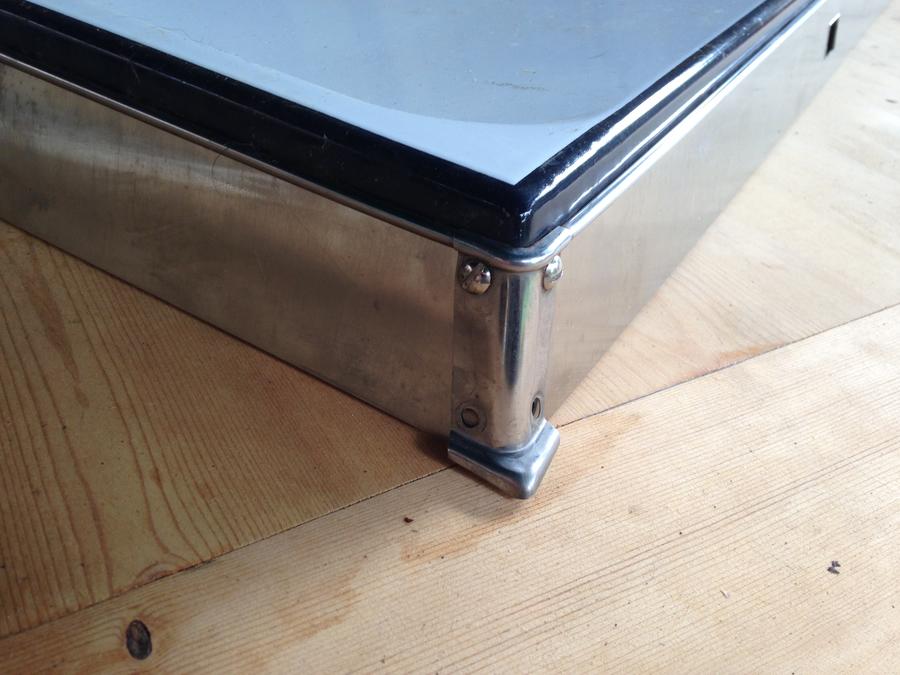
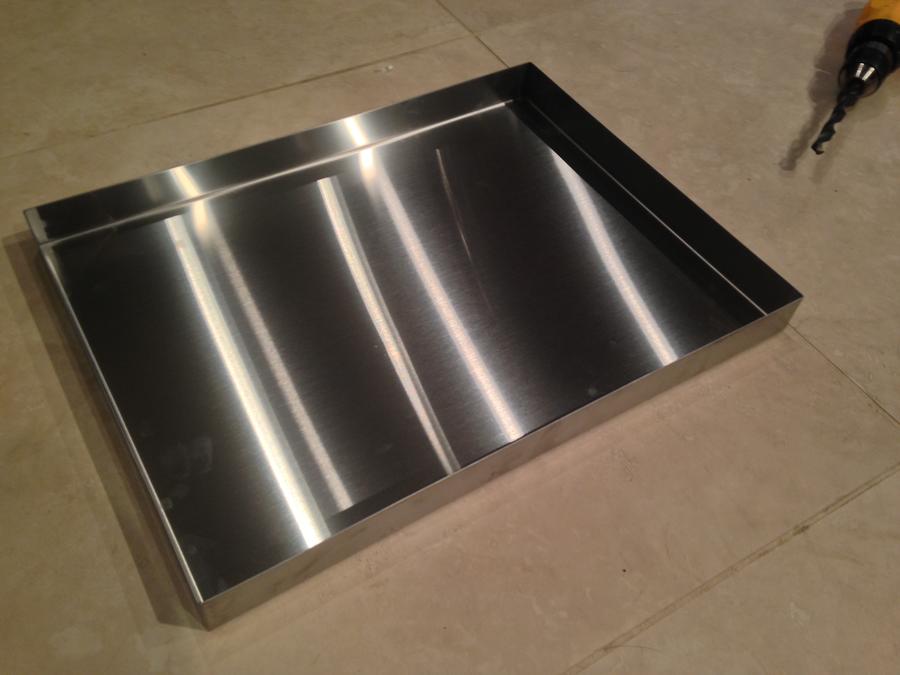
I also had a close fitting removable stainless drip pain fabricated to catch the drippings. It came out really nice. Proximity to the heating element may be an issue though.
That pretty much brings us current. At this point I have a number of little things besides paint to finish, I need to make a list and start ticking them off the list.
Cheers.
I have been running a laboratory PID on a red vertical Brinkman smoker for years. It works great if it's sunny and still outside; if it's below 70 or windy, it has trouble keeping temperature. 'que view here: https://plus.google.com/photos/1145...s/5713993606450446033?authkey=COHroe_owdbW_gE
I debated buying the smallest backwoods smoker for a time but I really wanted the electric heating element. So here we go...
I didn't get any photos of disassembly. There were a few extra coats of paint on it which masked some key screws. Had I found these, disassembly would have been a great deal easier. In the end I broke out the plastic strips which connected the inside box to the outside carcass and just tore it apart. It used two steel packing straps to support the weight of the box and prevent it from crushing the insulation, a brown fibrous hair type material. I kept all the hardware and trim pieces for reassembly.
I decided to mount a 1500W heating element in the lower back side of the inner box. After seeing some alarming threads on smoker fires, I decided to add a shield over the element. I used a piece of 304 stainless.
I did a quick trial run and could not get a reasonable temperature... I'm going to need to insulate. A lot!

I reached out to a local sheet metal shop to reproduce the plastic strips I had broken during disassembly. I reassembled the door shell as a trial run. The original trim pieces and the stainless steel look really sharp. I mounted it on the carcass to check fit and position a thermometer.
At this point, there's not much more I want to do before I paint and insulate. I sent all of the parts out to be blasted and epoxy primed. The inside box has a porcelain coating which I am going to keep. I plan to paint everything else. In the meantime I got busy with life and lost the weather... now the parts are back, clean and primed, so I am reassembling indoors. Fortunately, my wife loves bbq as much or more than I do, so the mess is greeted with a smile.
I'm doing another dry assembly to see how much damage I might do to the paint. I have to choose a paint as well. I was originally planning a white pearlescent tri-coat, but that now seems way overkill and costly for a smoker that is going to sit outside. I better figure this out though or it's going to stall again.
You can see the holes I put in the box and carcass to let in air and smoke.
One of the first things I did after I found this forum was decide to use a smoke generator instead of reusing the Brinkman heating element and a cast-iron skillet. I decided to go with a Smokai because the build quality looked superior to the other generators I saw for sale. I chose the larger 3l model because it suggested 12+ hours between refills, that was probably overkill. It is really large, the 1l model would probably have been sufficient.
I also had a close fitting removable stainless drip pain fabricated to catch the drippings. It came out really nice. Proximity to the heating element may be an issue though.
That pretty much brings us current. At this point I have a number of little things besides paint to finish, I need to make a list and start ticking them off the list.
Cheers.