New Smoker Build

  • Some of the links on this forum allow SMF, at no cost to you, to earn a small commission when you click through and make a purchase. Let me know if you have any questions about this.
SMF is reader-supported. When you buy through links on our site, we may earn an affiliate commission.

forgebbq

Newbie
Original poster
Apr 11, 2013
11
10
Lexington,KY
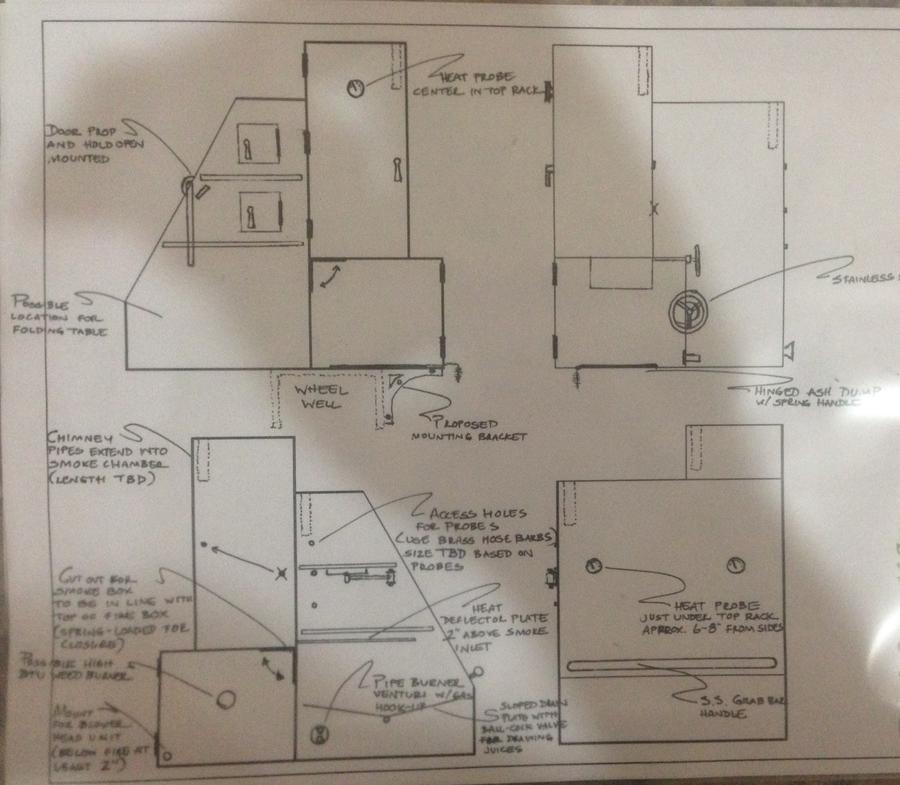
So after alot of waiting and changes we finally have some progress on the new smoker build.  Here is what has been done:

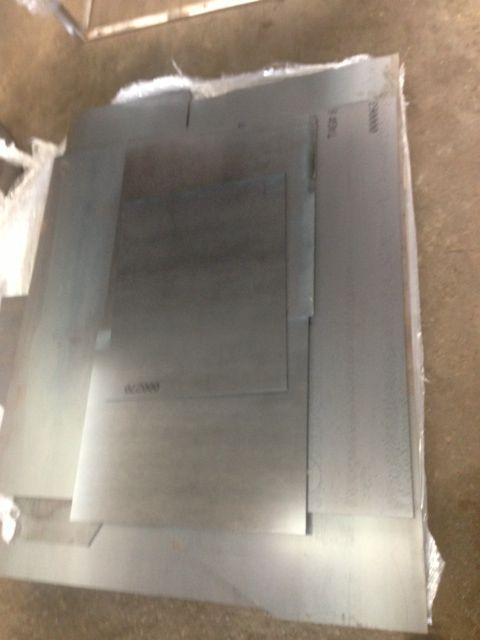
    All the main component have been cut and awaiting assembly.  Approximately 1200 lbs or raw steel!


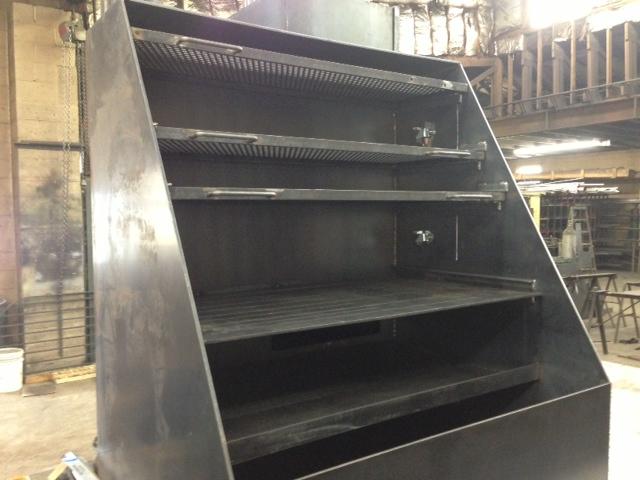
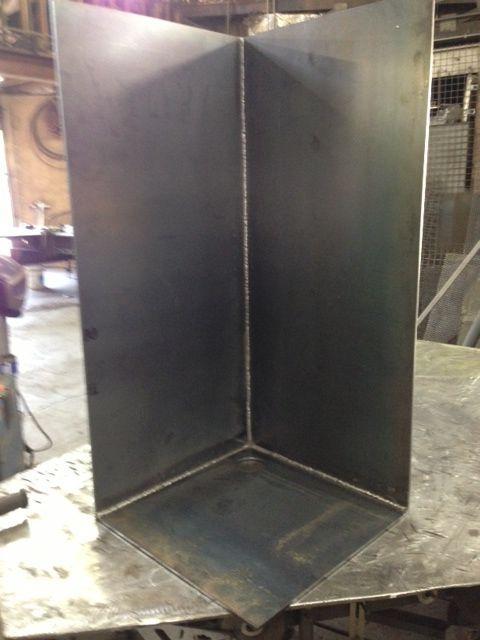
   Started the work on the vertical cook chamber so that we could stack it right on once the main chamber was assembled.


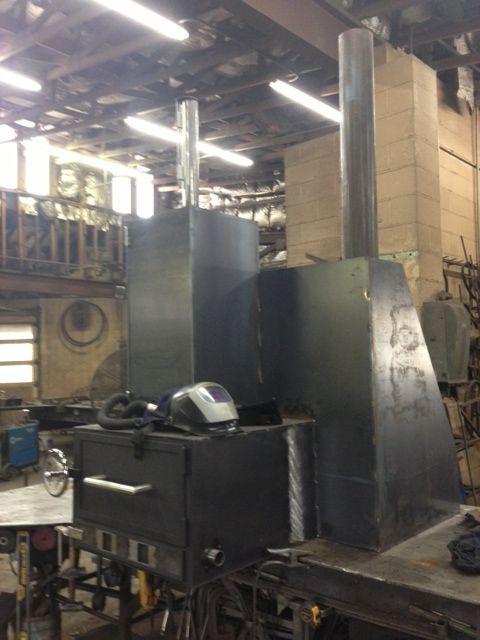
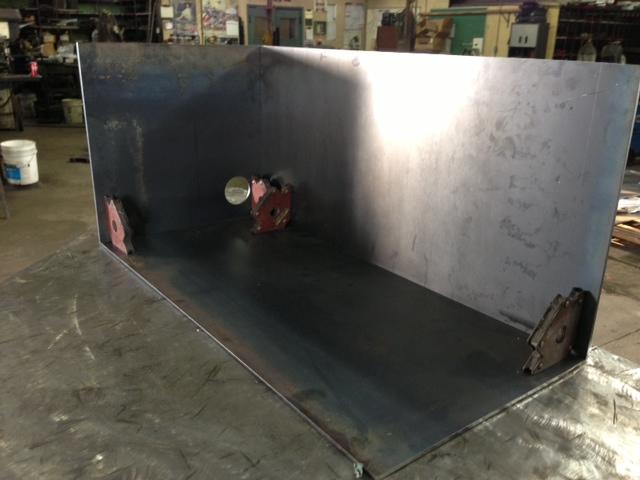
   Next up was to begin assembly of the main chamber and firebox.


The port on the side of the firebox is for a 25cfm stoker blower unit, I'm all about making things easier for me.  Once we had everything true and square the construction of the main cook chamber and structure began to take shape.


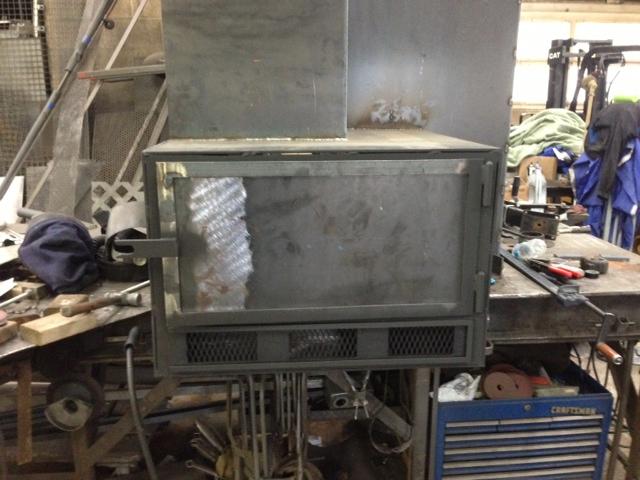
  We put 2 small view port doors on the right side of the main chamber to be able to inspect progress without opening the large main door (this should help maintain temps and smoke while giving me the ability to cheat peeks at the cooking process).  Once the main structure I began fabrication on the fire pit door and wood rack.


    With the main structure complete the next item to work on was the cooking grates and how they would fit into the main chamber.

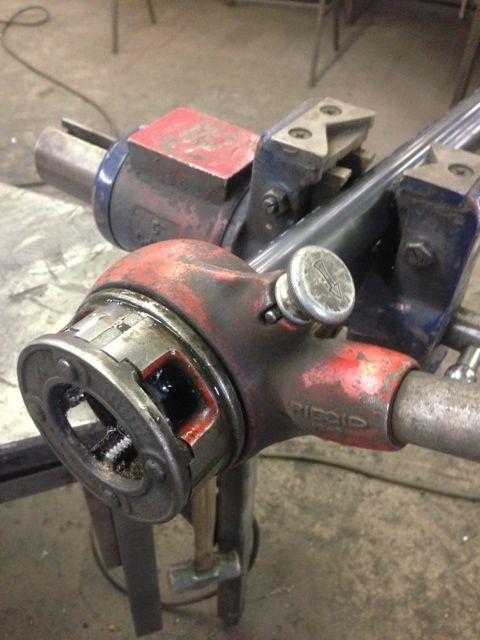
I also addressed the issue of not wanting to burn tons of firewood on long cooks so we built a large pipe burner to mount at the bottom of the cook chamber.  It made from 1-1/4" sch. 40 pipe, threaded and a large venturi mounted to introduce the gas.


  With a board full of work it may be a while before any more progress is made.  Next up will be the grease pan and drain, baffle plate, cook chamber doors and all the accesory fittings (i.e. probe inserts, mount for Stoker, door latch on firebox, handles...etc.)

Thanks for checking it out and any and all comments/suggestions are greatly appreciated! 
 
.................
popcorn.gif
................
 
Ok I have a question for you design gurus above the FB to CC opening.  Originally I used the complete inside volume of the FB and CC to get the opening size, but after getting the grease/water pan welded in I have a concern.


I have the grease pan mounted approximately 10 up from the bottom of the CC floor and is about 7" shy of the total depth.  My question/concern is should I re-figure the opening based on the total CC volume minus the space below the grease pan since the heat and smoke will probably never move down essentially leaving a larger opening than necessary and heating the CC too much, or leave the opening larger and control the temps with intakes?  Wasn't sure if larger openings were ok or if it would change the whole dynamics of the draft/flow through the smoker.  Side Note: Bringing the pit up to temp should be a problem with the pipe burner so I could go smaller as long as I still get the correct draft through the unit.
 
Forge, morning......  The CC opening can't be too big....   the opening at the end of the RF plate can't be too big....  Since the air/smoke flow is basically natural draft, making them too small will cause the FB to overheat because the air won't flow...   adding an air intake above the fire grate will allow for air to move through the CC moving heat or helping to cool the CC.....  Controlling the heat with the lower air intake and upper air intake of the FB is the only way to go.....    

Dave
 
Dave,
Thanks for the info...we will proceed with cutting the opening. I knew I could count on SMF for help. New pics and update coming soon!
 
Ok, so it's been busy but I finally got some more work in.


Got the handle, latching system and air intake door all installed and ready for final polish on all the stainless.

\

Fabricated the door and trim for the vertical chamber, installed the MASSIVE temp gauge (came in alot bigger than I was expecting but I like it for scale with the project) and door handle.  Built the exhaust for the vertical chamber and installed a damper plate and handle.


Ordered these stainless rack rails and cooking grids.  With a few mounting tabs welded in place it looks like they were made to fit.  I have the option of the water pan as seen here but it is removable if I don't need it.


Got the grease pan and drain installed in the main CC, tacked in a baffle plate but may change if it doesn't cook like I want.  Rails installed for the cooking grids and most of them fit with handles and installed.


Finally I temporarily fit up the exhaust for the main CC just to get a feel for size, handle placement and look.  Glad I did as we found out the total height will not fit out the garage door so that will be installed after it is moved out of the building.  Hope the have more updates soon as football season is creaping up fast and we hope to have this thing in paint and mounted on the trailer before the season opener.
 
Well it has been a really long time since i've had a chance to do any work or show you guys progress on the build but I am happy to say that many long nights last week put the new monster on the trailer.  We got all the fabrication finished except for a few minor parts, painted the whole thing out, polished all the stainless and fixed it to its new home.


This shows the completed pit with (2) coats of Thermolox stove paint in a satin black finish from all four sides.


And here she is on her maiden smoke.  I orginally thought I had oversized the temp gauges when they came in (5" diameter) but they look perfect on the grill.


We started the fire around 9:00 that morning with (2) charcoal starter cans (about 5 pounds of charcoal).  Once we had white coals we dumped them over to the fire box, added 4 split pieces of wood and hit them with a weed burner and within 20 total minutes the main chamber was 225-250.  After that we added 1-2 pieces of wood about every 3-4 hours and it held almost perfect all day long (5 p.m.).  I had anywhere between 50-100 degree adjustment in the firebox vent and 25-75 degree adjustment in the smoke stack damper.  We ran the Stoker unit with the blower and it rarely ever turned the blower on.  Other than some stove cement and fire chord to seal up some cracks and a few minor tweaks to place things exactly where I would like them I couldnt ask for a better experience in a build.  While I am ashamed to say I did not get a single pic of any finished product (mostly due to the fact that Sam Adams Oktoberfest showed up to the party in Keg form), We successfully smoked (4) 10-12lb shoulders, (2) whole pork loins, (3) beef tenderloin fillets, (3) pizzas and (50) chicken legs and there wasn't a bite left.  Thanks again for all the help and input into this project and I promise to be back with more pictures when everything is complete and have some Q-view for you guys!
 
As promised we fired up the smoker yesterday morning and had a pretty good batch of goodies loaded up.  Heres some Q-View!


Early start for the (4) pork shoulders.


Salmon and sausages on the top rack, beef fillets in the middle, and shoulders on the bottom.


Initial break up of the shoulders to cool before the finish pull.  Thanks for looking and we hope to get some briskets, chicken and turkey on the next smoke!
 
SmokingMeatForums.com is reader supported and as an Amazon Associate, we may earn commissions from qualifying purchases.

Latest posts

Hot Threads

Clicky