
This is the smoker that I just recently finished building. "The Party Smoker" Big enough to put all your meat in it for a party and let it cook without babysitting it all day. The cook gets to enjoy the company instead of just cooking.

The inside diminsions are 6' tall X 25" wide X 22" deep. Big enough to put 4 10 lb boston butts or 4 chickens per shelf.
I will get a parts list posted if anyone is interested.
All screws that are towards the inside and have the potential of getting heated or comeing into contact with food are all stainless.
Here are the pics of my build from start to finish.
9 Whitewood 2x4's for the frame and doors.
Old Oak Hardwood floor T&G boards 1" thick. Holds the heat in very well and the wind doesn't effect the temps.
The side of the frame.
Frame coming together. 3" wood screws used for the frame.
The start of lining the inside of the frame with the oak boards.
All inside oak boards in place. They are all held in place with 2 inch stainless steel wood screws.
Door frames with 6 1/2" handles attached.
3 3 1/2" hinges hold the top door on and 2 3" hinges hold the bottome door.
Feet added to keep the main part of the smoker off the ground.
Starting to line the inside with aluminum.
Oak put on doors. You will notice that the oak is on the inside. When the doors are closed the 1" thickness of the oak will go inside the smoker to help make a seal instead of it being flush on the front allowing air in and smoke out.
Inside and doors lined with Aluminum.
1" holes drilled for bottom front vent.
7" front vent. Looks like a large grill vent.
1" holes drill for top vent / Smoke stack.
Top vent.
Top of smoker. Can hold up to 13 wooden dowels for hanging sausage to cold smoke or anything else you would like to hang.
Completed and getting ready to season for the first time. Currently only has 2 racks but will be able to hold up to 7 or more.
Water pans / drip trays. Can be moved up or down depeding on heat source.
Dual thermometers to keep an eye on the temps in the top and close to the heat source.
Completed, moved outside and ready for heat for the first time.
Seasoning for the first time. Temps go up to around 220 in the top and 270 at the bottom near the heatsource. Water pans were not used to help distribute the heat during seasoning. Only 1 layer of charcoal was used in the bottom of the grill.
View from the deck. Top is coated in plasticote to seal it and keep water from leaking in from the top.
I will get some pics posted of the first meat that gets smoked.
Parts list to follow.

The inside diminsions are 6' tall X 25" wide X 22" deep. Big enough to put 4 10 lb boston butts or 4 chickens per shelf.
I will get a parts list posted if anyone is interested.
All screws that are towards the inside and have the potential of getting heated or comeing into contact with food are all stainless.
Here are the pics of my build from start to finish.
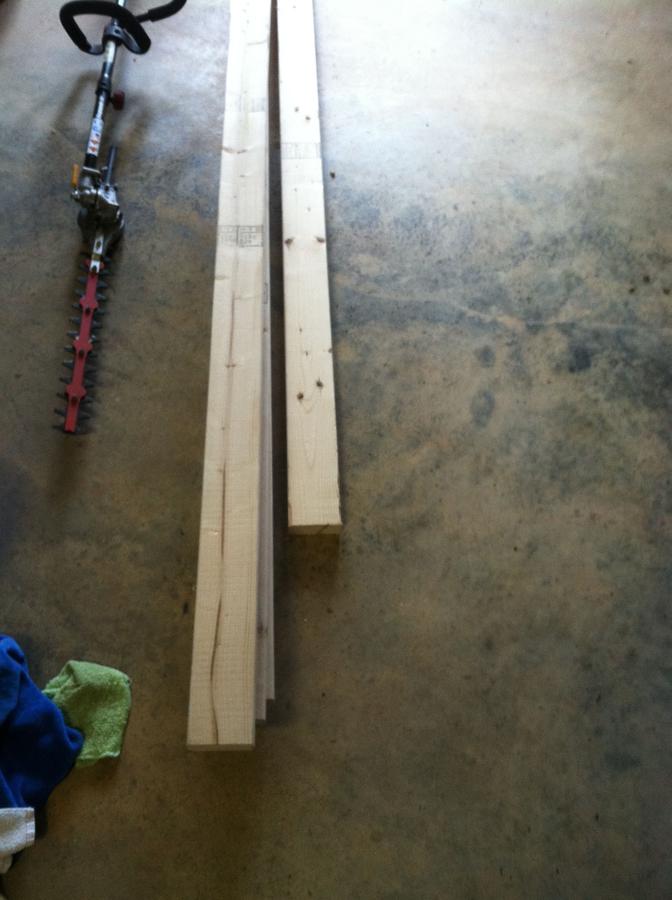
9 Whitewood 2x4's for the frame and doors.

Old Oak Hardwood floor T&G boards 1" thick. Holds the heat in very well and the wind doesn't effect the temps.

The side of the frame.
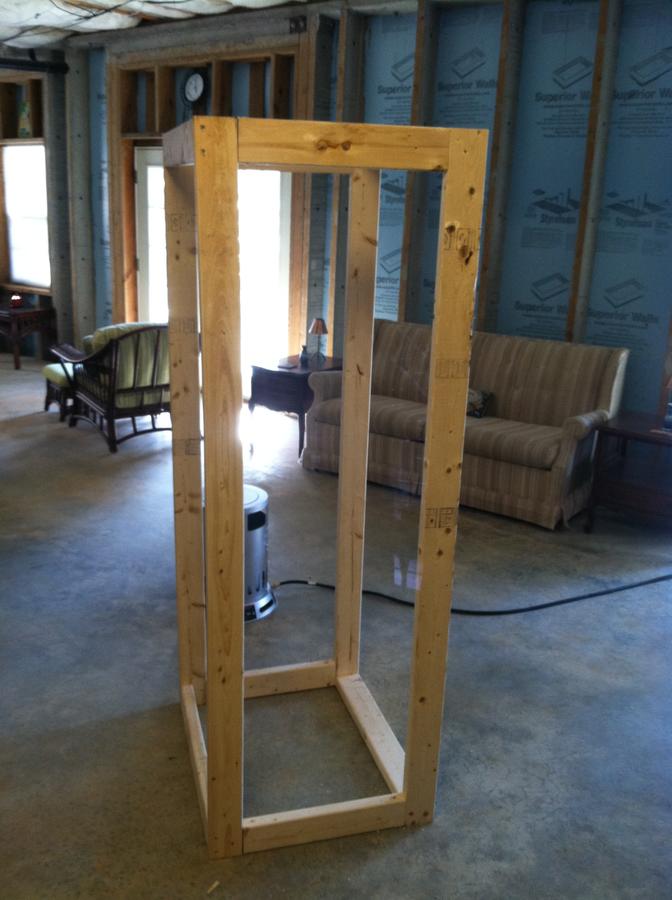
Frame coming together. 3" wood screws used for the frame.

The start of lining the inside of the frame with the oak boards.

All inside oak boards in place. They are all held in place with 2 inch stainless steel wood screws.

Door frames with 6 1/2" handles attached.

3 3 1/2" hinges hold the top door on and 2 3" hinges hold the bottome door.

Feet added to keep the main part of the smoker off the ground.

Starting to line the inside with aluminum.

Oak put on doors. You will notice that the oak is on the inside. When the doors are closed the 1" thickness of the oak will go inside the smoker to help make a seal instead of it being flush on the front allowing air in and smoke out.

Inside and doors lined with Aluminum.
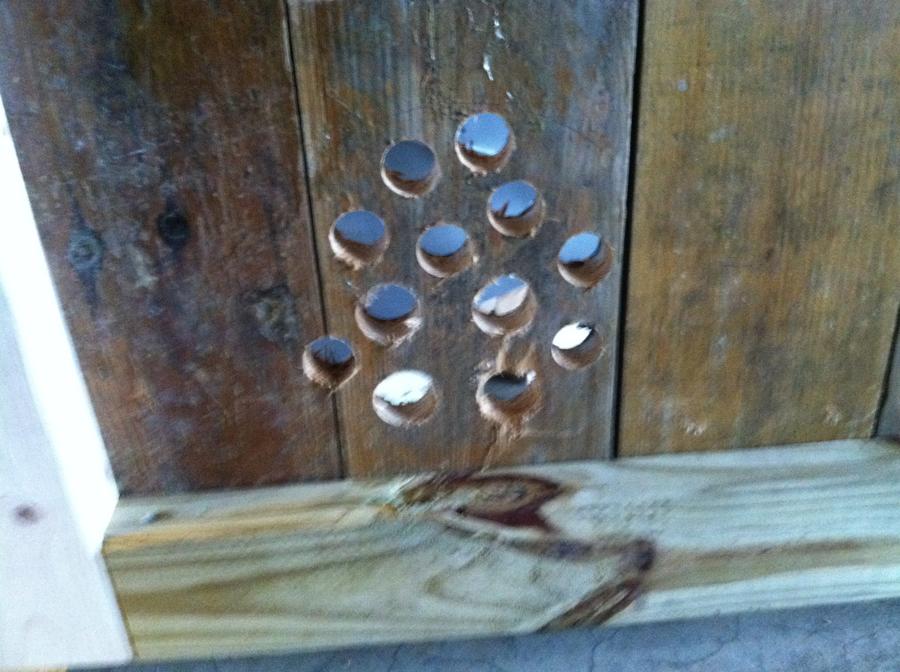
1" holes drilled for bottom front vent.

7" front vent. Looks like a large grill vent.

1" holes drill for top vent / Smoke stack.

Top vent.

Top of smoker. Can hold up to 13 wooden dowels for hanging sausage to cold smoke or anything else you would like to hang.

Completed and getting ready to season for the first time. Currently only has 2 racks but will be able to hold up to 7 or more.

Water pans / drip trays. Can be moved up or down depeding on heat source.

Dual thermometers to keep an eye on the temps in the top and close to the heat source.
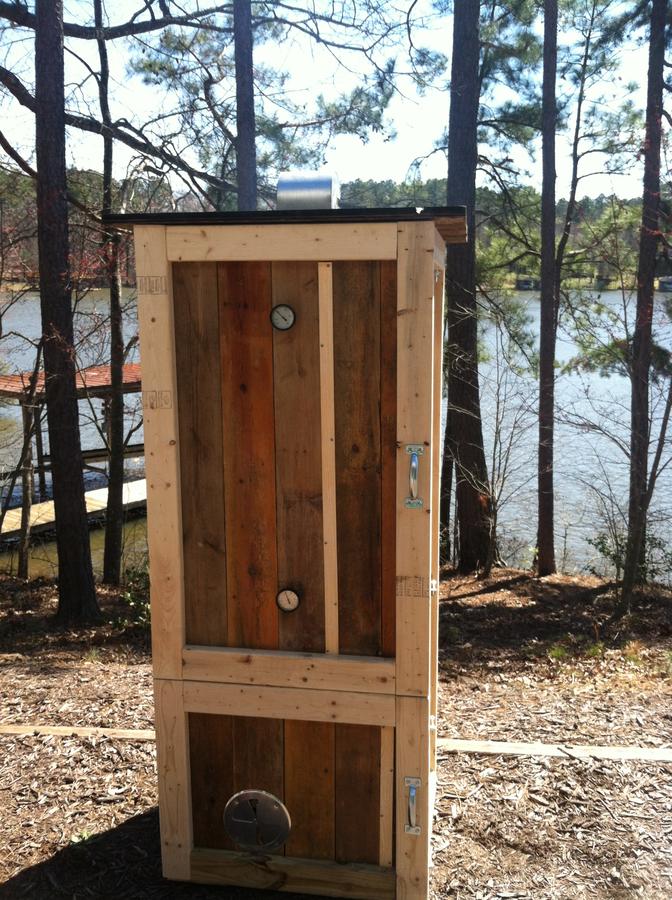
Completed, moved outside and ready for heat for the first time.

Seasoning for the first time. Temps go up to around 220 in the top and 270 at the bottom near the heatsource. Water pans were not used to help distribute the heat during seasoning. Only 1 layer of charcoal was used in the bottom of the grill.

View from the deck. Top is coated in plasticote to seal it and keep water from leaking in from the top.
I will get some pics posted of the first meat that gets smoked.
Parts list to follow.
Last edited:


