
I have been planning on building a smoker for several months. After a lot of review of this site and a couple of others it was time to stop planning and start building! In the words of George Patton “A good plan violently executed now is better than a perfect plan executed next week.” I want thank Gary (BabySmokologist) for putting up with my questions and Rancid CrabTree for great place to start. The final product will be a insulated aluminum lined adjustable dual stack smoker for both hot an cold smoke.
The smoker particulars: Construction - Plywood T1-11 siding on a 2 x 4 frame insulated lined with Hardie backer board covered by .040" 5052 aluminum sheeting. Smoke chamber is 24" x 20" x 4 ft high. Burner area is 24" x 20" x 18" lined with ceramic tile with a Northern Tools burner. Vents are 1 - 12" x 14" on the front and 2 - 3 1/2" circular on the sides.
I have seen some comments over time about medium to tall smokers having a temperature gradient from top to bottom. I know this is splitting hairs but every now and then the engineer in me shows up. Gator Pit out Texas, (a commercial steel smoker builder that has amazing products) has a model called a Dual Stacker that has solved the temperature gradient issue. I really liked the idea of having adjustable stacks for playing with the temperatures. So I incorporated this feature into my design. I am anxious to get this completed and running so I can check out the performance to see if I can really manipulate the temperature in the box with dampers in each stack.
I am well into the build and thought I would put my progress up so far to get thoughts and comments.
The frame laid out with cross members for material joints.
The smoker is starting to take shape. The box is line and I am finishing up the insulated door.
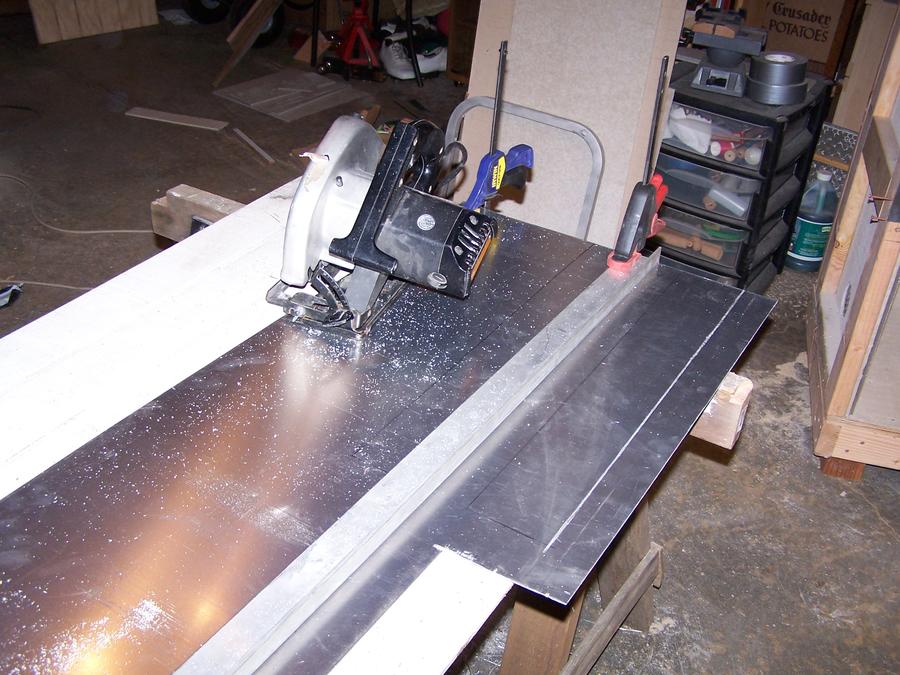
I decided to use .040" 5052 aluminum sheet thinking I can bent it at home with no problem. Not so much. Getting clean sharp bends with this material and a not having a commercial break was an interesting challenge. Scoring the material is the obvious answer but let me say setting a circular saw to score .040" material .020" deep without cutting totally through was entertaining. I did get my settings right and I was really happy with the outcome.
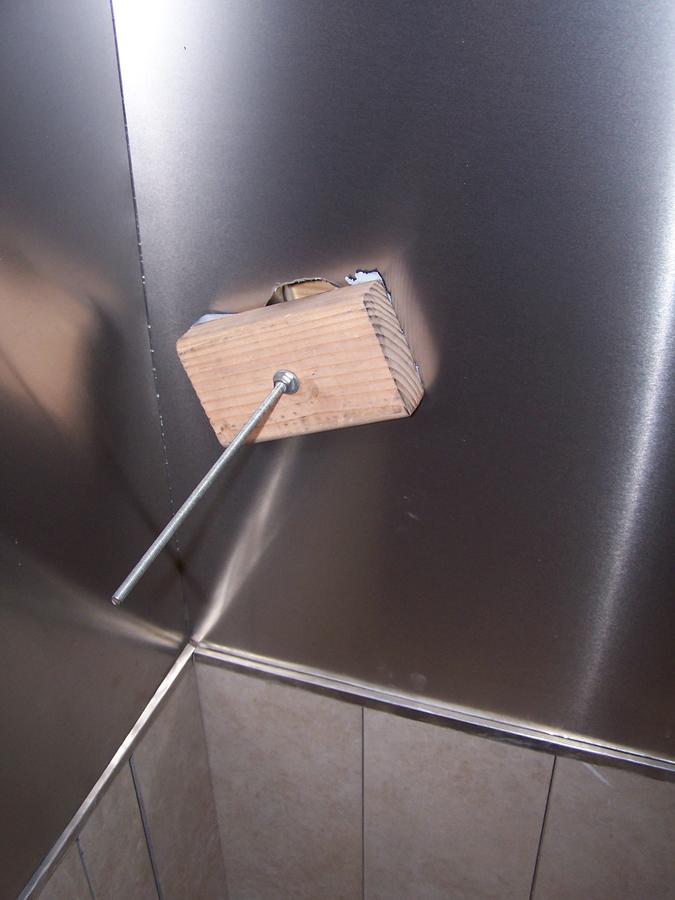
I wanted to be sure that the stack vents are well sealed so I used a good amount of high temp silicon and the clamped the walls against the pipe flange and the box.
You can also see the lip over the ceramic tile in this picture. This will keep everything cleaner and also keep the tile in place. I did not cement the tile in so that it can handle the heat expansion and contraction.
Overall I am pretty pleased with my progress so far. I am anxious to get it completed so that I can fire it up and test it out. I want to get some things smoked for this month's throw down. Here is picture of my progress as of last night including the door. Gary had warned me that it was going to be heavy. He wasn't lying.
I will have more pictures later in the week.
The smoker particulars: Construction - Plywood T1-11 siding on a 2 x 4 frame insulated lined with Hardie backer board covered by .040" 5052 aluminum sheeting. Smoke chamber is 24" x 20" x 4 ft high. Burner area is 24" x 20" x 18" lined with ceramic tile with a Northern Tools burner. Vents are 1 - 12" x 14" on the front and 2 - 3 1/2" circular on the sides.
I have seen some comments over time about medium to tall smokers having a temperature gradient from top to bottom. I know this is splitting hairs but every now and then the engineer in me shows up. Gator Pit out Texas, (a commercial steel smoker builder that has amazing products) has a model called a Dual Stacker that has solved the temperature gradient issue. I really liked the idea of having adjustable stacks for playing with the temperatures. So I incorporated this feature into my design. I am anxious to get this completed and running so I can check out the performance to see if I can really manipulate the temperature in the box with dampers in each stack.
I am well into the build and thought I would put my progress up so far to get thoughts and comments.

The frame laid out with cross members for material joints.

The smoker is starting to take shape. The box is line and I am finishing up the insulated door.
I decided to use .040" 5052 aluminum sheet thinking I can bent it at home with no problem. Not so much. Getting clean sharp bends with this material and a not having a commercial break was an interesting challenge. Scoring the material is the obvious answer but let me say setting a circular saw to score .040" material .020" deep without cutting totally through was entertaining. I did get my settings right and I was really happy with the outcome.

I wanted to be sure that the stack vents are well sealed so I used a good amount of high temp silicon and the clamped the walls against the pipe flange and the box.

You can also see the lip over the ceramic tile in this picture. This will keep everything cleaner and also keep the tile in place. I did not cement the tile in so that it can handle the heat expansion and contraction.


Overall I am pretty pleased with my progress so far. I am anxious to get it completed so that I can fire it up and test it out. I want to get some things smoked for this month's throw down. Here is picture of my progress as of last night including the door. Gary had warned me that it was going to be heavy. He wasn't lying.
I will have more pictures later in the week.


