Yet another RF build with custom trailer

  • Some of the links on this forum allow SMF, at no cost to you, to earn a small commission when you click through and make a purchase. Let me know if you have any questions about this.
SMF is reader-supported. When you buy through links on our site, we may earn an affiliate commission.

swechef

Fire Starter
Original poster
Hi everyone

Thought I'd share my first RF build with you all. I've had so much help from all the build threads here so I want to try and give something back. Maybe it can help others and even inspire in some way.

Some designs I have shamelessly stolen from others, some are my own ideas. Credit to those I have borrowed ideas from. I hope they take it as appraise - I know I would.

Right then. Prior to this build I had no metalworking experience whatsoever. After hanging around here a while I decided it was time and went to get some welding equipment. A decent MIG, an angle grinder and a reciprocating saw.

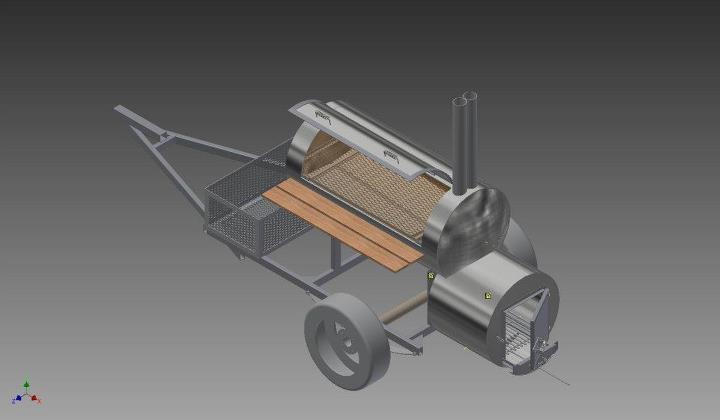
Got myself an old compressor tank. About 400 liters. Wanted to use a section of the tank as firebox. I made a sketch and quickly realized that joining a tube at the spherical end of the tank makes a nasty cutting problem. After considering my options I got myself a free copy of Autodesk Inventor CAD software to solve the problem. Needless to say I never touched a CAD software before...;-) Steep learning curve is somewhat of an understatement...

The cad sw solved my nasty cut and I ended drawing the entire project in it. Result below:

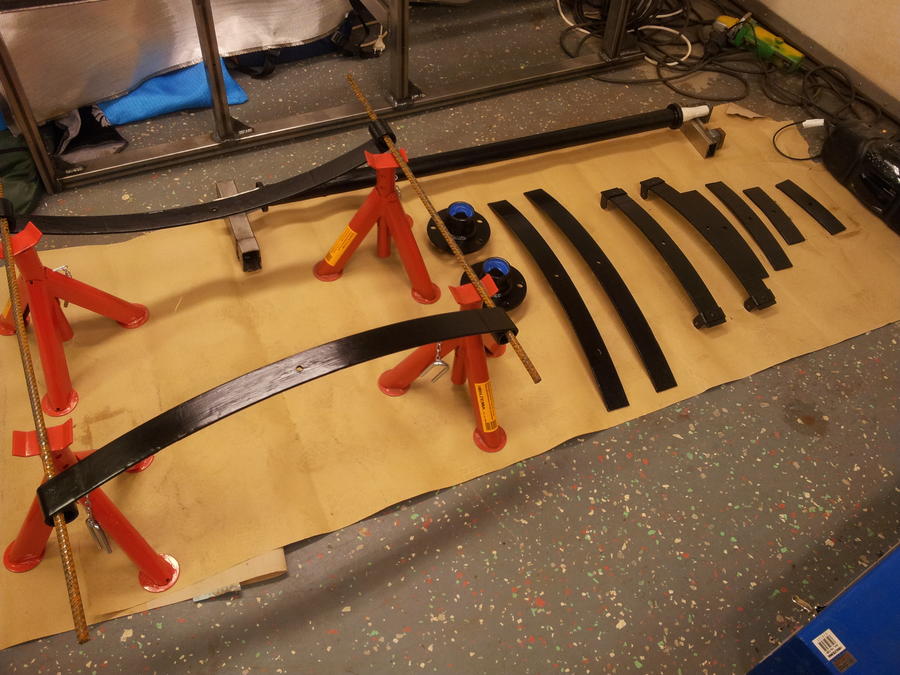
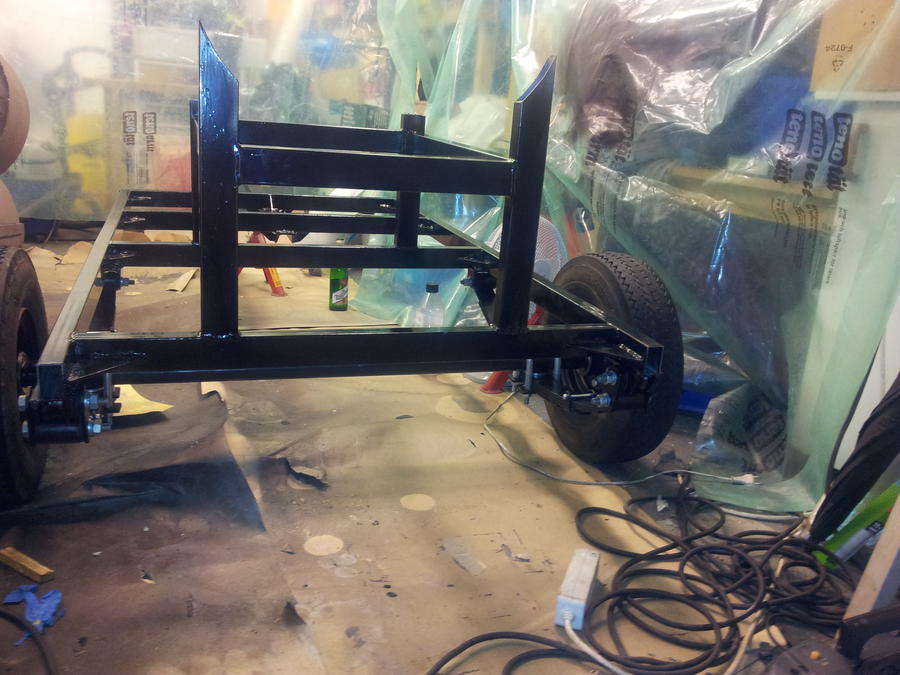
Alright. On to the build. I realized I'd better build the trailer first or else it will not be built a all...

That turned out to be an axcercise in grinding and refurbishing more than building... More in the next post.
 
OK here goes the trailer build with some pics.

First I got a scrapped old trailer to strip for an axle and leaf springs. Man, was it in poor shape. Hello my friend the grinder. Took a while but I got the parts cleaned and painted.

Then on to the frame. Again working with rusty scrap from the junk yard. Next project I will get new sweet clean metal...


Next, adding supports for the cooking chamber:

Now it starts looking like a trailer. But the suspension needs some hangers. Needed to fabricate those on my own:

Alright then. On with some paint. At this point I was new to heat resistant paint and went ahead to paint the frame with that. That went sideways as I couldn't bake it. Hello my friend acethone.

That was a merry friday night. Lucky I had my Finnish friend with me. Lapin Kulta translates to Gold Of Lapland. Good beer to lighten up the mood in the darkest hour.

Anyway. New paint, assembling and installing the axle. And there was a trailer. Oh. Did I mention finding bushes for the springs of unknown origin? Let's say I now know the Internet... :yahoo:

Finally on to building that BBQ!
 
Here goes the BBQ build.

First thing to sortt out was how to cut the dome end of the tank to fit a cylindrical firebox. Autodesk Inventor to the rescue:

Nice paper template! rolling it onto the pipe made it possible to trace the cut on the dome:

Fits like a glove! Next up is cutting the cooking chamber door. Thanks guys for all the tips on hinges and how to cut. It only warped slightly. Maybe I can fix ir with the old persuader.

OK. Attach the firebox and load it on the trailer.

Now it starts to look like a BBQ! Next the baffle plate. I borrowed this design as you can see. Those welds were a major pain and even if I am a rookie welder it's almost embarassing...:biggrin:

And this is where it is now. Made some grates from expanded metal and started on the firebox door. I will post pics as soon as I get around to snap them.

Cheers.

/Wes
 
You got skills!!!!
xrocker.gif
 
Good job!!! can't wait to see it done ? Looks like it's gonna be the perfect size for a great family gathering and not to big for just a quick one day family smoke ?
 
Thanks guys for the encouraging and kind words. The plan is to have it ready for our Oktoberfest at work. We are having it in mid october (not in september as the real one in Münich).

It seems misfortune is grinning me in the face, however... My MIG burned up just a moment ago. My prrreciousss... It seems the cabling from the coils went all melty and sticky. It overheated when I did the baffle plate previously but worked fine after that... Until now, that is...

Anyone had this kind of problem before? The On/off indicator lamp flickered a bit afterwards and then it went dead. Any hints would be most appreciated!

Cheers /Wes
 
Ok here's an update on the build. I got my welder back from repair... A tip for everyone when the welding goes dead: replace the fuses. It turned out my welder was ok but some fuse in the garage had gone bad. They all looked ok, but apparently some of them was bad. That was an expensive but mostly embarassing lesson... :biggrin:

Anyways. Got some work done also. Finished the grates (minus handle). Here's a pic:

Then spent most of friday and saturday evening with the firebox door latch, hinges and the air inlet.

Sorry about the rotated pic. Don't know how to fix it except snapping a new pic...

I was originally planning to have the air inlet at the opposite side of the firebox but reconsidered after checking another discussion here on SMF. Thanks again guys for saving me from unnecessary rework! We'll see how this works. Won't be starved of air anyway. The opposite might become a problem, though.

I will need to pretty that firebox front plate up a bit but that will wait until it's completely welded. It's now just tacked in place to check that everything fits.

It is slowly coming together! Keep you posted. Next up the smoke stacks and firebox grate. Then, maybe, some fire! :yahoo:
 
SmokingMeatForums.com is reader supported and as an Amazon Associate, we may earn commissions from qualifying purchases.
Clicky