Charcoal Fridge Smoker Plan (updated with WIP picks - 5/30/13)

  • Some of the links on this forum allow SMF, at no cost to you, to earn a small commission when you click through and make a purchase. Let me know if you have any questions about this.
SMF is reader-supported. When you buy through links on our site, we may earn an affiliate commission.

husker smoker

Newbie
Original poster
Apr 10, 2012
13
10
First time poster, but long time lurker.  After following numerous builds, going to try my own.  Actually put out the call for an old fridge and got two responses (one that is now sitting on my dad's farm, and the other one sitting in my brother's basement).

Fridge #1 - 1955 Firestone Tire and Rubber Co

4e4cb3a7_Firestone1.jpg


65c71408_Firestone2.jpg


63e6d521_Firestone3.jpg


764837cf_Firestone4.jpg


Fridge #2 - 1950 International Harvester

841bba14_IH1.jpg
fbadc782_IH2.jpg
6d57e26c_IH3.jpg
93e10c81_IH4.jpg
51da8c5d_IH5.jpg


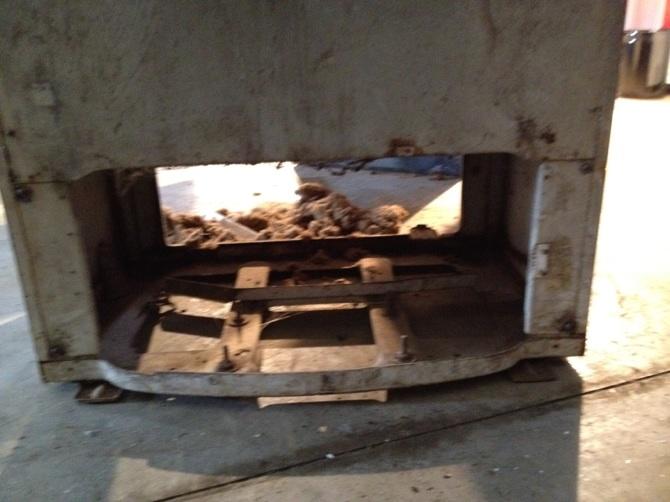
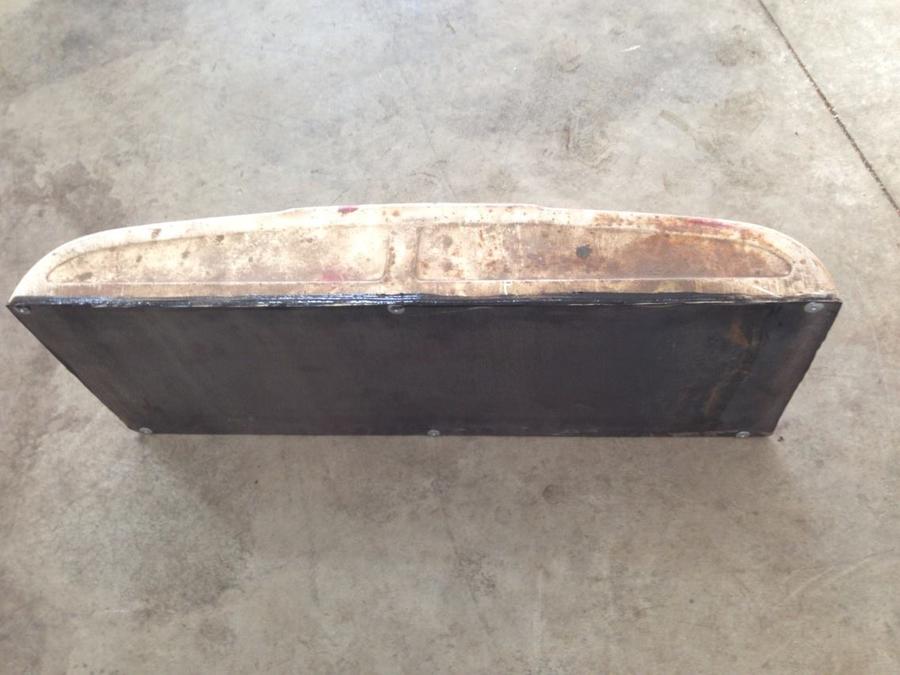
Initial thoughts: I think my preference will be to use the Firestone.  The fridge door does not cover up the the bottom where the compressor was and has a much better latch.  The cover for it is laying on top of the fridge so I would be able to put it on hinges and make a cabinet/slide out drawer for the charcoal box.

The Firestone is 40x24x13 (h w d).  The IH is 42x22x15.

I would have a 6 or 8 inch duct between the charcoal box and the upper fridge box.  I would like to have some type of damper on it also if anyone has thoughts how to do this.

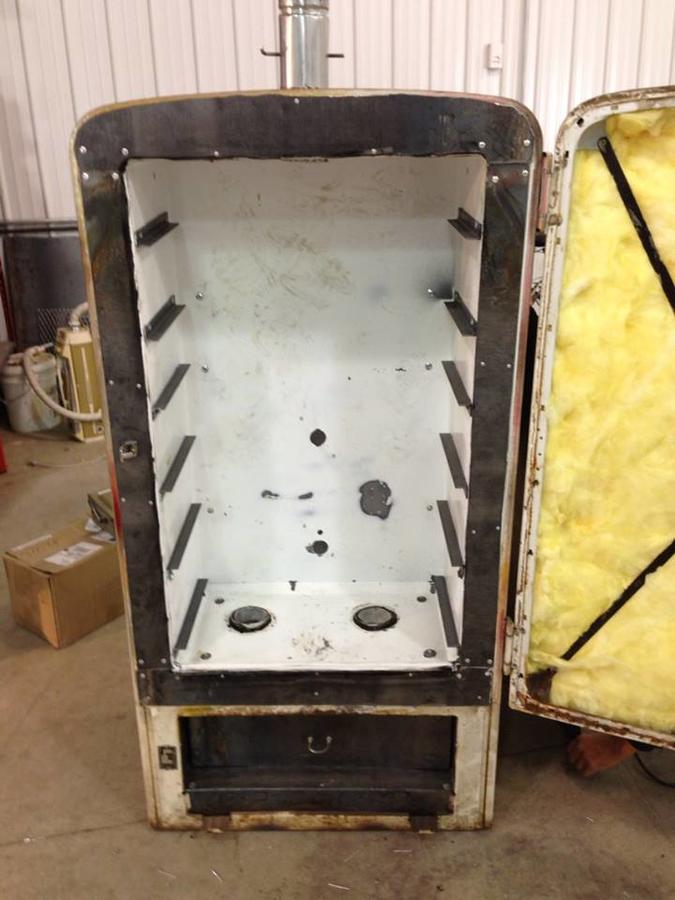
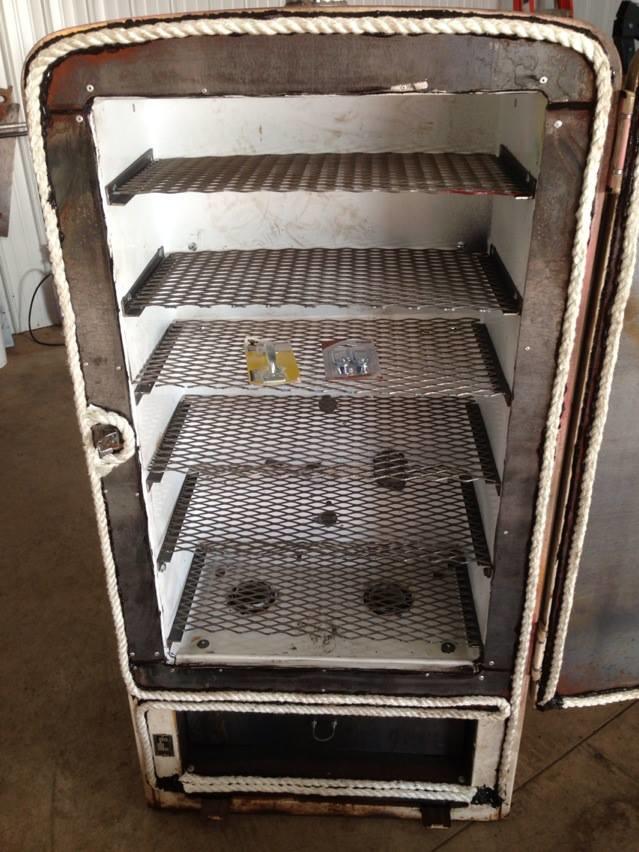
Above the opening I would have a cast iron pan that would hold water.  I would space out shelves every 7 inches for 4 shelves.  This would allow for about 1,200 square inches (24x13x4).

Will also have a simple exhaust at the top with another damper.

Tested the Firestone.  Appears to be mostly metal, so not much work to be done. May have to ask a friend of mine if he wouldn't mind sandblasting the fridge to remove the paint (the previous owner used it to store paint).

My sister was able to get me 2 4 feet x 4 feet of expanded metal for nearly nothing from her work, so I'll have plenty to make more racks as well as decide what I want to do with the other fridge for the next project.

Is there any major details I'm missing?
 
Last edited:
Time to update this project again.  Got married at the end of June and didn't have much free time.  Got a few days away from work this week and was able to head back to my parents' place to work on the fridge.

Thursday morning was mostly planning.  We stopped at Norfolk Iron and Metal to pick up a 16 gauge 12' by 4' sheet of metal (120 lbs worth - this fridge will be heavy by the time it is all done).  Also stopped by Menard's to pick up 3" gas exhaust pipe that we'll use to control airflow.  Thursday afternoon we took the piece of metal over to a friend of my dad that has a plasma cutter.  That works really slick to cut all pieces for the fridge.  We also cut 6 racks of expanded metal for my grates.  Thursday evening I took the cooking chamber into my buddies' auto body shop to have it sandblasted quick to make sure all the paint on the inside was gone.  By the time I left there had drank too much to do any more work...so I went to a field test plot party.

Friday was the big day.  Started from the bottom of the fridge and worked to the top...so my dad and I fabricated the firebox.  First is a series of pics prior to starting.  First is a pic from the back of the fridge where I'll put the firebox.  Took the torch and cut out off the middle crap at the bottom there.  Also removed all insulation that was in prior.  Don't know what it was, but we trashed it in the burn hole.


Getting the metal in place took a while.  Had to torch holes in the back to make it fix.  We put in two sheets all the way across bottom.  In between will be insulation (this way if I put it on a deck, hopefully it will have some protection from starting it on fire).  The sides are also insulated (easier to see from the picture in the back).  Also, between the two sheets are 2 4 inch tall square tubes for support of the firebox.  Since this was taller than the front lip, we had to cut a new metal piece to close up the front.


Next my dad welded the firebox together.  You can't see it in the pics, but the expanded metal is sitting on 1 inch angle iron so the ashes will fall through.  The back of the firebox has the sheet metal also up an inch so if i drag the box out, it won't pull the ashes with it.  Plan will be to use to latches, one on each side to bring the bottom door close.  Will need to get some fiberglass rope to create an air tight seal.  I wanted separate doors for the firebox and cooking chamber.  I'll have 3 - 3 inch tubes with dampers going from the firebox to the cooking chamber.  This way I can close the cooking chamber up from an ash if I need to fill back up the firebox with charcoal (shouldn't need to since it 24" by 13" and 5"-6" tall...that's alot of charcoal power for an insulated fridge I think.


The last pic is of the back of the fridge where we have closed up the back of the firebox.


This got us to the end of Friday when I needed to pack up and head back to Omaha.  Hope to make it back during Labor day weekend to finish it up.  We have the angle iron ready to be cut for the support of the expanded metal racks.  We have the hole for the chimney cut out on the top of the fridge.  Need to cut the hole for the chimney out of the top of the cooking chamber.  Also need to cut the holes from the firebox to the cooking chamber.  Will need to insulate and the chamber and close it all up.  Then it will be ready for a test run. 

Found today in my running around Omaha the Rutland high temp food grade silicon at Ace's.  Just need to find some fiberglass rope at a decent price.

I'm still considering a housing case for my remote thermometers.  I'm debating using the inch hole in the back of the fridge to run the lines and covering them with some type of cork...but I'm thinking it will be easier just to run the cables through the door under the fiberglass rope.  Let me know if you have any thoughts.
 
Was able to get back to my parents for the holidays and continue this build.  Sadly, this is looking to be a year long build as I won't be able to make it back now until May. 

It doesn't look like much was done, but the entire smoke box has been completed and sealed with caulk.  Mounted the box back into the fridge and added in the dampers.  I have 2 pipes going from the charcoal box to the smoke box using 3" pipe.  Both are controlled using a damper system.  Also put in the exhaust pipe using the same 3" pipe and a damper.

I need to pick up some hooks to mount from the top of the smoke box, finish insulating and enclose the remaining pieces.  Was able to find 300 feet of fiberglass rope, so I'm ready to go with that. Just need one more day of work to finish it up to test.  If the test is successful, I'll paint it up.

 
Another holiday weekend, another trip to the parents to work on the smoker.  Finished insulating and enclosing the smoker.  Use sealant all openings and imperfections in the metal work/fridge. Seal up the opening with fiberglass rope and sealant. 

Next time I make it back I'll be able to season it. How long would you suggest to fire it up?  Will I be able to go day 1 - season, day 2 - smoke?  Or do I have to let it sit for a while?

If the test goes good, last thing to do will be to give it a new paint job.

Dad and I at work.


The metal pieces fit good enough to work.


Insulating the door.


The metal fits on the door.  The smoker is getting heavy now.  I would estimate it will end up to be about 160lbs.


Got the fiberglass rope laid on.


Sealed up the back of the fridge. Made 3-1 inch air intake holes.  Have room to make more if needed.  Flap slides over to open holes.  Used bolts and washers to hold it on there.  May not look the best, but it was quick and easy.  Not sure how else to do it.


The smoke box cover.  Need to install latches to attach to fridge (going to let sealant dry good)


Fiberglass stays in place.  Rutland makes some good stuff.


Door roped off.


Smoke chamber roped off.  The door and the smoke chamber ropes both line up and are dang tight.  Had to extend the door latch to make it work, but it's good.  Shouldn't be any air getting through there.

 
Aaron,morning and welcome....  After the new skin was on the door, does it still fit "square" ???  If not, I have a method to re-skin a door and it fits square/flush as it did when new....  

Smoker is looking good...  getting close to gettin' smokey....  

Dave 
 
Thanks guys.  It's been fun. In no hurry though.  The ECB works great for my wife and I at this point. 

Dave, are you referring to how the skin lays on the door, or how the door shuts with the new skin?  The skin was pretty tight to the door.  I put a bead of Rutland sealant around it to help.  When closing the door, it was too much rope, so I had to extend the door latch.  Curious to your method if you can provide more details.
 
 
Husker Smoker, morning....   I sure can, and will...  First, I have reskinned the inside of a fridge door, as well as others....  The door I did had a twist and would not seal... others have had that same problem....    

Solution, lay the door on a solid surface (no interior skin).....  using string, make an X pattern from corner to corner...   Where the string crosses, in the center of the door, they should just barely touch......  that insures the door is in "one" plane, no twist....  If needed, shim the corners of the door until the strings touch......     apply and fasten the new interior skin....  Insulate inside the door cavity FIRST, or you will 
head-wall.gif
 ...   

Did I explain that right ???  At times my brain runs faster than my fingers...  At times, my brain doesn't run at all !!!!!!

Dave
 
looks good.  is that regular fibreglass insulation?  you should use Roxul high temp. 

How did you attach your gasket?  What I noted when I had a grease fire in mine the hi temp sealant melted...lol  Thus I would personally not use it inside the smoker...only exterior.

nice paint job and you will be set.
 
 
Thanks for the heads up Dave.  I'll take a closer look at it next time I'm back.

BBQ - i used regular insulation.  We were grinding right next to it and it never caught.  Figured that would be hotter than anything the smoker will see.  However, I did attach the rope with Rutland.  That doesn't make me feel good.  The stuff I used is rated up to 500 degrees - assume this is the same stuff you were using?   What are you using now to hold on the gasket?
 
 
Last edited:
Hey husker 

Just starting my fridge build.  I too am going charcoal route. I have a big opening on the bottom as well wanted to make a basket that slides out. Wondering what ur basket slides on?  Just the bottom metal or is it on slides or glides?  space under basket for air flow? Just trying to think how to avoid the basket tipping forward when I pull it out. 

Thanks 

Kevin
 
Mine just rests on the floor.  The bottom of the box is set up an inch for air flow from the bottom.  I wanted to do something that slides out, but I don't believe I'll be needing to add charcoal during most cooks.
 

Have you started your build?  If so, is there a thread anywhere?  Would like to watch another to see what I could have improved on.
 
Last edited:
Hey husker 

Just starting my fridge build.  I too am going charcoal route. I have a big opening on the bottom as well wanted to make a basket that slides out. Wondering what ur basket slides on?  Just the bottom metal or is it on slides or glides?  space under basket for air flow? Just trying to think how to avoid the basket tipping forward when I pull it out. 

Thanks 

Kevin
Quoting to let you know the thread is updated.  Sorry it took a while.  Forgot to respond when I saw the notice.
 
SmokingMeatForums.com is reader supported and as an Amazon Associate, we may earn commissions from qualifying purchases.

Latest posts

Hot Threads

Clicky