Utility Cart Holding Cabinet Conversion - Should work well eh?

  • Some of the links on this forum allow SMF, at no cost to you, to earn a small commission when you click through and make a purchase. Let me know if you have any questions about this.
SMF is reader-supported. When you buy through links on our site, we may earn an affiliate commission.
I "Borrowed" this from the internet.....

Fiberglass is rated to 1,000°

Mineral Wool ratings depend on what type you use, but 480° - 1,400°

Since your insulation does not come in contact with the food, why would a "Food Rating" matter?
Insulation MaterialTemperature Range
LowHigh
([sup]o[/sup]C)([sup]o[/sup]F)([sup]o[/sup]C)([sup]o[/sup]F)
Calcium Silicate-1806501200
Cellular Glass-260-450480900
Elastomeric foam-55-70120250
Fiberglass-30-205401000
Mineral Wool, Ceramic fiber    12002200
Mineral Wool, Glass032250480
Mineral Wool, Stone0327601400
Phenolic foam    150300
Polyisocyanurate or polyiso-180-290150300
Polystyrene-50-6075165
Polyurethane-210-350120250
 
And while Im thinking about it...Finally ordered a bunch of supplies.

From Auber:

Products
------------------------------------------------------
1 x K type thermocouple 4"probe, Smoker, Oven (TC-K3MM)  = $11.95
1 x 25A SSR (MGR-1D4825)  = $15.00
1 x PID Temperature Controller w/ Ramp/soak, Kiln (SSR Output) (SYL-2352P) = $77.95
1 x External Mount Heat Sink for 25A SSR (HS25ET)  = $12.50
1 x 120V 15A Receptacle, Panel Mount, IEC 320-C14 (INR1)  = $1.95
1 x LED Indicator, 22 mm, 120/240V (IND-1)  = $3.45
        Power Voltage Option 120V AC/DC
        LED Color Option Yellow

From Amazon:
31HHgTETEUL._SCLZZZZZZZ__SY115_SX115_.jpg
Sierra International CB41210 10 Amp Marine Resettable Circuit Breaker 
Automotive 
Sold by Amazon.com LLC 
$8.67  
41Lglstx+ZL._SCLZZZZZZZ__SY115_SX115_.jpg
Amico Red Light DPST ON/OFF Snap in Boat Rocker Switch 16A/250V 20A/125V AC 30x21mm 
Misc. 
Sold by uxcell 
$3.96  
31-qIhD306L._SCLZZZZZZZ__SY115_SX115_.jpg
BUD Industries CU-3009-A Aluminum Electronics Minibox, 8" Length x 6" Width x 3-1/2" Height, Natural Finish 
Misc. 
Sold by Amazon.com LLC 
$14.54  
41g8vBz6niL._SCLZZZZZZZ__SY115_SX115_.jpg
Gino 10 Pcs Electrical Panel Mounted 5 x 20mm Fuse Holder 
Electronics 
Sold by uxcell 
$6.20  
41GI6xgVx-L._SCLZZZZZZZ__SY115_SX115_.jpg
Amico 2 Pcs 8 Position Double Row Screw Terminal Covered Barrier Strip 600V 25A 
Electronics 
Sold by uxcell 
$6.60  
From Amazin:
AMNPS5X8"NEW" A-MAZE-N-PELLET-SMOKER 5X81$39.99$39.99
AMNP2 SPL-0002A-MAZE-N-PELLETS SPECIALTY - 2LB - Apple1$5.99$5.99
AMNP2 STD-0005A-MAZE-N-PELLETS STANDARD - 2LB - Cherry1$4.99$4.99
AMNP2 STD-0006A-MAZE-N-PELLETS STANDARD - 2LB - Hickory1$4.99$4.99
DSC-3Customer Appreciation - 20%1-$11.19-$11.19
Many thanks to Todd for not only putting up with multiple PM's but also providing a code for an additional 20% off. 

I now need to figure out how to install an intake/exhaust system. Does anyone know where I can find some type of adjustable vent inserts? With the cabinet being double wall construction I need some type of a sleeve to seal the area between layers so smoke does not get into the insulation and just passes through.
 
Last edited:
I would think a 3" or 4" Tube w/Butterfly Valve would work well fro both the intake and exhaust

Add a rain cap for the exhaust

Hmmm.....New Product for me????

Todd
 
Not a bad idea. I've pretty well searched out these forums and it does not appear there is an "off the shelf" product out there for intake and exhaust ports on all these DIY smoker conversions.

People use HVAC vents, steel pipe with ball valves and end caps, plain duct work pieces, and probably other things but can't remember.

For intake a slide in sleeve attached to a butterfly valve so it was flush on the outside and then maybe tabs on the inside that could be bent around and sealed?

I did fine an exhaust cap like this, think the stainless would be the way to go. Not sure if it's the best solution or not but all I could find. Completely struck out on the intake part though.

 
I used a flanged, 1-1/4" stainless steel sink pipe for my inlet on the bottom of my smoker. It doubles as the drain hole, also.
 
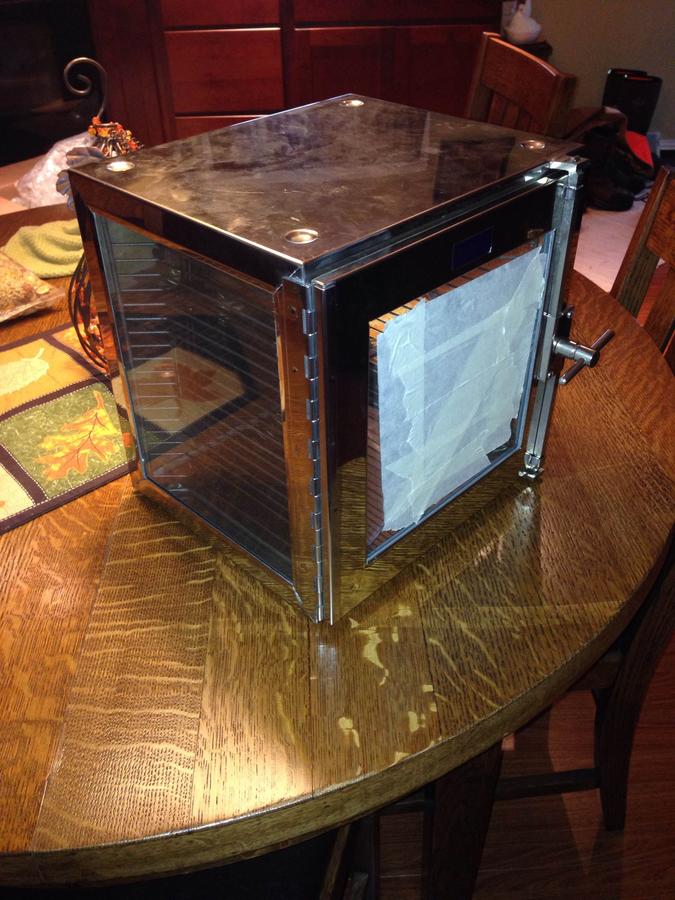
Saw this and had to snag it...Not sure if I will use it as a smoke chamber or something else. The glass is broken but will be easily replaced. Its all stainless steel and big enough where I could fit the AMNPS in there about 12 x 12 x 12. It has 2 stainless grates and a stainless catch pan. There is a nice seal on the door and a super heavy duty latch as well! I was kind of thinking mailbox mod?

To small to actually smoke something in it right? 

Mailbox mod on steroids? Would just need to cut a hole in the top and then maybe replace the broken glass with sheet metal and cut an intake vent in the door.


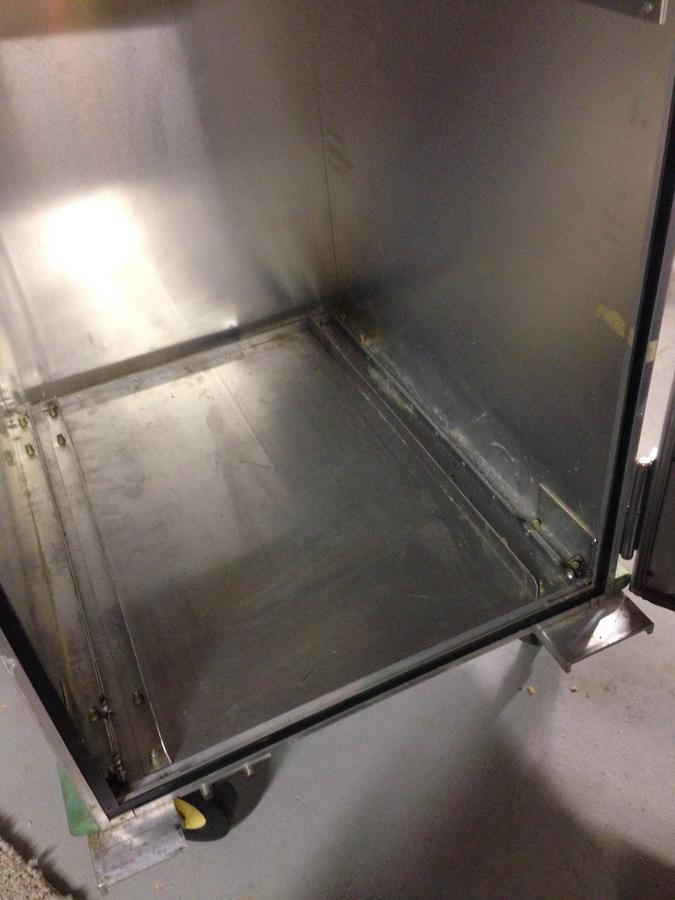
Okay guys, really need some advice here. Im stuck and parts are starting to roll in and Im anxious to start putting everything together. So many ways to mount the burner. Trying to do this on the cheap but if I have to spend a little money to make it look nice thats okay too. I do have an old crappy baking sheet that can be cut up or laid in the bottom for protection as well if needed. So many questions, not enough time. The goal is to get the burner as close to the bottom as safely possible.

Option #1:

I could cut a big hole in the inner bottom of the cabinet? (likely the cleanest looking install with most room inside but unsure if aluminum interior will hold up to heat from element/burner)

Option #2

I could cut a whole in the full sized baking sheet, either right side up or upside down? (this is what woodcutter has done and suggested THANKS FOR THIS IDEA only instead of buying sheet metal and having it cut to size I just use what I already have. The cavity if laid upside down could be filled with cement board for insulation between burner and aluminum walls but obviously this would not look at nice as the first option and the burner would be mounted up higher in the box, about an inch)

Option #3

I could use 1/2 or the upper piece of the hot plate housing? If so, is it okay being painted white like it is? (this is the least visually appealing and the burner would be up even higher making it the option i like least. I also do not know if the white paint on the hot plate is safe at higher temps of say 250 for multiple hours)

Option #4

It has been suggested that I place cement board/hardi backer on the bottom to better insulate the Aluminum from heat...can I cut a hole in that and mount the burner right in there? (not even sure if this is an option but if so, again would probably look less visually pleasing compared to other options.

Option #5

Something entirely different that I have not thought of or do not know about? Maybe there is an "off-the-shelf" burner housing/box that I can buy made of shiney stainless that can be mounted to the bottom and will solve all of my problems? 

Additionally, what would one use as a drip/heat deflector so drippings do not get directly onto the element and how close can that be mounted?


The hot plate looks like a good idea and leaves room for your AMNPS in front of it. The switch and wiring will not take the heat but it makes a nice housing and will protect your floor. If your going with the PID you will be rewiring it anyway. I use 2 half sheet pans for drip pans and put each one on its own shelf so smoke can travel through it. A wire shelf with a smaller pan works good too.
 
It's Alive! Re-insulated w/rock wool insulation, what a mess that stuff is. Should have worn long sleeved shirt, pants, and a mask...what a mess. None the less, should hold heat well. Fired right up, but wow does the PID seem complicated. Took me 20 min to figure out how to turn it on.

Anyone aware of a "cheatsheet" for the PID? I see the ones on Auber's website but I was hoping for something a little more straight forward for basic functions.  

Thanks to Bamafan for the schematics!!!

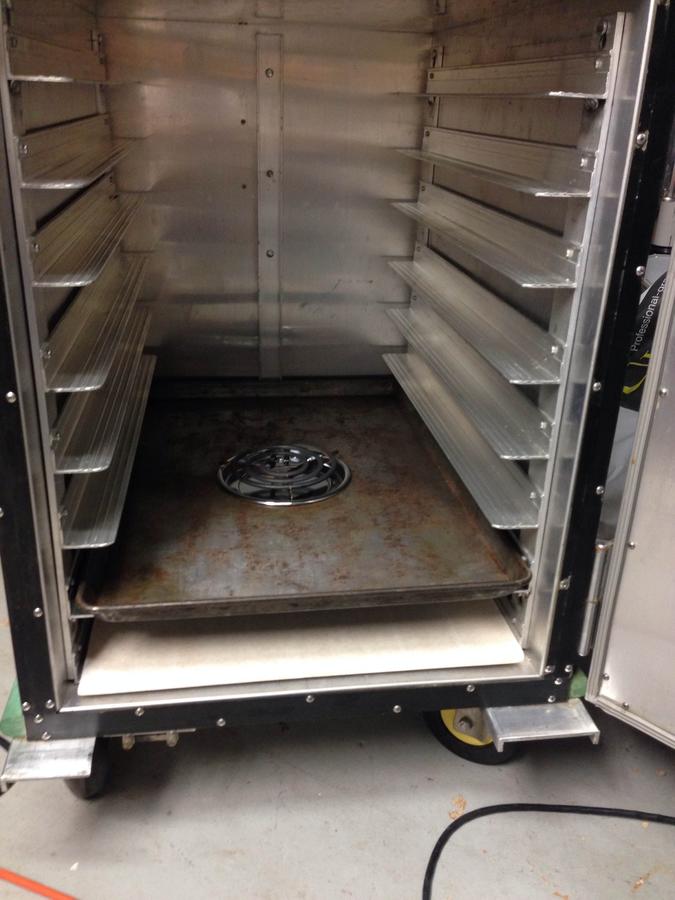
Cut a hole in an old baking sheet since this cabinet was made for it to mount the burner. Cut and slid a piece of 1/4" Fiberock on the bottom for extra heat protection. Honestly the burner was on for 15 min and i could place my hand 1" under it with no problems so the Fiberock was probably overkill. 

Now to figure out the intake and exhaust. I previously posted the question and got some answers. Now that you can all see what its looking like wondering what the optimal place for these would be? I was thinking the exhaust in the back centered next to the PID. Think we have decided on a 4" exhaust from Sausage Maker.


Are you talking about a "cheat sheet" for the wiring or for the programming?

Never mind, after re-reading your last post its clear you already have wiring schematics, so its programming you are looking for now.
 
Last edited:
For running the PID. How to set the temp and work it. Not exactly as easy as an oven.

And the. How I would change the wiring to protect the SSR as was noted above.
 
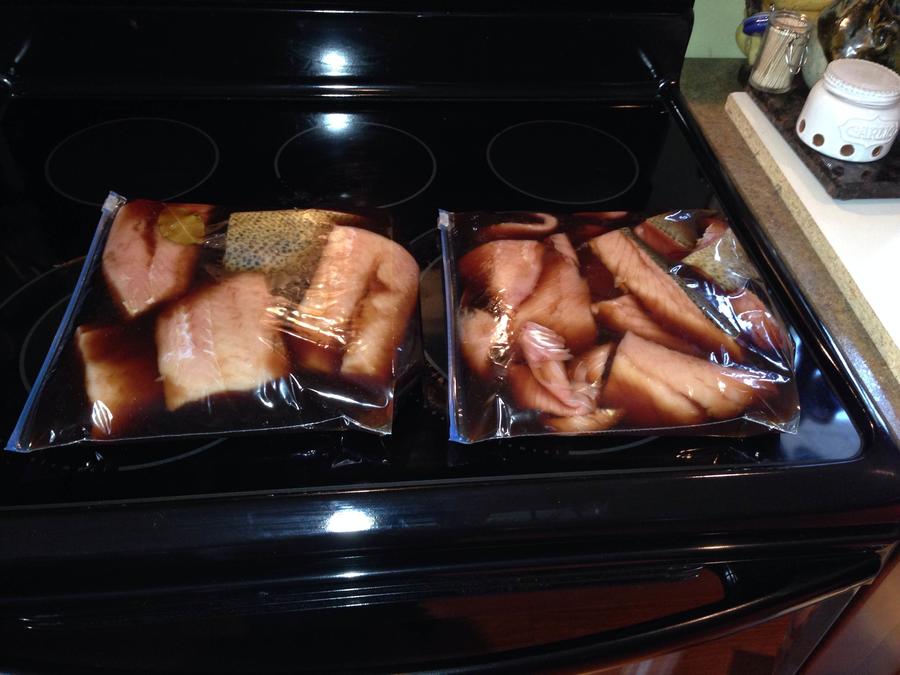
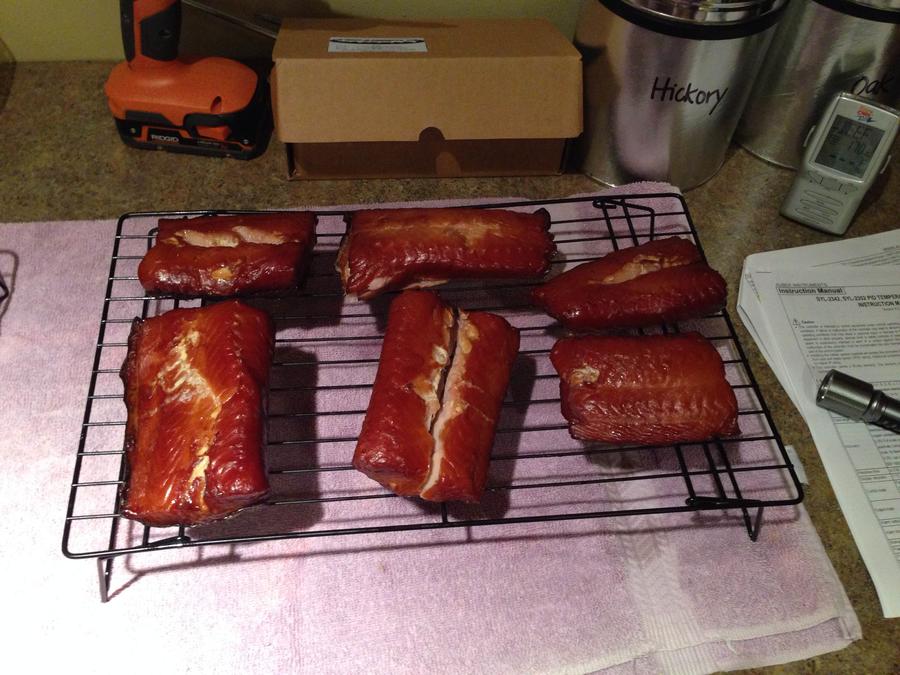
An update, need to get some racks made up so right now pulled the grates from my grill. We just caught some Salmon Friday so I whacked one up and threw it in some brine... recipe/instructions from Bearcarver. Smoker same out nicely and appears to be working as it should. I did have to light the AMNPS on both ends to get enough smoke....not sure why?


Very nice! Look professionally made.

Just wondering, is there a drain hole in that cookie sheet somewhere, so the drippings don't flow into the burner?
 
No drain hole. So I need to get 2 nice 1/2 size cookie sheets. The plan is to set them on separate shelves and stager them so the smoke can weave through them and I have 100% coverage for drips. Right now for this first smoke I only have one salmon going and it fit on the 3 1/2 size grill racks so they are directly above a 1/2 cookie sheet I was able to steal from the kitchen after promising i would clean it such that my wife couldn't tell I used it in the smoker.

So there is the full cookie sheet where the burner is mounted, no drain. then there is a smaller one above the burner to disperse heat and act as a catch for drippings right now.

Any better ideas than this would be welcomed???

...you are the pros!
 
You should be okay with salmon and such, but if you plan on doing something really fatty, like a Fatty, or turkey or something, you could get a lot of grease coming down and pooling in that bottom cookie sheet.

Is there anyway to raise the back end of the burner/cookie sheet, or lower the front? If so, I'd drill a small hole and set a metal cup under it to catch the drippings. After all the work you've done, you don't want a grease fire to break out.

Just ask Papa Chops: http://www.smokingmeatforums.com/t/137950/coldspot-fridge-smoker/20
 
SmokingMeatForums.com is reader supported and as an Amazon Associate, we may earn commissions from qualifying purchases.

Hot Threads

Clicky