Old Country BBQ Pits Wrangler - Mods

  • Some of the links on this forum allow SMF, at no cost to you, to earn a small commission when you click through and make a purchase. Let me know if you have any questions about this.
SMF is reader-supported. When you buy through links on our site, we may earn an affiliate commission.

damnthatsgood

Meat Mopper
Original poster
Sep 5, 2013
153
22
Just East of San Antonio
First off, this is already a good pit, and I do try to live by KISS.(keep it simple, stupid)  But I also live by BOMB.(better off modified, baby)
sawzall.gif


There were a couple problems with it, IMHO.

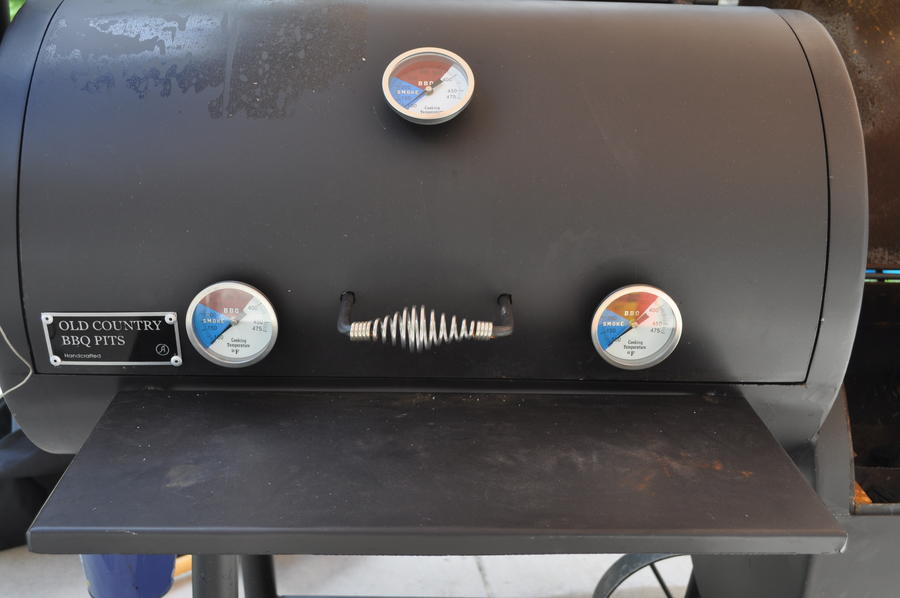
First off, there isn't much shelf space, and the pitiful shelf it comes with is hardly a place you can safely put a cookie sheet without it falling off.  So.....

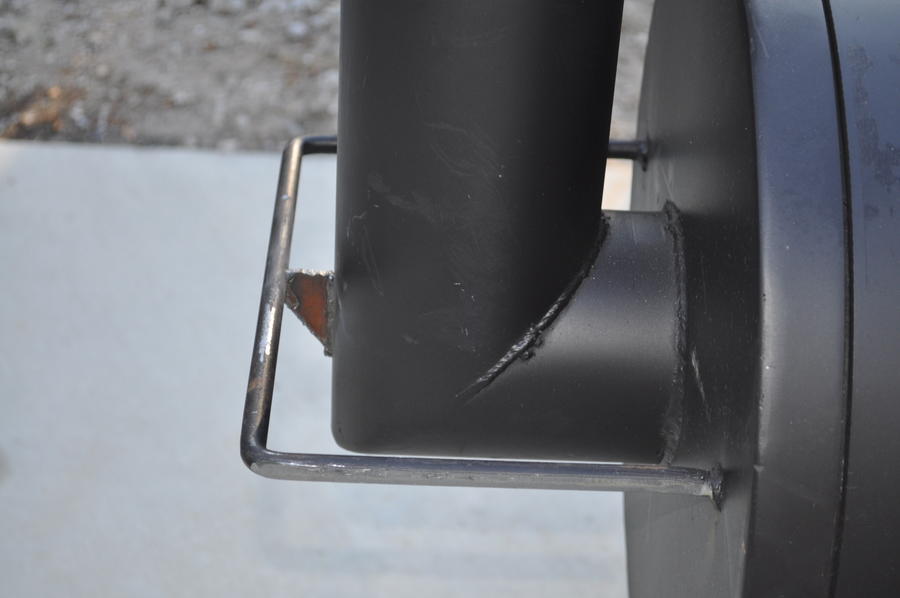
I decided to use the existing handle to hold my shelf.  It was already pretty stout, but I welded in a brace to the stack just to make it last over time without sagging.


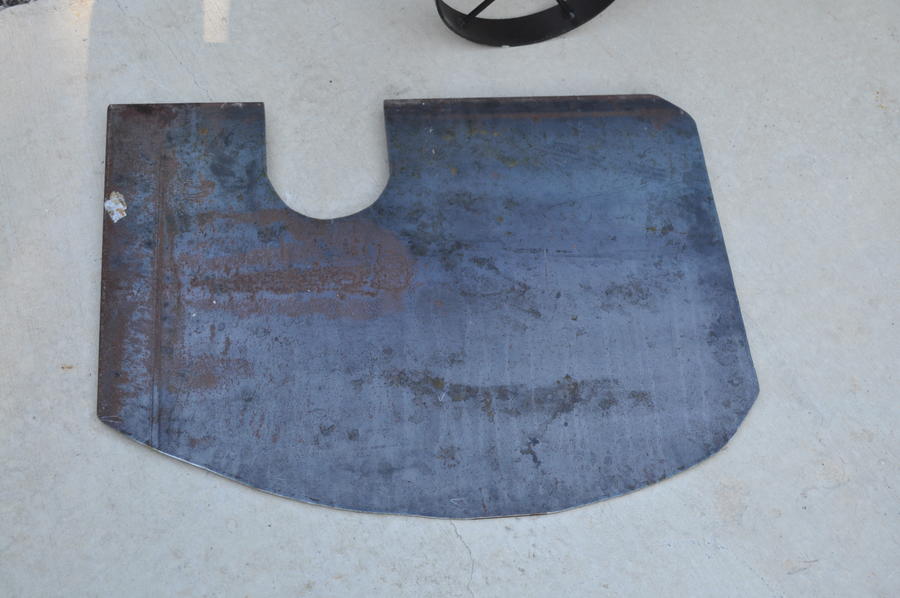
View from the top...The shelf is made from 3/16" steel.


View from the bottom.  The simple design will hold up, and allow me to slide the shelf off if I need to access the handle to move the smoker.


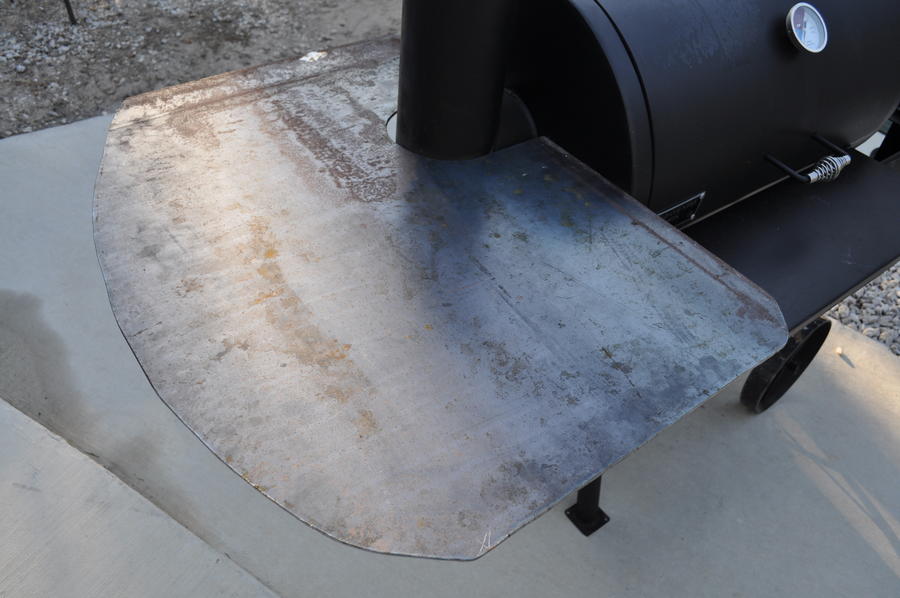
I have tons of space.  I used the milk jug for a size reference.  And that is a massive cookie sheet and a full-size plate.


I've done three more things besides the shelf.  I'll get pics up in a minute.  Let me know what you think!
 
Okay, everybody!  Mod #2...

The stock intake damper on my pit sucked.  After they cut it out with the plasma cutter, there was still remnants of dross on the damper, and the door.  This led to a poor seal no matter how you slice it.  Couple that with the fact that they were coupled together with a loose fitting bolt, and the results were just plain disastrous!  It was so loose, that you couldn't even get it to stay put.  I would try to dampen it, and as soon as I let go, it would "fall" to whatever spot it felt like.  Not gonna work....

On top of all that, it wouldn't even close all the way.  As you can see in these five pics.  Look at the bottom left.  The top right shows the same gap, but the angle of the pic hides it.


I used my grinder to get rid of the excess dross, and plasma cutter to enlarge the holes on the door and damper.  As usual, I didn't have the right drill bit....

But the holes turned out perfect, and I used my Dremel to touch them up.


View from inside the door featuring new, and much larger, bolt.


I added a spring from the AFC housing on an injection pump.  Now the damper is held perfectly flat against the door, and under spring tension that I can adjust.  It is leaps and bounds ahead of the stock damper.  I couldn't be happier.


I'm not done with the door just yet.  I still need to add a beefier handle to the latch and damper.  I'm probably going to redesign the latch from the ground up.  But that's for another day.

What do ya think?
 
dtg, morning.....  looks good......  something to think about...... having the upper opening adjustable for "thru smoker heat control"......

Here's a mod skifreak did to his smoker.......      

He said it made all the difference in temp control in his smoker......


Dave
 
 
dtg, morning.....  looks good......  something to think about...... having the upper opening adjustable for "thru smoker heat control"......

Here's a mod skifreak did to his smoker.......      

He said it made all the difference in temp control in his smoker......


Dave
I don't understand.  Does the top and bottom adjust separately?  Or are you talking about an adjustable door in between the firebox and cooker?
 
With the addition of a plate for the top hole, the top adjust separately from the bottom hole.....   The theory is......  the bottom hole adjust the air to the fire to create heat.....  the top hole adjust air flow through the smoker .....  the top hole should be above the fire grate.....     It is like having a forced air furnace (example)....  the burner heats the furnace fire box.....  the fan circulates the heat....  It's an adjustable fan for lack of a better term.....    Dave
 
 
With the addition of a plate for the top hole, the top adjust separately from the bottom hole.....   The theory is......  the bottom hole adjust the air to the fire to create heat.....  the top hole adjust air flow through the smoker .....  the top hole should be above the fire grate.....     It is like having a forced air furnace (example)....  the burner heats the furnace fire box.....  the fan circulates the heat....  It's an adjustable fan for lack of a better term.....    Dave
Geez, I'm an idiot.  It's so obvious now.  That second door looked like it was farther back in the firebox at first glance, so I thought it was something entirely separate.  At first, it looked like the bottom and top were exactly the same.  Now, looking at it with a fresh pair of eyes, I can plainly see the second door attached to the first.

I like it.  I'll have to incorporate something like that into my smoker.

Thanks for the idea, Dave!
 
Okay ladies and gents, it's time for mod #3!

Not really much to it....it's a charcoal maze!!


I welded angle iron on each side and slid the expanded steel in there, making sure to have the strength axis facing the right direction so i wouldn't sag.  I also threw a couple tack welds on for good measure.  Nothing that can't be grind off in a few seconds to replace it when it burns through.


I have ample room for ash removal.


Here it is with about fifteen coals fresh from the chimney.


Thirty minutes later.


Thirty minutes later.


Thirty minutes later.


Thirty minutes later.


And now, I've consolidated the coals to one side, and started the snake going the other direction.


Final thoughts--

It keeps temps very even, and uses very little fuel.  Putting wood on top of the coals like that creates a constant white smoke, and you can only achieve TBS at the end of the burn, or if you remove most of the wood.  Next time, I will put small chunks of wood every so often in the snake.  It provides excellent ash management, fuel management, and temperature control......if I can just figure out the best way to use it.
 
Last edited:
  • Like
Reactions: the1pearson
Very nice thread, and I really like the mods you have going on this smoker. I plan on getting a Wrangler pretty soon and I know there are a few things I want to do with it. First thing is I am going to order a 2 or 3 Tel-Tru thermometers to install to the left and right of the handle at grate level, and one up top where the hole is already made, to gauge the temp on the upper grate. This will be my first time doing any type of modification to a smoker. What side hole do I need to drill to make sure the thermometers seal well on the lid?

Once I get that done, I want to try to get a bigger cooking grate for the top rack. It looks like there is a lot of room to spare on the top rack. Not sure why Old Country didn't just put a bigger cooking grate up top.
I wound up scrapping the thermometers and went with a Maverick digital unit instead. But I did get a bigger top grate made, and I have almost doubled the cooking space from the factory grate.

I do have some questions about getting a good seal on my pit though. I am losing smoke in a few places and want to have it corrected ASAP. I have been looking at getting a high heat adhesive gasket from www.bbqgaskets.com, but I do not know which gasket width would be appropriate. I am wanting to use these gaskets for the smoking chamber door and the firebox door. Does anyone have experience with these kinds of gaskets? Or could someone recommend a size? I'm just really unsure on what I would need for width and thickness.

And I also have a gap between my damper door and the bottom of the firebox. I have contacted Old Country BBQ Pits about this, but haven't heard from them in 3 days. The gap is not a consistent width either. It follows the shape of the firebox where the door meets it and gets wider towards the front of the smoker. At it's widest, it's probably close to 1/4".  I'm afraid to try to seal it with some high heat silicone sealant, because I think the firebox will get too hot and it will ruin the silicone. Any ideas on this other than following up with Old Country BBQ?
 
JTX, morning.... You would be better served from our community if you started a new thread on this problem.... Until then, I suggest you bend the door to close the gap as much as possible.... or bend the CC if that is where stuff is out of alignment.... then start a thread with the new information.....

Dave
 
SmokingMeatForums.com is reader supported and as an Amazon Associate, we may earn commissions from qualifying purchases.

Latest posts

Hot Threads

Clicky