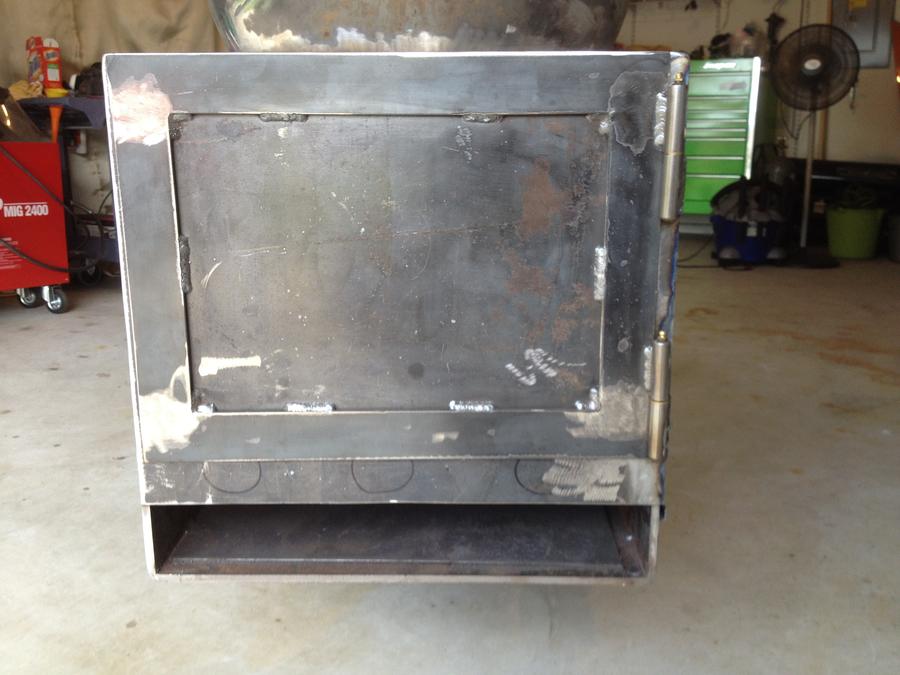
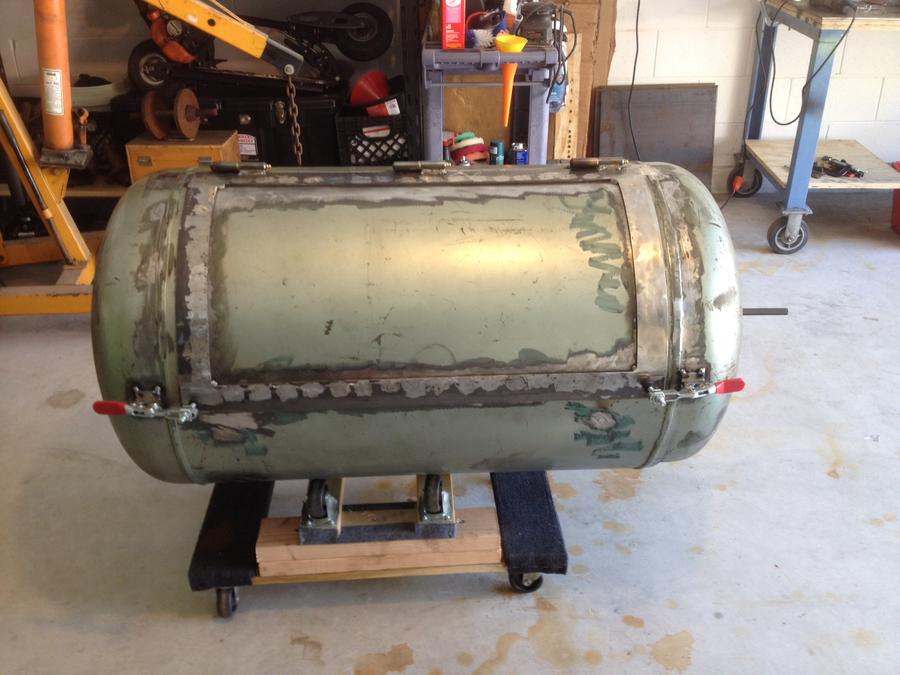
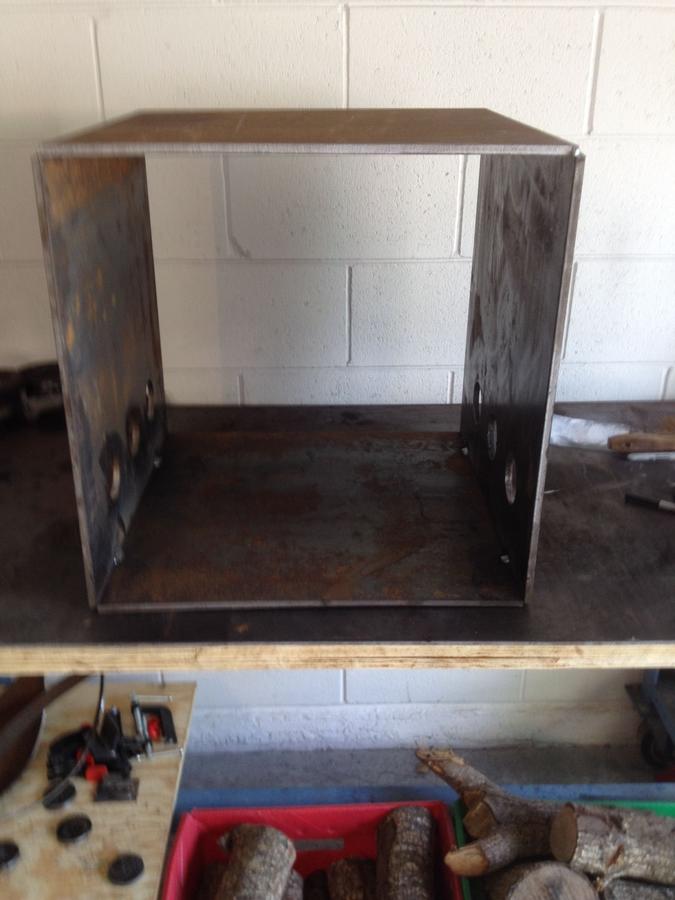
I've been viewing this site for months and just got to say you all corrupted me. Starting searching craigslist and found this 80 gallon compressor for a 100 buck they said the pump was sized no big deal just wanted the tank well I pick it up and end up selling the pump and the motor for 200 so I'm up 100 can't beat that. So the build is on. Just one problem regular flow with tuning or reverse flow? The Feldon calculator is great. Here is the progress so far started around the end of Feb. goal is to complete by end of April. Firebox is 20x20x20 and the FB Tto CC is right around 66sqin. Plan is for a slide out ash pan and the fire grate right above the intake holes which are 2.5" total of 6. I would like to thank everyone who has posted their builds alot of great builds to get ideas from.
ReplyQuote Multi
post #2 of 9
5 days, 19 hours ago
What an amazing first build! That looks great so far. I smoke on a mini WSM, so I'm not going to be much for advice, but sure do love watching smoker builds. Great job. Keep it up!
- Ryan
JUST ANOTHER BEER DRINKER WITH A MEAT RUBBING PROBLEM
ReplyQuote Multi
post #3 of 9
5 days, 19 hours ago
Good looking build. Looks like it's coming along great. Look forward to seeing the final product.
Current rig: Homemade UDS, Maverick 733
In the works: Double Barrel "T" style Charcoal grill / Smoker
ReplyQuote Multi
post #4 of 9
3 days, 19 hours ago
THREAD STARTER
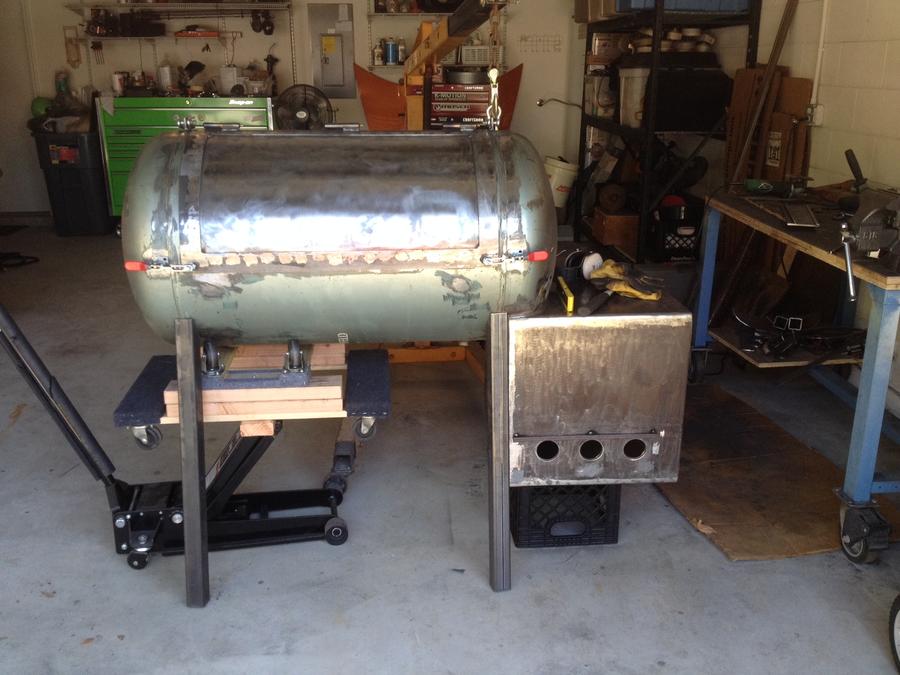
Legs and wheels mounted. Temp guages installed and started the wood rack or lower shelf and one of the intake slides on. Making forward progress. Will be cuting the holes for the other side of the intakes 3 2.5" holes in 1/4" plate with a drill and holesaw fun fun fun.
.
ReplyQuote Multi
post #5 of 9
3 days, 16 hours ago
Making progress. The legs and wheels look nice. You are very skilled. Keep up the good work.
JUST ANOTHER BEER DRINKER WITH A MEAT RUBBING PROBLEM
ReplyQuote Multi
post #6 of 9
2 days, 19 hours ago
THREAD STARTER
Thank you very much it feels good to fabricate again. Made a little more progress today after work got the lower shelf framed out and worked on the exhaust decided to go with a 5" square tube for the exhaust its 4 3/4"ID a square hole is eaiser to cut with a cutoff wheel. What is the recommended distance from the bottom cooking surface for the tube is 3" to 4" good.
ReplyQuote Multi
post #7 of 9
2 days, 18 hours ago
Lookin good Rotorhead, I envy anyone who has the skills and stamina to do their own build. It's nice to buy one from a fabricator, but there is a huge amount of pride in making your own. Good smoking, Joe
ReplyQuote Multi
post #8 of 9
19 hours, 11 minutes ago
THREAD STARTER
Thank you.
Its really fun doing your own build I bet I made 10 trips to Bass Pro looking at the Horizons they sell and I just could not see spending a grand on one that wasn'r the size I wanted to have. So I found this fourm then spent months viewing past builds and that was i said i can do this so here we are. Spent some time today wire wheeling and sanding disc to the inside of the CC set the 5" exhaust back in and laid the angle for the cooking rack in. right now ita sitting 3 inches from the top of the cooking rack. I'm also thinking I may need to cut the door opening another 2" lower. I want to put a top rack in 12" to 14" wide. Need to know if 3" is good distance from the lower rack and how much space you need between the top and lower track. right now if I leave as is I'll have about 6 1/2" betwwen racks.
ReplyQuote Multi
post #9 of 9
18 hours, 4 minutes ago
That's coming out great. In my UDS I have 7 inches between racks. Not sure on a reverse flow setup though. I Agree building is half the fun. Just about done with my latest build and starting to decide on my next project. Might be a different hobby though. Maybe a new remote control plane.
Current rig: Homemade UDS, Maverick 733
In the works: Double Barrel "T" style Charcoal grill / Smoker


ReplyQuote Multi
post #2 of 9
5 days, 19 hours ago

- RMMurray
-

- offline
- 392 Posts. Joined 3/2015
- Location: Indian Trail, NC (some podunk little hick town just east of...
- Points: 28
What an amazing first build! That looks great so far. I smoke on a mini WSM, so I'm not going to be much for advice, but sure do love watching smoker builds. Great job. Keep it up!
- Ryan
JUST ANOTHER BEER DRINKER WITH A MEAT RUBBING PROBLEM
ReplyQuote Multi
post #3 of 9
5 days, 19 hours ago

- gunkle
-
- offline
- 161 Posts. Joined 8/2014
- Location: Connecticut
- Points: 24
Good looking build. Looks like it's coming along great. Look forward to seeing the final product.
Current rig: Homemade UDS, Maverick 733
In the works: Double Barrel "T" style Charcoal grill / Smoker

"T" style smoker (21 photos) |
ReplyQuote Multi
post #4 of 9
3 days, 19 hours ago
THREAD STARTER

- Rotor Head
-
- online
- 5 Posts. Joined 4/2015
- Points: 10
Legs and wheels mounted. Temp guages installed and started the wood rack or lower shelf and one of the intake slides on. Making forward progress. Will be cuting the holes for the other side of the intakes 3 2.5" holes in 1/4" plate with a drill and holesaw fun fun fun.
.

ReplyQuote Multi
post #5 of 9
3 days, 16 hours ago
- RMMurray
-
- offline
- 392 Posts. Joined 3/2015
- Location: Indian Trail, NC (some podunk little hick town just east of...
- Points: 28
Making progress. The legs and wheels look nice. You are very skilled. Keep up the good work.
JUST ANOTHER BEER DRINKER WITH A MEAT RUBBING PROBLEM
ReplyQuote Multi
post #6 of 9
2 days, 19 hours ago
THREAD STARTER
- Rotor Head
-
- online
- 5 Posts. Joined 4/2015
- Points: 10
Thank you very much it feels good to fabricate again. Made a little more progress today after work got the lower shelf framed out and worked on the exhaust decided to go with a 5" square tube for the exhaust its 4 3/4"ID a square hole is eaiser to cut with a cutoff wheel. What is the recommended distance from the bottom cooking surface for the tube is 3" to 4" good.
ReplyQuote Multi
post #7 of 9
2 days, 18 hours ago
- Joe Black
-
- offline
- 148 Posts. Joined 1/2015
- Location: Forgot to say that I'm in Greenville, SC
- Points: 16
Lookin good Rotorhead, I envy anyone who has the skills and stamina to do their own build. It's nice to buy one from a fabricator, but there is a huge amount of pride in making your own. Good smoking, Joe
ReplyQuote Multi
post #8 of 9
19 hours, 11 minutes ago
THREAD STARTER
- Rotor Head
-
- online
- 5 Posts. Joined 4/2015
- Points: 10
Thank you.
Its really fun doing your own build I bet I made 10 trips to Bass Pro looking at the Horizons they sell and I just could not see spending a grand on one that wasn'r the size I wanted to have. So I found this fourm then spent months viewing past builds and that was i said i can do this so here we are. Spent some time today wire wheeling and sanding disc to the inside of the CC set the 5" exhaust back in and laid the angle for the cooking rack in. right now ita sitting 3 inches from the top of the cooking rack. I'm also thinking I may need to cut the door opening another 2" lower. I want to put a top rack in 12" to 14" wide. Need to know if 3" is good distance from the lower rack and how much space you need between the top and lower track. right now if I leave as is I'll have about 6 1/2" betwwen racks.


ReplyQuote Multi
post #9 of 9
18 hours, 4 minutes ago
- gunkle
-
- offline
- 161 Posts. Joined 8/2014
- Location: Connecticut
- Points: 24
That's coming out great. In my UDS I have 7 inches between racks. Not sure on a reverse flow setup though. I Agree building is half the fun. Just about done with my latest build and starting to decide on my next project. Might be a different hobby though. Maybe a new remote control plane.
Current rig: Homemade UDS, Maverick 733
In the works: Double Barrel "T" style Charcoal grill / Smoker
|
"T" style smoker (21 photos) |