Finally starting my first build
- Thread starter hamrhead1971
- Start date
-
Some of the links on this forum allow SMF, at no cost to you, to earn a small commission when you click through and make a purchase. Let me know if you have any questions about this.
You are using an out of date browser. It may not display this or other websites correctly.
You should upgrade or use an alternative browser.
You should upgrade or use an alternative browser.
SMF is reader-supported. When you buy through links on our site, we may earn an affiliate commission.
Thanks Ty. That's why I decided to use it, besides being unique I just thought it would be plumb cool looking.following this one. That'll be a cool smoker with lot's of character that nobody will be able to duplicate.
I did quite a bit of thinking on how to do my vents since they are under the smoker. On the up side, I was able to use a solid piece of plate to cover the vents since it slides straight back. Started out with two pieces of rebar (because I have plenty laying around) running toward the back angling in toward each other. Drilled a hole in the end of a third piece, ran a pin thru and welded the pin to the first to rebars making it where the handle can pivot up and down.
Made a "rest" for the handle and then cut notches every 1/4" in the bottom of the handle. Now I can open the vent in 1/4 inch increments and it also prevents me from accidentally bumping the handle and opening the vent while working in front of the smoker.
Fully closed.
Fully opened
For the upper vents, I just used a short piece of bar angled downward.
Need help from some of you metal workers! I welded one inch flat bar around my door, put in the insulation and tacked up the inner piece of 18ga metal. When I tried to close the door, oh crap!! The door has warped pretty bad. I got some of it out by running some welds on the outside then grinding them back down but still have a bad warp. How can I get the door straightened up without messing up its shape?
At this point the door flange is hitting the box from the top of the hinge to top center of the door.
smokejumper
Smoking Fanatic
A hydraulic press will work to straighten the door.
Just take it in small steps so that you don't over do it.
Just take it in small steps so that you don't over do it.
Well, I got the door straightened out. Put a piece of board between the top of the door and CC by the hinge and clamped the bottom latch side closed and left it overnight. Worked like a charm. With the door straight, I finished insulation, welded the inside and replaced the latch rods.
I wrapped the sheet metal around the outside of the flat bar on the door for a better fit and nicer look besides being easier than trying to cut to fit the top radius and the notches around the locking mechs.
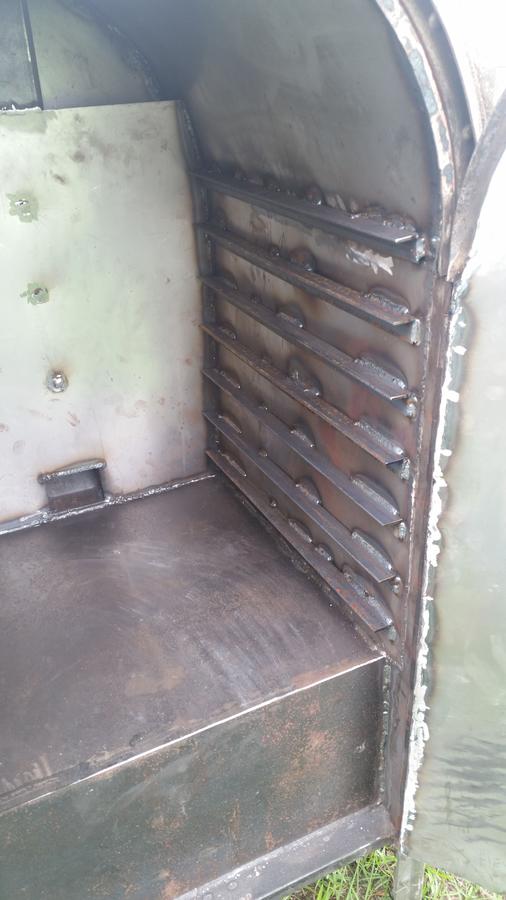
Finished welding in the back separation wall and got the racks in. Seven rack positions 3" apart.
FB door cut and insulated, handle and latches put on.
Basket made
rmmurray
Master of the Pit
Thanks RM. I actually couldn't wait either so while I was working on another project I lit a chimney of charcoal and fired this beast up. It hit 400 degrees with the vent wide open in about 45-60 minutes. but after completely closing the vents the temp stayed above 300 until the charcoal had completely burned out.Good work today. It will soon be ready. I cannot wait to see her in action.
On the up side, this was the outside of the box while the CC was at 375-380.
The very top was around 105. Not exactly cool but I could lay my hand on it with no problem.
Thank you sir. I will probably fire it up again tomorrow and throw some meat on it this weekend at the latest. I want to get at least three or four burns in to see if I need to make any changes before I worry about painting it.Looking Good
Gary
smokejumper
Smoking Fanatic
Got a few hours in today. No picture, but started by running a bead of RTV high temp gasket compound around the FB door. Then I covered that with some Glad Cling Wrap and closed the door to dry. When I remove the cling wrap, I should have an airtight seal around the door.
Added pieces of angle to keep the racks from tipping forward and built four racks.
I had to modify one rack because the therm in the door was hitting it not letting the door close.
Made a piece that I can place in the charcoal box to try a line of charcoal for long smokes. May work, may not but it took five minutes so why not try?
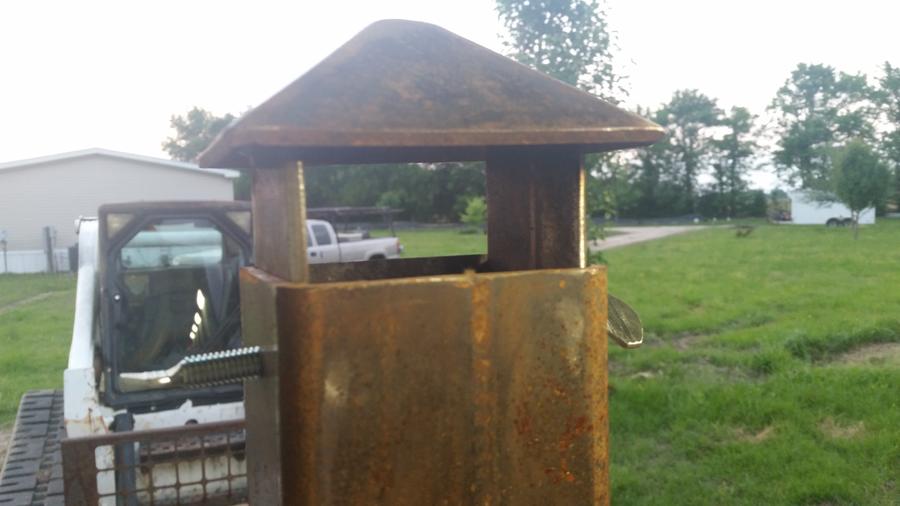
Made a cap for the chimney. Drilled and tapped two holes for 3/8" thumb screws so it can be closed or opened.
May fire it up and get it seasoned tomorrow to stop some light surface rust that is starting to show on the inside. That will also let me know if I want to change anything before I get ready to paint it although I still have a couple of things to add on the outside.
lendecatural
Smoking Fanatic
You had a good day!
I would suggest doing the season and then cooking on it. The best way to see if you need changes is to crank out some meat and have a taste, if it is good, then paint it and call it good.
I would suggest doing the season and then cooking on it. The best way to see if you need changes is to crank out some meat and have a taste, if it is good, then paint it and call it good.
dannyp
Fire Starter
Thanks gents. So here the good the bad and the ugly. I coated the inside down, racks and all, in vegetable oil. Put a small layer of charcoal in the basket and started about 10 briquettes in the chimney. Got everything going, dumped the lit ones into the basket and in the FB it went. About 45 minutes in, temp was only 175-180. So I added to the layer, figured not enough charcoal since the vents were wide open. Temp started rising slowly. At around 210 closed the vents to halfway. The next time I checked it, temp was 285. Closed vents completely. Next check temp at 375. Closed the chimney cap and peeked into the firebox. The back line of briquettes had lit. Pulled the basket out at around 425. Total burn time around 3 1/2 to 4 hours. Was cutting grass during this so not real sure of times.
So some things I learned are:
1. Add the gasket to the CC door before I try another burn.
2. Add a piece of 18ga to the middle divider in the basket to act as a heat shield . Only a couple of inches high so it won't block too much air flow when the backside is burning.
3. Cut the vent stops off, slide vent plate out and run some gasket material around vent opening to get a better seal around the vents.
4. Try again dang it. Gotta get some meat in that thing.
On the upside, I pulled the fire basket at around 420-425 degrees. All vents and chimney cap closed. Almost 2 hours later, CC temp was 195. Could be wrong, but I think that's pretty good heat retention.
smokejumper
Smoking Fanatic
I agree that is good heat retention..... Could be wrong, but I think that's pretty good heat retention.
On the plus side, you needed to get that hot to properly season it, so job well done!
Things have been pretty hectic around here so there hasn't been much time to work on the smoker. Little by little I did manage to make the changes I wanted so I had to try it again today To see if the changes worked.
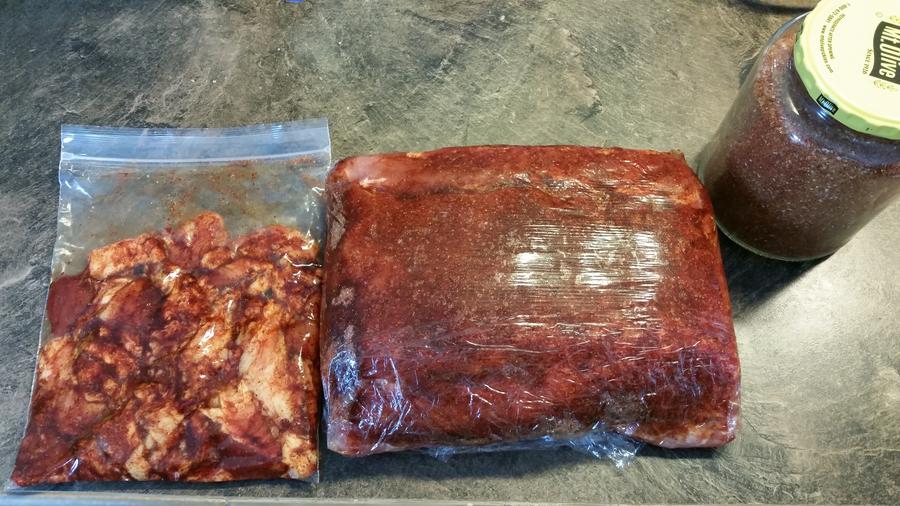
I love pork roast.
Trimmed, rubbed and wrapped to sit while I get the smoker ready. Trimmings are also covered in rub.
Had an idea about preheating the smoker. Some guys use a weed burner to help preheat but I decided to go a different route and I must say it was simple and very effective if you use charcoal. I took a small piece of 18 ga sheet I had and cut it to just wider than my charcoal chimney then bent the corners up to fit fairly tight to the chimney. A hole in two opposing corners allowed me to run a piece of wire thru to hold my new ash pan to the chimney.
Chimney loaded, lit and sitting in the CC. Of course I had to leave the door cracked but the CC still heated to 185 when I pulled the chimney out. And the ash from the paper didn't dirty my CC.
Loin went on second rack with the Trimmings in a foil boat with some holes on top rack to baste the loin as it cooks.
Got distracted and let the temp hit 275 before I knew it so I shut the vents down and the temp stabilized. Temp was higher than I really wanted but whatcha gonna do? Three and a half hours later, it's time.
Coated in mahogany sauce, it went past what I wanted and hit IT of 160 before I pulled it out but no complaints.
Money money money.
First cook was a success. I let the coals burn after I was done just to see and was pleased with the results. Had a layer of charcoal about 2 1/2-3 inches deep and got a steady 260-275 burn for 6 1/2 hours.
txsmokedlk
Fire Starter
SmokingMeatForums.com is reader supported and as an Amazon Associate, we may earn commissions from qualifying purchases.
Similar threads
- Replies
- 35
- Views
- 1K
- Replies
- 6
- Views
- 752
- Replies
- 8
- Views
- 262
- Replies
- 217
- Views
- 11K
- Replies
- 4
- Views
- 448
- Replies
- 3
- Views
- 937
Latest posts
-
-
-
Our Second piece of Heaven, Little piece on the Atlantic Ocean
- Latest: daspyknows
Hot Threads
-
Our Second piece of Heaven, Little piece on the Atlantic Ocean
- Started by DRKsmoking
- Replies: 46
- General Discussion
-
Getting to the bottom of what happens to cure in smoked sausage
- Started by hog warden
- Replies: 31
- Food Safety
-
Non fat dried milk
- Started by hog warden
- Replies: 31
- Sausage
-
8 second ride!
- Started by Buckeyedude
- Replies: 26
- Flat Top Griddles and Discada


