Been building UDS cookers for a few years, started out building some mini ones out of 15 gallon drums, then moved on to the 55 gallon variety. For my friends I build them at cost, but typically I will build and sell at $225 each. After several builds, you start to find easier ways to do certain parts of the build not to mention handy ideas here and there. Hopefully some of these might help others who are looking to build a UDS....
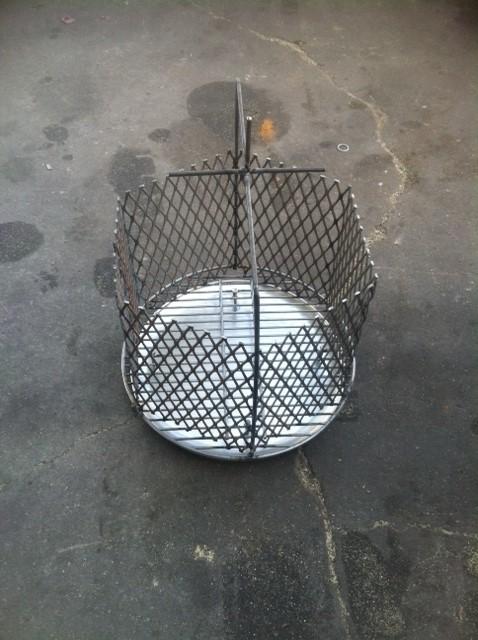
After battling getting my 3/4 x 9 expanded metal sheet in a perfect circle shape (never accomplished that feat!), I had an epiphany, why not heat and bend the metal and form a hexagon?...so, I cut my 12" tall by 4' wide piece of expanded metal (using an abrasive blade on my circular saw), then marked the first line at 4", then every 8" after that, until I had 4" left on the other side. Laid it on the work table and started heating up the metal and bending to the appropriate inside angle of 120 degrees for a hexagon. Once all the bends were made, the two ends matched up perfectly, forming a hexagon and a much better looking charcoal basket. If you don't have a torch, bending the expanded metal can be done with a couple clamps, a 2 x 4 and a sturdy work bench or saw horse. After welding together the two ends, I welded the hexagon to the charcoal grate, a 16" replacement for the Weber Kettle.
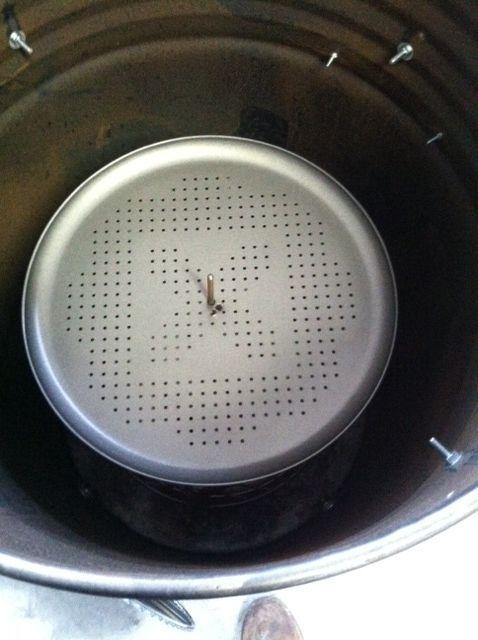
Added a 16" pizza pan to the bottom to catch ashes, gave it about a 2" gap between the pan and the bottom of the basket. Then I took a piece of 1/4" rod, heated and bent to make a handle to be able to pick the basket up and also to act as a resting spot for the heat diverter / deflection plate, I use the perforated pizza pan for this purpose, but you can also use a charcoal grate that goes in the Old Smokeys.
After battling getting my 3/4 x 9 expanded metal sheet in a perfect circle shape (never accomplished that feat!), I had an epiphany, why not heat and bend the metal and form a hexagon?...so, I cut my 12" tall by 4' wide piece of expanded metal (using an abrasive blade on my circular saw), then marked the first line at 4", then every 8" after that, until I had 4" left on the other side. Laid it on the work table and started heating up the metal and bending to the appropriate inside angle of 120 degrees for a hexagon. Once all the bends were made, the two ends matched up perfectly, forming a hexagon and a much better looking charcoal basket. If you don't have a torch, bending the expanded metal can be done with a couple clamps, a 2 x 4 and a sturdy work bench or saw horse. After welding together the two ends, I welded the hexagon to the charcoal grate, a 16" replacement for the Weber Kettle.
Added a 16" pizza pan to the bottom to catch ashes, gave it about a 2" gap between the pan and the bottom of the basket. Then I took a piece of 1/4" rod, heated and bent to make a handle to be able to pick the basket up and also to act as a resting spot for the heat diverter / deflection plate, I use the perforated pizza pan for this purpose, but you can also use a charcoal grate that goes in the Old Smokeys.
Last edited: